1. 서론
This manual provides detailed instructions for the setup, operation, maintenance, and troubleshooting of your ACEMAGIC S1 Mini PC. Please read this manual thoroughly before using the device to ensure proper functionality and safety.
2. 안전 정보
- 항상 기기와 함께 제공된 원래 전원 어댑터를 사용하세요.
- 기기를 물, 습기 또는 극한 온도에 노출시키지 마세요.
- 직사광선이나 열원 근처에 장치를 두지 마십시오.
- 직접 기기를 열거나 수리하지 마십시오. 자격을 갖춘 서비스 담당자에게 문의하십시오.
- 과열을 방지하려면 장치 주변을 적절하게 환기시키십시오.
3. 패키지 내용
패키지에 모든 품목이 들어 있는지 확인하세요.
- ACEMAGIC S1 Mini PC
- 전원 어댑터
- 사용 설명서 (본 문서)
- 베이스 홀더
4. 제품 오버view
4.1 전면 및 후면 패널
The ACEMAGIC S1 Mini PC features a unique design with an integrated LCD display and various ports for connectivity.
이미지: 앞면과 뒷면 view of the ACEMAGIC S1 Mini PC, highlighting the various input/output ports and the LCD screen.
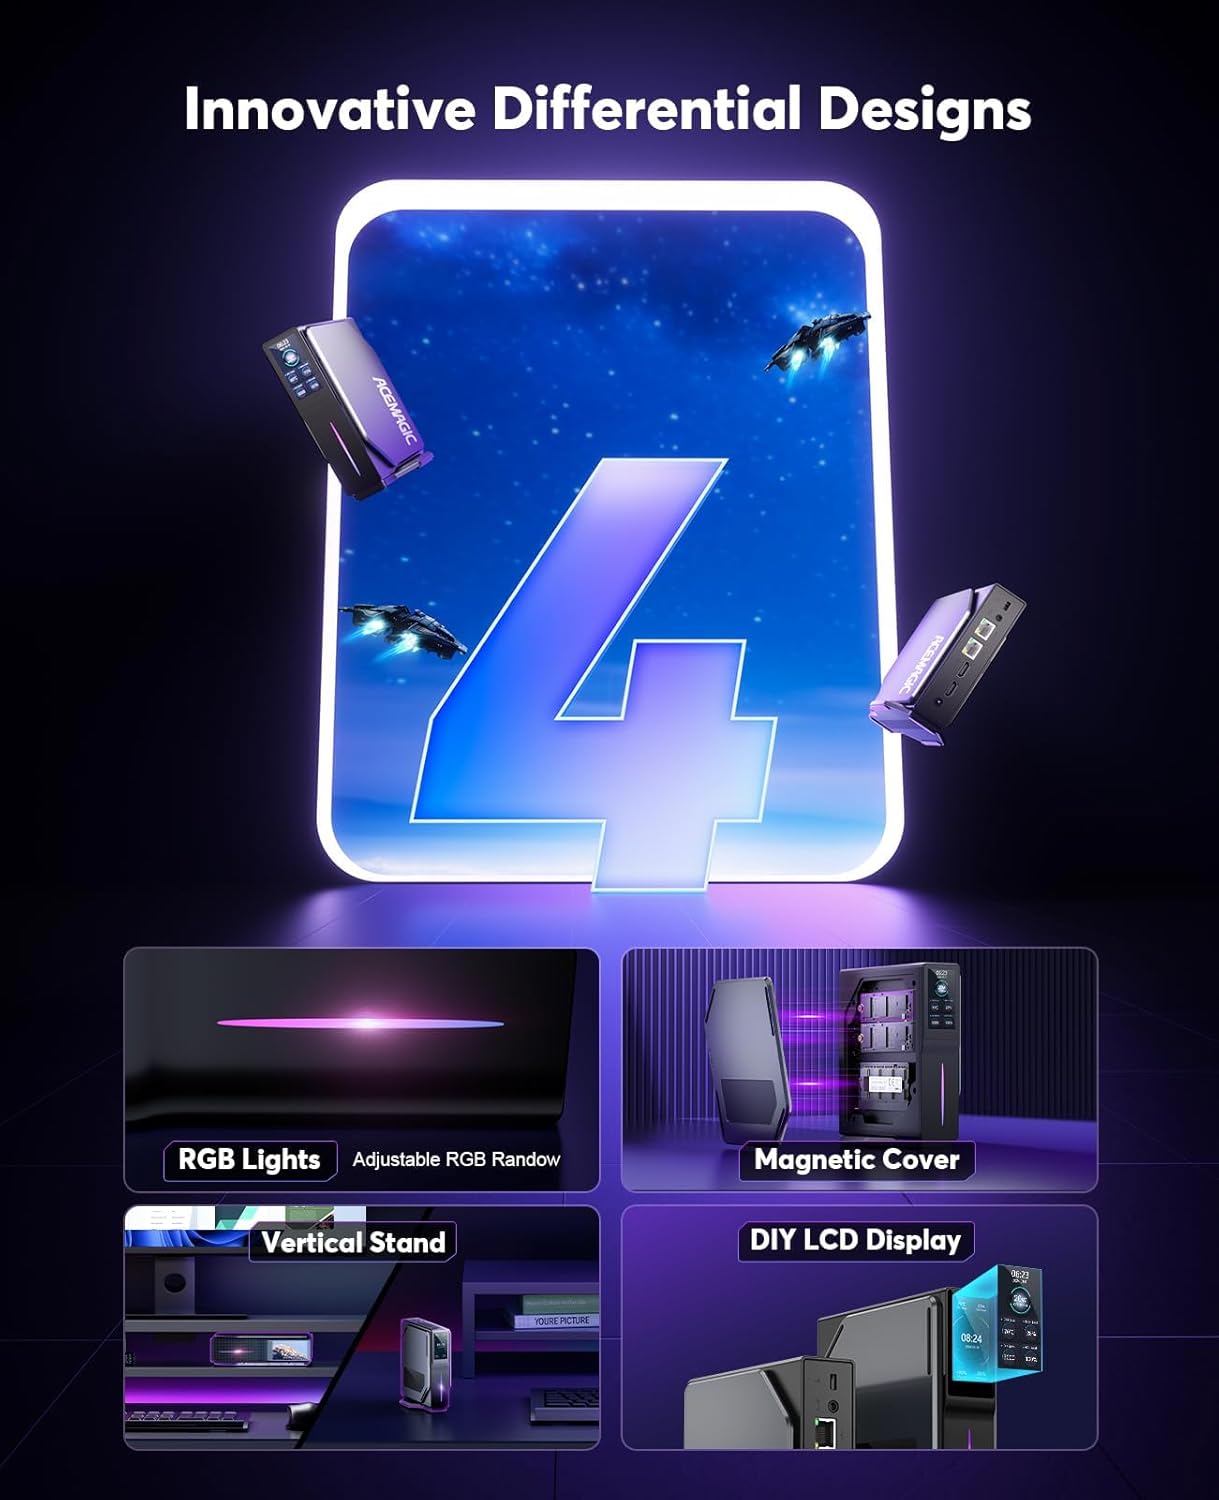
4.2 고유 기능
- DIY LCD Display: Monitor operating status, time, and temperature.
- RGB 조명: Adjustable lighting for aesthetic customization.
- 자석 커버: Facilitates easy memory replacement.
- 듀얼 LAN 포트: Offers versatile network configuration options.

Image: Close-up of the ACEMAGIC S1 Mini PC's DIY LCD display, showing CPU temperature, power consumption, memory usage, and CPU load. The image also illustrates various display themes.
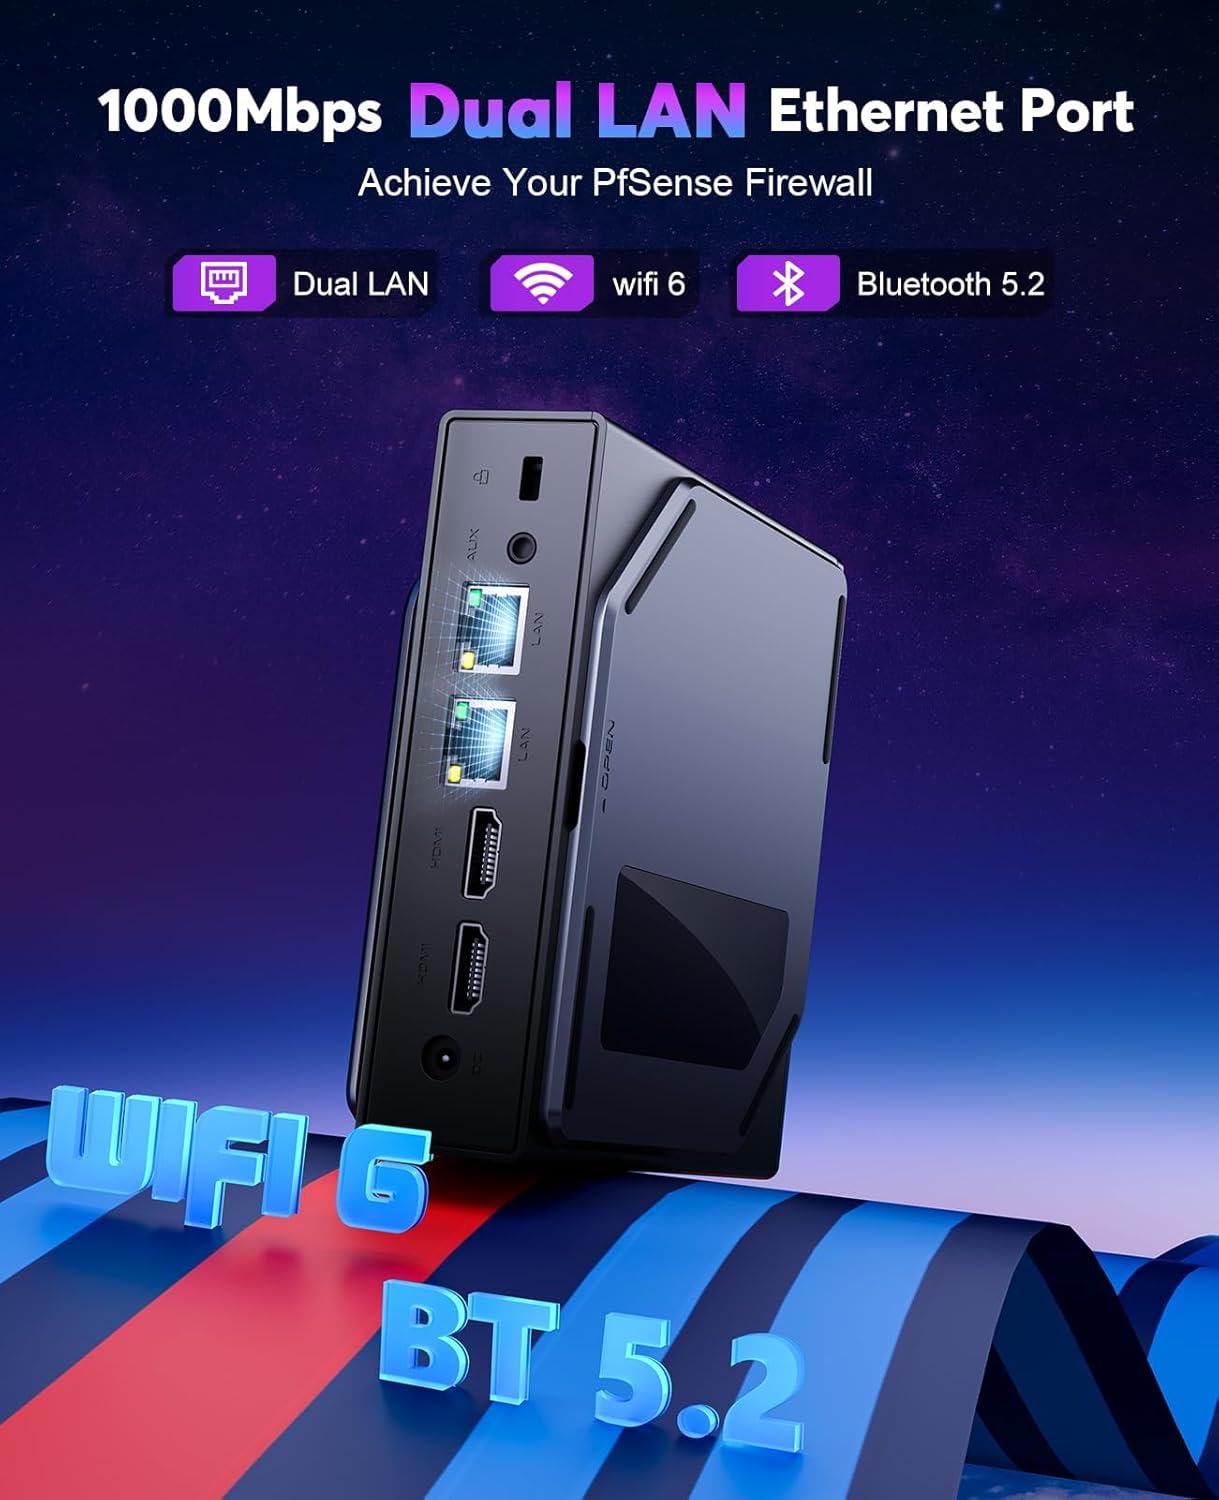
이미지: 후면 view of the ACEMAGIC S1 Mini PC, emphasizing the dual Gigabit LAN Ethernet ports, along with indicators for WiFi 5 and Bluetooth 4.2 connectivity.
5. 설정
5.1 주변기기 연결하기
- Connect your monitor(s) to the HDMI ports on the rear panel. The device supports dual 4K@60Hz UHD screen display.
- 키보드와 마우스를 사용 가능한 USB 2.0 또는 USB 3.0 포트에 연결하십시오.
- 유선 네트워크에 접속하려면 이더넷 케이블을 LAN 포트 중 하나에 연결하십시오.
- 전원 어댑터를 DC 입력 포트에 연결한 다음 전원 콘센트에 연결하십시오.
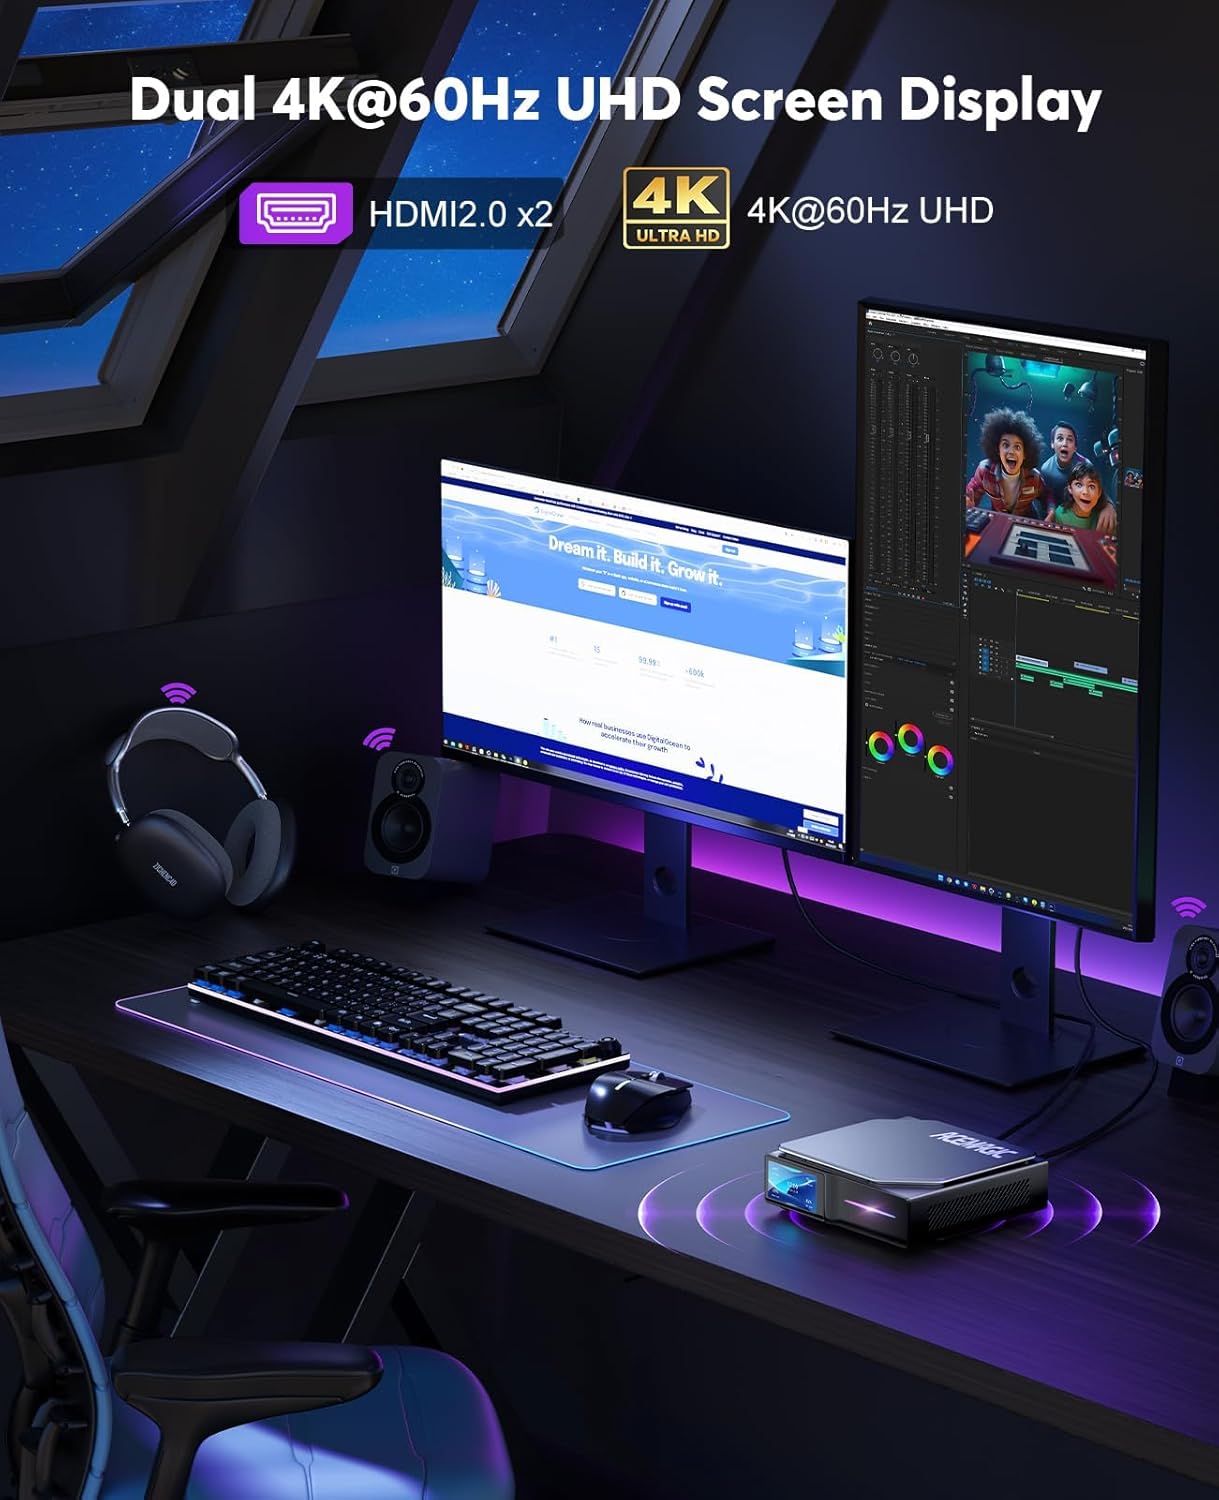
Image: The ACEMAGIC S1 Mini PC connected to two 4K UHD monitors, demonstrating its dual display capability for a multi-tasking setup.
5.2 전원 켜기
Press the power button located on the front panel of the Mini PC. The device will boot up, and the LCD display will activate.
5.3 배치 옵션
The ACEMAGIC S1 Mini PC can be placed either vertically using the included base holder or horizontally, depending on your desk space and preference.

Image: The ACEMAGIC S1 Mini PC shown in both horizontal and vertical orientations on a desk, illustrating its flexible placement options.
6. 운영
6.1 기본 작업
- 전원 켜기: 전원 버튼을 누르세요.
- 전원 끄기 : Use the operating system's shutdown function. Alternatively, press and hold the power button for 5 seconds to force shutdown (not recommended for regular use).
- 다시 시작: 운영체제의 재시작 기능을 사용하십시오.
6.2 LCD 디스플레이 사용
The integrated LCD display provides real-time information about the Mini PC's status. You can monitor:
- CPU 온도
- CPU 전력 소비
- 메모리 사용량
- CPU 부하
- 현재 시간
Refer to the operating system's settings or specific ACEMAGIC software (if provided) for customization options of the LCD display themes and values.
6.3 네트워크 연결
- WiFi 5 (802.11ac): Connect to wireless networks using the built-in dual-band (2.4G + 5G) WiFi. Access network settings through your operating system.
- 듀얼 기가비트 LAN: For stable and high-speed wired connections, use the two Ethernet ports. This allows for advanced network configurations such as a PfSense firewall.
6.4 블루투스 연결
The Mini PC supports Bluetooth 4.2, allowing you to connect wireless peripherals such as keyboards, mice, and headphones. Enable Bluetooth through your operating system's settings and pair your devices.
7. 유지관리
7.1 청소
Regularly clean the exterior of the Mini PC with a soft, dry cloth. Do not use liquid cleaners or abrasive materials. Ensure ventilation openings are free from dust accumulation.
7.2 Memory Replacement
The ACEMAGIC S1 features a magnetic cover design for easy access to internal components, particularly for memory replacement. Gently remove the magnetic side panel to access the memory slots. Ensure the device is powered off and unplugged before performing any internal maintenance.
7.3 열 방출 시스템
The Mini PC is equipped with an efficient heat dissipation and noise-reduction system to maintain optimal performance. Ensure that the air vents are not obstructed to allow for proper airflow.

이미지: 내부 view of the ACEMAGIC S1 Mini PC, highlighting the cooling fan and heat dissipation components designed to keep the system cool and quiet during operation.
8. 문제 해결
- 전원 없음: 전원 어댑터가 미니 PC와 작동하는 콘센트에 제대로 연결되어 있는지 확인하십시오. 다른 콘센트에 연결해 보십시오.
- 디스플레이 없음: Verify that the monitor is correctly connected to the HDMI port and is powered on. Check the monitor's input source settings.
- 네트워크 문제: For wired connections, check the Ethernet cable. For WiFi, ensure the WiFi adapter is enabled in the operating system and you are connected to the correct network with the correct password.
- 느린 성능: Close unnecessary applications. Check for background processes. Ensure adequate ventilation.
- LCD 디스플레이가 작동하지 않음: Check if the display is enabled in the system settings or any dedicated ACEMAGIC software.
문제가 지속되면 추가 지원을 받으려면 지원 섹션을 참조하세요.
9. 사양
| 특징 | 사양 |
|---|---|
| 프로세서 | 12th Gen Alder Lake-N97 (up to 3.6 GHz) |
| 숫양 | 8GB DDR4 |
| 저장 | 256GB M.2 SSD |
| 제도법 | 인텔 UHD 그래픽 |
| 최대 화면 해상도 | 3840x2160(4K) |
| 무선 연결 | WiFi 5 (802.11ac, 2.4G + 5G), Bluetooth 4.2 |
| 랜 | 듀얼 기가비트 이더넷 |
| USB 포트 | 2x USB 2.0, 2x USB 3.0 |
| 비디오 출력 | 2x HDMI 1.2 (Dual 4K@60Hz UHD) |
| 운영 체제 | Supports Linux, Windows |
| 특별 기능 | DIY LCD Screen, RGB Lights, Magnetic Cover, Wake On LAN, RTC Wake, Auto Power On |
| 치수 | 12.4 x 12.8 x 4cm (약 4.88 x 5.04 x 1.57인치) |
| 무게 | 0.38kg(약 0.84파운드) |
10. 보증 및 지원
10.1 보증 정보
ACEMAGIC offers a 1-year limited warranty on the S1 Mini PC from the date of purchase. This warranty covers defects due to design and workmanship. Please retain your proof of purchase for warranty claims.
10.2 고객 지원
For technical assistance, troubleshooting, or warranty inquiries, please contact ACEMAGIC customer support. Refer to the official ACEMAGIC web자세한 연락처 정보는 해당 사이트나 구매 설명서를 참조하세요.


