GOOLOO GT6000 Jump Starter & DS200 OBD2 Scanner User Manual
Model: GT6000 & DS200
1. 서론
This manual provides detailed instructions for the safe and effective use of your GOOLOO GT6000 6000A Jump Starter and GOOLOO DEEPSCAN DS200 OBD2 Diagnostic Scanner. Please read this manual thoroughly before operating the devices and retain it for future reference.
The GOOLOO GT6000 is a powerful portable jump starter designed to start vehicles with dead batteries, while also serving as a portable power bank. The GOOLOO DEEPSCAN DS200 is a compact OBD2 scanner that connects wirelessly to your smartphone, providing comprehensive vehicle diagnostics and maintenance functions.

Image 1.1: The GOOLOO GT6000 Jump Starter and GOOLOO DEEPSCAN DS200 OBD2 Scanner.
2. 중요한 안전 정보
Always observe the following safety precautions when using the GOOLOO GT6000 Jump Starter and DS200 OBD2 Scanner to prevent injury or damage to the devices or your vehicle.
- 사용하기 전에 모든 지침을 읽으세요.
- 어린이의 손이 닿지 않는 곳에 보관하세요.
- Do not expose the devices to rain or extreme temperatures.
- 기기를 분해하거나 개조하지 마세요.
- 사용 및 충전 시에는 적절한 환기를 유지하세요.
- Wear eye protection when working with vehicle batteries.
- 점프 스타터 회로의 단락을 피하십시오.amps.
- Use the jump starter only for 12V lead-acid batteries.

Image 2.1: The GT6000 Jump Starter features multiple safety protections including over-charge, short-circuit, and reverse-polarity protection.
3. GOOLOO GT6000 Jump Starter
3.1. 제품 오버view
The GT6000 is a high-capacity jump starter with a 6000A peak current, capable of starting all gas engines and diesel engines up to 12L. It also functions as a portable power bank with 100W bi-directional fast charging.

Image 3.1: Diagram showing the ports and controls of the GT6000 Jump Starter, including the BOOST button, jump cable socket, DC port, USB output ports, and IN/OUT PD100W port.

Image 3.2: The 3.2-inch LED display on the GT6000 shows battery level, charging power, low current mode, 'Ready to Start' status, low temperature reminder, and battery clips reversed warning.
3.2. GT6000 충전하기
Before first use, fully charge the GT6000. It supports 100W bi-directional fast charging. A full charge from 0-100% takes approximately 1.4 hours.
- Connect the provided USB-C cable to the IN/OUT PD100W port on the GT6000.
- Connect the other end of the cable to a compatible 100W USB-C power adapter (a 100W car charger is included).
- LED 디스플레이에는 충전 상태와 배터리 백분율이 표시됩니다.tage.

Image 3.3: The GT6000 charging, indicating 100W super fast charging capabilities.
3.3. Operating the Jump Starter
Follow these steps to jump-start a vehicle with a dead battery:
- 끼워 넣다: Insert the smart jumper cable plug into the jump cable socket on the GT6000. Ensure a secure connection.
- 연결하다: 빨간색 cl을 연결하세요amp 차량 배터리의 양극(+) 단자와 검은색 clamp to the negative (-) terminal. Ensure the clamps are firmly attached. If the LED display shows "Battery Clips Reversed", recheck the connections.
- 시작: Once the GT6000 display shows "READY", start your car engine. If the engine does not start immediately, wait 20-30 seconds and try again. Do not attempt more than 3 consecutive jump starts.
- 제거하다: 차량이 시동되면 cl을 분리하세요.amps from the car battery first, then remove the jumper cable from the GT6000.

Image 3.4: Visual guide for the three steps to jump start your vehicle using the GT6000.
3.4. 보조배터리로 사용하기
The GT6000 can charge various electronic devices via its USB output ports and the bi-directional USB-C port.
- Connect your device's charging cable to one of the GT6000's output ports (5V/2.4A, 5V/9V/12V, or IN/OUT PD100W USB-C).
- The GT6000 will automatically begin charging your device.

Image 3.5: The GT6000 functioning as a portable power bank, charging a laptop and smartphone.
3.5. LED Flashlight Functions
The GT6000 includes an integrated LED flashlight with multiple modes:
- 일반 조명: Press and hold the power button for 3 seconds to turn on the flashlight.
- 스트로브 라이트: Short press the power button again to switch to strobe mode.
- SOS 신호: Short press the power button a third time to activate the SOS signal mode.
- 끄기: Short press the power button a fourth time or press and hold for 3 seconds to turn off the flashlight.
3.6. GT6000 Specifications
| 특징 | 세부 사항 |
|---|---|
| 피크 전류 | 6000A |
| 엔진 호환성 | All Gas, up to 12.0L Diesel |
| 배터리 용량 | 27000 mAh (99.9Wh) |
| 빠른 충전 | 100W Bi-directional (USB-C) |
| 표시하다 | 3.2 인치 LED |
| 보호 | 10 SuperSafe Protections (Over-Charge, Short-Circuit, Reverse-Polarity, etc.) |
| LED 조명 | 400 Lumens (Flashlight, Strobe, SOS) |
| 대기 시간 | 최대 24개월 |
4. GOOLOO DEEPSCAN DS200 OBD2 Scanner
4.1. 제품 오버view
The DS200 is a wireless Bluetooth OBD2 scanner designed for comprehensive vehicle diagnostics. It connects to your smartphone via an app and supports full system diagnostics, bidirectional control, and various maintenance services.
4.2. Setup & App Installation
To begin using your DS200 scanner, you need to download and install the GOOLOO DEEPSCAN app on your smartphone.
- 앱 다운로드 : 검색 "GOOLOO DEEPSCAN" in the Apple App Store (for iOS devices) or Google Play Store (for Android devices).
- 앱을 설치: 응용 프로그램을 다운로드하여 설치하십시오.
- 등록/로그인: Follow the in-app instructions to register an account or log in if you already have one.

Image 4.1: The DS200 scanner and instructions for downloading the GOOLOO DEEPSCAN app from app stores.
4.3. 차량 연결하기
The DS200 connects to your vehicle's OBD2 port, typically located under the dashboard on the driver's side.
- Locate your vehicle's 16-pin OBD2 port.
- Plug the DS200 scanner firmly into the OBD2 port. The scanner will power on automatically.
- Turn on your vehicle's ignition (engine off or running, depending on the diagnostic task).
- Open the GOOLOO DEEPSCAN app on your smartphone and follow the prompts to connect to the DS200 via Bluetooth.

Image 4.2: The DS200 scanner connected to a vehicle's OBD2 port, displaying diagnostic information on a smartphone.
4.4. 기본 진단 기능
Once connected, the DS200 app provides access to standard OBD2 functions:
- 코드 읽기: Retrieve Diagnostic Trouble Codes (DTCs) from the vehicle's Engine Control Unit (ECU).
- 명확한 코드: Erase DTCs and turn off the Check Engine Light (MIL) after repairs.
- 라이브 데이터 : View real-time sensor data, such as engine RPM, vehicle speed, coolant temperature, and fuel system status.
- I/M 준비: Check the status of emission-related monitors to ensure the vehicle is ready for an emissions test.
- 프레임 데이터 고정: View a snapshot of sensor data recorded when an emission-related fault occurred.
- 차량 정보: 차량 식별 번호(VIN), 교정 ID 및 교정 확인 번호(CVN)를 검색합니다.
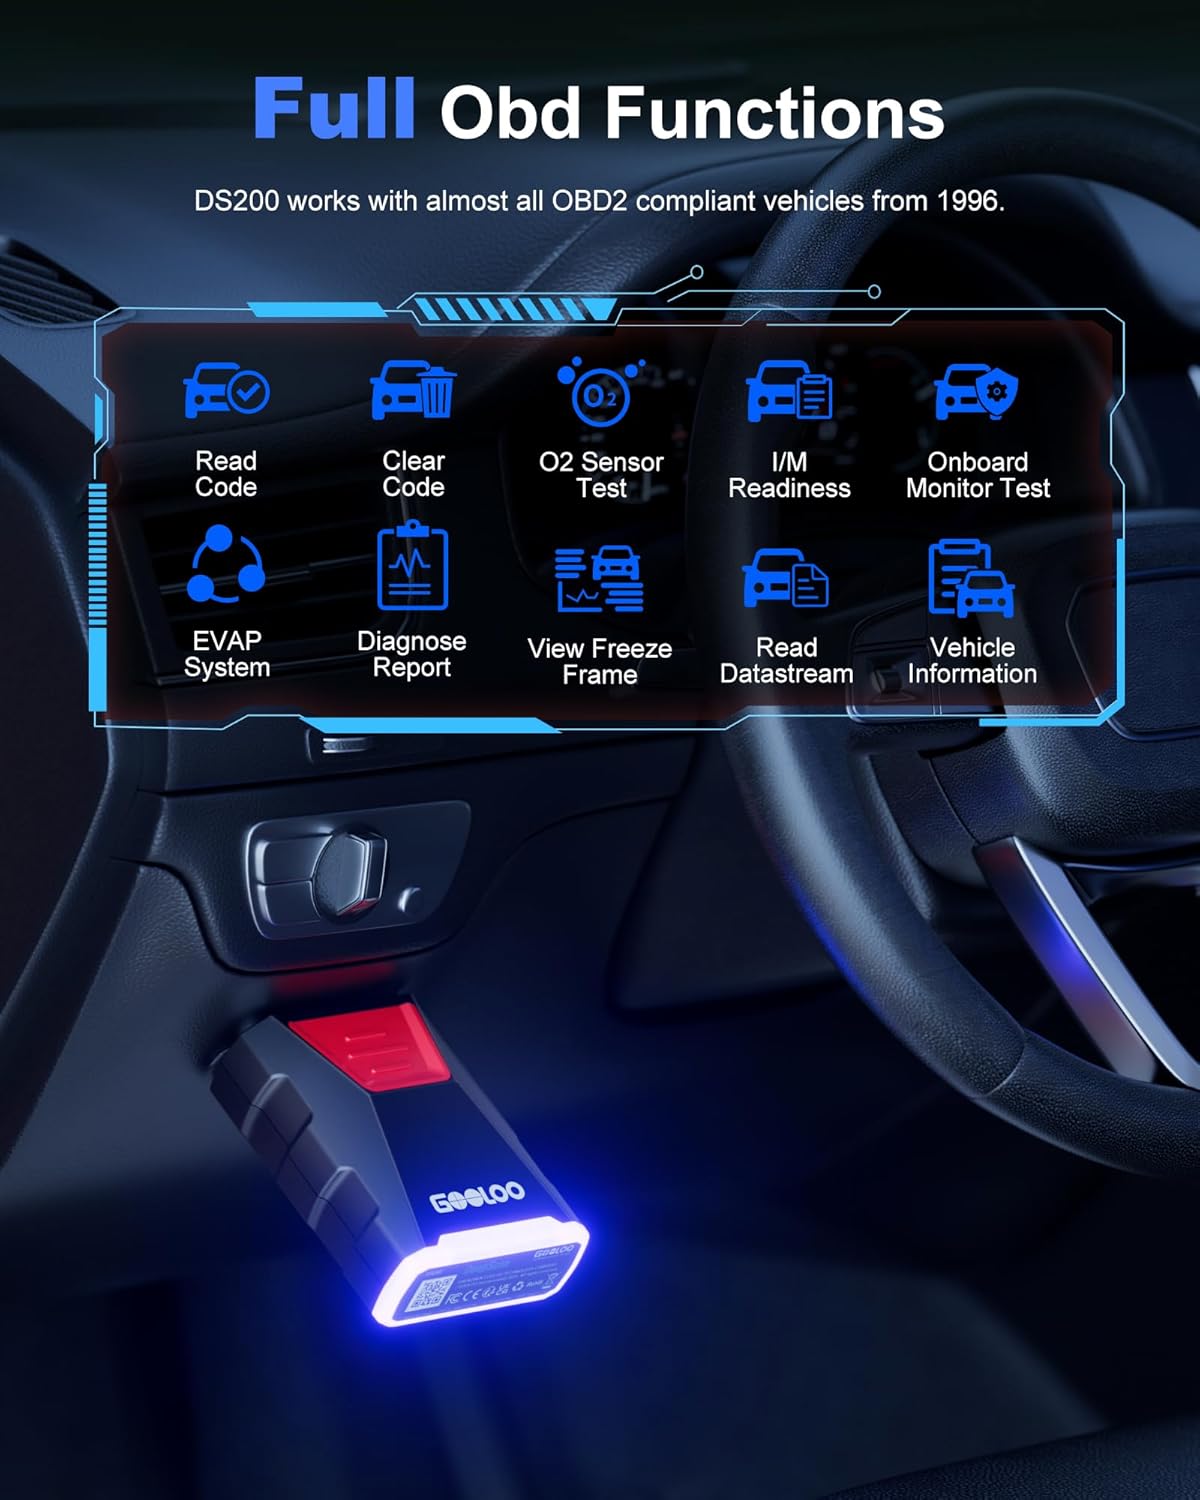
Image 4.3: The DS200 app interface displaying various full OBD functions like Read Code, Clear Code, O2 Sensor Test, and Live Data.
4.5. Advanced Diagnostic Functions
The DS200 offers advanced features for in-depth vehicle analysis:
- 전체 시스템 진단: Scan all available electronic control units (ECUs) in the vehicle, including Engine, Transmission, ABS, SRS, BCM, etc., to read and clear fault codes.
- 양방향 제어: Perform active tests to control various vehicle components (e.g., turn on/off wipers, headlights, fuel pump) to verify their functionality.
- 유지 보수 서비스: Access common maintenance functions such as Oil Reset, Throttle Adaptation, EPB Reset, Steering Angle Resets, DPF Regeneration, ABS Bleeding, BMS Reset, and Airbag Reset.
- Vehicle Performance Test: Conduct tests to evaluate vehicle performance metrics like acceleration time, top speed, and engine load.

Image 4.4: The DS200 app interface listing 8 common maintenance services available for various vehicle systems.

Image 4.5: The DS200 app demonstrating bidirectional control, allowing users to troubleshoot faults by controlling components like wipers, mirrors, and headlights.
4.6. DS200 Specifications
| 특징 | 세부 사항 |
|---|---|
| 연결성 | 블루투스 5.0 |
| 지원 장치 | iOS and Android smartphones/tablets |
| OBD2 프로토콜 | All standard OBD2 protocols, including FCA & CAN-FD |
| 기능 | Full System Diagnostics, Bidirectional Control, 8 Maintenance Services, Full OBD Functions, Real-time Data Monitoring, Vehicle Performance Test |
| 차량 보장 | Most OBD2 compliant vehicles from 1996 onwards |
5. 관리 및 유지 보수
Proper care ensures the longevity and optimal performance of your GOOLOO devices.
- 청소: Use a soft, dry cloth to clean the exterior of both devices. Do not use abrasive cleaners or solvents.
- 저장: Store the devices in a cool, dry place away from direct sunlight and extreme temperatures. For the GT6000, ensure it is charged to at least 50% before long-term storage and recharge every 3-6 months.
- 손질: 기기를 떨어뜨리거나 강한 충격을 주지 마십시오.
- 케이블 : Inspect jumper cables and OBD2 connector for any damage before each use. Replace if frayed or damaged.
6. 문제 해결
6.1. GT6000 Jump Starter Issues
- 장치가 켜지지 않음: 기기가 충전되어 있는지 확인하십시오. 전원 버튼을 몇 초 동안 길게 누르십시오.
- 차량 시동이 걸리지 않음:
- cl을 확인하세요amps는 올바른 배터리 단자에 단단히 연결되어 있습니다.
- Ensure the GT6000 has sufficient charge.
- If the battery is severely discharged, press the BOOST button on the GT6000 (if available and safe to do so, refer to specific product instructions for boost mode).
- The vehicle battery might be completely dead or damaged and require replacement.
- "Battery Clips Reversed" error: cl 연결 해제amps and reconnect them to the correct positive (+) and negative (-) terminals.
6.2. DS200 OBD2 Scanner Issues
- 스캐너 전원이 켜지지 않음: Ensure the DS200 is fully plugged into the vehicle's OBD2 port and the vehicle's ignition is on.
- 블루투스로 연결할 수 없습니다:
- 스마트폰에서 Bluetooth가 활성화되어 있는지 확인하세요.
- Restart the GOOLOO DEEPSCAN app.
- Unplug and re-plug the DS200 from the OBD2 port.
- Check if the app requires location permissions, as some Bluetooth functions do.
- No communication with ECU:
- 차량의 시동이 켜져 있는지 확인하십시오.
- Ensure the DS200 is securely connected to the OBD2 port.
- Confirm your vehicle is OBD2 compliant (most vehicles from 1996 onwards).
- Try scanning a different vehicle to rule out scanner malfunction.
7. 보증 및 고객 지원
GOOLOO products are designed for reliability and performance. For warranty information, technical support, or any questions regarding your GT6000 Jump Starter or DS200 OBD2 Scanner, please refer to the official GOOLOO web사이트를 방문하거나 고객 서비스에 직접 문의하세요.
Please have your product model number (GT6000, DS200) and purchase information ready when contacting support.


