1. 이상view
The PUSOKEI A78SD3 is a desktop motherboard designed for reliable performance and versatile connectivity. It supports compatible AMD AM3 socket processors and DDR3 memory, offering a solid foundation for various computing needs. Featuring integrated graphics, 100Mbps Ethernet, and 6-channel audio, it provides a comprehensive multimedia experience.
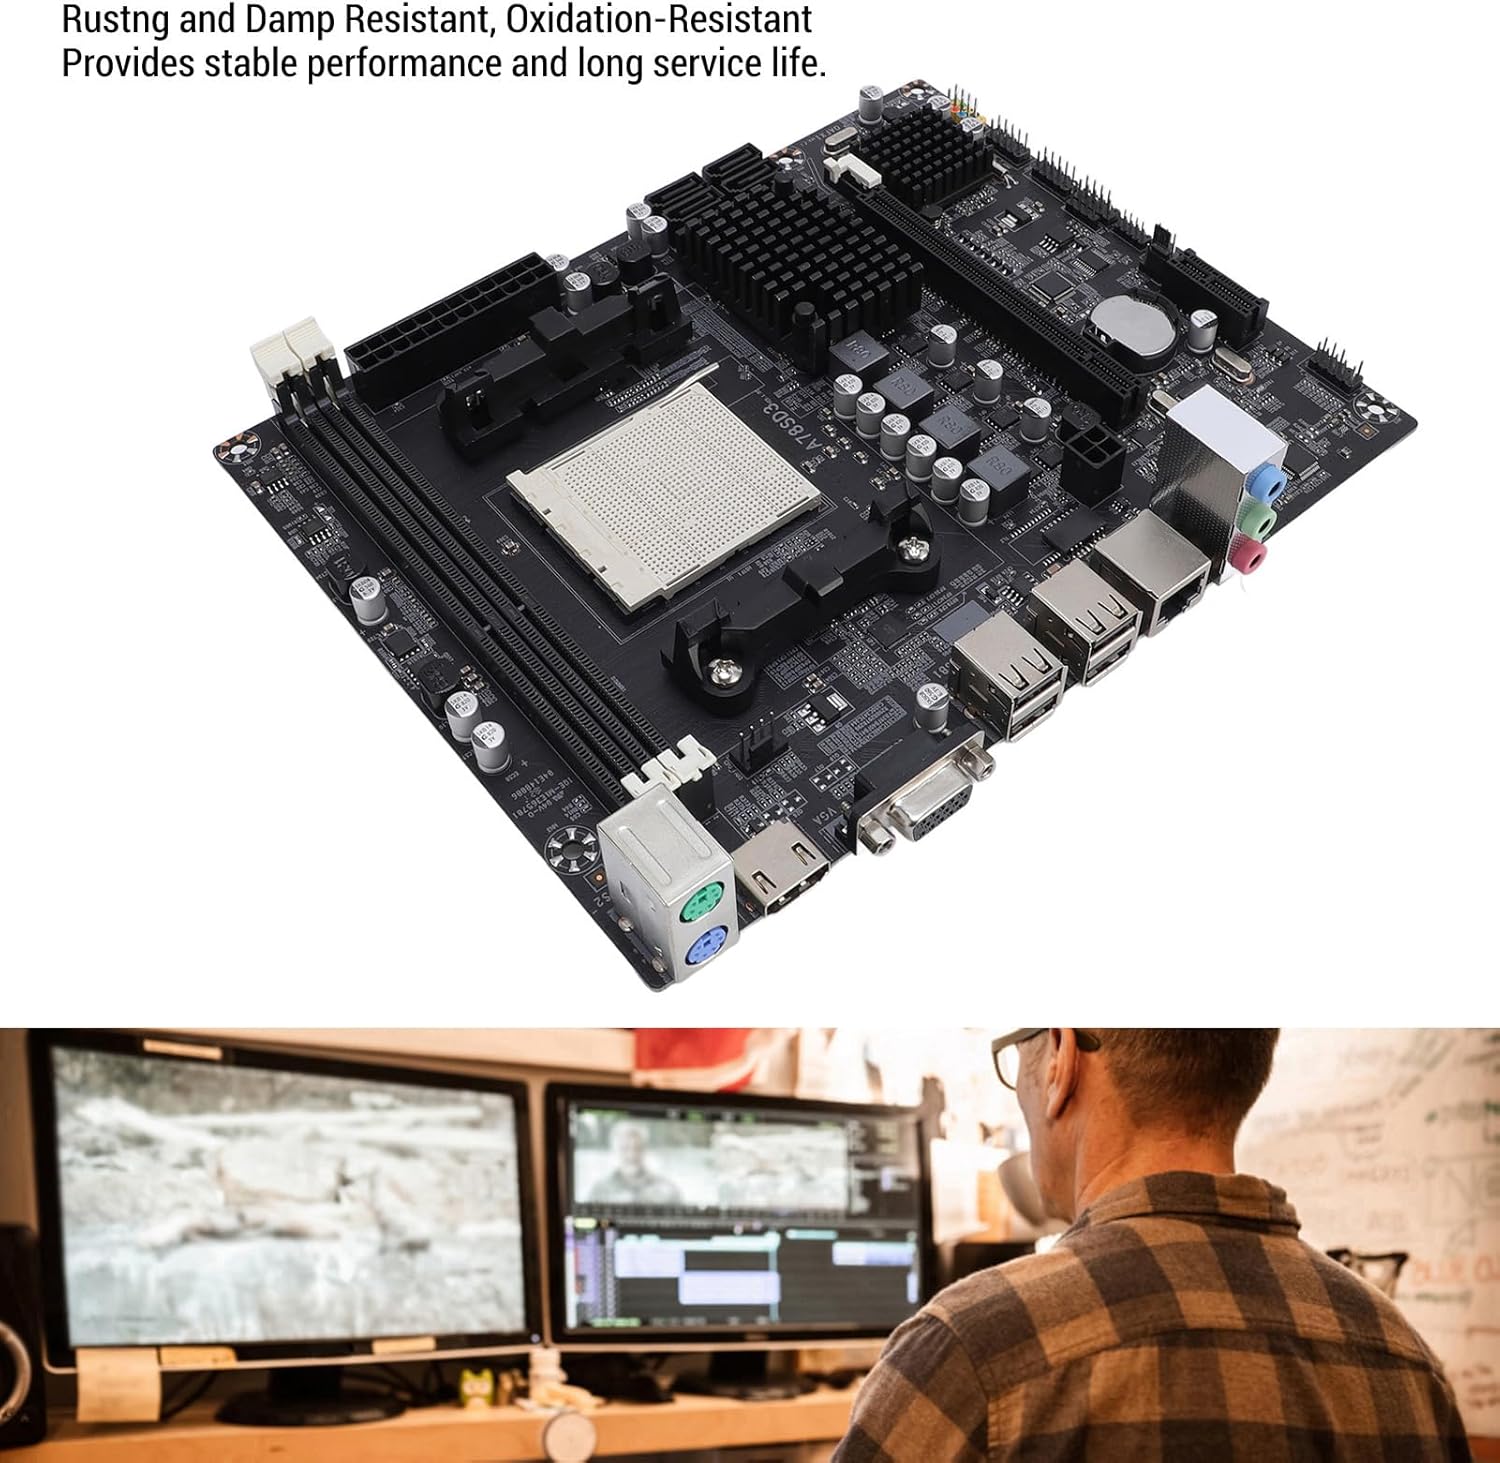
This image shows the motherboard from an angle, emphasizing its robust construction designed to be rust, damp, and oxidation resistant. This design contributes to stable performance and extended service life.
2. 사양
| 특징 | 사양 |
|---|---|
| 품목 유형 | A78SD3 Desktop Motherboard |
| 재료 | 인쇄 회로 기판 |
| 마더보드 칩 | Integrated graphics card, integrated network card |
| 메인 칩셋 | For Series (compatible with AMD A78/A75/A55 series) |
| Network Card Chip | 100Mbps 이더넷 |
| 사운드 칩 | Integrated 6-channel audio |
| CPU 소켓 | AM3 (Supports compatible AMD AM3 socket processors. Note: The product title mentions 'Richland Series APUs', but this motherboard features an AM3 socket, which is incompatible with Richland APUs, which require FM2/FM2+ sockets. Please ensure your CPU is compatible with the AM3 socket.) |
| Supported CPU Quantity | 1 (CPU not included) |
| 메모리 유형 | DDR3 1600/1333/1066MHz |
| 메모리 슬롯 | 2 x DDR3 slots (Max 16GB capacity) |
| 확장 슬롯 | 1 x PCIe X16 slot |
| 스토리지 인터페이스 | 4 x Serial ATA 3.0 ports |
| I / O 인터페이스 | 1 x PS/2 (keyboard/mouse), 1 x RJ45 Ethernet Port, 1 x VGA Port, 1 x High-Definition Multimedia Interface (HDMI) Output, 4 x USB 2.0 Ports, Audio Interfaces |
| 마더보드 크기 | Approx. 17x21.3cm / 6.7x8.4in |
| 배터리 유형 | 1 x CR2032L Battery |
| 배터리 용량 | 240 mAH (included) |
| 전원 커넥터 | 4-pin and 24-pin power connectors |
| 파워 페이즈 | 4상 |

오버헤드 view of the motherboard with measurements indicating its dimensions: approximately 17cm (6.7 inches) in width and 21.3cm (8.4 inches) in length.
3. 패키지 내용
- 1 x PUSOKEI A78SD3 Motherboard
- 1 x SATA 케이블
- 1 x I/O 실드
- 1 x 사용자 설명서

This image displays the complete package contents: the PUSOKEI A78SD3 motherboard, a red SATA data cable, and the metal I/O shield for the computer case.
4. 설정 및 설치
This section provides general guidelines for installing your PUSOKEI A78SD3 motherboard. Always refer to your CPU, RAM, and other component manuals for specific installation instructions.
4.1 마더보드 레이아웃

This image displays the PUSOKEI A78SD3 motherboard from an overhead perspective, highlighting key components and their functions. Labels include the 24-pin Modern ATX Power Connector, 2 Channel DDR3 Memory Slots, All Solid Capacitors, Serial ATA 2.0 Ports x4 (note: text description says 3.0), Keyboard and Mouse Ports (PS/2), High-Definition Multimedia Interface Port (HDMI), VGA Port, USB 2.0 Ports, Network Port (RJ45), 4-pin CPU Independent Power Connector, and PCIe X16 Slot.
4.2 설치 전 체크리스트
- Ensure you have a compatible AM3 socket CPU.
- Acquire DDR3 RAM modules (1600/1333/1066MHz).
- Prepare a compatible ATX power supply.
- Gather necessary tools (screwdriver, anti-static wrist strap).
4.3 설치 단계
- 사례 준비: 컴퓨터 케이스의 뒤쪽 개구부에 I/O 실드를 설치합니다.
- CPU 설치: Carefully open the CPU socket lever. Align the CPU with the socket, ensuring the golden triangle on the CPU matches the marking on the socket. Gently place the CPU into the socket without force. Close the lever to secure the CPU.
- CPU 쿨러 설치: CPU 쿨러를 마더보드에 설치하려면 쿨러 제조업체의 지침을 따르십시오.
- RAM 설치: Open the clips on the DDR3 memory slots. Align your DDR3 RAM modules with the slots, ensuring the notch on the module matches the notch in the slot. Press down firmly on both ends until the clips snap into place.

자세한 view of the two DDR3 memory slots on the motherboard, indicating where RAM modules should be installed. The slots are designed for dual-channel memory configurations.
- 마더보드 장착: 마더보드를 컴퓨터 케이스에 조심스럽게 넣고 나사 구멍과 스탠드오프를 맞춰주세요. 나사를 사용하여 마더보드를 고정합니다.
- 전원 연결: 전원 공급 장치의 24핀 ATX 전원 커넥터와 4핀 CPU 전원 커넥터를 마더보드의 해당 포트에 연결합니다.
- 저장 장치 연결: Use the provided SATA cable to connect your SATA 3.0 storage devices (HDD/SSD) to the SATA ports on the motherboard.
- 전면 패널 케이블 연결: Connect the front panel headers (power button, reset button, USB ports, audio jacks, LED indicators) from your case to the corresponding pins on the motherboard. Refer to your case manual for pin assignments.
- 확장 카드 설치: If using a dedicated graphics card or other PCIe expansion cards, insert them into the PCIe X16 slot and secure them.
- 주변기기 연결: Connect your keyboard, mouse, monitor (VGA or HDMI), and Ethernet cable to the rear I/O ports.
5. 사용 설명서
모든 구성 요소를 설치하고 연결하면 시스템의 전원을 켤 수 있습니다.
5.1 첫 번째 부팅
- 컴퓨터 케이스의 전원 버튼을 누르세요.
- 시스템 전원이 켜지고 모니터에 화면이 표시될 것입니다.
- Access the BIOS/UEFI setup (usually by pressing DEL or F2 during boot) to configure boot order, system time, and other settings.
- Install your operating system from a bootable USB drive or DVD.
5.2 드라이버 설치
After installing the operating system, install the necessary drivers for the motherboard's integrated components (chipset, graphics, audio, network). These drivers are typically provided on a CD/DVD with the motherboard or can be downloaded from the PUSOKEI support web대지.
5.3 High-Definition Multimedia Experience
The A78SD3 supports high-definition visuals via its HDMI and VGA outputs. Combined with 100Mbps Ethernet and 6-channel audio, it offers an exceptional multimedia experience for gaming, streaming, and other activities.
6. 유지관리
Proper maintenance can extend the lifespan and ensure stable operation of your motherboard.
- 깨끗하게 유지하세요: 컴퓨터 케이스 내부의 먼지는 압축 공기를 사용하여 정기적으로 청소하십시오. 먼지가 쌓이면 과열될 수 있습니다.
- 적절한 공기 흐름을 보장합니다. Make sure your computer case has adequate ventilation and that fans are functioning correctly to prevent heat buildup.
- BIOS 업데이트: 정기적으로 제조업체를 확인하십시오 website for BIOS updates. Updates can improve stability, compatibility, and performance. Follow update instructions carefully.
- 구성 요소 검사: 모든 케이블이 단단히 연결되어 있고 부품이 헐거워지지 않았는지 확인하십시오.
7. 문제 해결
메인보드에 문제가 발생하면 다음의 일반적인 문제 해결 단계를 참조하십시오.
7.1 전원 없음 / 화면 안 켜짐
- 전원 연결 확인: Ensure the 24-pin ATX and 4-pin CPU power connectors are firmly seated.
- 전원 공급 장치 확인: Test your power supply unit (PSU) to ensure it is functional.
- 구성 요소 재장착: Remove and re-install RAM modules, graphics card (if applicable), and CPU to ensure they are properly seated.
- CMOS 지우기: Refer to the motherboard manual for instructions on how to clear the CMOS (Complementary Metal-Oxide-Semiconductor) settings, which can resolve boot issues. This usually involves removing the CR2032L battery for a few minutes or using a jumper.
- 최소한의 구성 요소로 테스트: Disconnect all non-essential components (e.g., extra drives, expansion cards) and try booting with only the CPU, one RAM stick, and the necessary power connections.
7.2 시스템 불안정성/충돌
- 온도 확인: Monitor CPU and motherboard temperatures. Overheating can cause instability. Ensure proper cooling.
- RAM 테스트: Use memory diagnostic tools to check for faulty RAM modules.
- 드라이버 업데이트: Ensure all motherboard and component drivers are up to date.
- 파워서플라이를 확인하세요: An insufficient or failing power supply can cause instability.
7.3 Peripheral Issues (USB, Audio, Network)
- 드라이버 설치/업데이트: Ensure the latest drivers for these components are installed.
- 연결 확인: Verify that internal headers (for front panel USB/audio) and external cables are securely connected.
- BIOS 설정 : Check BIOS settings to ensure integrated peripherals are enabled.
8. 보증 및 지원
For warranty information and technical support, please refer to the documentation included with your purchase or visit the official PUSOKEI web사이트. 보증 청구를 위해 구매 증빙 자료를 보관하세요.