소개
This manual provides essential instructions for the safe operation, installation, and maintenance of your Vissani 3-in-1 Portable Air Conditioner, Model VAP09R1AWT. This unit is designed to provide cooling, dehumidification, and fan functions for rooms up to 150 square feet. Please read all instructions thoroughly before initial use.
중요 안전 지침
Please read all instructions carefully before using this appliance. Failure to follow these instructions may result in electric shock, fire, or personal injury. Keep this manual for future reference.
- Always connect the unit to a grounded 3-prong outlet. Do not remove the grounding prong or use an adapter.
- Do not operate the unit with a damaged power cord or plug. If the power cord is damaged, it must be replaced by the manufacturer, its service agent, or similarly qualified persons to avoid a hazard.
- Do not block air vents or exhaust openings. Ensure adequate clearance around the unit for proper airflow.
- Keep flammable materials, such as aerosols, away from the unit.
- Unplug the unit from the power outlet before cleaning, performing maintenance, or moving it.
- Do not use the unit in wet areas such as bathrooms or laundries where it may come into contact with water.
- Ensure proper installation of the exhaust hose to prevent hot air recirculation and maintain cooling efficiency.
- 본 기기는 신체적, 감각적 또는 정신적 능력이 저하된 사람(어린이 포함)이나 경험 및 지식이 부족한 사람이 사용하도록 의도된 것이 아니며, 안전을 책임질 사람으로부터 기기 사용에 관한 감독이나 지시를 받은 경우에만 사용할 수 있습니다.
패키지 내용
상자를 풀 때 모든 품목이 패키지에 들어 있는지 확인하세요.
- Vissani Portable Air Conditioner Unit
- 원격 제어
- Window Installation Kit (includes exhaust hose, window slider kit, and adapters)
- 사용 설명서 (본 문서)
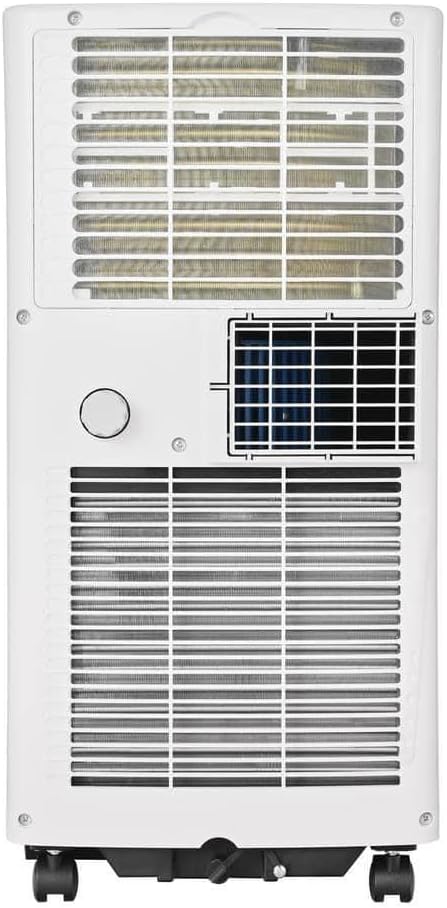
제품 끝view
Familiarize yourself with the main components and general appearance of your portable air conditioner.

The unit features a compact design with integrated caster wheels for easy mobility between rooms.


설정 및 설치
The Vissani portable air conditioner requires proper installation of the window kit to vent hot exhaust air outside. Correct installation is crucial for efficient cooling performance.
창 키트 조립
- Attach one end of the exhaust hose to the unit's exhaust port. Twist or click into place until secure.
- Connect the window exhaust adapter to the other end of the exhaust hose.
- Adjust the window slider kit to fit your window opening. Extend or retract the panels as needed.
- Place the assembled window slider kit securely in the window frame. Close the window against the kit to seal it.
- Insert the window exhaust adapter into the opening of the window slider kit.
- Ensure all connections (unit to hose, hose to adapter, adapter to window kit) are secure to prevent air leakage, which can reduce efficiency.


작동 지침
Your Vissani portable AC offers three operating modes: Cool, Dehumidify, and Fan. It can be controlled via the unit's control panel or the included remote control.
제어판 및 원격 제어
The control panel on top of the unit allows direct access to all functions. The remote control provides convenient operation from a distance. Ensure batteries are correctly inserted into the remote control.
작동 모드
- 쿨 모드 : Select this mode for air conditioning. Use the temperature adjustment buttons to set your desired room temperature. The unit will cool the room to the set temperature and cycle on/off to maintain it.
- 제습 모드: This mode removes excess moisture from the air. The fan speed is typically fixed at a low setting in this mode. For continuous dehumidification, ensure the continuous drainage option is set up (refer to the Maintenance section).
- 팬 모드: Circulates air without cooling. Select desired fan speed (low, medium, high) to provide a refreshing breeze.
타이머 기능
The 24-hour programmable timer allows you to set the unit to turn on or off automatically after a specified period. To set the timer, press the 'Timer' button on the control panel or remote, then use the temperature adjustment buttons to select the desired delay time (in hours). Press 'Timer' again to confirm.
유지
Regular maintenance ensures optimal performance, improves air quality, and extends the lifespan of your portable air conditioner.
에어 필터 청소
The air filter should be cleaned every two weeks or more frequently depending on usage and air quality. A dirty filter can significantly reduce cooling efficiency and airflow.
- 청소하기 전에 전원 콘센트에서 장치의 플러그를 뽑으십시오.
- Locate and remove the air filter (typically found on the back or side of the unit).
- Wash the filter with warm, soapy water. Rinse thoroughly to remove all dirt and debris.
- 필터를 다시 설치하기 전에 완전히 자연 건조시키세요. 직사광선이나 열에 노출시키지 마세요.
- Reinsert the dry filter into the unit, ensuring it is properly seated.
배수
The unit collects condensate during cooling and dehumidifying operations. Periodically drain the collected water from the drainage port at the bottom rear of the unit. For continuous dehumidification, connect a standard garden hose (not included) to the continuous drainage port and direct it to a floor drain or suitable receptacle.
저장
Before storing the unit for an extended period (e.g., during off-season):
- Drain all accumulated water completely from the unit.
- Clean the air filter as described above.
- Run the unit in fan-only mode for a few hours to ensure internal components are thoroughly dry.
- Unplug the unit and carefully coil the power cord.
- Store the unit in a dry, upright position, preferably in its original packaging, away from extreme temperatures.
문제 해결 가이드
고객 지원에 문의하기 전에 다시 문의하세요.view 다음은 흔히 발생하는 문제점과 그에 대한 잠재적인 해결책입니다.
| 문제 | 가능한 원인 | 해결책 |
|---|---|---|
| 장치가 켜지지 않습니다 | No power supply; power cord unplugged; circuit breaker tripped; unit's internal safety switch activated. | Ensure unit is securely plugged into a functional, grounded outlet; check and reset the circuit breaker if tripped; press the reset button on the plug if available. |
| 냉각이 부족합니다 | Dirty air filter; blocked air intake/exhaust; room size exceeds capacity; windows/doors open; exhaust hose not properly installed or kinked. | Clean the air filter; clear any obstructions from air inlets and outlets; ensure the room size is within 150 sq. ft.; close all windows and doors; verify exhaust hose installation and ensure it is straight. |
| 제품이 지나치게 시끄럽거나 진동이 심합니다. | Unit not on a level surface; fan obstruction; loose components. | Place the unit on a flat, stable surface; check for foreign objects in the fan area; contact support if noise persists after checking. |
| 물 누출 | Drain plug not securely closed; unit tilted; internal water tank full (if applicable and not continuously drained). | Ensure the drain plug is securely closed; place the unit on a level surface; drain accumulated water from the unit. |
| 리모컨이 작동하지 않습니다 | Dead batteries; obstruction between remote and unit; remote not pointed at receiver. | Replace batteries with new ones; remove any obstructions; ensure remote is pointed directly at the unit's receiver. |
제품 사양
| 특징 | 세부 사항 |
|---|---|
| 모델 번호 | VAP09R1AWT |
| 냉각 용량(DOE) | 5,000비티유 |
| 적용 범위 | 최대 150제곱피트 |
| 기능 | 에어컨, 제습기, 선풍기 |
| 권tage | 115 볼트 |
| 왓tage | 450 와트 |
| 소음 수준 | 50~52데시벨 |
| 품목 무게 | 45.9파운드 |
| 제품 크기(D x W x H) | 약 15 x 16 x 12인치 |
| 색상 | 하얀색 |
| 포함된 구성 요소 | Remote Control, Window Installation Kit |
보증 및 고객 지원
For specific warranty information regarding your Vissani Portable Air Conditioner, Model VAP09R1AWT, please refer to the warranty card included with your product packaging. It is recommended to retain your purchase receipt as proof of purchase for any warranty claims.
For technical assistance, troubleshooting beyond this guide, or to inquire about replacement parts, please contact Vissani customer support. Contact details can typically be found on the product packaging, the official Vissani web해당 사이트 또는 포함된 보증 문서를 참조하십시오.


