1. 서론
The Waveshare ESP32-S3 Dual Eye Round LCD AIoT Development Board is a versatile microcontroller development platform designed for makers and electronics enthusiasts. Based on the ESP32-S3 chip, it offers robust connectivity with 2.4GHz Wi-Fi and Bluetooth BLE 5. This board features dual 1.28-inch round IPS LCD displays, each with 240x240 resolution and 65K colors, capable of running graphical user interfaces (GUIs) like LVGL smoothly. It also integrates a microphone, speaker header, Lithium battery recharge circuit, TF card slot, and various expansion connectors, making it suitable for a wide range of applications including HMI, robotic agents, and AI voice-interactive projects.

이미지 1.1: The Waveshare ESP32-S3 Dual Eye Round LCD AIoT Development Board. This image shows the compact design of the board with its two circular displays, one of which is being touched by a finger, illustrating its interactive capabilities.
2. 주요 특징
- 프로세서: High-performance Xtensa 32-bit LX7 dual-core processor, up to 240MHz main frequency.
- 무선 연결 : Supports 2.4GHz Wi-Fi (802.11 b/g/n) and Bluetooth 5 (LE) with an onboard antenna.
- 메모리: 내장형 512KB SRAM 및 384KB ROM, 온보드 8MB PSRAM 및 16MB 플래시 메모리를 갖추고 있습니다.
- 디스플레이: Dual 1.28-inch LCD displays, 240 × 240 resolution, 65K color, with optional capacitive touch function.
- 오디오: Onboard ES8311 audio codec and ES7210 audio ADC chip, equipped with a standard microphone and speaker header, supporting AI speech interaction.
- 저장: Onboard TF card slot for convenient local storage expansion of data, images, and audio files.
- 전원 관리 : Onboard Lithium battery recharge management module, with a reserved 3.7V Lithium battery power supply header.
- 확장: Onboard SH1.0 14PIN connector, adapting UART, I2C, and various IO interfaces for DIY customization.
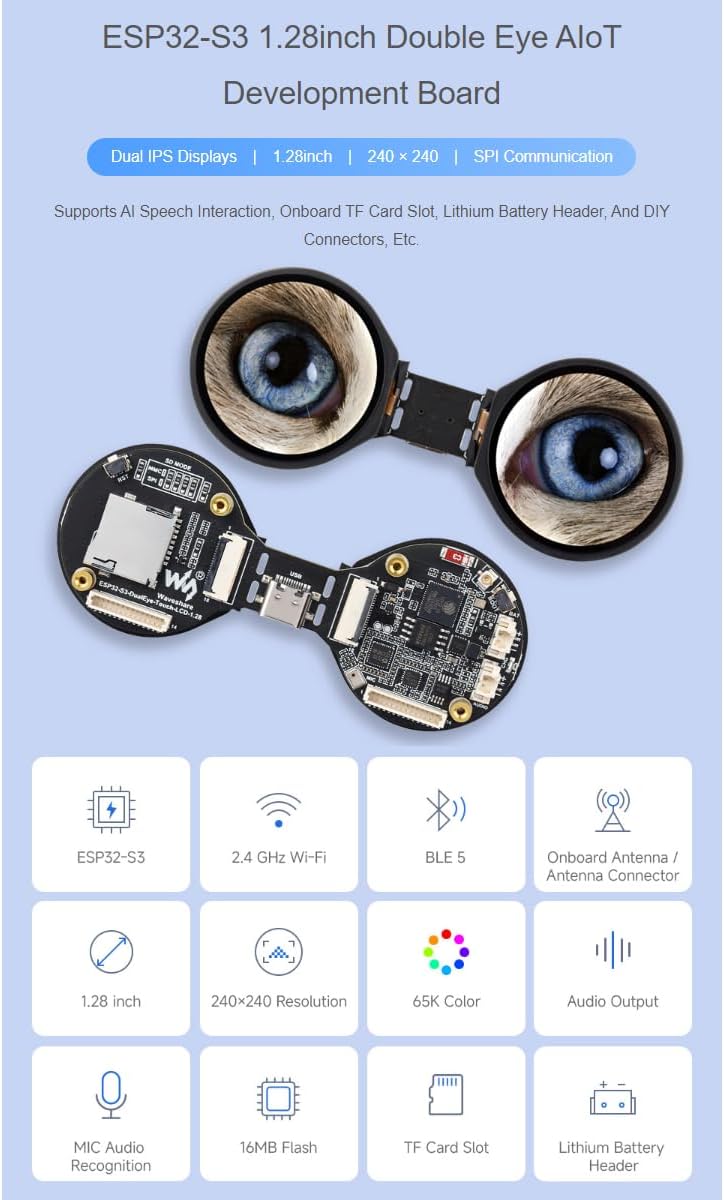
이미지 2.1: 피처 오버view of the ESP32-S3 Dual Eye AIoT Development Board. This image displays the board along with various icons representing its core functionalities such as ESP32-S3 chip, Wi-Fi, Bluetooth, onboard antenna, 1.28-inch displays, 240x240 resolution, 65K colors, audio output, MIC audio recognition, 16MB Flash, TF card slot, and Lithium battery header.
3. 패키지 내용물
다음 항목이 패키지에 포함되어 있습니다.
- ESP32-S3-DualEye-Touch-LCD-1.28 Board x1
- SH1.0 14PIN cable (~100mm) x1
- FFC 18PIN cable (~200mm) x1
- 8Ω 2W MX1.25 2PIN speaker x1

이미지 3.1: Package contents. This image shows the ESP32-S3 Dual Eye Touch LCD board, an FFC cable, a SH1.0 14PIN cable, and an 8Ω 2W MX1.25 2PIN speaker, which are all included in the product package.
4. 설치 및 하드웨어 오버헤드view
Before operating the board, familiarize yourself with its components and connection points.
이미지 4.1: What's On Board. This diagram provides a numbered overview of the ESP32-S3 Dual Eye Touch LCD board's components and connectors, essential for setup and development.
4.1 구성 요소 식별
- ESP32-S3R8: Dual-core processor, up to 240MHz operating frequency.
- 16MB Flash.
- Battery recharge management chip.
- Amp증폭기 칩.
- ES8311: Audio codec.
- ES7210: Audio ADC.
- 마이크로폰.
- MP1605GTF-Z: Power module, supports up to 3.3V 2A output.
- Onboard ceramic antenna.
- IPEX1 connector: For connecting an external antenna, enabled via resoldering an onboard resistor.
- 부팅 버튼.
- GPIO1 function selection resistor: Soldered on the side near the crystal by default; the GPIO1 pin is used for battery voltage measurement. Resoldered to the other side: the GPIO1 connects to the 17. FPC connector, enabling three-screen display function through software modification.
- Battery header.
- MX1.25 2PIN connector for 3.7V Lithium battery, supports charging and discharging.
- Charge indicator: Lithium battery charge indicator, lights up when charging, off when fully charged (the light status is uncertain when the battery is not connected).
- 스피커 헤더.
- SH1.0 14PIN header.
- 18PIN FPC connector: For three-screen display function by resoldering the 12. resistor and modifying the display configuration parameters in the program. When the board is split into two halves, this FPC connector can be linked with 18. FPC connector so that both displays function properly (Note: when the board is split and connected via FPC cable, the RESET button will be unavailable).
- 18PIN FPC header: For connection to the host.
- TF card communication mode selection: When the board is split into two halves, switching to SPI mode allows the TF card to be controlled by an external master controller.
- TF 카드 슬롯.
- 리셋 버튼.
- SH1.0 14PIN cable header: For controlling TF card and the LCD display via SPI interface when the board is split into two halves and resoldering 19. resistor to SPI mode.
- C형 포트.
4.2 초기 연결
- 전원 공급 장치: Connect the board to a power source using the Type-C port (24). Alternatively, connect a 3.7V Lithium battery to the Battery header (13) or MX1.25 2PIN connector (14).
- 스피커 연결: If using the included speaker, connect it to the Speaker header (16).
- TF 카드: Insert a TF card into the TF card slot (21) for local storage if needed.
- 확장: Utilize the SH1.0 14PIN header (17) or other FPC connectors (18, 19) for custom expansions as required by your project.
5. 사용 설명서
5.1 개발 환경
The ESP32-S3-DualEye-Touch-LCD-1.28 supports two primary development tools and frameworks:
- 아두이노 IDE: A popular choice for ease of use and a large community.
- ESP-IDF: Espressif IoT Development Framework, offering more control and advanced features for complex projects.
Choose the development tool that best suits your project requirements and personal preferences. Development resources and examples can be obtained by contacting Waveshare support.
5.2 Display and Touch Functionality
The board features dual 1.28-inch IPS displays with 240x240 resolution. The displays support 65K colors and can render GUIs efficiently. The optional capacitive touch function is controlled via an I2C interface, providing flexible operation and smooth UI interaction with interrupt support.

이미지 5.1: Capacitive Touch. This image demonstrates the touch functionality of the displays, showing a finger interacting with one of the screens displaying a scenic image.
5.3 AI 음성 상호작용
The integrated microphone and audio codec chips enable AI speech interaction. This allows the board to process audio input and interact with online large model platforms such as DeepSeek and Doubao for advanced speech recognition and response capabilities.

이미지 5.2: Supports AI Speech Interaction. This diagram illustrates the workflow of AI speech interaction: a conversation is made with the built-in microphone, sent to a large model platform for analysis, an answer is received, and a reply is generated via an external speaker.
5.4 오디오 입력 및 출력
The onboard audio codec chip supports high-quality audio processing, providing clear audio input and output. This is crucial for applications involving sound, music, or voice commands.

이미지 5.3: Onboard Audio Codec Chip. This image visually represents the audio output and input capabilities of the board, with musical notes displayed on the screens, indicating sound processing.
6. 유지관리
To ensure the longevity and optimal performance of your ESP32-S3 Dual Eye Round LCD AIoT Development Board, follow these maintenance guidelines:
- 손질: Always handle the board by its edges to avoid touching sensitive components or applying undue pressure to the displays.
- 청소: Use a soft, dry, anti-static cloth to clean the board and displays. Avoid using liquids or abrasive materials.
- 저장: Store the board in a cool, dry, and dust-free environment. If not in use for extended periods, consider storing it in an anti-static bag.
- 힘: 적절한 전원 공급량을 확인하세요.tage (3.7V for battery, 5V via Type-C) and avoid reverse polarity connections.
- 환경: Protect the board from extreme temperatures, humidity, and direct sunlight.
7. 문제 해결
If you encounter issues with your development board, consider the following troubleshooting steps:
- 전원 없음:
- Type-C 케이블 연결 상태와 전원을 확인하십시오.
- 배터리를 사용하는 경우, 배터리가 충전되어 있고 배터리 헤더에 올바르게 연결되어 있는지 확인하십시오.
- Verify the charge indicator LED (15) behavior.
- 디스플레이가 작동하지 않음:
- Ensure FFC cables are securely connected.
- Check display initialization code in your program.
- If the board is split, ensure the 18PIN FPC connector (18) and resistor (12) are correctly configured.
- Wi-Fi/Bluetooth 연결 문제:
- Verify your code for correct Wi-Fi/Bluetooth initialization and credentials.
- Ensure the onboard ceramic antenna (9) is not obstructed.
- If using an external antenna, ensure it's properly connected to the IPEX1 connector (10) and the onboard resistor is configured correctly.
- 오디오 문제:
- Check speaker connection to the Speaker header (16).
- Verify audio codec initialization and playback/recording code.
- Ensure the microphone (7) is not covered.
- TF 카드가 감지되지 않았습니다:
- Ensure the TF card is fully inserted into the TF card slot (21).
- Check TF card communication mode selection (20) if the board is split.
- Verify your code for correct TF card initialization and file 시스템 액세스.
For further assistance, refer to the official Waveshare documentation or contact their technical support.
8. 사양
| 특징 | 세부 사항 |
|---|---|
| 프로세서 | Xtensa 32비트 LX7 듀얼 코어, 최대 240MHz |
| 무선 연결 | 2.4GHz Wi-Fi(802.11 b/g/n), 블루투스 5(LE) |
| 온보드 메모리 | 512KB SRAM, 384KB ROM, 8MB PSRAM, 16MB Flash |
| 디스플레이 | Dual 1.28-inch IPS LCD, 240 × 240 resolution, 65K colors |
| 터치 기능 | Optional Capacitive Touch (I2C interface) |
| 오디오 | ES8311 Codec, ES7210 ADC, Microphone, Speaker Header |
| 저장 공간 확장 | TF 카드 슬롯 |
| 전원 입력 | Type-C, 3.7V Lithium Battery Header |
| 치수 | 4.25 x 3.15 x 1.02인치(패키지) |
| 품목 무게 | 0.704 온스 |
| 모델 번호 | ESP32-S3 Double Eye Touch LCD (ESP32-S3-DualEye-Touch-LCD-1.28) |
9. 보증 및 지원
9.1 보증 정보
Specific warranty details for the Waveshare ESP32-S3 Dual Eye Round LCD AIoT Development Board are typically provided at the point of purchase or on the official Waveshare web자세한 내용은 구매 서류 또는 제조업체의 웹사이트를 참조하십시오. web가장 정확하고 최신의 보증 정책을 확인하려면 사이트를 방문하세요.
9.2 기술 지원
For technical assistance, development resources, or inquiries regarding the ESP32-S3 Dual Eye Round LCD AIoT Development Board, please visit the official Waveshare support page or contact their customer service directly. You can often find detailed documentation, examp코드와 커뮤니티 포럼 web대지.
웨이브쉐어 공식 계정 Web대지: www.waveshare.com


