1. 서론
This manual provides comprehensive instructions for the installation, setup, and operation of your KETOTEK Smart Digital Thermostat, specifically designed for 16A electric underfloor heating systems. Please read this manual thoroughly before installation and use to ensure proper function, safety, and to maximize the benefits of your new thermostat.
2. 안전 정보
Adhering to these safety guidelines is crucial for preventing damage and ensuring safe operation:
- 전문적인 설치: 설치는 해당 지역의 전기 규정 및 규정에 따라 자격을 갖춘 전기 기술자가 수행해야 합니다.
- 전원 차단: Always ensure the main power supply is disconnected before attempting any installation, wiring, or maintenance.
- 전력 요구 사항: This thermostat requires both a live (L) and neutral (N) conductor for power. It is not a battery-operated thermostat.
- 환경 조건: Do not expose the device to water, excessive humidity, or extreme temperatures. The device is designed for indoor use only.
- 아동 안전: Utilize the child lock feature to prevent accidental adjustments by children.
3. 패키지 내용
다음 품목이 모두 패키지에 포함되어 있는지 확인하세요.
- KETOTEK Smart Digital Thermostat
- 장착 나사
- 사용 설명서 (본 문서)
- External Floor Sensor (2.5m cable length)

Image showing the KETOTEK thermostat, mounting screws, user manual, and external sensor, indicating the complete package contents.

Image displaying the KETOTEK thermostat with icons for APP remote control, voice control, weekly programming, child lock, heating/cooling mode, window function, reset function, and power-off memory.
4. 제품 오버view
The KETOTEK Smart Digital Thermostat provides precise and intelligent temperature control for your electric underfloor heating system. It features a clear, easy-to-read display and intuitive controls, complemented by smart functionalities.
주요 특징:
- 앱을 통한 원격 제어: Manage and adjust temperature settings from anywhere using the Smart Life or Tuya mobile application.
- 음성 제어: Seamlessly integrates with Amazon Alexa for convenient hands-free temperature adjustments.
- 프로그래밍 가능한 일정: Create personalized heating schedules with up to six time intervals per day to optimize comfort and energy efficiency.
- 아동 잠금: A safety feature to prevent unintended changes to settings, ensuring consistent heating.
- 전원 끄기 메모리: Automatically saves and restores previous settings after a power interruption, eliminating the need for manual re-configuration.
- 조정 가능한 디스플레이 밝기: Offers three standby backlight modes (no display, low brightness, medium brightness) for customizable visibility.
- 온도 교정: Supports temperature calibration from -9°C to +9°C for highly accurate temperature readings.
- 윈도우 함수: Automatically detects open windows and temporarily suspends heating to save energy.
5. 설치
This thermostat is designed for installation in standard 86mm or European 60mm recessed wall boxes. Ensure the main power supply is OFF before beginning installation.
5.1 배선도
Carefully connect the wires according to the diagram below. It is essential to connect the live (L) and neutral (N) wires from your power supply to the corresponding input terminals on the thermostat. Connect the electric underfloor heating load to the 'Load' terminals. The NTC external floor sensor should be connected to its dedicated terminals.

Image showing the back of the thermostat with wiring terminals (L, N, Load, NTC sensor) and dimensions for standard 86mm or European 60mm recessed boxes. It also illustrates the connection to AC 90-240V power and electric underfloor heating.
5.2 장착
Once wired, secure the back plate of the thermostat into the recessed wall box using the provided mounting screws. Then, carefully attach the front display panel of the thermostat to the mounted back plate until it clicks securely into place.

Image showing the KETOTEK thermostat disassembled, with the front display unit separated from the wall-mounted back plate, illustrating how the components fit together during installation.
The thermostat can be installed as a standalone unit or alongside other devices in a multi-gang setup.
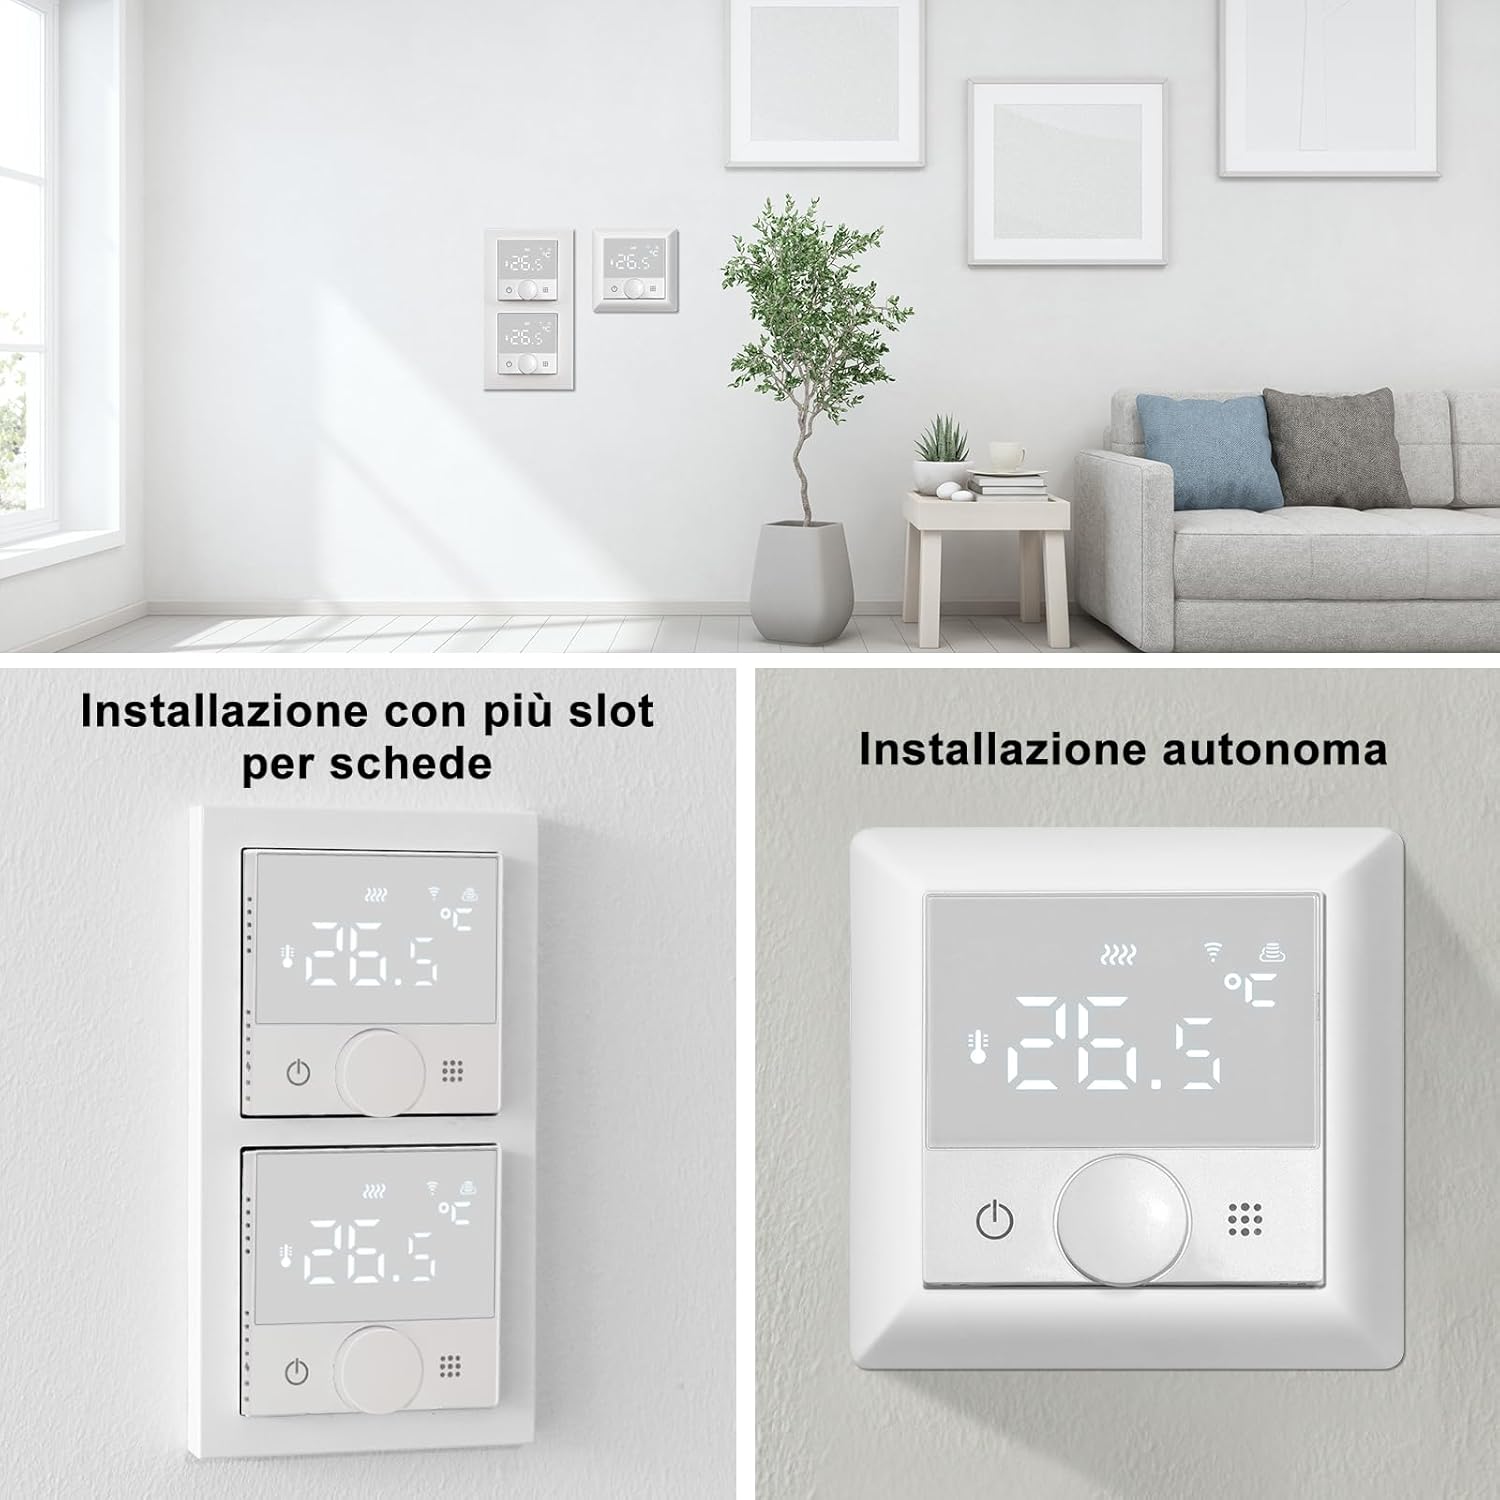
Image showing two installation examples: one with multiple thermostats installed vertically in a multi-gang setup, and another with a single thermostat installed standalone on a wall.
6. 초기 설정 및 Wi-Fi 연결
To enable smart features and remote control, connect your thermostat to your home Wi-Fi network using the Smart Life or Tuya application.
- 휴대전화 준비: Activate Bluetooth on your mobile phone. Ensure your phone is connected to a 2.4GHz Wi-Fi 네트워크 (5 GHz networks are not supported). Download and open the Smart Life or Tuya app from your app store.
- 온도 조절기 페어링 모드: On the thermostat, simultaneously press and hold the power button and the grid button (usually the menu or settings button) until the Wi-Fi icon on the display begins to flash.
- 앱에 장치 추가: In the Smart Life/Tuya app, tap the "+" icon (usually in the top right corner) and select "Add device". The app should automatically search for and display your thermostat.
- 완벽한 페어링: Follow the on-screen instructions within the app to complete the pairing process. Confirm your Wi-Fi network and enter the password if prompted. Click "Continue" or "Next".
- 연결 성공: Once the connection is established, the app will confirm successful pairing. You can now begin controlling your thermostat remotely.

A step-by-step visual guide demonstrating how to connect the KETOTEK thermostat to the Smart Life/Tuya app, including activating Bluetooth, connecting to 2.4GHz Wi-Fi, pressing thermostat buttons, and confirming connection in the app.
7. 운영
7.1 온도 조절
The thermostat allows for precise temperature settings ranging from 0.0°C to 70.0°C. For enhanced accuracy, temperature calibration is supported from -9°C to +9°C, which can be adjusted via the app or device settings.
7.2 프로그래밍 가능한 일정
Utilize the programmable scheduling feature to set up to six distinct time intervals per day. This allows the thermostat to automatically adjust the temperature based on your daily routine, optimizing both comfort and energy efficiency.

Image illustrating a programmable weekly schedule with six time slots (Wake up, Away, Return home, Away, Return home, Sleep) and corresponding temperature settings, highlighting energy and money saving benefits.
7.3 음성 제어 (알렉사 호환)
The thermostat is fully compatible with Amazon Alexa. Once connected, you can use simple voice commands to adjust the temperature without needing to interact with the device manually.
Examp르 명령: "Alexa, set the temperature to 26 degrees Celsius."

Image depicting a person using voice control with an Amazon Echo device to command the thermostat, with a speech bubble showing 'Alexa, set the temperature to 26°C.' and the response 'OK.'.
7.4 Window Function (Ventilation Mode)
The thermostat features an intelligent window function. When windows are opened for ventilation, the thermostat detects a sudden drop in temperature below the set value. It automatically recognizes this as ventilation mode and temporarily suspends heating. Once ventilation is complete and the room temperature begins to rise, the thermostat will automatically resume operation in the previously set mode.

Image showing a person opening a window, with text explaining the thermostat's ventilation function: it detects sudden temperature drops, suspends heating, and resumes when the temperature stabilizes.
7.5 차일드락
Activate the child lock feature to prevent accidental or unauthorized changes to the thermostat settings, ensuring your heating schedule remains undisturbed.

Image split into two parts: one showing a child reaching for the thermostat with a shield icon, indicating the child lock feature; the other showing a finger pressing a button on the thermostat for the one-click reset function.
7.6 디스플레이 밝기
The thermostat's display offers three adjustable standby backlight modes: no display, low brightness, and medium brightness. You can customize this setting to suit your preference for clear readability from any viewing angle, day or night.

Image demonstrating the three adjustable display brightness modes: semi-bright, low brightness, and no display, showing how the thermostat screen appears in different standby settings.

Collage of images showing the thermostat installed in different room settings, emphasizing its clear display readability from various angles.
7.7 전원 끄기 메모리
In the event of a sudden power interruption, the thermostat automatically saves all previous settings. Once power is restored, the device will resume operation with these saved settings, eliminating the need for manual re-configuration.
7.8 Historical Data Query
Through the Smart Life/Tuya app, you can monitor both the set temperature and the actual internal temperature simultaneously. The app supports querying historical data and analyzing temperature graphs, which can help you optimize your energy-saving strategies over time.

Image showing a family looking at a smartphone displaying the Smart Life/Tuya app interface with a 'History status query' screen, illustrating how users can view historical temperature data and graphs.
8. 유지관리
To ensure the longevity and optimal performance of your KETOTEK thermostat, follow these simple maintenance guidelines:
- 청소: Clean the thermostat surface with a soft, dry cloth. Do not use abrasive cleaners, solvents, or chemical sprays, as these can damage the display or casing.
- 통풍: Ensure that the air vents on the thermostat are not obstructed by dust or debris. Clear vents are essential for accurate temperature sensing.
- 펌웨어 업데이트: Periodically check for firmware updates through the Smart Life/Tuya app. Updates can provide improved performance, new features, and bug fixes.
9. 문제 해결
If you encounter any issues with your thermostat, please refer to the following troubleshooting table before contacting support:
| 문제 | 가능한 원인 | 해결책 |
|---|---|---|
| 온도 조절 장치가 켜지지 않습니다 | 전원 공급이 안 됨; 배선이 잘못됨. | Check the circuit breaker for the heating system. Verify that the live and neutral connections are correctly wired to the thermostat. If unsure, consult a qualified electrician. |
| Wi-Fi 연결에 실패했습니다 | Incorrect Wi-Fi band (5GHz); weak Wi-Fi signal; incorrect password. | Ensure your router is broadcasting a 2.4 GHz network and your phone is connected to it. Move the thermostat closer to the Wi-Fi router or consider a Wi-Fi extender. Double-check the Wi-Fi password. Repeat the app pairing steps carefully. |
| Heating not turning on/off as expected | Incorrect temperature settings; external sensor issue; heating load wiring problem; schedule conflict. | Verify the set temperature and current room temperature. Check the connection of the external floor sensor. Ensure the heating load wiring is correct. Review your programmable schedules in the app. |
| Display not clear or unresponsive | Brightness setting; physical damage; software glitch. | Adjust the display brightness settings. If the display is physically damaged, contact customer support. Try restarting the thermostat by cycling its power. |
10. 사양
- 상표: 케토텍
- 모델: B0FQBV1M2V (16A Electric Underfloor Heating)
- 전원 공급 장치: 교류 90-240V 50/60Hz
- 출력 전류: 최대 16A
- 온도 설정 범위: 0.0°C ~ 70.0°C
- 온도 교정: -9°C ~ +9°C
- Wi-Fi 연결: 2.4GHz (5GHz는 지원되지 않음)
- 제어 유형: App, Amazon Alexa, Manual, Programmable, Smart/Remote
- 색상: 하얀색
- Dimensions (Thermostat): 약 10×10×6 cm
- 품목 무게: 237g
- 특별 기능: Remote control via WiFi, Voice control, Area heating, Child lock, Power-off memory, Window function.
11. 보증 및 지원
For detailed warranty information and technical support, please refer to the documentation included with your purchase or visit the official KETOTEK web해당 사이트입니다. 보증 청구를 위해 구매 증빙 자료를 보관하시는 것이 좋습니다.
반품 정책: This product is subject to a 14-day return policy (refund/replacement) as per Amazon.it terms.
판매처: YINGTU store


