1. 서론
The NYXI Warrior Wireless Switch Controller is a versatile gaming peripheral designed for enhanced gameplay across multiple platforms. It features advanced technologies such as Hall Effect Joysticks and Triggers for precision and longevity, micro mechanical switch buttons for rapid response, HD Rumble for immersive feedback, and a 6-axis gyroscope for motion sensing. This controller is compatible with Nintendo Switch, Nintendo GameCube (NGC), Wii, and PC.

Image: NYXI Warrior controllers in various colors, highlighting the product line.
2. 패키지 내용
- NYXI Warrior Wireless Switch Controller
- USB 무선 수신기
- USB-C 충전 케이블
- 사용 설명서 (본 문서)

Image: The NYXI Warrior controller and its wireless receiver.
3. 설정 가이드
3.1 컨트롤러 충전
Before first use, fully charge the controller. Connect the supplied USB-C charging cable to the controller's USB-C port and the other end to a USB power source (e.g., console, PC, or USB wall adapter). The indicator lights on the controller will show charging status and turn off when fully charged. A full charge typically takes approximately 2-3 hours.
3.2 장치에 연결하기
3.2.1 닌텐도 스위치 연결
- Nintendo Switch 콘솔을 켭니다.
- 홈 메뉴에서 컨트롤러, 그 다음에 그립/오더 변경.
- 를 누르고 계세요 페어링 버튼 on the top of the NYXI Warrior controller for 3 seconds until the indicator lights begin to flash rapidly.
- 연결되면 컨트롤러의 해당 플레이어 표시등이 계속 켜져 있습니다.
3.2.2 PC/NGC/Wii Connection (via USB Wireless Receiver)
- Insert the USB Wireless Receiver into an available USB port on your PC, NGC, or Wii console.
- Ensure the NYXI Warrior controller is powered on.
- The controller should automatically connect to the receiver. The indicator light on the receiver and controller will become solid once a connection is established.
- For PC, additional driver installation may be required depending on the operating system. Refer to your PC's documentation for USB device setup.

Image: The NYXI Warrior controller connected to a laptop via its USB receiver, demonstrating PC compatibility.

Image: The NYXI Warrior controller with a Nintendo Wii console, illustrating Wii compatibility.
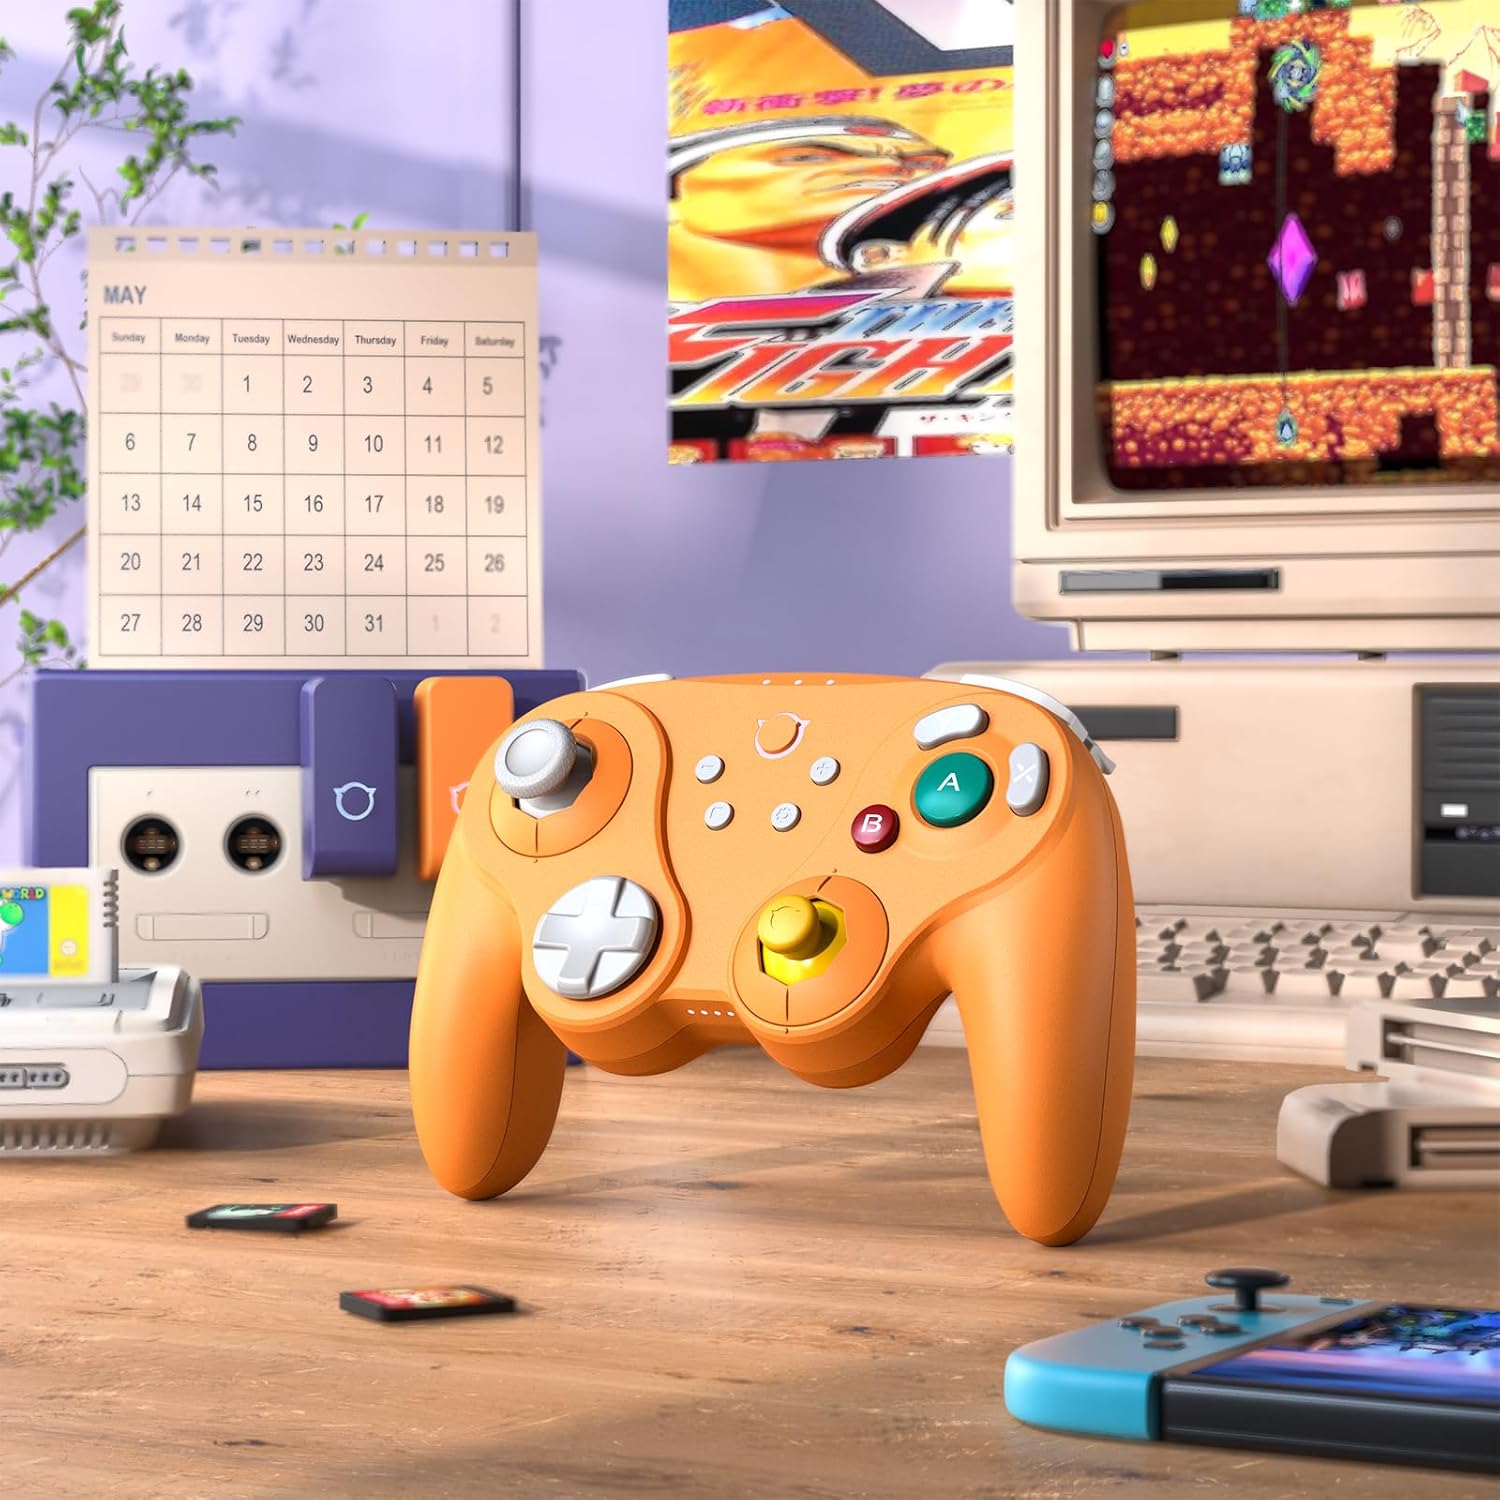
Image: The NYXI Warrior controller with a retro gaming setup, illustrating GameCube compatibility.
4. 사용 설명서
4.1 버튼 레이아웃 및 기능
The NYXI Warrior controller features a comprehensive button layout for various gaming needs:
- 왼쪽 아날로그 스틱: 움직임과 카메라 제어를 위해.
- 방향 패드: 방향 입력.
- 오른쪽 아날로그 스틱: For camera control or specific in-game actions.
- A/B/X/Y 버튼: Action buttons with micro mechanical switches for precise and rapid input.
- L/R 버튼: 어깨 단추.
- ZL/ZR 트리거: Hall Effect analog triggers for precise input, adjustable for different gameplay styles.
- +/- 버튼: Start/Select or Menu functions.
- 홈 버튼: 콘솔의 홈 화면으로 돌아갑니다.
- 스크린샷 버튼: 스크린샷을 캡처합니다.
- Programmable Back Paddles (M1/M2): Located on the underside, these can be assigned to various button functions.

이미지: 앞면 view of the NYXI Warrior controller, illustrating its button layout.

이미지: 뒤로 view of the NYXI Warrior controller, highlighting the programmable back paddles.

이미지: 정면 상단 view of the NYXI Warrior controller, showing triggers and charging port.

Image: Two users playing with NYXI Warrior controllers, demonstrating in-game use.
4.2 고급 기능
4.2.1 홀 효과 조이스틱 및 트리거
The controller utilizes Hall Effect technology for its joysticks and triggers. This magnetic sensing technology prevents stick drift and ensures precise, long-lasting input. The triggers are also adjustable, allowing users to fine-tune their activation distance based on personal preference or game requirements.

Image: Illustration of the Hall Effect Joystick technology.

Image: Adjustable Hall Sensing Triggers feature.
4.2.2 Micro Mechanical Switch Buttons
The A/B/X/Y buttons and D-pad utilize micro mechanical switches, offering a short travel distance of approximately 0.3mm and a response speed of 0.2ms. This design provides tactile feedback and minimal latency, crucial for competitive gaming.

Image: Microswitches for A/B/X/Y buttons and D-pad.
4.2.3 6축 자이로스코프
The integrated 6-axis gyroscope supports motion sensing, particularly useful for games on the Nintendo Switch that utilize tilt or motion controls.

Image: 6-Axis Gyroscope feature illustration.
4.2.4 HD 럼블
The controller features HD Rumble, providing enhanced vibration feedback that can convey a wider range of sensations, from subtle tremors to powerful impacts, enriching the gaming experience.

Image: HD Rumble feature illustration.
4.2.5 Programmable Back Paddles and Turbo Function
The interchangeable back paddles (M1 and M2) can be programmed to replicate other button inputs, offering additional customization and ergonomic advantages. The controller also supports a turbo function for rapid, repeated button presses. Refer to the specific programming instructions provided with the controller for detailed steps on assigning functions to the back paddles and activating turbo mode.

Image: Interchangeable Back Paddle Design.
5. 유지관리
- 청소: 부드럽고 마른 천을 사용하여 컨트롤러 표면을 닦으세요. 잘 지워지지 않는 오염의 경우, 가볍게 두드리세요.amp천에 물을 묻혀 닦으세요. 강한 화학 물질이나 연마재는 사용하지 마세요.
- 저장: 컨트롤러는 직사광선과 극한의 온도를 피해 서늘하고 건조한 곳에 보관하세요.
- 배터리 관리 : 배터리 수명을 연장하려면 컨트롤러를 자주 완전히 방전시키지 마십시오. 장기간 보관할 경우 몇 달에 한 번씩 배터리를 약 50% 정도 충전하십시오.
- 손질: 컨트롤러를 떨어뜨리거나 강한 충격을 주지 마세요. 내부 구성 요소가 손상될 수 있습니다.
6. 문제 해결
6.1 컨트롤러가 연결되지 않음
- 컨트롤러가 충분히 충전되었는지 확인하세요.
- Verify the USB Wireless Receiver is securely plugged into the console/PC.
- For Switch, ensure you are in the "Change Grip/Order" menu.
- Try re-pairing the controller by pressing the pairing button.
- 콘솔/PC와 컨트롤러를 다시 시작하세요.
6.2 입력 지연 또는 버튼 반응 없음
- 주변에 강력한 무선 간섭원(예: Wi-Fi 라우터, 기타 무선 기기)이 없는지 확인하십시오.
- 콘솔/PC에 더 가까이 다가가세요.
- 컨트롤러의 배터리 잔량이 부족한지 확인하세요.
- Perform a controller reset (refer to manufacturer's specific reset procedure if available, typically a small pinhole button).
6.3 조이스틱 보정
While Hall Effect joysticks are designed to prevent drift, if you experience any unusual behavior, you may need to recalibrate them through your console's system settings (e.g., Nintendo Switch System Settings > Controllers and Sensors > Calibrate Control Sticks).
7. 사양
| 모델 번호 | 전사 |
| ASIN | B0FB9577L9 |
| 패키지 크기 | 7.64 x 7.52 x 3.58 인치 |
| 품목 무게 | 1.54파운드 |
| 배터리 | 1개의 리튬 이온 배터리(포함) |
| 첫 번째 이용 가능 날짜 | 24년 2025월 XNUMX일 |
8. 보증 및 지원
For information regarding warranty coverage, technical support, or replacement parts, please refer to the official NYXI web해당 웹사이트를 방문하거나 제품을 구매한 판매점에 문의하십시오. 보증 청구를 위해 구매 증빙 자료를 보관하십시오.
Official NYXI Store: 아마존에서 NYXI 스토어를 만나보세요