1. 서론
This manual provides detailed instructions for the Machenike G3V2 Bluetooth Controller. It covers setup, operation, maintenance, and troubleshooting to ensure optimal performance and longevity of your device. Please read this manual thoroughly before using the controller.
2. 패키지 내용
패키지에 모든 품목이 들어 있는지 확인하세요.
- 마체니케 G3V2 블루투스 컨트롤러
- 충전 도크
- USB-C 충전 케이블
- 사용자 설명서
- Dual-Core Receiver (USB Dongle)
3. 제품 오버view
The Machenike G3V2 controller features Hall Effect joysticks, RGB lighting, programmable buttons, and a 1000mAh battery with a dedicated charging station. It supports multiple platforms including PC, Switch, iOS, and Android.

그림 3.1: 이상view of Machenike G3V2 Controller features.
4. 설정
4.1. 컨트롤러 충전
Place the controller on the included charging dock. The built-in 1000mAh battery will begin charging via the USB-C port. The charging dock protects the controller and ensures efficient power replenishment for extended gaming sessions.
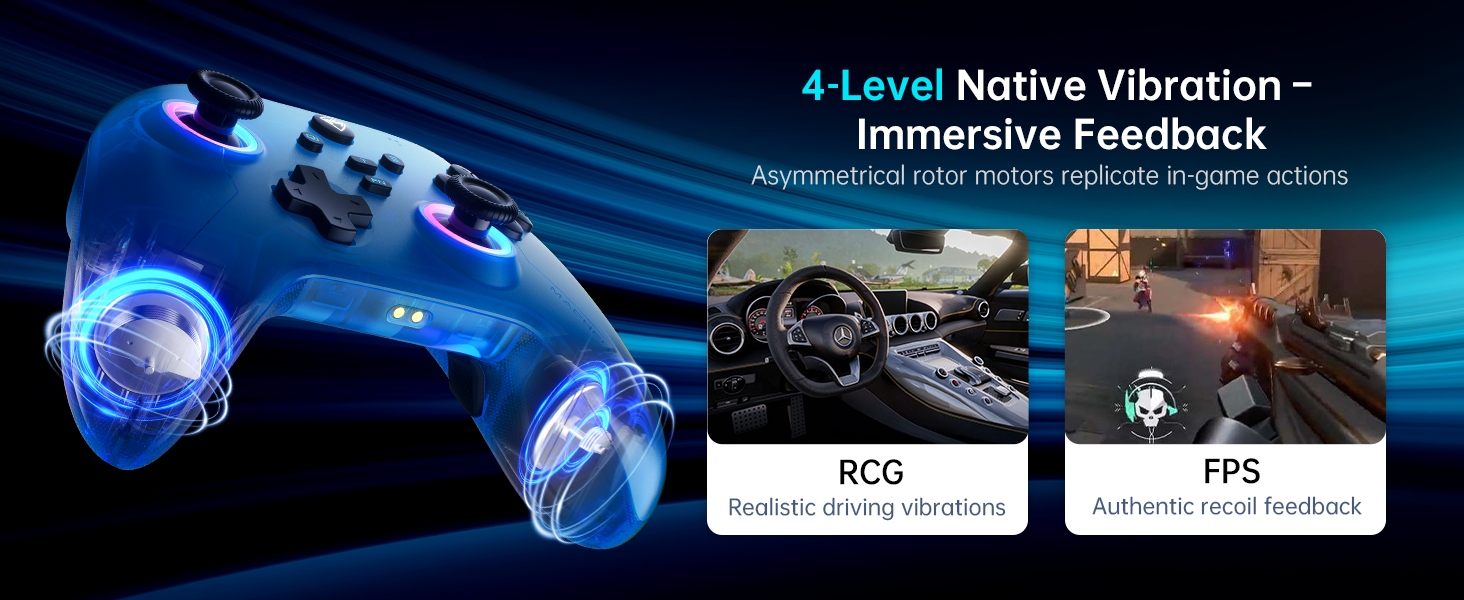
Figure 4.1: Controller on Dedicated Charging Dock.
4.2. 연결성
The Machenike G3V2 supports three connection modes: 2.4G (via dual-core receiver), Bluetooth, and Wired.
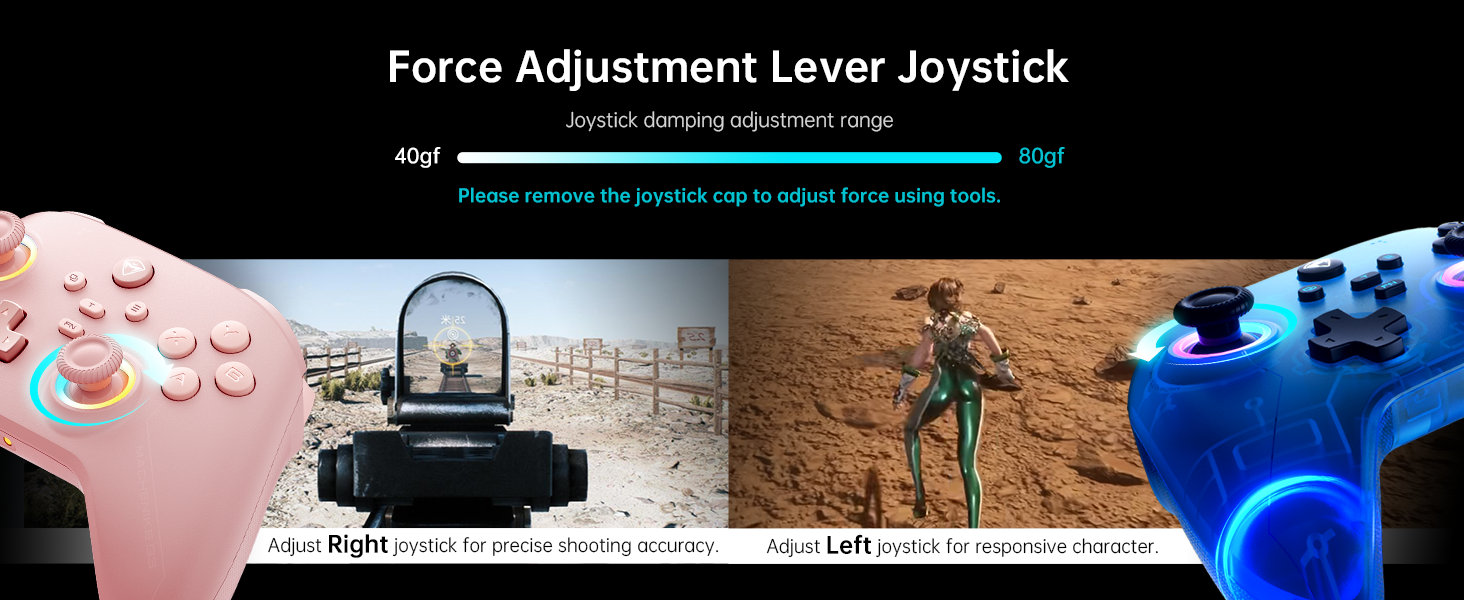
Figure 4.2: Multi-platform connectivity options.
4.2.1. 닌텐도 스위치 연결하기 (블루투스 모드)
To connect your controller to a Nintendo Switch:
- Put the controller into Switch pairing mode by holding the Y + Home buttons simultaneously. The indicator light will flash rapidly, changing from slow to fast flashing.
- Nintendo Switch에서 홈 메뉴로 이동합니다.
- Select the 'Controllers' icon, then choose 'Change Grip/Order'.
- 컨트롤러가 자동으로 연결될 때까지 기다리세요. 연결되면 컨트롤러가 진동하고 닌텐도 스위치 화면에 컨트롤러 아이콘이 나타납니다.
- Press the 'A' button on your Machenike G3V2 controller to confirm.
- If you prefer the Switch button layout (A/B swapped), you can toggle it by pressing FN + A on the controller.
Video 4.1: Tutorial on connecting the Machenike G3V2 controller to a Nintendo Switch.
4.2.2. Connecting to PC/iOS/Android
For PC, iOS, and Android devices, follow the standard Bluetooth pairing procedure for your specific device. Ensure the controller is in the correct pairing mode (refer to the quick start guide for specific button combinations for different platforms).
5. 사용 설명서
5.1. Customizable Back Buttons (M1/M2)
The G3V2 controller features two customizable back buttons (M1 and M2) that support up to 32 programmable actions, including macro recording and remapping. This is particularly useful for complex combos in fighting games or rapid actions in shooters.
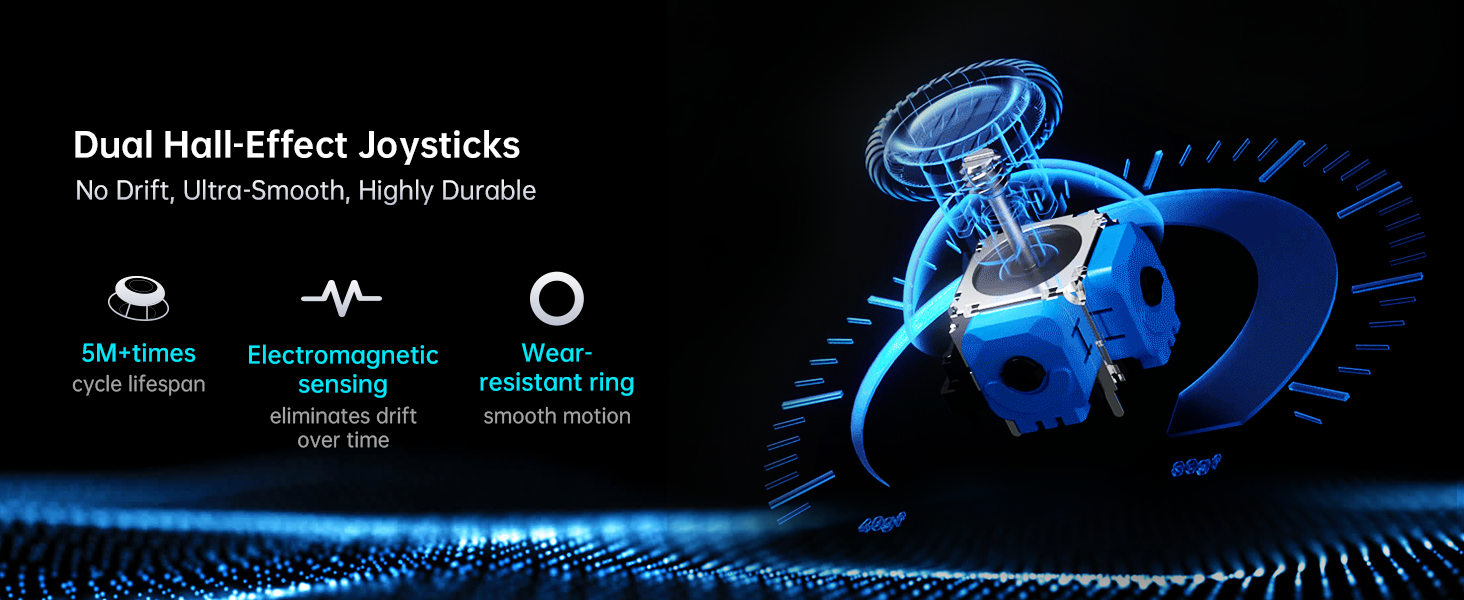
Figure 5.1: Dual Customizable Back Buttons.
Video 5.1: Tutorial on how to record keystroke macros for the back buttons.
5.2. Adjustable Hall Effect Joysticks and Triggers
The controller features dual Hall-Effect joysticks and triggers, offering precision and durability. The unique force adjustment feature allows you to customize joystick tension from 40gf to 80gf, adapting to various game requirements for responsive character movement or precise shooting accuracy. The triggers provide contactless, 255-level linear control with millisecond actuation.
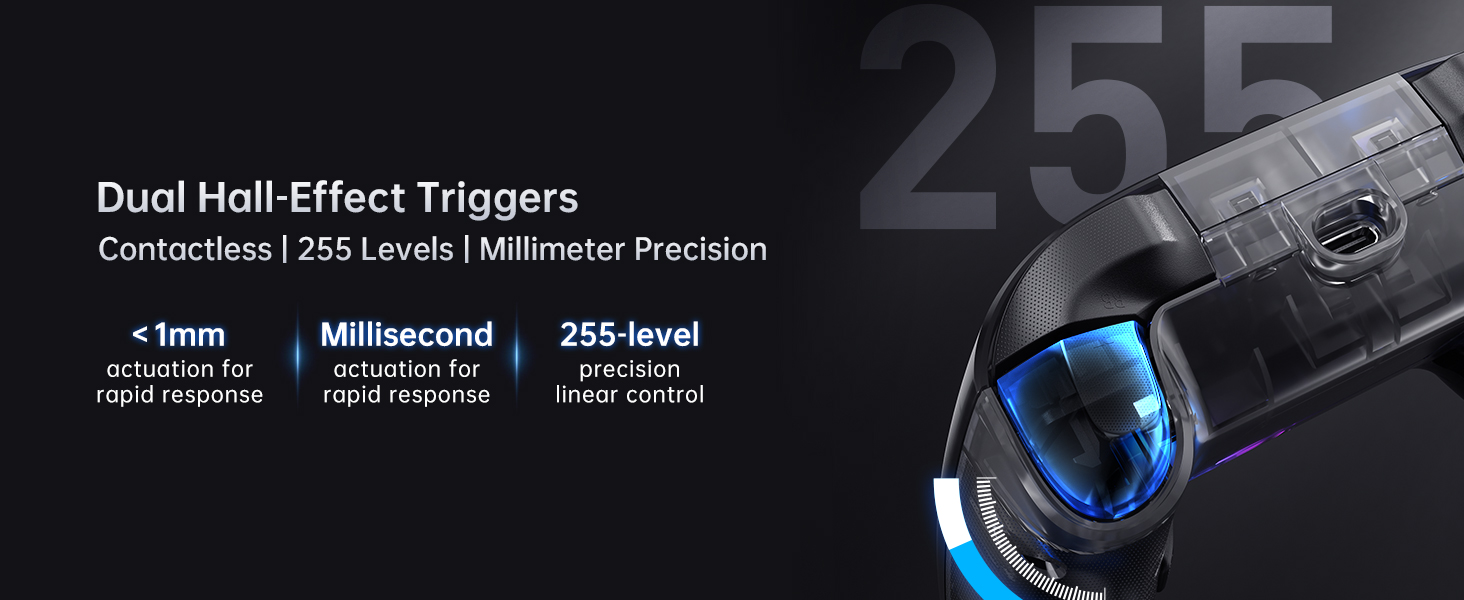
Figure 5.2: Force Adjustment Lever Joystick.
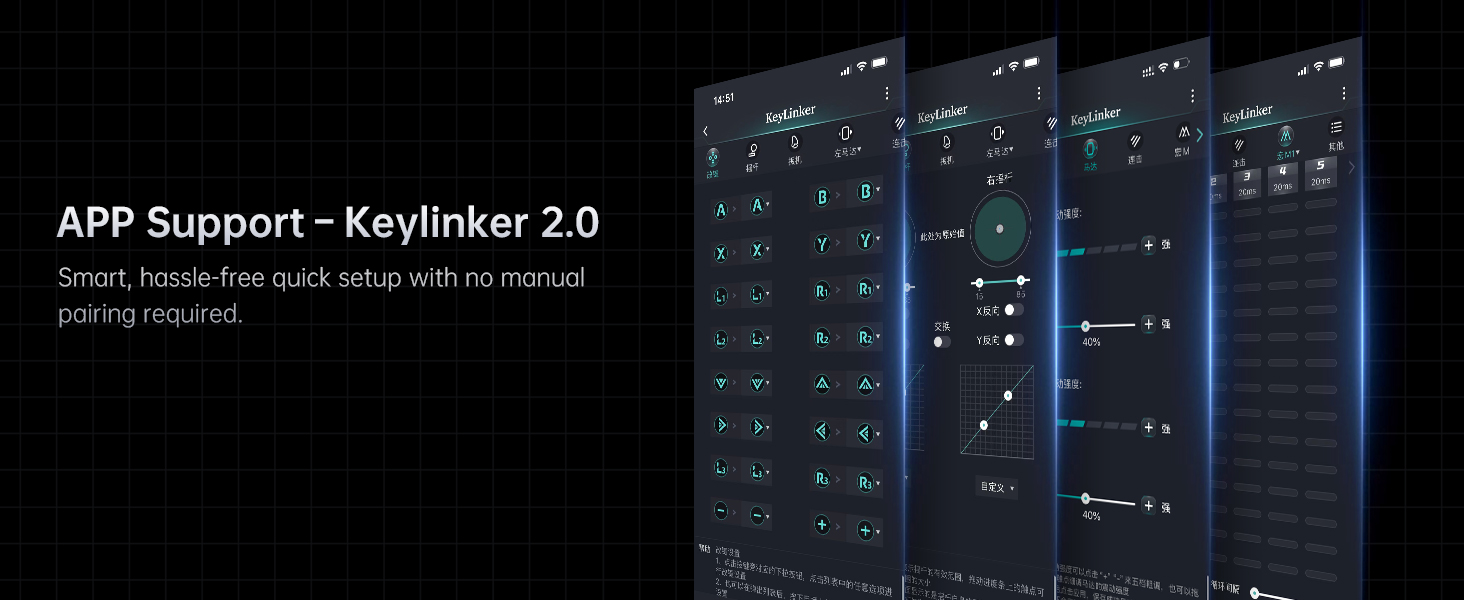
Figure 5.3: Dual Hall-Effect Joysticks.
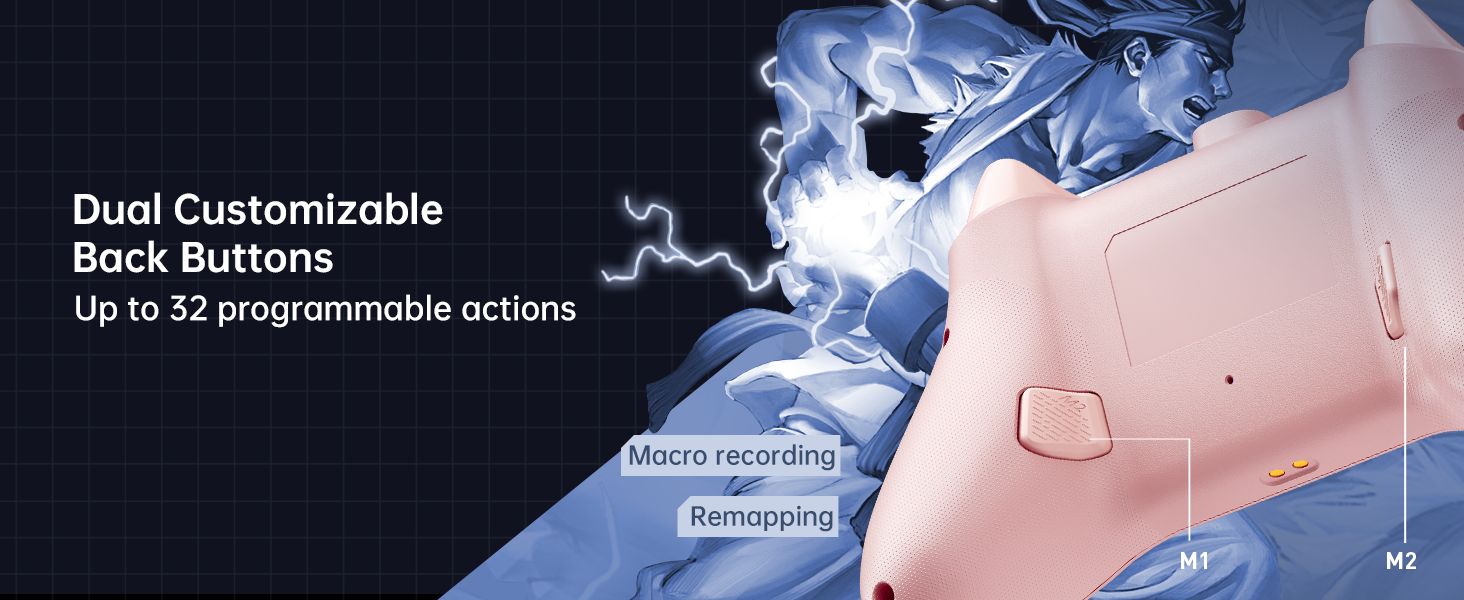
Figure 5.4: Dual Hall-Effect Triggers.
5.3. RGB 조명
The controller features dual-ring dynamic RGB lighting around the joysticks, offering aesthetic customization to match your gaming setup.
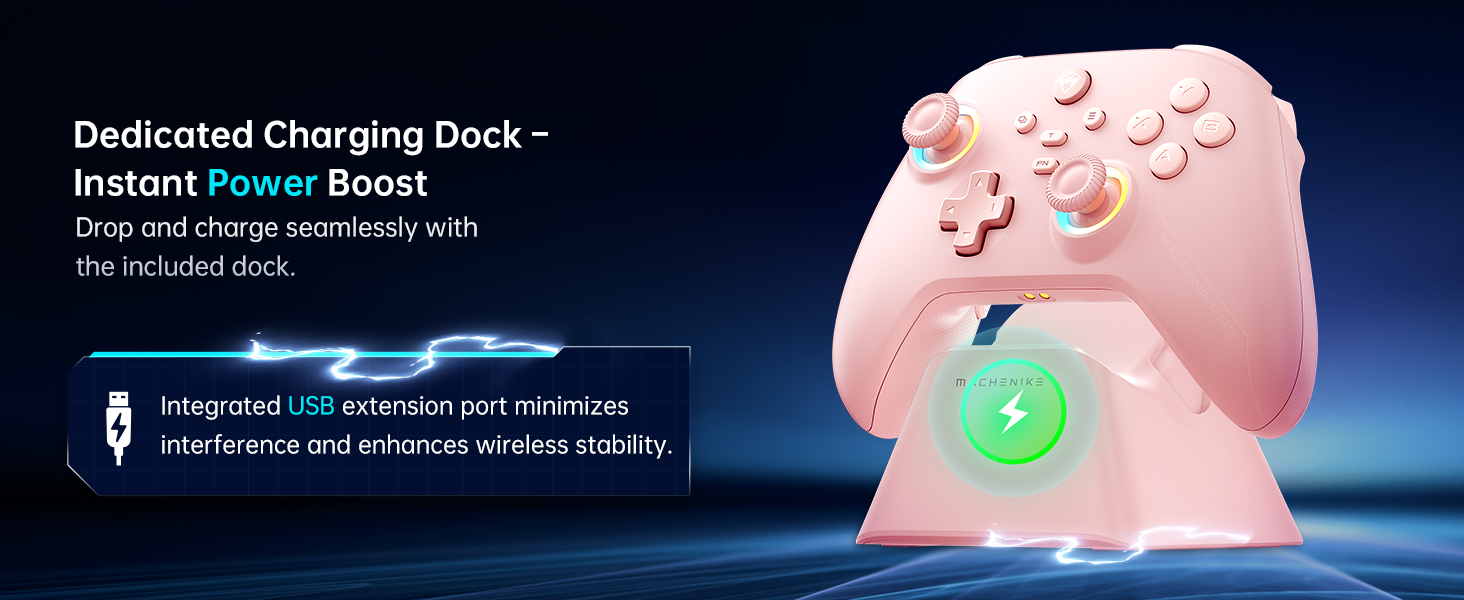
Figure 5.5: Dual-Ring Dynamic Lighting.
5.4. 진동 피드백
Experience immersive gameplay with 4-level native vibration feedback. Asymmetrical rotor motors replicate in-game actions, providing realistic driving vibrations for racing games and authentic recoil feedback for first-person shooters.
Figure 5.6: 4-Level Native Vibration Feedback.
6. 교정
To ensure optimal performance and address any potential joystick drift or trigger issues, you can calibrate your controller's joysticks and triggers.
6.1. 조이스틱 보정
To calibrate the joysticks:
- Press and hold the B + Back + Home buttons simultaneously. The blue LED will flash, indicating calibration mode.
- Move both joysticks in circles all the way around, making about three full rotations slowly and steadily.
- Once done, press the Start button to save. The controller will power off, indicating successful calibration.
- 컨트롤러를 기기에 다시 연결하세요.
6.2. 트리거 보정
To calibrate the triggers:
- Press and hold the Y + Back + Home buttons simultaneously. The red light will flash, indicating trigger calibration mode.
- Press each trigger normally all the way down three times. Do not press too hard.
- Then press the Start button to save. The controller will power off, indicating successful calibration.
- 컨트롤러를 기기에 다시 연결하세요.
Note: When calibrating joysticks or triggers, always use normal, gentle pressure to ensure accurate calibration and avoid abnormal behavior.
Video 6.1: Tutorial on how to calibrate the triggers and joysticks.
7. 유지관리
To maintain your Machenike G3V2 controller in optimal condition:
- 부드럽고 마른 천으로 닦아 컨트롤러를 깨끗하게 유지하세요. 강한 화학 물질이나 연마재는 사용하지 마세요.
- 컨트롤러는 직사광선과 극한의 온도를 피해 서늘하고 건조한 곳에 보관하세요.
- 컨트롤러를 떨어뜨리거나 강한 충격을 주지 마십시오.
- Regularly check the charging port and cables for any signs of damage.
8. 문제 해결
If you encounter issues with your Machenike G3V2 controller, refer to the following common solutions:
- 컨트롤러가 켜지지 않음: Ensure the controller is fully charged. Connect it to the charging dock or directly via USB-C cable.
- 연결 문제: Verify that the controller is in the correct pairing mode for your device (Switch, PC, iOS, Android). Ensure Bluetooth is enabled on your device. Try re-pairing the controller.
- 조이스틱 쏠림 또는 부정확한 입력: Perform joystick calibration as described in Section 6.1.
- Trigger issues: Perform trigger calibration as described in Section 6.2.
- 버튼이 반응하지 않음: Ensure the controller is properly connected and charged. If using custom mappings, check the Keylinker 2.0 app settings.
- Back buttons not working as expected: Clear existing assignments and re-record macros as shown in Video 5.1.
- RGB 조명이 작동하지 않습니다: Check the controller's settings via the Keylinker 2.0 app for lighting customization options.
For further assistance, please contact Machenike customer support.
9. 사양
| 모델 번호 | G3V2 (PE-Upgrade) |
| 치수 | 3.94 x 2.76 x 5.91 인치 |
| 품목 무게 | 1.12파운드 |
| 배터리 | 리튬폴리머 배터리 1개(1000mAh) 포함 |
| 연결성 | Bluetooth, 2.4G (with Dual-Core Receiver), Wired |
| 호환성 | Switch/Switch 2, iOS, Android, Windows PC (Not compatible with Xbox, PlayStation, or GeForce Now) |
| 조이스틱 | Dual Hall-Effect, Infinitely Adjustable (40-80gf) |
| 트리거 | Dual Hall-Effect, Contactless, 255 Levels |
| 폴링 속도 | 1000Hz |
| 프로그래밍 가능한 버튼 | 2 (M1, M2) with up to 32 actions |
| 제조업체 | 마체니케 |
| 첫 번째 이용 가능 날짜 | 27년 2025월 XNUMX일 |
10. 보증 및 지원
For warranty information, technical support, or any inquiries regarding your Machenike G3V2 controller, please contact the seller, Machenike US STORE, directly through your purchase platform. Keep your proof of purchase for warranty claims.
You can visit the official Machenike Store for more information: Machenike Store


