1. 서론
The RADIOMASTER XR4 Gemini Xrossband Dual-Band Receiver is designed for remote control applications, offering reliable signal reception through its dual-band capabilities. It supports ExpressLRS Gemini Xrossband (Gem-X) protocol, operating on both 2.4GHz and Sub-G 900MHz frequencies. This manual provides essential information for the proper setup, operation, and maintenance of your XR4 receiver.
2. 패키지 내용
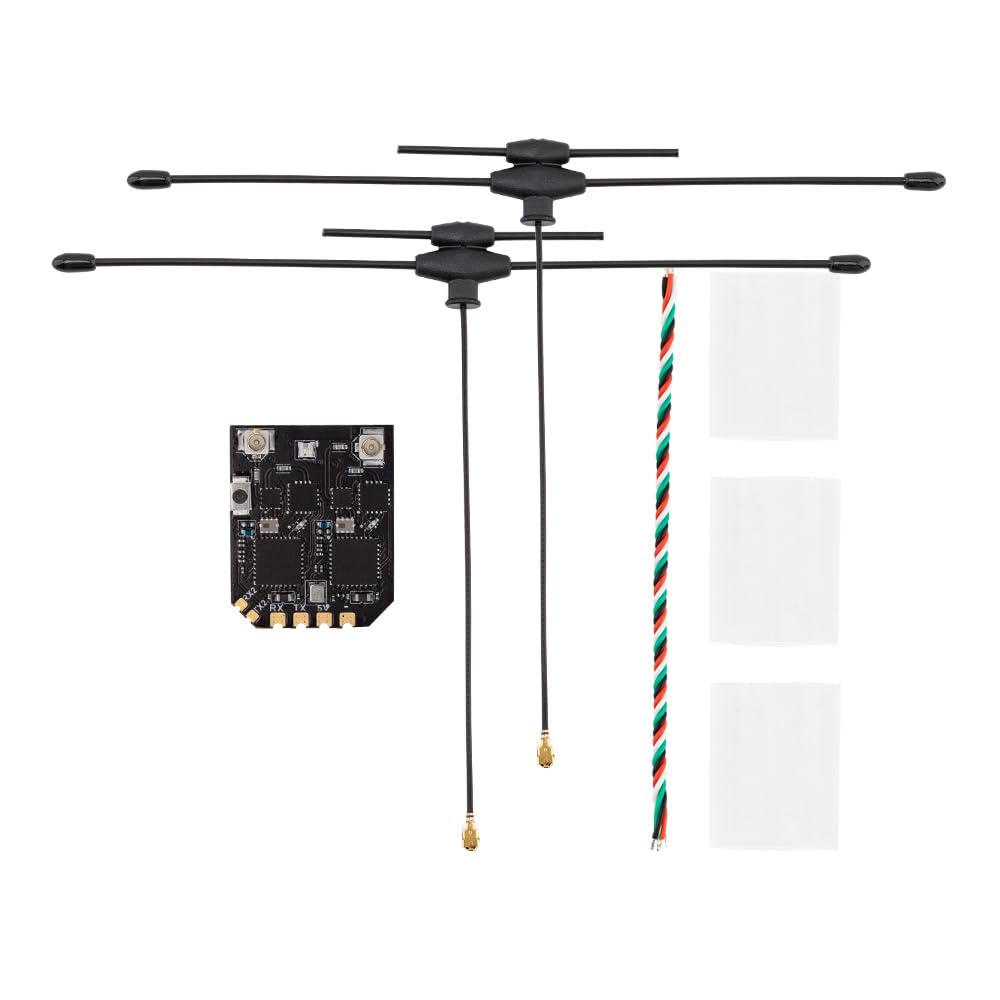
아래 나열된 모든 품목이 패키지에 포함되어 있는지 확인하세요.
- 1 x XR4 Gemini Xrossband Dual-Band Receiver
- 2 x Dual-Band T-Antenna
- CRSF 와이어 1개
- 3 x Heat-Shrinkable Tube

This image displays the Radiomaster XR4 receiver board with its two dual-band T-antennas attached, illustrating the complete receiver assembly.
3. 특징
- True Diversity & Dual-Band: Utilizes dual LR1121 RF transceivers for enhanced reliability.
- ExpressLRS Gemini Xrossband (Gem-X) Compatible: Supports 2.4GHz and Sub-G 900MHz bands.
- 고성능 MCU: Equipped with ESP32D4.
- Dual Semtech LR1121 Transceivers: Provides robust signal processing.
- Secondary UART Port: For advanced functionality and future expansion.
- Castled Pads: Facilitates easy soldering.
- Integrated Wi-Fi Module: Simplifies firmware updates and configuration via WebUI.
- Ultra-Low Latency & High Refresh Rate: Ensures stable RF link.

This image highlights the two Semtech LR1121 transceivers, which are central to the receiver's dual-band and true diversity capabilities.

이 이미지는 자세한 내용을 보여줍니다. view of the XR4 receiver board, specifically pointing out the additional UART port available for future expansion and advanced functionality.
4. 사양
| 매개변수 | 값 |
|---|---|
| MCU | ESP32D4 |
| RF 칩 | LR1121 x 2 |
| RF 커넥터 | IPEX-1 x 2 |
| 안테나 | Dual-Band T Antenna x 2 (Included) |
| 주파수 범위 | 2.4GHz / Sub-G 900MHz |
| 원격 측정 전원 | 100mW |
| 최대 수신 새로 고침률 | DK500Hz / K1000Hz |
| 최소 수신기 새로 고침률 | 50Hz |
| 작업 볼륨tage | DC 4.5-8.4V |
| 무게(안테나 제외) | 1.7g |
| 치수 | 22mm x 18mm x 4mm |
| Firmware Version (pre-installed) | 익스프레스LRS v3.5.1 |
| FW 타겟 | 라디오마스터 XR4 2.4/900 제미니 RX |
| 버스 인터페이스 1 | CRSF |
| 버스 인터페이스 2 | 유아트 |
이 이미지는 명확한 상향식을 제공합니다. view of the XR4 receiver's circuit board, showing component layout and connection points.
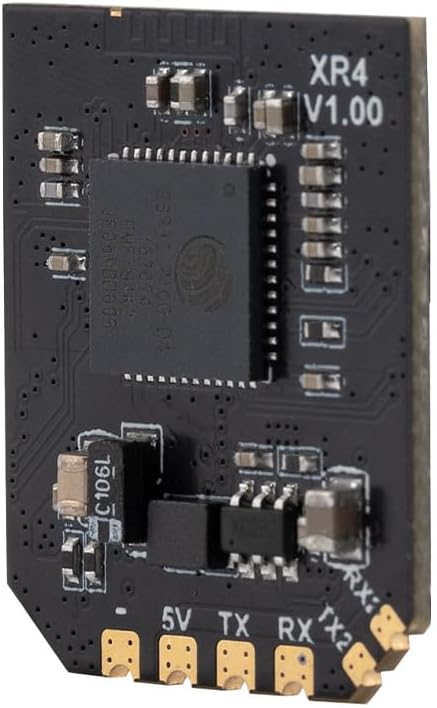
이 이미지는 측면 프로를 보여줍니다.file of the XR4 receiver board, with "XR4 V1.00" clearly visible, indicating the model and version.
5. 설정 및 설치
5.1 배선 연결
The XR4 receiver uses standard CRSF protocol for communication. Connect the receiver to your flight controller or other compatible device using the provided CRSF wire. Ensure correct polarity for power connections (DC 4.5-8.4V).
- 5V : Power input (4.5-8.4V DC)
- GND : 지면
- TX : CRSF Transmit (connect to RX on flight controller)
- RX : CRSF Receive (connect to TX on flight controller)
- TX2/RX2: Secondary UART port for advanced functionality.
5.2 안테나 설치
Connect the two dual-band T-antennas to the IPEX-1 connectors on the receiver board. Position the antennas at a 90-degree angle to each other for optimal signal diversity. Use the provided heat-shrinkable tubes to secure and protect the antenna connections.
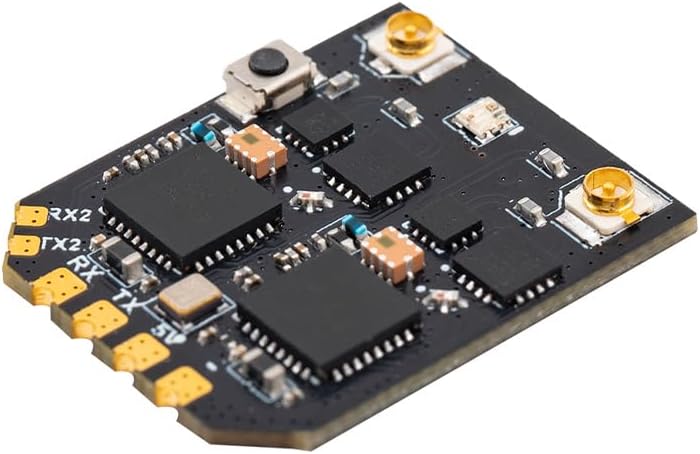
이 이미지는 각도를 보여줍니다 view of the XR4 receiver board, highlighting the IPEX-1 antenna connectors and the soldering pads for power and CRSF communication.
6. 사용 설명서
6.1 Binding Procedure (ExpressLRS)
The XR4 receiver comes pre-installed with ExpressLRS v3.5.1 firmware. To bind the receiver to your ExpressLRS transmitter module, follow these general steps:
- Ensure your transmitter module is running a compatible ExpressLRS firmware version.
- Power on the receiver. It will enter binding mode if it does not find a valid link. The LED on the receiver will typically flash rapidly.
- On your ExpressLRS transmitter, initiate the binding process. This is usually done via the Lua script or a dedicated bind button/menu option.
- 연결이 완료되면 수신기의 LED가 계속 켜져 있어 연결이 성공적으로 이루어졌음을 나타냅니다.
- If binding fails, ensure your transmitter and receiver have matching ExpressLRS firmware versions and binding phrases (if configured).
6.2 Operating Modes: Gemini and Xrossband (Gem-X)
The XR4 receiver supports various operating modes, leveraging its dual RF circuits:
- Gemini 2.4GHz: Uses two 2.4GHz antennas for dual-frequency operation within the 2.4GHz band.
- Gemini Sub-G 900MHz: Uses two 900MHz antennas for dual-frequency operation within the Sub-G 900MHz band.
- Xrossband (Gem-X): Utilizes one Sub-G 900MHz antenna and one 2.4GHz antenna for dual-band operation, providing enhanced reliability across different frequency ranges.
The specific mode is typically configured via the ExpressLRS Lua script on your transmitter or through the receiver's WebUI.

This diagram visually explains the different antenna configurations and packet transmission methods for Gemini 2.4GHz, Gemini Sub-G 900MHz, and Xrossband (Gem-X) dual-band modes.
7. 펌웨어 업데이트
The XR4 receiver features an integrated Wi-Fi module for convenient firmware updates and configuration. To update the firmware:
- 수신기의 전원을 켭니다.
- 컴퓨터 또는 모바일 기기에서 수신기의 Wi-Fi 핫스팟에 연결하세요. 네트워크 이름은 일반적으로 "ExpressLRS RX" 뒤에 고유 식별자가 붙습니다.
- 열기 web 브라우저로 이동하여 탐색하세요 http://10.0.0.1.
- 사용하세요 WebUI to flash new firmware or adjust settings. Refer to the official ExpressLRS documentation for detailed instructions on firmware flashing.
8. 유지관리
The XR4 receiver requires minimal maintenance. Keep the device clean and free from dust and moisture. Regularly inspect antenna connections for damage. Ensure proper heat dissipation if operating in enclosed spaces.
9. 문제 해결
- 링크 없음/LED 깜빡임 없음:
- 수신기에 올바른 전원(4.5~8.4V)이 공급되는지 확인하십시오.
- Verify the transmitter module is powered on and transmitting.
- Check if the receiver is in binding mode (rapid LED flash). If not, re-initiate binding.
- Confirm that the transmitter and receiver are running compatible ExpressLRS firmware versions.
- Check for correct binding phrase if one is set.
- 범위/신호 품질이 좋지 않음:
- Inspect antennas for damage or improper connection.
- Ensure antennas are positioned optimally (e.g., 90 degrees to each other).
- Check for sources of interference near the receiver or antennas.
- Verify the selected operating mode (Gemini/Xrossband) is appropriate for your setup.
- 수신기가 응답하지 않습니다:
- Check all wiring connections (power, ground, CRSF TX/RX).
- Ensure the flight controller or connected device is configured correctly for CRSF protocol.
- Attempt a firmware re-flash if the receiver is unresponsive.
10. 안전 정보
- Always ensure correct power polarity before connecting the receiver. Incorrect wiring can cause permanent damage.
- Operate RC equipment responsibly and within legal limits.
- 수신기를 물, 습기 및 극한 온도로부터 멀리하십시오.
- Do not attempt to modify the receiver's hardware beyond specified connection points.
- 과열을 방지하려면 적절한 환기를 유지하세요.
11. 보증 및 지원
보증 정보 및 기술 지원에 대해서는 RADIOMASTER 공식 웹사이트를 참조하십시오. web사이트를 방문하거나 공인 대리점에 문의하세요. 보증 청구를 위해 구매 증빙 자료를 보관하세요.


