1. 서론
This manual provides essential information for the safe and efficient operation of your FLASHFORGE AD5X 3D Printer. Please read it thoroughly before initial use and retain it for future reference.
The FLASHFORGE AD5X is a smart multi-color 3D printer designed for high-speed and precise printing. It features an Intelligent Filament System (IFS) for up to 4-color printing, fully automatic leveling, and a 300°C direct extruder, supporting various filament types including PLA-CF and PETG-CF.
2. 상자 안에 무엇이 들어있나요?
Carefully unpack all components and verify against the list below. If any items are missing or damaged, contact customer support.
- AD5X 3D Printer x1
- 10g HS PLA Filament x4
- 전원 케이블 x1
- IFS connection cable x1
- 4-in-1 guide tube x1
- 디스플레이 화면 x1
- Spool Holder x4
- 장착 플레이트 x1
- IFS (Intelligent Filament System) x1
- 나사 M3*6 x4
- 케이블 클립 x1
- 그리스 x1
- 드라이버 x1
- Allen Wrench Kits x1
- Diagonal Pliers x1
- 빠른 시작 가이드 x1

Figure 2.1: The FLASHFORGE AD5X 3D Printer with a multi-color print in progress.
3. 설정
3.1 언박싱 및 초기 배치
Remove the printer from its packaging. Place the printer on a stable, level surface in a well-ventilated area, away from direct sunlight and heat sources. Ensure adequate space around the printer for operation and maintenance.
3.2 전원 연결
Connect the provided power cable to the printer's power input and then to a suitable power outlet. Ensure the power switch is in the OFF position before connecting.
3.3 Intelligent Filament System (IFS) Setup
The AD5X features an Intelligent Filament System for multi-color printing and automatic filament management.
- Mount the spool holders onto the designated positions on the printer.
- Place filament spools onto the holders. The IFS supports up to 4 colors.
- Feed the filament into the IFS unit. The system supports auto filament loading/unloading and up to 4kg filament auto refill.
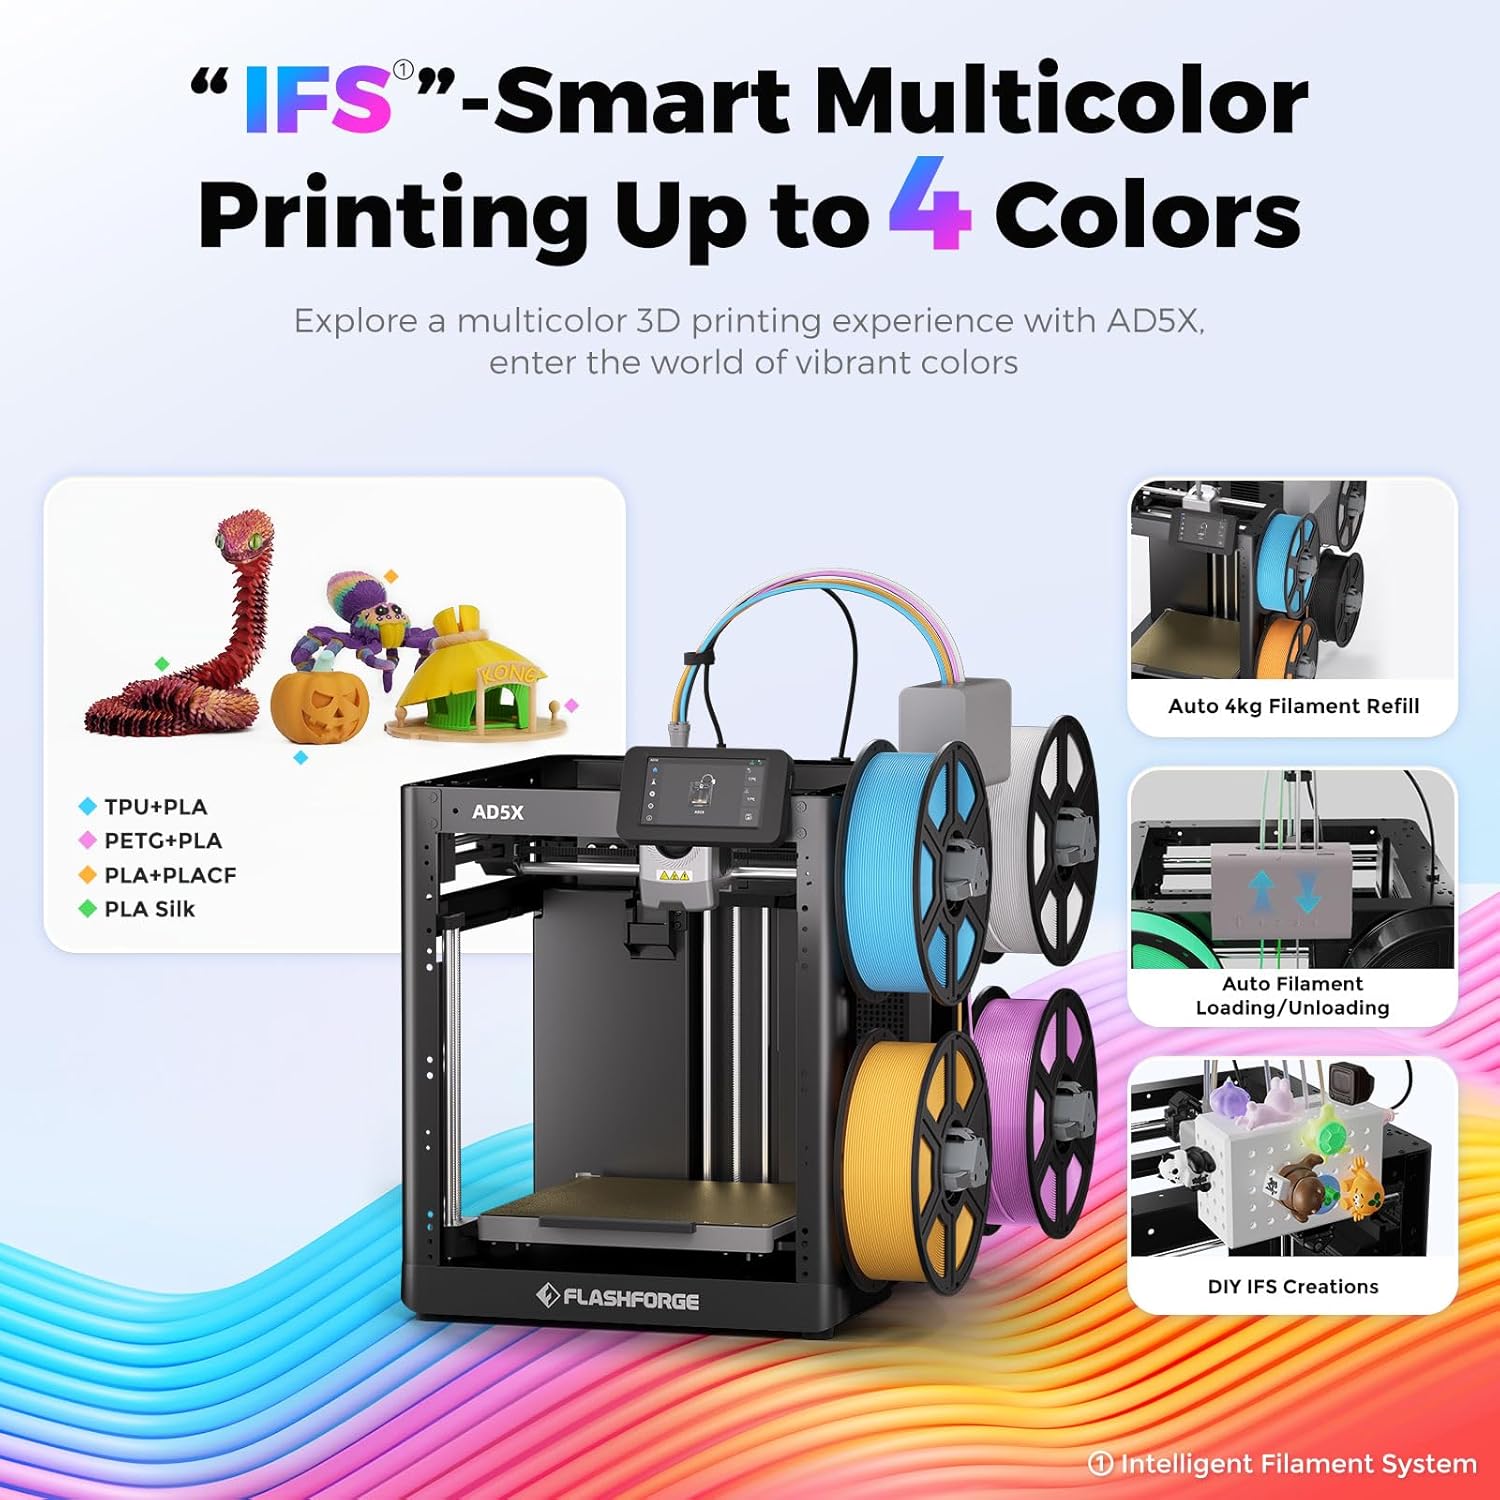
Figure 3.1: The Intelligent Filament System (IFS) for multi-color printing.
Video 3.1: Demonstration of the AD5X's various filament support and loading process.
3.4 자동 베드 레벨링
The AD5X features one-click auto leveling to ensure a perfect first layer.
- Ensure the build plate is clear of any debris or foreign objects.
- On the 4.3-inch colorful touchscreen, navigate to the leveling function.
- Initiate the one-click auto leveling process. The printer will automatically calibrate the build plate.
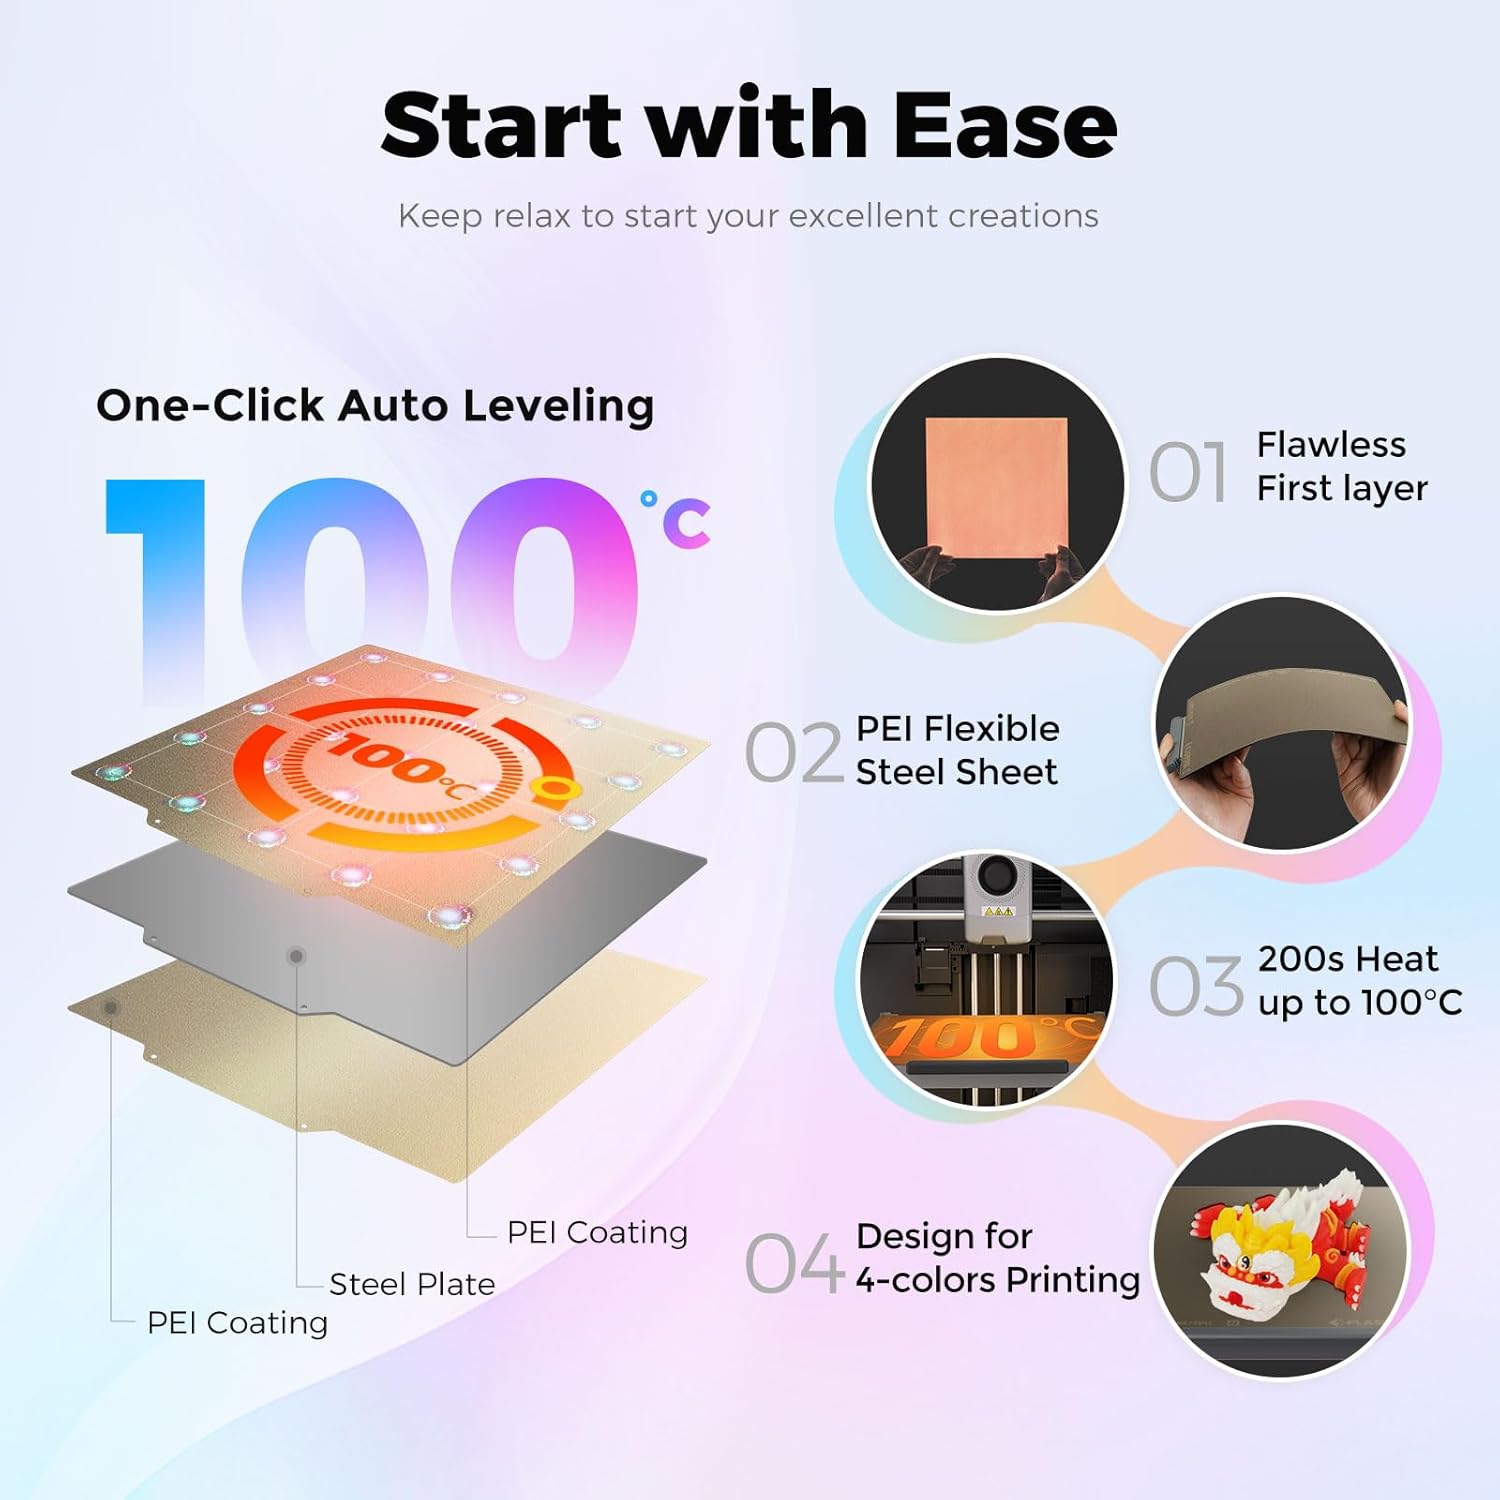
Figure 3.2: One-Click Auto Leveling ensures a flawless first layer.
Video 3.2: A note on the AD5X 3D Printer, showing the screen interface and leveling process.
4. 사용 설명서
4.1 Software Installation and Slicing
The FLASHFORGE AD5X is compatible with Flash Maker and Orca-Flashforge (or Orca Slicer) for preparing your 3D models for printing.
- Download and install the latest version of FlashPrint or Orca-Flashforge from the official FLASHFORGE web대지.
- 3D 모델을 엽니다. file (e.g., STL, OBJ) in the slicing software.
- Configure print settings such as layer height, infill density, print speed (up to 300mm/s), and travel speed (up to 600mm/s).
- For multi-color prints, ensure the color zones and filament types set in the software are consistent with the physical setup of the IFS. Inconsistent settings may lead to color errors in the model.
- 모델을 슬라이싱하여 G 코드를 생성합니다. file.
Video 4.1: Demonstration of the AD5X's capability for up to 4-color printing.
비디오 4.2: 끝view of the FLASHFORGE AD5X 3D Printer, including software interaction and printing.
4.2 전송 Files to the Printer
The AD5X offers multiple connectivity options:
- 와이파이: Connect the printer to your local Wi-Fi network for wireless file transfer and remote monitoring via Flash Maker app or Orca-Flashforge.
- USB: G코드 전송 files using a USB drive.
- 이더넷: Connect the printer to your network via an Ethernet cable for stable data transfer.
4.3 인쇄 시작
- Select the desired G-code file from the printer's touchscreen interface.
- Confirm the print settings and material selection.
- Press 'Print' to begin. The printer will pre-heat the nozzle and build plate before starting the print.

Figure 4.1: Multi-device management allows remote control and monitoring of multiple printers.
5. 유지관리
5.1 노즐 유지보수
The AD5X features a 300°C high-temperature direct extruder with quick-swap nozzles.
- Regularly inspect the nozzle for clogs or wear.
- To swap the nozzle, ensure the extruder is cooled down. Follow the quick-swap procedure outlined in the detailed user manual. Available nozzle diameters include 0.25mm, 0.4mm, 0.6mm, and 0.8mm.

Figure 5.1: The 300°C High Temp Direct Extruder with quick-swap nozzle options.
5.2 Build Plate Care
The PEI flexible steel sheet build plate provides excellent adhesion and easy print removal.
- Clean the build plate with isopropyl alcohol (IPA) before each print to ensure optimal adhesion.
- Avoid using sharp objects to remove prints, as this can damage the PEI surface.
5.3 일반 청소
Keep the printer clean from dust and filament debris. Regularly wipe down the exterior and internal components (when powered off) with a soft, dry cloth.
6. 문제 해결
6.1 일반적인 인쇄 문제
- 첫 번째 레이어 접착력이 좋지 않음: Ensure the build plate is clean and properly leveled. Adjust Z-offset if necessary.
- 필라멘트가 압출되지 않음: Check for clogged nozzle, tangled filament, or incorrect filament loading. The printer features filament detection to alert you to issues.
- 레이어 이동: Verify that belts are properly tensioned and the printer is on a stable surface. The AD5X includes vibration compensation to minimize this issue.
6.2 연결 문제
If you experience issues with Wi-Fi or Ethernet connectivity:
- 프린터가 Wi-Fi 라우터의 범위 내에 있는지 확인하십시오.
- Verify network settings on the printer and your computer/app.
- Restart both the printer and your network router.
6.3 전력 손실 복구
The AD5X features power loss recovery. In case of a power outage, the printer will resume printing from where it left off once power is restored.

그림 6.1: 이상view of additional functions including power loss recovery and filament detection.
7. 사양
| 특징 | 사양 |
|---|---|
| 장치 이름 | AD5X |
| 압출기 수량 | 1 |
| 인쇄 정밀도 | ±0.1mm (based on 100mm cubes) |
| 위치 정확도 | X/Y축: 0.0125mm, Z축: 0.0025mm |
| 층 두께 | 0.1-0.4mm |
| 볼륨을 빌드하세요 | 220x220x220mm |
| 노즐 직경 | 0.4mm (default), 0.25/0.6/0.8mm (optional) |
| 인쇄 속도 | 10-300mm/초 |
| 최대 가속도 | 20000mm/초² |
| 최대 주행 속도 | 600mm/초 |
| Max Extruder Temp | 300도 |
| 전원 공급 장치 | Input: AC 100-120V/200-240V, 50/60Hz, 650W |
| 장치 크기 | 363x356x413mm |
| 순중량 | 11.4kg |
| 연결성 | USB/Wi-Fi/이더넷 |
| 작동 온도 | 15~30도 |
| 호환 가능한 운영 체제 | Windows 7/8/10/11, Mac OS: support version 10.9 or later |
| 슬라이싱 소프트웨어 | Orca-Flashforge/Orca Slicer |
| Max Bed Temp | 110도 |
| 레벨링 방법 | 원클릭 자동 레벨링 |
| 필라멘트 런아웃 알림 | 예 |
| 전력 손실 복구 | 예 |
| 스마트 터치 스크린 | 4.3인치 |
| 빌드 플레이트 | PEI steel sheet |
8. 보증 및 지원
보증 정보 및 기술 지원에 대해서는 FLASHFORGE 공식 웹사이트를 참조하십시오. web사이트를 방문하거나 가까운 대리점에 문의하세요. 구매 영수증을 구매 증빙 자료로 보관하세요.


