1. 서론
구매해주셔서 감사합니다asing the Voyager Bluey 12V Electric Go Kart. This manual provides essential information for the safe assembly, operation, and maintenance of your new ride-on toy. Please read all instructions carefully before use and retain this manual for future reference. This product is designed for children aged 3 to 6 years.
2. 안전 정보
WARNING: Use as Directed. Adult supervision is required at all times.
- 아이가 헬멧과 적절한 안전 장비를 착용했는지 항상 확인하십시오.
- Operate the go-kart only on flat, dry surfaces away from traffic, swimming pools, or steep inclines.
- 사용 전에는 반드시 안전벨트가 단단히 착용되었는지 확인하십시오.
- 한 번에 한 명 이상의 탑승자를 허용하지 마십시오.
- 손, 머리카락, 옷을 움직이는 부품에서 멀리하세요.
- Never modify the electrical system or components of the go-kart.

Image 2.1: The Voyager Bluey 12V Electric Go Kart, ready for use.
3. 패키지 내용
구성품이 모두 있는지 확인해 주십시오.
- Bluey 12V Electric Go Kart body
- 스티어링 휠
- 바퀴 (4)
- Axles and Fasteners
- 12V 충전식 배터리
- 배터리 충전기
- 사용 설명서
- Australian Flag accessory
4. 조립 및 설정
Assembly typically requires a Phillips head screwdriver and takes approximately 30-60 minutes. Follow these general steps:
- 바퀴 부착: Securely attach all four wheels to the axles using the provided fasteners.
- 스티어링 휠 설치: Connect the steering wheel to the steering column, ensuring it clicks into place or is fastened according to specific instructions.
- 배터리 연결: Locate the battery compartment, typically under the seat. Connect the battery terminals (red to red, black to black).
- 깃발 부착: Insert the Australian flag accessory into its designated slot at the rear of the go-kart.

이미지 4.1: 앞면 view of the go-kart highlighting key features like the 12V rechargeable battery, 4 mph max speed, rear drift wheels, and recommended age range of 3-7 years.
5. 배터리 충전
The go-kart is powered by a 12V rechargeable battery. For optimal performance and battery life, follow these charging instructions:
- 초기 청구 : Before first use, charge the battery for a full 10-12 hours. Do not overcharge for more than 18 hours.
- 일반 충전: After each use, recharge the battery for 8-10 hours.
- 충전 포트: Locate the charging port, usually near the battery compartment or on the dashboard. Plug the charger into the port and then into a standard wall outlet.
- 지시자: The charger may have an indicator light to show charging status (e.g., red for charging, green for fully charged).
- 안전: Always charge the battery in a dry, well-ventilated area. Do not allow children to handle the charger or battery.
6. 사용 설명서
Familiarize yourself with the controls before allowing a child to operate the go-kart.
6.1. 컨트롤
- 전원 스위치: Located on the dashboard, this switch turns the go-kart on or off.
- 정방향/역방향 스위치: Allows the go-kart to move forward or backward.
- 발 페달: 가속하려면 페달을 밟고, 페달에서 발을 떼면 제동합니다.
- 허파: The go-kart is equipped with vibrant lights for enhanced visibility and fun.
- MP3 잭: Connect an external audio device to play music through the go-kart's speakers.
- Musical Steering Wheel: Features integrated musical functions for added entertainment.

Image 6.1: Detail of the Forward/Reverse switch and power button for intuitive control.
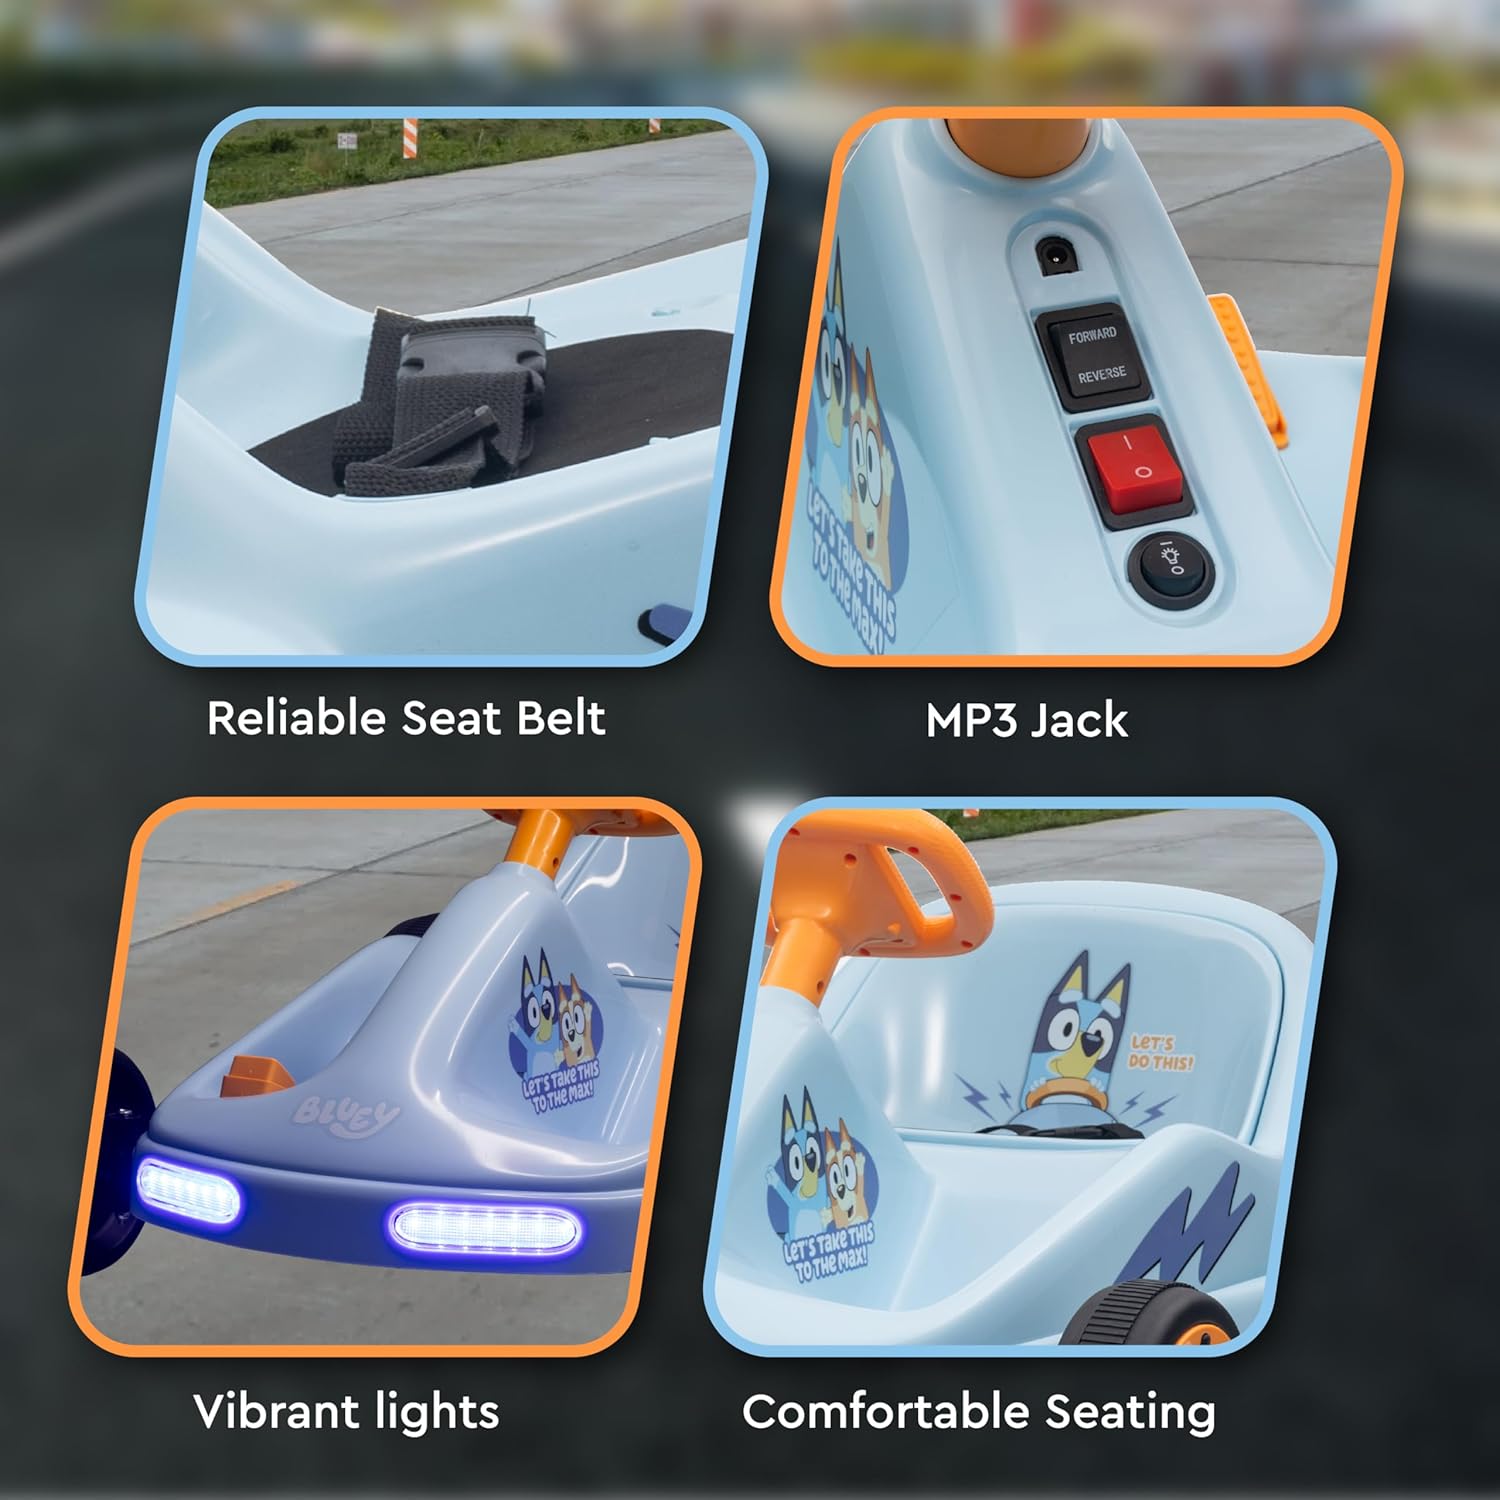
이미지 6.2: 상세 view of the reliable seat belt, MP3 jack, vibrant front lights, and comfortable seating area.
6.2. Driving the Go Kart
- Ensure the child is seated properly and the seat belt is fastened.
- 전원 스위치를 켜세요.
- Select 'Forward' or 'Reverse' using the switch.
- Press the foot pedal to move. Release the pedal to stop.
- 핸들을 사용하여 조종하세요.

Image 6.3: The go-kart is suitable for operation on various surfaces including concrete, tile, asphalt roads, and wood floors.
7. 유지관리
정기적인 유지보수는 고카트의 수명 연장과 안전한 작동을 보장합니다.
- 청소: Wipe the go-kart with a soft, damp 천. 연마성 세척제나 용매를 사용하지 마십시오.
- 배터리 관리 : Always recharge the battery after each use. If storing for extended periods, charge the battery once a month to prevent deep discharge.
- 저장: Store the go-kart in a dry, cool place away from direct sunlight and moisture.
- 점검: 정기적으로 모든 나사, 너트 및 연결부가 단단히 조여져 있는지 확인하십시오. 바퀴와 타이어의 마모 상태를 점검하십시오.
8. 문제 해결
If you encounter issues, refer to this section before contacting support.
| 문제 | 가능한 원인 | 해결책 |
|---|---|---|
| Go-kart does not move | Battery is low or not connected; Power switch is off; Forward/Reverse switch is in neutral position; Loose wire connection. | Charge the battery; Turn on the power switch; Select Forward or Reverse; Check all wire connections. |
| Go-kart moves slowly | Battery is low; Overloaded; Operating on an uneven surface. | Recharge the battery; Reduce weight; Move to a flat, smooth surface. |
| 조명이 작동하지 않습니다 | Loose wire connection; Damaged bulb/LED. | Check wire connections to the lights; Contact customer support if damaged. |
9. 사양
- 모델 번호: A12VGCLU241
- 제품 크기: 24.2 x 16.5 x 28 인치
- 품목 무게: 27.1파운드
- 배터리: 12V 충전식
- 최대 속도: Approximately 4 mph
- 추천 연령: 3 years and up (typically 3-6 years)
- 건축 자재: Durable PVC and Iron
- 제조업체: 사카 인터내셔널
10. 보증 및 지원
For warranty information or technical support, please refer to the warranty card included with your product or contact the manufacturer, Sakar International, directly. Keep your proof of purchase for any warranty claims.
추가 지원이 필요하면 다음을 방문하세요. Voyager Store on Amazon.