1. 서론
Thank you for choosing the Spigen ArcDock 6-in-1 Laptop Stand Hub. This versatile device combines an ergonomic laptop stand with a powerful docking station, providing essential connectivity and a comfortable workspace. This manual will guide you through the setup, operation, and maintenance of your new ArcDock.
2. 제품 오버view
The Spigen ArcDock is designed to enhance your productivity and comfort with its integrated 6-in-1 hub and adjustable stand features. It supports a wide range of laptops up to 15.6 inches.

주요 특징:
- 6-in-1 연결성: Includes USB-A 3.0, USB-C 3.0, PD 100W, and 4K 60Hz HDMI.
- 전력 공급 : Up to 100W Power Delivery for fast charging your laptop.
- 고해상도 디스플레이: Supports 4K at 60Hz via HDMI.
- 보편적 인 호환성 : Works with MacBook Pro, MacBook Air, Dell, HP, Surface, Lenovo, and other laptops up to 15.6 inches.
- Adjustable & Rotatable: Features adjustable height and a 360-degree rotating base for optimal view각도를 나타냅니다.
- 향상된 공기 흐름: Designed to improve airflow and prevent overheating.
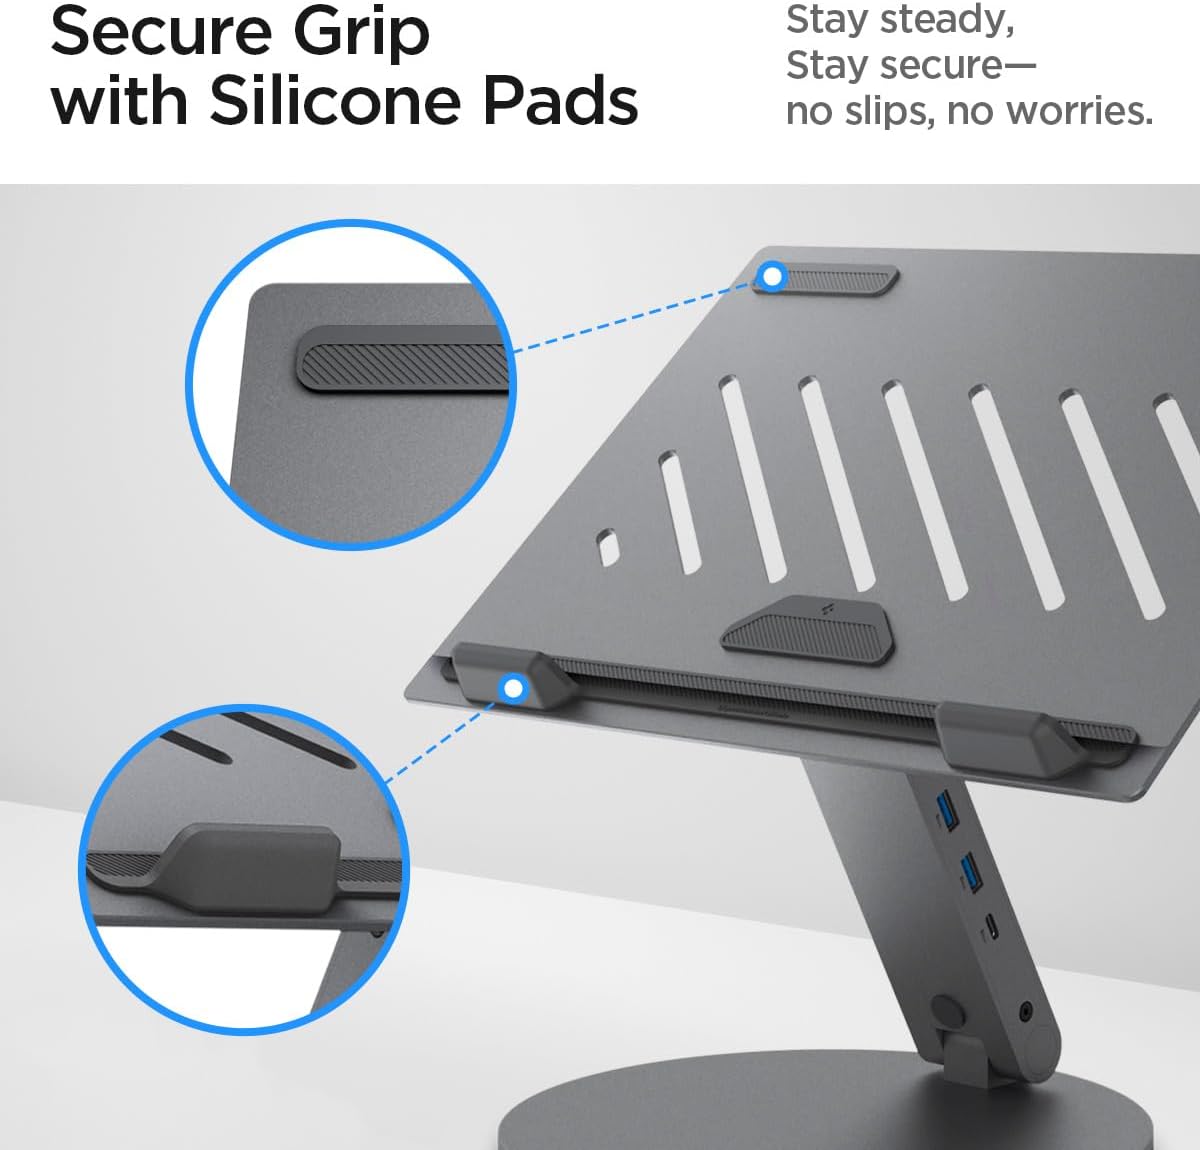
- 안전한 그립: Equipped with silicone pads for stability and scratch protection.
3. 설정 가이드
3.1. 언박싱 및 구성품
Carefully remove all components from the packaging. You should find the Spigen ArcDock Laptop Stand Hub, a USB-C to USB-C cable, and a power adapter.
3.2. 전원 연결
- Connect the provided power adapter to the 'Power' input port on the ArcDock.
- Plug the power adapter into a wall outlet. The power LED on the ArcDock will illuminate.
3.3. 노트북 연결하기
- Use the included USB-C to USB-C cable to connect the 'USB-C (Host connection)' port on the ArcDock to a compatible USB-C port on your laptop.
- Ensure your laptop's USB-C port supports Power Delivery and video output for full functionality.
3.4. 외부 디스플레이 연결
The ArcDock supports up to two external displays via HDMI and DisplayPort.
- For HDMI display, connect an HDMI cable from your monitor to the 'HDMI 2.1' port on the ArcDock.
- For DisplayPort display, connect a DisplayPort cable from your monitor to the 'DisplayPort' port on the ArcDock.
- Adjust your laptop's display settings (e.g., Extend, Mirror) as needed.
3.5. USB 주변기기 연결
Connect your USB-A and USB-C peripherals (e.g., mouse, keyboard, external hard drives) to the available USB-A 3.0 and USB-C 3.0 ports on the ArcDock.

4. 사용 설명서
4.1. 디스플레이 기능
Once connected, your laptop should automatically detect the external displays. You can configure display settings (e.g., resolution, orientation, extended or mirrored desktop) through your operating system's display settings.
- HDMI 2.1 : 최대 4K@60Hz 해상도를 지원합니다.
- 디스플레이포트: 최대 4K@60Hz 해상도를 지원합니다.
4.2. 전력 공급(PD)
The ArcDock provides up to 100W Power Delivery through its dedicated USB-C PD port, allowing you to charge your laptop while using the hub's other features. Ensure your laptop supports USB-C PD for this function.
4.3. 데이터 전송
The USB-A 3.0 and USB-C 3.0 ports offer high-speed data transfer for connected devices like external hard drives, USB flash drives, and other peripherals.
5. Adjustments and Ergonomics
The ArcDock is designed for ergonomic comfort and flexibility.
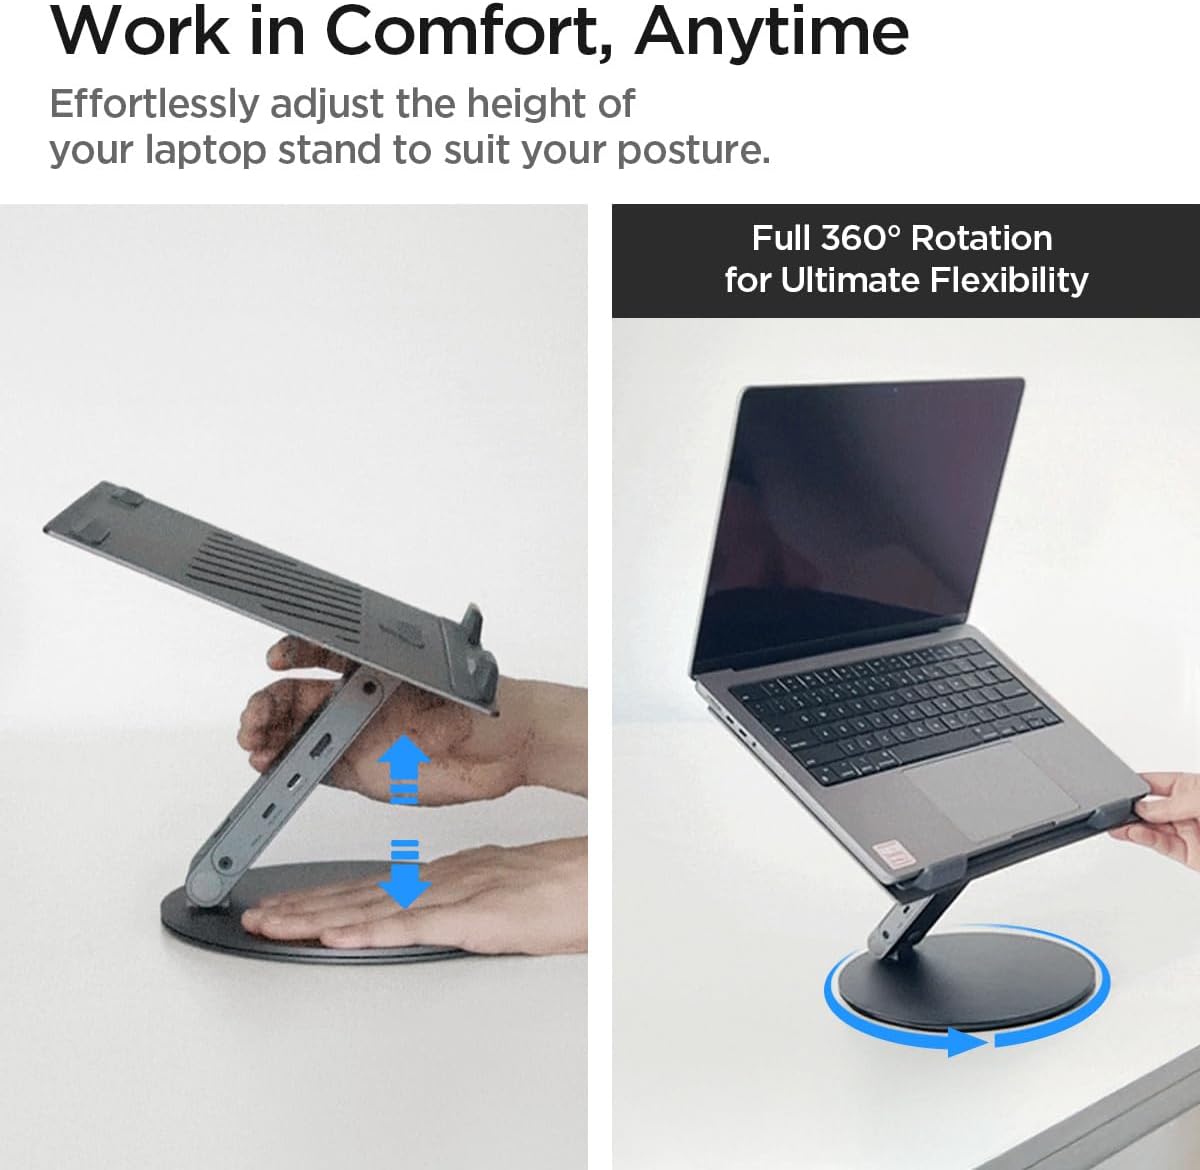
5.1. 높이 조절
Gently lift or lower the laptop platform to your desired height. The stand is designed to hold its position securely once adjusted.
5.2. 360도 회전
The base of the ArcDock allows for a full 360-degree rotation, enabling you to easily share your screen or adjust your viewing angle without moving the entire stand.
6. 관리 및 유지 보수
To ensure the longevity and optimal performance of your Spigen ArcDock, follow these care instructions:
- 청소: Use a soft, dry cloth to wipe down the surface of the stand. Avoid abrasive cleaners or solvents.
- 저장: When not in use, store the ArcDock in a cool, dry place.
- 과부하를 피하세요: Do not place items heavier than the recommended weight limit on the stand.
- 실리콘 패드: The silicone pads provide a secure grip. Keep them clean and free from dust or debris to maintain their effectiveness.

7. 문제 해결
If you encounter any issues with your Spigen ArcDock, please refer to the following common solutions:
- 외부 모니터에 디스플레이가 표시되지 않음:
- Ensure the USB-C host connection cable is securely plugged into both the ArcDock and your laptop.
- Verify that your laptop's USB-C port supports video output (DisplayPort Alt Mode).
- Check the display cable connections (HDMI/DisplayPort) to the ArcDock and the monitor.
- Confirm the external monitor is powered on and set to the correct input source.
- For some graphics cards that only support 3 monitors, you may need to turn off the host screen.
- macOS does not support MST (Multi-Stream Transport); external monitors will display the same content.
- 노트북이 충전되지 않음:
- Ensure the power adapter is correctly connected to the ArcDock and a working power outlet.
- Verify that your laptop's USB-C port supports Power Delivery (PD).
- USB 장치가 인식되지 않거나 데이터 전송 속도가 느린 경우:
- Ensure USB devices are properly connected to the ArcDock's USB ports.
- Try connecting the device directly to your laptop to rule out device-specific issues.
- Disconnect and reconnect the ArcDock from your laptop.
8. 기술 사양
| 상표 | 슈피겐 |
| 모델 번호 | AMP08885 |
| 색상 | 스페이스 그레이 |
| 재료 | 알류미늄 |
| 제품 치수 | 29.6 x 21.7 x 4cm |
| 품목 무게 | 1.33kg |
| 호환 장치 | MacBook Pro, MacBook Air, Dell, HP, Surface, Lenovo (up to 15.6" Laptops) |
| 특별 기능 | Foldable, Adjustable Height, 360 Rotating Base |
| USB-A 포트 | 2x USB-A 3.0 |
| USB-C 포트 | 1x USB-C (Host connection), 1x USB-C (PD 100W) |
| HDMI 출력 | HDMI 2.1 포트 1개 (4K@60Hz) |
| 디스플레이포트 출력 | 1x DisplayPort (4K@60Hz) |
9. 보증 및 지원
For warranty information and customer support, please refer to the documentation included with your product packaging or visit the official Spigen web대지. 보증 청구를 위해 구매 영수증을 보관하십시오.


