1. 이상view
The Waveshare ESP32-S3-LCD-1.47 is a compact and powerful development board designed for a wide range of embedded applications. It integrates a high-performance dual-core processor with a vibrant 1.47-inch LCD display, offering robust connectivity options including Wi-Fi and Bluetooth 5. This board is ideal for projects requiring a small form factor, display capabilities, and wireless communication.

Image 1.1: Waveshare ESP32-S3-LCD-1.47 Development Board connected to a USB port, displaying a colorful interface.
2. 상자 안에 무엇이 들어있나요?
Upon unboxing your Waveshare ESP32-S3-LCD-1.47 Development Board, you should find the following components:
- 1x ESP32-S3-LCD-1.47 Development Board
- 1x Black Header (for pin expansion)

Image 2.1: Contents of the Waveshare ESP32-S3-LCD-1.47 package, showing the development board and a black header.
3. 주요 특징
- 고성능 프로세서: Equipped with an Xtensa 32-bit LX7 dual-core processor, operating at up to 240MHz main frequency.
- 통합 디스플레이: Features a 1.47-inch LCD display with 172×320 resolution and 262K colors, providing clear visual output.
- 무선 연결 : Supports 2.4GHz Wi-Fi (802.11 b/g/n) and Bluetooth 5 (LE) with an onboard antenna for versatile wireless applications.
- 메모리: Includes 512KB SRAM, 384KB ROM, 16MB Flash, and 8MB PSRAM for amp프로그램 및 데이터 저장소.
- 확장 가능한 I/O: Offers multiple IO interfaces and a full-speed USB port for flexible peripheral connections.
- 스토리지 확장: An onboard TF card slot allows for external storage of pictures or files.
- 전원 관리 : Supports flexible clock and multiple power modes for optimized low power consumption.
- RGB LED: Built-in RGB LED with a clear acrylic sandwich panel for customizable lighting effects.

Image 3.1: Visual representation of the ESP32-S3-LCD-1.47's core features, including its dual-core processor, Wi-Fi, BLE 5, onboard antenna, 1.47-inch display, resolution, color depth, and multiple interfaces.
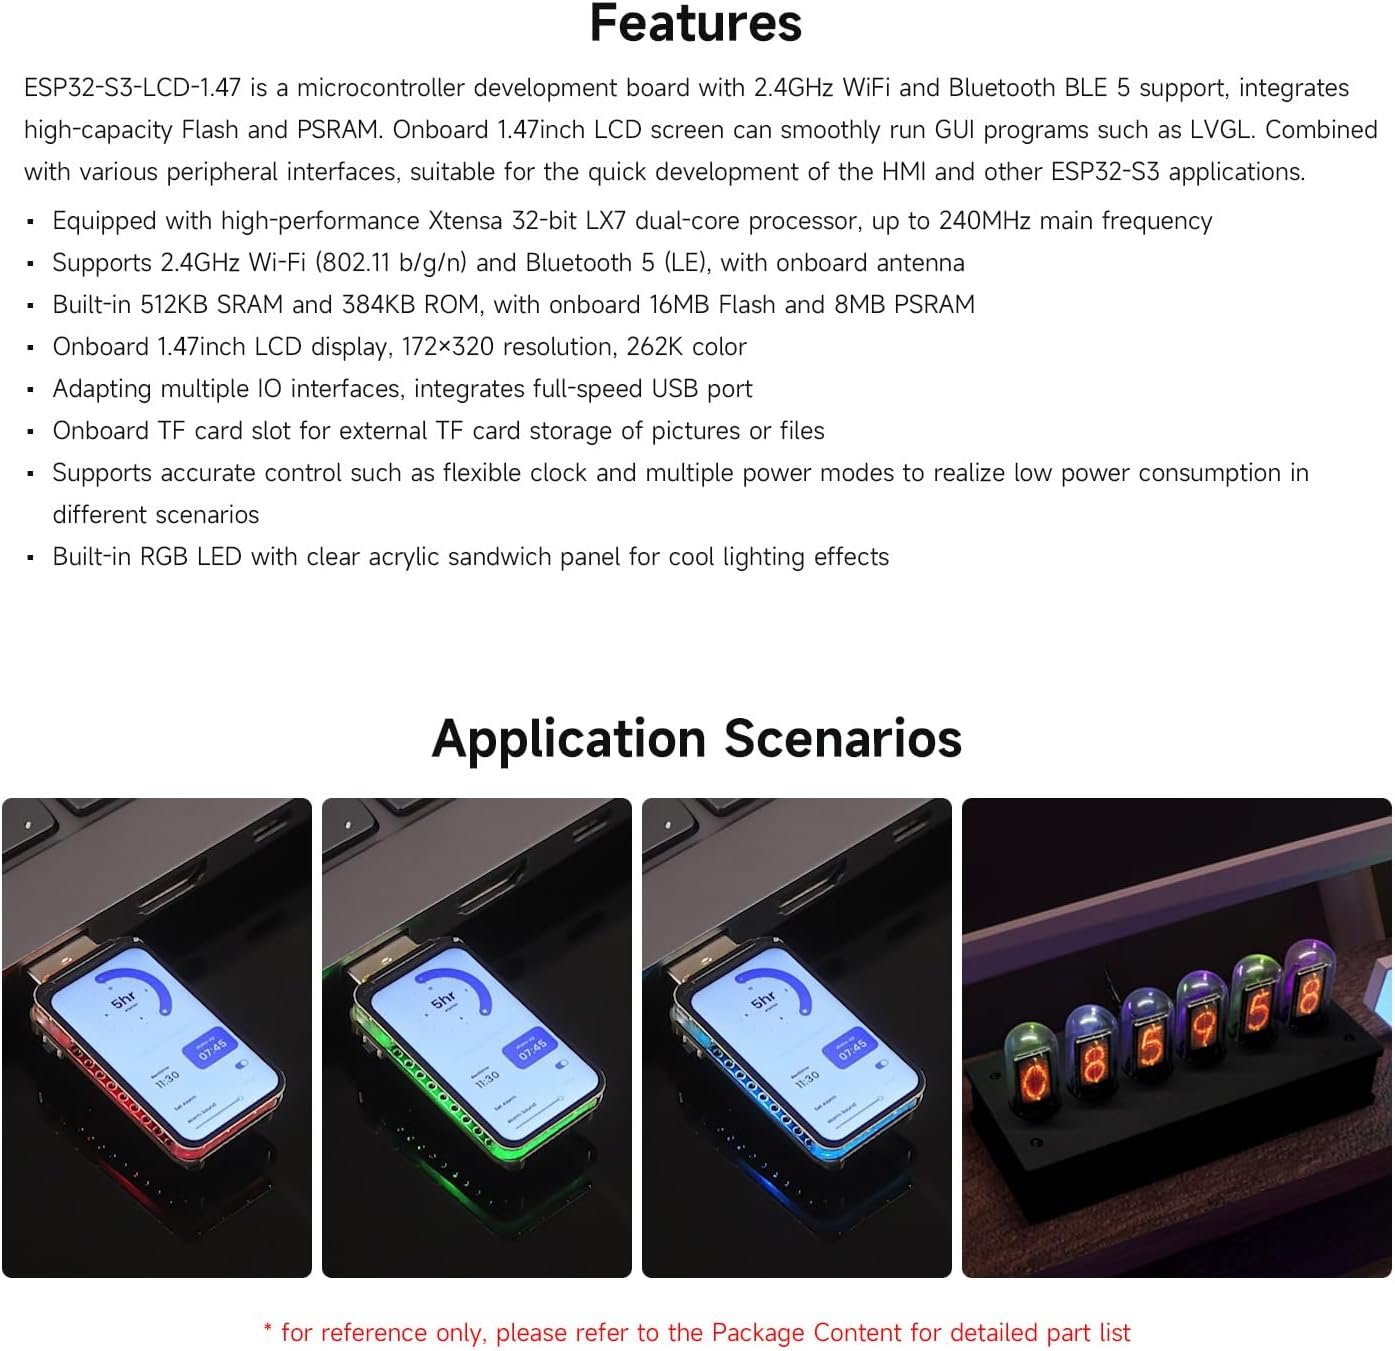
이미지 3.2: Examples of application scenarios for the ESP32-S3-LCD-1.47, showcasin다양한 프로젝트에서 활용도가 높다는 점입니다.
4. 사양
| 특징 | 세부 사항 |
|---|---|
| 프로세서 | Xtensa 32비트 LX7 듀얼 코어, 최대 240MHz |
| 표시하다 | 1.47-inch LCD, 172×320 resolution, 262K color |
| 무선 연결 | 2.4GHz Wi-Fi(802.11 b/g/n), 블루투스 5(LE) |
| 숫양 | 512KB SRAM, 8MB PSRAM |
| 집시 남자 | 384KB 롬 |
| 플래시 메모리 | 16MB 플래시 |
| 외부 저장소 | TF 카드 슬롯 |
| I / O 인터페이스 | Multiple IO interfaces, full-speed USB port |
| 주도의 | 내장 RGB LED |
| 치수 | Approximately 2.83 x 2.09 x 0.67 inches (based on package dimensions, actual board is smaller) |
| 무게 | 약 0.317온스 |

이미지 4.1: 상세 view of the ESP32-S3-LCD-1.47 board, highlighting key components like the ESP32-S3R8, Flash, TF card slot, and buttons, along with its outline dimensions.
5. 설정 및 핀 배치
To begin using your Waveshare ESP32-S3-LCD-1.47 Development Board, follow these general setup guidelines. For detailed pin configurations and programming, refer to the official Waveshare documentation.
5.1 핀 배치도

Image 5.1: GPIO pinout diagram for the ESP32-S3-LCD-1.47, indicating power, ground, and various GPIO pins for UART, PWM, I2S, ADC, I2C, and SPI communication.
The board features a standard GPIO header for connecting external peripherals. Ensure correct voltage levels (3.3V or 5V) when connecting components to avoid damage. The pinout diagram above illustrates the available pins and their primary functions.
5.2 초기 설정
- 전원 연결: Connect the development board to your computer using a USB-C cable. The board can also be powered via a lithium battery interface.
- 드라이버 설치: Depending on your operating system, you may need to install USB-to-serial drivers. Refer to the ESP32-S3 documentation for specific driver requirements.
- 개발 환경: Install a suitable Integrated Development Environment (IDE) such as Arduino IDE or ESP-IDF. These environments provide the necessary tools for programming and debugging.
- 이사회 구성: Within your chosen IDE, select the "ESP32-S3 Dev Module" or equivalent board from the board manager.
- 펌웨어 업로드: Use the IDE to upload your desired firmware or example code to the board.
6. 사용 설명서
The ESP32-S3-LCD-1.47 is designed for flexibility in operation. Once programmed, the board will execute the uploaded code. The integrated 1.47-inch LCD can be used for displaying information, user interfaces, or graphics, depending on your application.
6.1 디스플레이 상호작용
- The LCD display can be programmed to show various data, sensor readings, or custom graphical user interfaces.
- If your board features a touch-enabled display (check your specific model), you can interact directly with the screen for input.
6.2 무선 통신
- 와이파이: Configure the Wi-Fi module in your code to connect to local networks, access online services, or create an access point.
- 블루투스: Utilize Bluetooth 5 (LE) for low-energy communication with other Bluetooth-enabled devices, such as smartphones or sensors.
6.3 Using the TF Card Slot
- Insert a formatted TF card into the onboard slot to expand storage.
- Your firmware can be programmed to read from and write to the TF card for data logging, image storage, or configuration files.
7. 유지관리
To ensure the longevity and optimal performance of your Waveshare ESP32-S3-LCD-1.47 Development Board, consider the following maintenance tips:
- 깨끗하게 유지하십시오: Regularly clean the board and display with a soft, dry cloth. Avoid using liquids or abrasive materials.
- 조심스럽게 다루십시오: The display is a delicate component. Avoid applying excessive pressure or dropping the board.
- 적절한 보관: 사용하지 않을 때는 보드를 건조하고 정전기 방지 환경에 보관하세요.
- 펌웨어 업데이트: 웨이브쉐어 공식 웹사이트를 주기적으로 확인하세요. website for firmware updates and new libraries to ensure you have the latest features and bug fixes.
8. 문제 해결
If you encounter issues with your Waveshare ESP32-S3-LCD-1.47 Development Board, consider the following troubleshooting steps:
- 전원/디스플레이 없음:
- Ensure the USB-C cable is securely connected and providing power.
- Verify that the power source (computer USB port, power adapter) is functional.
- If using a battery, ensure it is charged and correctly connected.
- 업로드 오류:
- IDE에서 올바른 보드와 COM 포트가 선택되었는지 확인하십시오.
- Ensure all necessary drivers are installed.
- Try pressing the BOOT button while uploading if instructed by your IDE or documentation.
- Display Issues (Garbled/Blank):
- Verify that the display initialization code in your firmware is correct.
- Check for loose connections if the display is connected via a ribbon cable.
- Wi-Fi/블루투스 연결 문제:
- Ensure your code correctly initializes and configures the wireless modules.
- 다른 2.4GHz 장치의 간섭을 확인하세요.
- 외부 안테나를 사용하는 경우 안테나 연결 상태를 확인하십시오.
For more advanced troubleshooting or specific technical support, visit the official Waveshare product page or community forums.
9. 관련 동영상
Explore these official Waveshare videos for additional insights and demonstrations of the ESP32-S3 series development boards.
ESP32 S3 Touch LCD 2
Video 9.1: An introduction to the Waveshare ESP32-S3 2-inch LCD screen development board, highlighting its display capabilities, camera support, processor, and memory configuration.
ESP32 C6 LCD 1.47 en
비디오 9.2: 끝view of the ESP32-C6 1.47-inch LCD display development board, showcasing its compact design, RISC-V processor, Wi-Fi 6, Bluetooth 5, TF card slot, and RGB LEDs.
ESP32 S3 Touch LCD 1.69
Video 9.3: A detailed look at the ESP32-S3 1.69-inch Touch LCD development board, highlighting its compact size, touch interaction, processor, memory, wireless communication, and peripheral integration.
ESP32 S3/C6 LCD Touch 1.9 Series
Video 9.4: Comparison and features of the ESP32-S3 and ESP32-C6 1.9-inch LCD display development boards, emphasizing their low cost, high performance, and various functionalities.
ESP32-S3 1.8inch AMOLED Touch Display,368x448,AI Speech
Video 9.5: Introduction to a highly integrated ESP32-S3 1.8-inch AMOLED touch display development board, showcasing its high-performance processor, display quality, storage, audio processing, and motion sensing capabilities.
Lonely Binary ESP32-S3 IPEX Unboxing
영상 9.6: 언박싱 및 종료view of the Lonely Binary ESP32-S3 IPEX Gold Edition, highlighting its PCB design, Wi-Fi and Bluetooth performance with an external antenna, and memory configuration.
10. 보증 및 지원
Waveshare products are designed for reliability and performance. For warranty information, technical support, and additional resources, please visit the official Waveshare web대지:
You can also find extensive documentation, tutorials, and community forums on their website to assist you with your projects.


