1. 제품 오버view
The Kidde Hardwired Smoke Detector, model 20SAR, is designed to provide reliable smoke detection with enhanced sensing technology to reduce false alarms. It operates on 120V AC wiring and includes AA battery backup for continuous operation during power outages. This model features interconnect capability, allowing all connected alarms to sound when one detects smoke.

Image: The retail packaging for the Kidde Hardwired Smoke Detector, showing two units and indicating hardwired operation with AA battery backup.
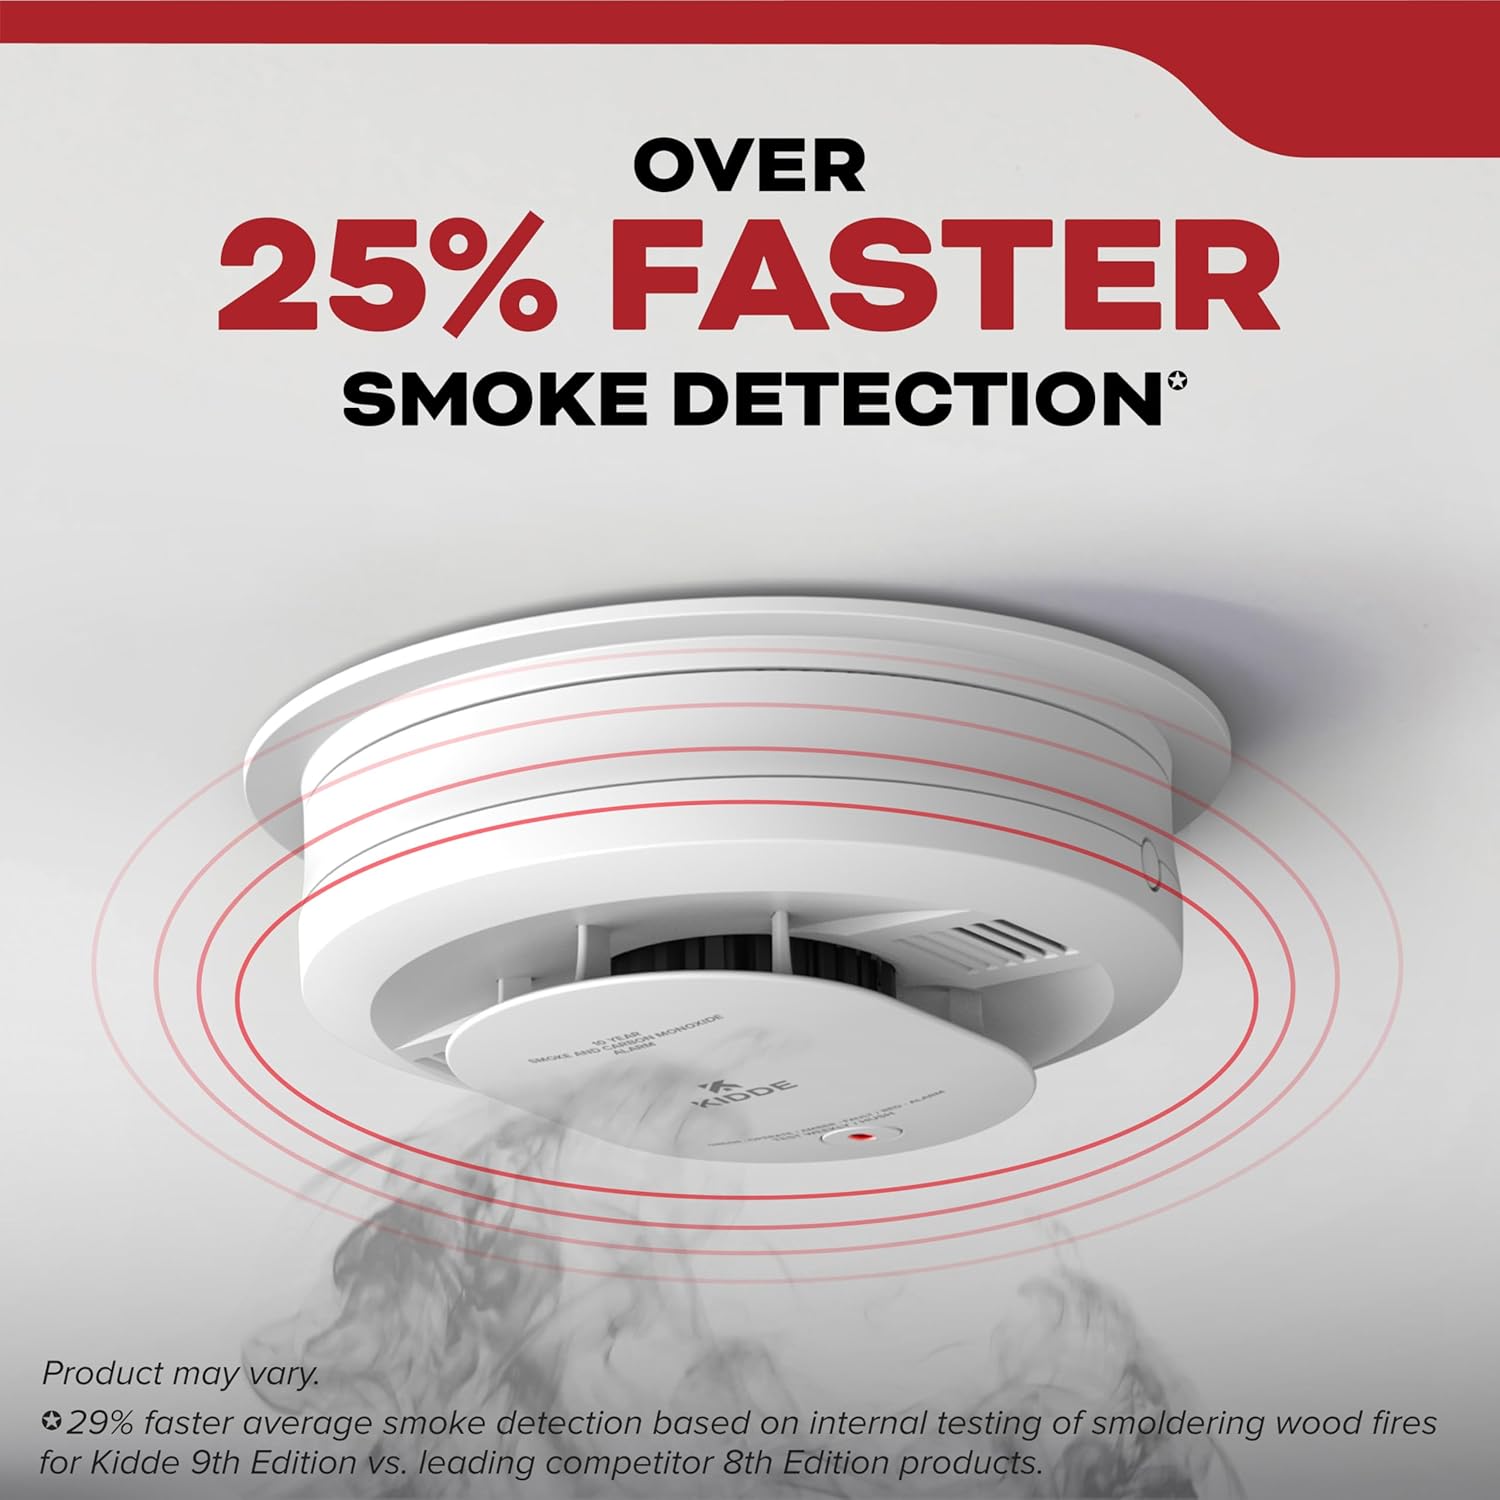
Image: A smoke detector mounted on a ceiling, with red concentric circles indicating smoke detection, highlighting its fast response.

Image: Three smoke alarms in different rooms (kitchen, bedroom, living room) connected by dashed lines, illustrating the interconnected alarm feature where if one sounds, they all sound.
Key features include an 85-decibel alarm, 120V AC wiring with 2 AA alkaline replaceable backup batteries, enhanced sensing technology to reduce false alarms from cooking, and self-testing capabilities. The alarm also provides LED notifications for normal operation, errors, and smoke detection. It conforms to UL 217 9th Edition and FCC standards.
2. 설정 및 설치
Proper installation is crucial for the effective operation of your smoke detector. Please follow these steps carefully.
2.1. 개봉 및 초기 설정
- Unbox your Kidde alarm and mounting bracket. Review the included user guide for detailed instructions specific to your model.
- Before beginning installation, mark the current date on your alarm. This helps you track when it's time for replacement, which should be 10 years from the installation date.

Image: A person on a ladder installing a white smoke alarm on a ceiling, demonstrating the simple installation process.
2.2. Installing a Hardwired Alarm
If your alarm is hardwired, follow these steps:
- Turn Main Power Off: Before any electrical work, turn off the main power to the circuit you are using at your home's circuit breaker.
- 마운팅 브래킷 설치: All Kidde alarms come with a mounting bracket. Pull the wire harness through the center hole in the mounting bracket. Secure the mounting bracket to the electrical box using the provided screws. Ensure the mounting screws are positioned in the small ends of the keyholes before tightening. Do not overtighten.
- 전선 연결: Connect the wires according to the user guide. Typically, this involves connecting the black wire to black, white to white, and red to red (for interconnectivity).
- Connect the Wire Harness: Connect the wire harness to the alarm, ensuring the connector snaps into place securely.
- Push in Excess Wire: Push any excess wire back into the electrical box through the hole in the center of the mounting bracket.
2.3. 배터리 활성화
For models featuring AA batteries (like the 20SAR), ensure the battery door is closed and pull the tab to activate the backup battery before installation. You should hear a beep to confirm activation. If no beep is heard, remove and reinstall the batteries.

이미지: 클로즈업 view of the back of the smoke detector, showing the compartment for two AA batteries and the wiring for hardwired connection.
Note: 10-year battery models do not have a pull tab; their internal battery self-activates upon secure mounting.
2.4. Attaching the Alarm (Easy Twist & Click)
Once wiring is complete (for hardwired models) or batteries are activated (for battery-operated models), attach the alarm:
- Align the alarm with the mounting bracket.
- Twist and click the alarm into place on the mounting bracket by rotating clockwise until it is secure.
2.5. 설치 비디오 가이드
For a visual guide on the installation process, please refer to the official Kidde installation video below:
Video: Official Kidde Detector Installation Video. This video provides step-by-step instructions for installing both hardwired and battery-operated Kidde alarms, including unboxing, marking the date, mounting the bracket, connecting wires, activating batteries, and attaching the alarm.
3. 사용 설명서
3.1. 정상 작동
Once properly installed and powered, your Kidde smoke detector will indicate its operational status through an LED light:
- 녹색 LED : A steady green LED light indicates normal operation for hardwired alarms. For battery-operated alarms, a flashing green LED light every 60 seconds indicates normal operation.
- 황색 LED: An amber LED light indicates an operating error or fault. Refer to the troubleshooting section if this occurs.
- 적색 LED : A red LED light, accompanied by three long beeps, indicates smoke detection.
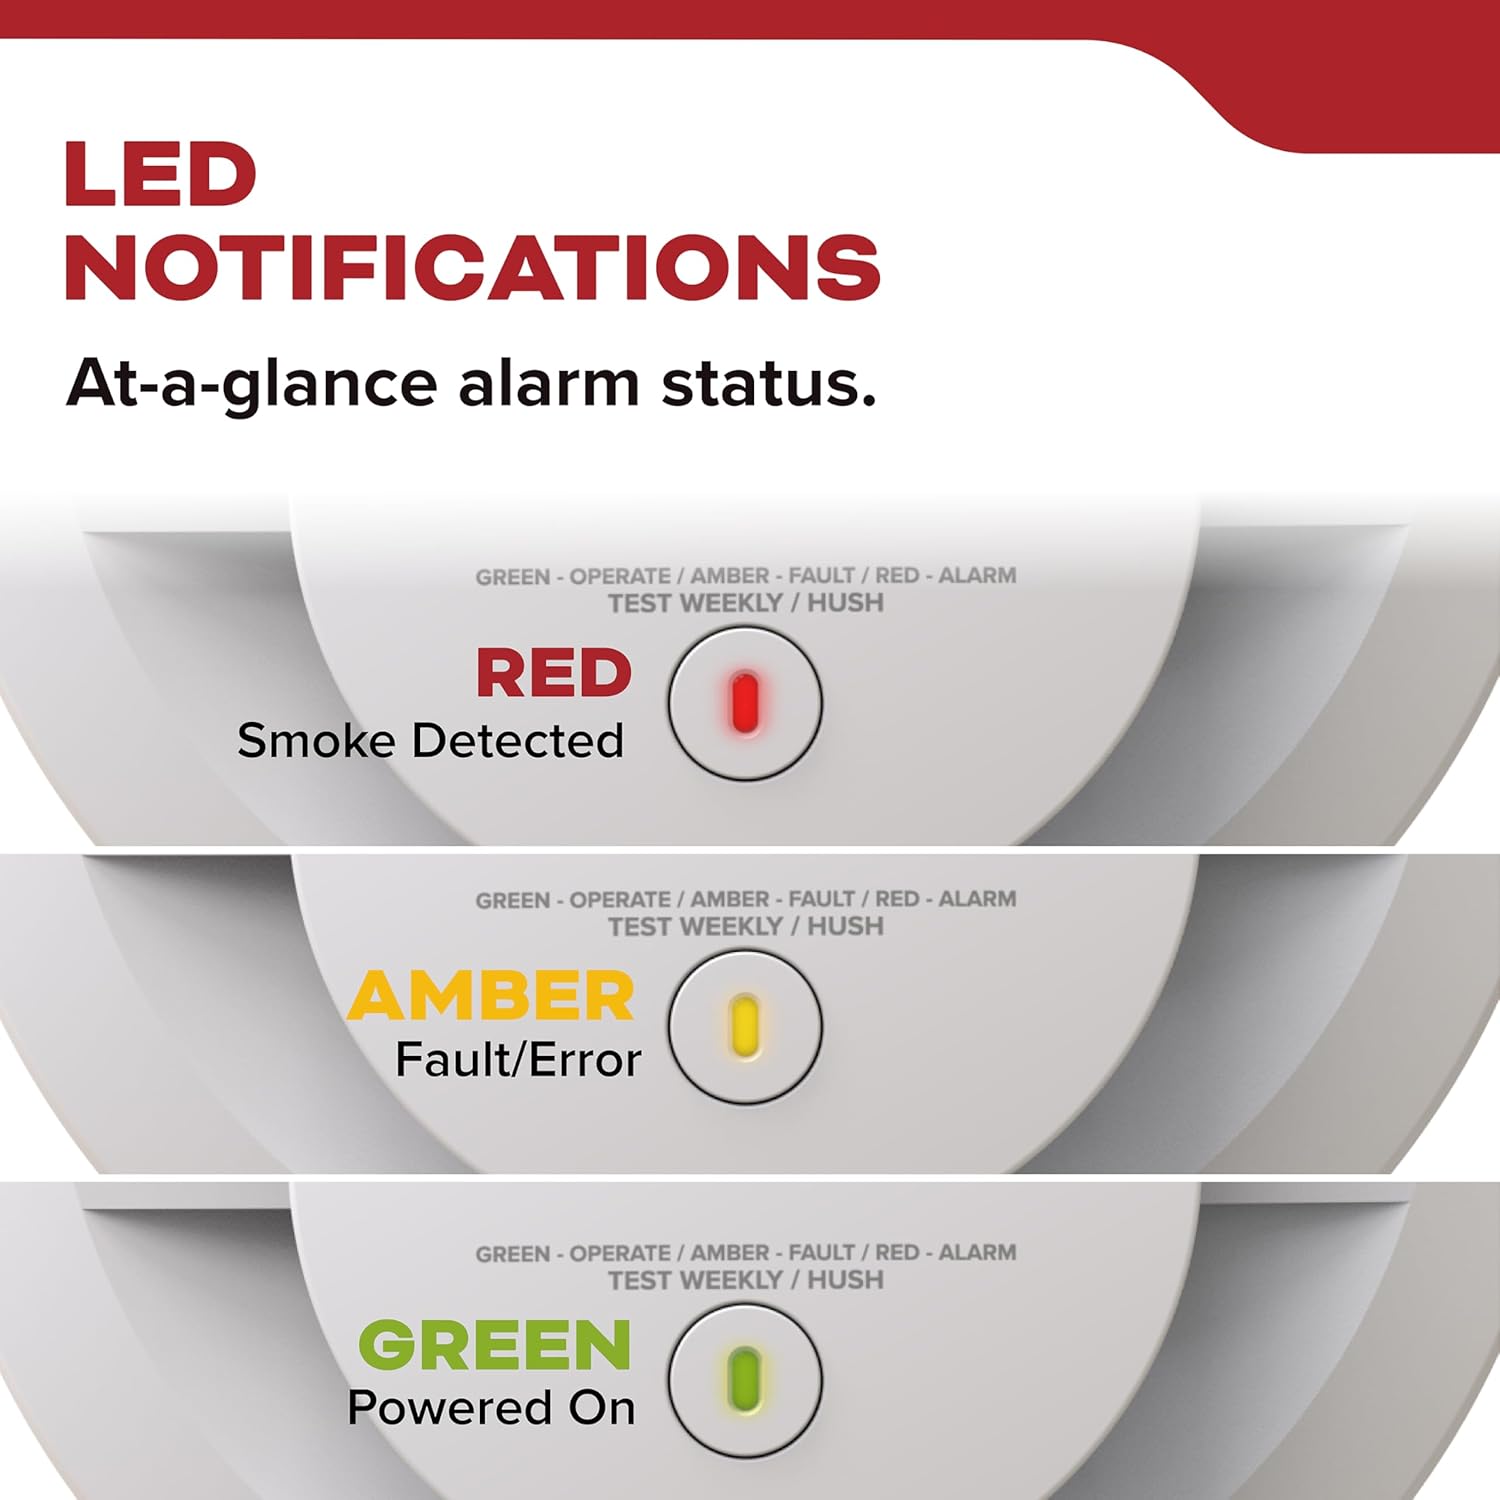
Image: A visual representation of the smoke detector's LED light, showing its different states: Red for smoke detected, Amber for fault/error, and Green for powered on/normal operation.
3.2. Making Renovations Easier (Dust Cover)
To avoid potential false alarms during construction or renovations, ensure the proprietary dust cover is securely in place over the alarm. The alarm will not operate until the dust cover has been removed. Remove the dust cover at least 24 hours after construction is completed to allow dust to settle and ensure proper operation.
3.3. 알람 테스트
연기 경보기가 제대로 작동하는지 확인하기 위해 매주 테스트하는 것이 좋습니다.
- Press and release the center button on the alarm.
- The alarm will sound a loud 85-decibel alarm. Since the alarm is very loud, it is advisable to stand about 2.5 feet away or use ear protection during testing.
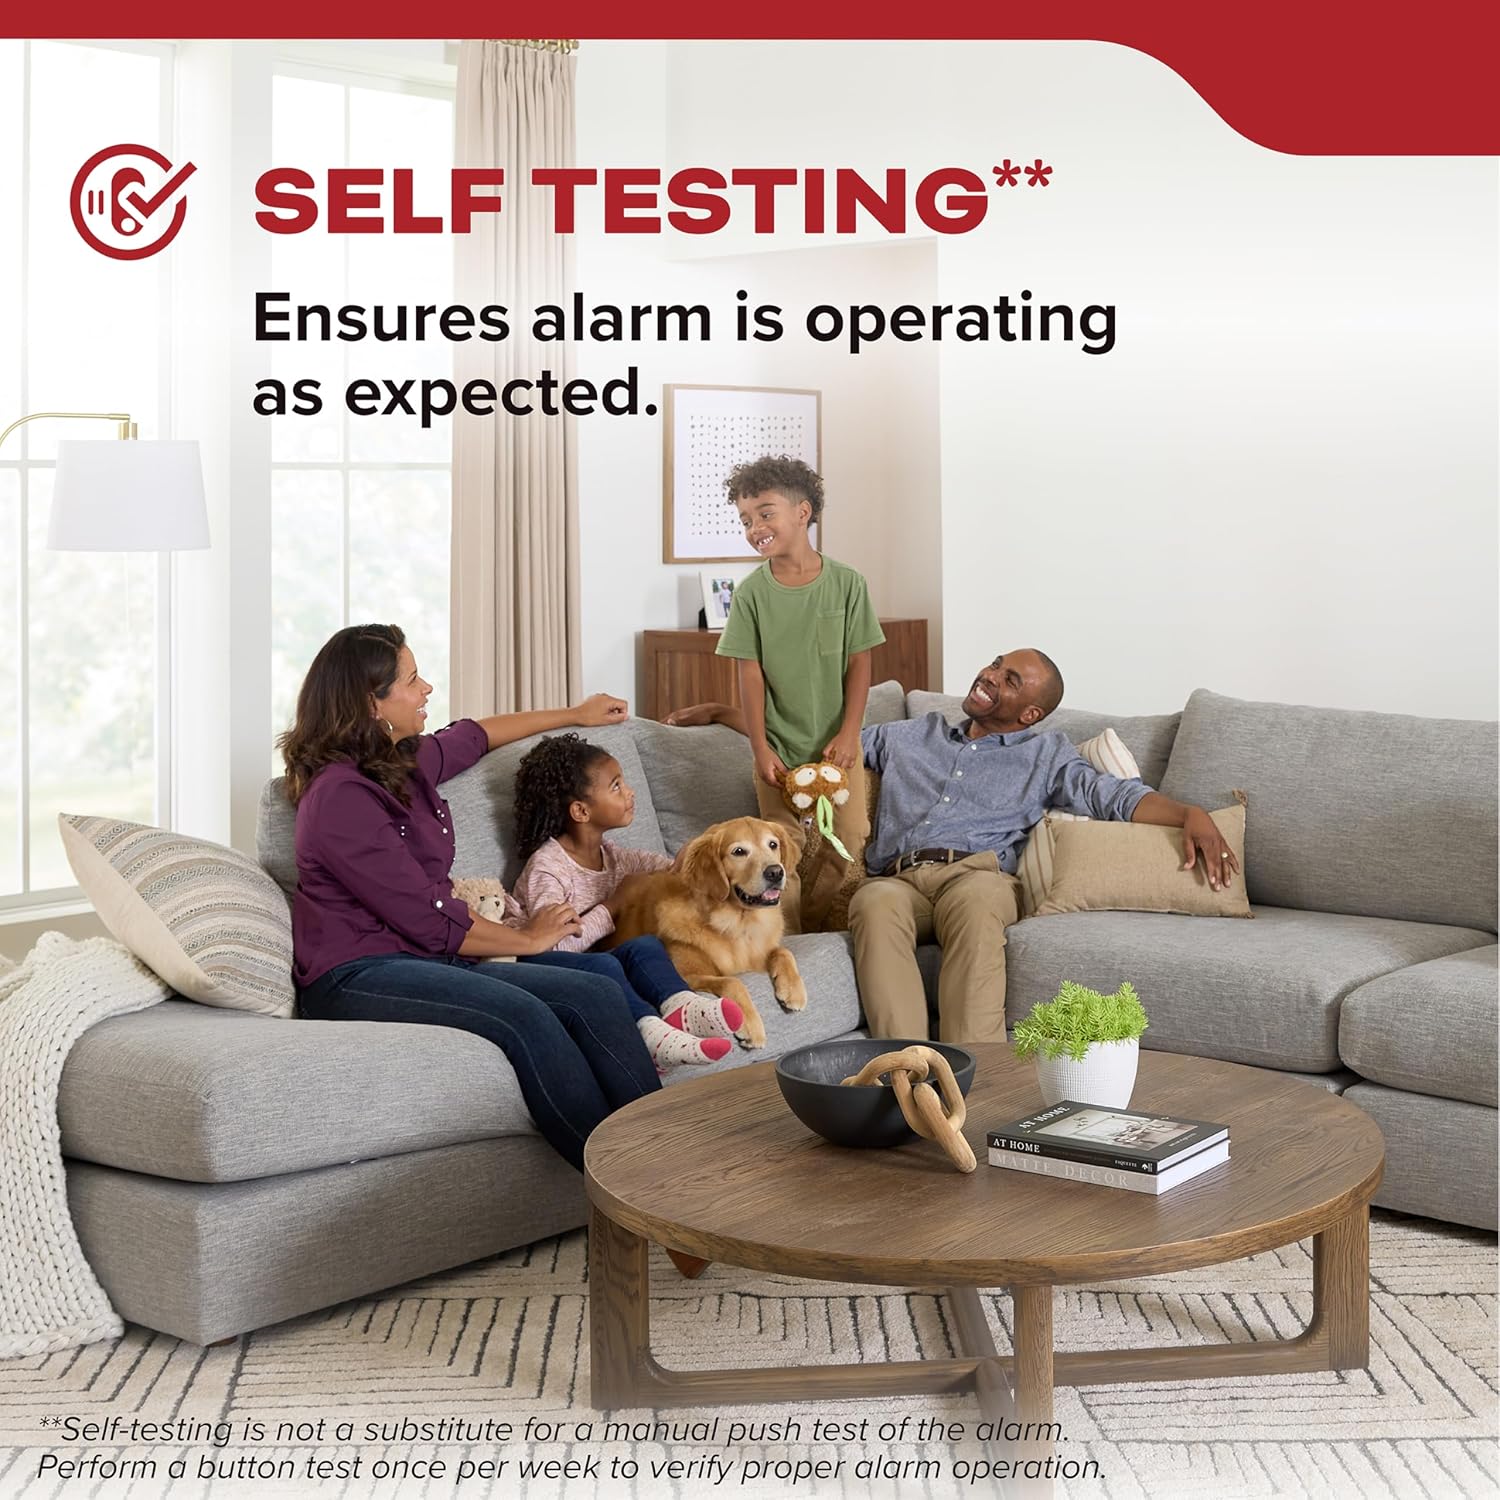
Image: A family in a kitchen, with a smoke detector visible on the ceiling, emphasizing the self-testing feature that ensures the alarm is operating as expected.
4. 유지관리
정기적인 유지보수는 연기 감지기의 수명과 신뢰성을 보장합니다.
4.1. 배터리 교체
For models with AA battery backup, the batteries should be replaced at least once a year, or immediately if the low battery warning sounds (a chirp every 30-60 seconds). Always use the specified AA alkaline batteries.
4.2. 청소
Clean your smoke alarm regularly to prevent dust and debris buildup from affecting its performance. Use a soft brush attachment on your vacuum cleaner to gently remove dust from the alarm's vents. Do not paint the alarm.
4.3. Self-Testing
The alarm features internal components that ensure it is always operating as expected. However, this is not a substitute for a manual push test. Perform a button test once per week to verify alarm operation, as described in section 3.3.
5. 문제 해결
If your smoke detector is not functioning as expected, consider the following common issues and solutions:
| 문제 | 가능한 원인 | 해결책 |
|---|---|---|
| 30~60초마다 경보가 울립니다. | 배터리가 부족합니다. | Replace the AA backup batteries. Ensure the battery door is securely closed. |
| 연기가 보이지 않는데도 경보가 자주 울립니다. | Dust buildup, high humidity, cooking fumes, or steam. | Clean the alarm as per maintenance instructions. Relocate the alarm if it's too close to cooking appliances or bathrooms. Use the Hush button to temporarily silence nuisance alarms. |
| 테스트 중에는 알람이 울리지 않습니다. | 전원이 들어오지 않거나, 배터리가 방전되었거나, 제품이 오작동하는 경우. | Ensure power is on (for hardwired). Replace batteries. If issues persist, the unit may need replacement. |
| Amber LED light is on. | Operating error or fault. | Refer to the detailed user guide for specific fault codes or contact Kidde customer support. |
For more complex issues or if troubleshooting steps do not resolve the problem, please consult the full user guide or contact Kidde customer support.
6. 사양
- 상표: 키드
- 모델: 20세르
- 전원: 120V AC Hardwired with 2 AA Battery Backup
- 센서 유형: 광전
- 알람 데시벨: 85데시벨
- 제품 크기: 1.88인치 깊이 x 5인치 너비 x 5인치 높이
- 품목 무게: 0.8파운드(약 12.8온스)
- 색상: 하얀색
- 재료: 플라스틱
- 작동 습도: 최대 95% 상대 습도(RH), 비응축
- 상한 온도 등급: 화씨 100도
- 표준: Meets UL 217 9th Edition & FCC standards

Image: A diagram showing the dimensions of the 5-inch smoke detector, including its diameter and depth, highlighting its modern design.
7. 보증 및 지원
The Kidde Hardwired Smoke Detector, model 20SAR, comes with a 10년 한정 보증. The warranty period begins when the alarm is powered on. If the power-on date is unknown, it is generally assumed that alarms should be replaced after 10 years from the manufacturing date.

Image: A circular seal indicating a "10 Year Limited Warranty" on a smoke detector, emphasizing the product's long-term reliability.
For warranty claims, technical support, or further assistance, please refer to the contact information provided in your product's user guide or visit the official Kidde web대지.


