1. 서론
Thank you for choosing the Aigo Q2503 Mini-Tower PC Case. This manual provides detailed instructions for the proper installation, operation, and maintenance of your new computer chassis. Please read this guide thoroughly before beginning assembly to ensure optimal performance and longevity of your system components.
2. 제품 오버view
The Aigo Q2503 is a compact Mini-Tower PC case designed for M-ATX and ITX motherboards. It offers a streamlined design with essential features for building a functional and efficient computer system. Its robust construction provides a secure environment for your components.
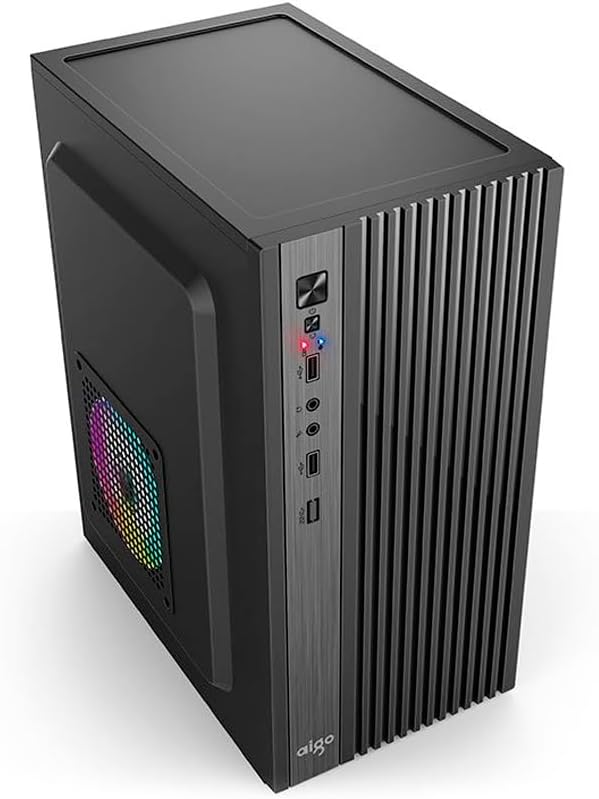
그림 2.1: 전면 view of the Aigo Q2503 Mini-Tower PC Case, showcasing its compact design and front panel I/O ports.
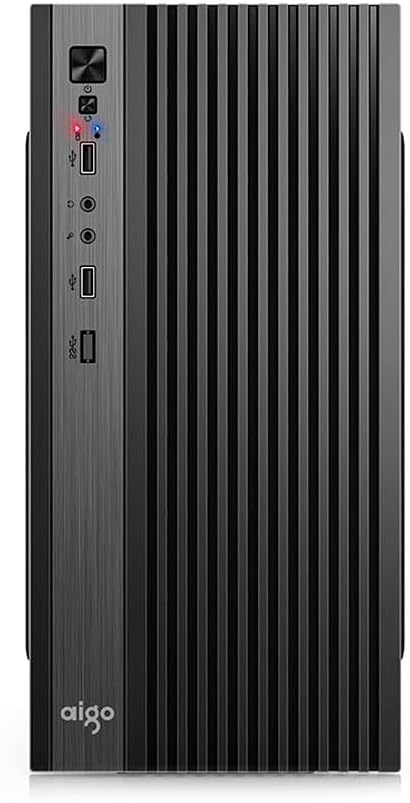
그림 2.2: 전면 view of the Aigo Q2503 Mini-Tower PC Case, highlighting the vertical ventilation slats and front panel controls.
3. 설정 및 설치
Follow these steps for proper component installation within the Aigo Q2503 case.
3.1 사건 준비
- 케이스를 개봉하고 모든 포장재를 제거하세요.
- Carefully remove the side panels by unscrewing the thumbscrews at the rear of the case and sliding the panels backward.
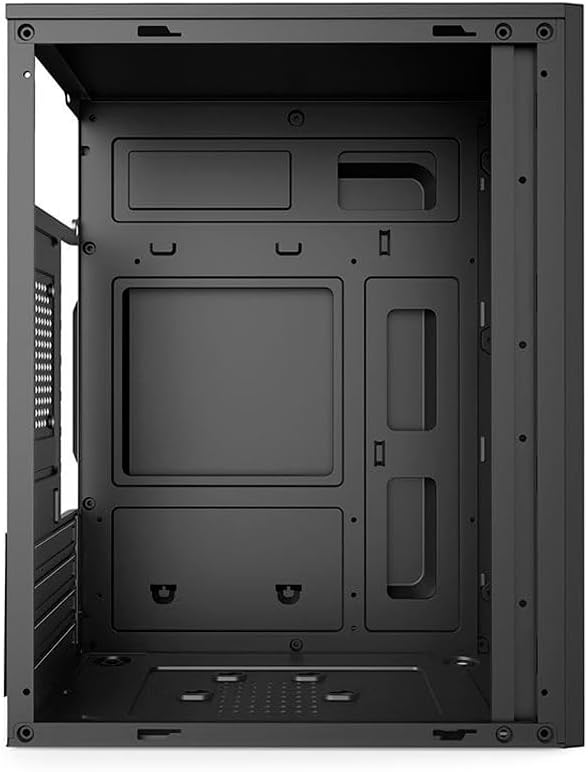
그림 3.1: 내부 view of the Aigo Q2503 PC Case, showing the motherboard tray and drive mounting points.
3.2 마더 보드 설치
- 메인보드와 함께 제공된 I/O 쉴드를 케이스 후면 개구부에 설치하십시오.
- Align your M-ATX or ITX motherboard with the standoffs inside the case. Ensure all standoffs match the motherboard's mounting holes.
- 적절한 나사를 사용하여 마더보드를 고정하십시오.
3.3 드라이브 설치
- SSD (1x): Locate the dedicated SSD mounting point (typically on the motherboard tray or behind it). Secure the SSD using screws.
- HDD (1x): Locate the HDD bay. Slide the HDD into the bay and secure it with screws.
3.4 Expansion Card Installation (VGA)
- 케이스 후면에서 필요한 확장 슬롯 덮개를 제거하십시오.
- Insert your graphics card (VGA) or other expansion cards into the PCIe slots on your motherboard.
- Secure the expansion cards with screws. Note the maximum VGA length supported is 150 mm.
3.5 CPU 쿨러 설치
Install your CPU cooler according to its manufacturer's instructions. Ensure the cooler's height does not exceed the maximum supported height of 250 mm for this case.
3.6 전원 공급 장치 설치
The Aigo Q2503 supports ATX power supplies. Mount your ATX power supply in the designated area, typically at the top or bottom rear of the case, and secure it with screws.
3.7 팬 설치
The case supports the following fan configurations (fans are not included):
- 뒤쪽: 1 x 80 mm fan
- 옆: 1 x 120 mm fan
Install fans in the specified locations to optimize airflow.
3.8 전면 패널 연결
Connect the front panel cables (Power SW, Reset SW, HDD LED, Power LED, USB 2.0, Audio/Mic) to the corresponding headers on your motherboard. Refer to your motherboard manual for exact pin layouts.
4. PC 케이스 작동 방법
Once all components are installed and connected, replace the side panels and secure them. Connect your monitor, keyboard, mouse, and power cable to your system. Press the power button on the front panel to start your computer.
전면 패널을 통해 다음에 편리하게 접근할 수 있습니다.
- 전원 버튼
- 재설정 버튼
- 2개의 USB 2.0 포트
- Audio Out (Headphone) Jack
- 마이크 인 잭
5. 유지관리
정기적인 유지 관리는 최적의 성능을 보장하고 PC 부품의 수명을 연장하는 데 도움이 됩니다.
5.1 청소
- 외부: 부드러운 d를 사용하세요amp 외부 표면을 닦을 때는 천을 사용하세요. 연마성 세제는 사용하지 마세요.
- 내부: Periodically open the case and use compressed air to remove dust buildup from components, fans, and filters. Ensure the system is powered off and unplugged before cleaning the interior.
5.2 공기 흐름
Ensure that the case's ventilation openings are not obstructed to maintain proper airflow and prevent overheating.
6. 문제 해결
PC 조립 중 문제가 발생하면 다음과 같은 일반적인 문제 해결 단계를 고려해 보세요.
- 전원 없음: Double-check all power connections, including the power supply to the wall, the power supply to the motherboard, and the front panel power switch cable to the motherboard.
- 과열: Verify that all case fans and CPU cooler fans are spinning correctly. Ensure proper airflow within the case and that ventilation openings are clear.
- 전면 패널 포트가 작동하지 않습니다: Confirm that the USB and Audio/Mic cables from the front panel are correctly connected to the motherboard headers.
- 부품 장착 문제: Ensure that all components, especially the graphics card and CPU cooler, are within the specified maximum dimensions for the case.
7. 사양
Below are the detailed specifications for the Aigo Q2503 Mini-Tower PC Case:
| 특징 | 사양 |
|---|---|
| 상표 | Aigo 사와 |
| 모델 | Q2503-BK |
| 케이스 유형 | 미니타워 |
| 마더보드 지원 | M-ATX / ITX |
| 재료 | 0.4mm SPCC (Steel Alloy) |
| 드라이브 베이 | 1 x SSD, 1 x HDD |
| 확장 슬롯 | 4 |
| 전면 I / O 포트 | 2 x USB 2.0, Audio/Mic |
| 최대 VGA 길이 | 150mm (XNUMXmm) |
| 최대 CPU 쿨러 높이 | 250mm (XNUMXmm) |
| 전원 공급 지원 | 에이티엑스 |
| Supported Fans (not included) | Rear: 1 x 80 mm, Side: 1 x 120 mm |
| 치수(길이 x 너비 x 높이) | 265 x 165 x 340mm |
| 색상 | 검은색 |
8. 보증 정보
The Aigo Q2503 Mini-Tower PC Case comes with a manufacturer's warranty of 12개월 from the date of purchase. This warranty covers defects in materials and workmanship under normal use. Please retain your proof of purchase for warranty claims. The warranty does not cover damage caused by improper installation, misuse, accidents, modifications, or unauthorized repairs.
9. 지원
For technical assistance, troubleshooting, or warranty inquiries, please contact your retailer or the official Aigo support channels. Refer to the Aigo official web최신 연락처 정보와 지원 리소스를 제공하는 사이트입니다.
Before contacting support, please have your product model (Q2503-BK) and proof of purchase readily available.


