1. 제품 오버view
The VIVOTEK FD9383-HTV is a high-performance 5-megapixel outdoor network dome camera designed for robust surveillance applications. It features a 2.8-12mm motorized varifocal lens, providing flexibility in field of view, and integrated IR LEDs for clear night vision up to 98 feet. This camera is built to withstand harsh outdoor conditions with IP66 and IK10 ratings, ensuring protection against dust, water, and vandalism. It also includes a built-in microphone for audio monitoring.
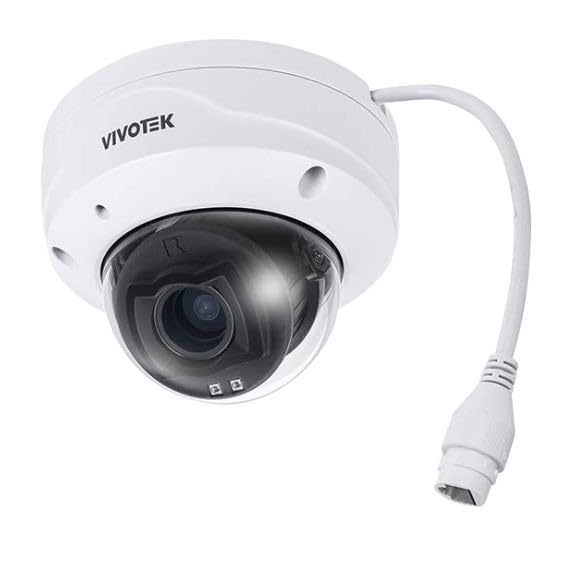
이미지 1.1: 앞면 view of the VIVOTEK FD9383-HTV 5MP Outdoor Network Dome Camera.
주요 특징:
- 2560 x 1920 Resolution at 30 fps for high-quality video.
- IR LEDs for Night Vision up to 98 feet (30 meters).
- 2.8-12mm Motorized Varifocal Lens for flexible view각도를 나타냅니다.
- 95.4 to 28.7° Horizontal Angle of View.
- Built-In Microphone for audio capture.
- IP66-Rated for outdoor use, protecting against dust and water.
- IK10-Rated for vandal resistance.
- Supports microSD Cards up to 1TB for local storage.
- RJ45 Ethernet with Power over Ethernet (PoE) Technology.
- Complies with ONVIF Profiles G, S, T for broad compatibility.
2. 패키지 내용
모든 품목이 있는지, 그리고 양호한 상태인지 확인하십시오. 누락되거나 손상된 품목이 있는 경우 즉시 판매업체에 연락하십시오.
- VIVOTEK FD9383-HTV Network Dome Camera
- Mounting Screw Kit (screws, wall anchors)
- 방수 커넥터 키트
- Alignment Sticker/Drill Template
- 빠른 설치 가이드
- Software CD (or download link information)
3. 안전 정보
Please read these safety instructions carefully before operating the device to prevent injury to yourself or others and to avoid damage to the device. Keep this manual for future reference.
- 설치: 설치는 자격을 갖춘 담당자만 수행해야 하며 모든 지역 규정을 준수해야 합니다.
- 전원: Use only the specified power source (PoE or 12V DC adapter, if applicable) to avoid fire or electric shock.
- 환경: 카메라를 지정된 작동 조건을 벗어나는 극한 온도, 습도 또는 부식성 환경에 노출시키지 마십시오.
- 청소: 청소하기 전에 전원을 분리하세요. 부드럽고 마른 천을 사용하세요. 액체 또는 에어로졸 세척제는 사용하지 마세요.
- 서비스: 이 제품을 직접 수리하려고 하지 마십시오. 모든 서비스는 자격을 갖춘 서비스 담당자에게 문의하십시오.
4. 설정
4.1 물리적 설치
The FD9383-HTV camera is designed for wall or ceiling mounting. Ensure the mounting surface is strong enough to support the camera's weight.
- 장착 표면 준비: Use the provided drill template to mark the screw holes on the desired mounting location.
- 드릴 구멍: Drill pilot holes for the mounting screws and, if necessary, for the network cable. Insert wall anchors if mounting on drywall or masonry.
- 장착 브래킷 부착: 제공된 나사를 사용하여 카메라 장착 브래킷을 표면에 고정하십시오.
- 케이블 연결: Route the Ethernet cable through the mounting surface or cable entry point. Connect the RJ45 connector to the camera's network port. If not using PoE, connect a 12V DC power adapter (sold separately) to the power input. Ensure waterproof connections for outdoor installations.
- Secure Camera Body: Attach the camera body to the mounting bracket. Adjust the camera's orientation and angle as needed.
- 설치 마무리: Secure all covers and ensure the camera is firmly mounted and protected from the elements.

Image 4.1: Illustrative diagram of camera mounting and cable connection.
4.2 네트워크 연결
이 카메라는 간편한 설치를 위해 PoE(Power over Ethernet)를 지원하며, 단일 이더넷 케이블을 통해 전원과 데이터를 모두 전송할 수 있습니다.
- Connect the camera to a PoE-enabled switch or a PoE injector using a standard Ethernet cable.
- Alternatively, connect to a standard network switch and use a separate 12V DC power adapter.
- Ensure your network is configured to assign an IP address to the camera (DHCP recommended for initial setup).
4.3 초기 구성
After physical installation and network connection, you need to access the camera's web 초기 설정을 위한 인터페이스입니다.
- 카메라의 세계를 알아보세요: Use VIVOTEK's IP Search utility (available on their website) or a network scanner to find the camera's IP address on your network.
- 입장 Web 인터페이스: 열기 web 웹 브라우저(예: 크롬, 파이어폭스)를 열고 주소 표시줄에 카메라의 IP 주소를 입력하십시오.
- 로그인: The default username is typically 'root' and the password is 'pass'. You will be prompted to change the password upon first login for security reasons.
- 기본 설정: Configure essential settings such as date/time, network settings (if not using DHCP), and user accounts.
5. 운영
5.1 카메라 인터페이스 접근
Once configured, you can access the camera's live view and settings through its web interface or compatible VIVOTEK software/NVR systems.
- Enter the camera's IP address in your web 브라우저.
- Log in with your configured username and password.
- The interface provides access to live video, recording settings, motion detection, and other advanced features.
5.2 Adjusting Lens and Focus
The FD9383-HTV features a motorized varifocal lens, allowing remote adjustment of zoom and focus.
- Navigate to the 'Video' or 'Lens' settings section in the web 인터페이스.
- Use the zoom controls to adjust the focal length (2.8mm to 12mm) to achieve the desired field of view.
- Utilize the focus controls to sharpen the image. Many VIVOTEK cameras offer a one-touch focus feature for automatic adjustment.
5.3 Night Vision Settings
The camera automatically switches to night vision mode in low-light conditions using its IR LEDs.
- In the 'Image' or 'IR' settings, you can configure the IR illuminator's behavior (e.g., auto, manual on/off).
- Adjust IR intensity if available, to prevent overexposure or underexposure in specific scenarios.
5.4 기록 및 저장
The camera supports various recording methods, including local storage on a microSD card and network video recording (NVR).
- MicroSD 카드: Insert a compatible microSD card (up to 1TB) into the camera's slot. Format the card via the web interface. Configure recording schedules and triggers (e.g., continuous, motion-triggered).
- NVR/NAS: Connect the camera to a VIVOTEK NVR or a compatible Network Attached Storage (NAS) device. Configure recording settings on the NVR/NAS.
5.5 동작 감지
Configure motion detection to trigger recordings, send alerts, or activate other actions.
- Access the 'Event' or 'Motion Detection' settings in the web 인터페이스.
- Define detection zones within the camera's field of view.
- Adjust sensitivity levels to minimize false alarms.
- Set up actions to be taken when motion is detected (e.g., record video, send email notification).
6. 유지관리
6.1 청소
정기적인 청소는 최적의 이미지 품질을 유지하고 카메라의 수명을 연장하는 데 도움이 됩니다.
- 렌즈: Gently wipe the lens with a soft, lint-free cloth. For stubborn dirt, use a lens cleaning solution specifically designed for optical surfaces. Avoid abrasive materials.
- 주택: 카메라 하우징을 ad로 닦으세요amp 옷감. 강한 세제나 용제를 사용하지 마세요.
- 돔 덮개: If applicable, carefully clean the dome cover to ensure clear visibility.
6.2 펌웨어 업데이트
VIVOTEK을 주기적으로 점검하십시오. website for firmware updates. Firmware updates often include bug fixes, performance improvements, and new features.
- Download the latest firmware for your FD9383-HTV model from the official VIVOTEK support page.
- 카메라에 접근 web interface and navigate to the 'System' or 'Maintenance' section.
- 화면의 지시에 따라 펌웨어를 업로드하고 설치하십시오. 업데이트 과정 중에는 카메라 전원을 끄지 마십시오.
7. 문제 해결
This section provides solutions to common issues you might encounter with your VIVOTEK FD9383-HTV camera.
| 문제 | 가능한 원인 | 해결책 |
|---|---|---|
| 카메라 전원이 켜지지 않음 | No power from PoE switch/injector; faulty power adapter; loose cable connection. | Check PoE status on switch; verify power adapter functionality; ensure all cables are securely connected. |
| 네트워크를 통해 카메라에 접속할 수 없습니다. | Incorrect IP address; network cable issue; firewall blocking access; camera not receiving an IP address. | Verify IP address; check network cable integrity; temporarily disable firewall; use IP Search utility to find camera. |
| 이미지 품질이 좋지 않음 (흐릿하고 어두움) | Lens out of focus; dirty lens/dome; insufficient lighting; incorrect image settings. | 초점을 조정하려면 다음을 통해 조정하세요. web interface; clean lens/dome; check IR settings; reset image settings to default. |
| 동작 감지가 작동하지 않음 | Detection zones not configured; sensitivity too low; event actions not set up. | Configure detection zones; increase sensitivity; ensure event actions (e.g., record, notify) are enabled. |
| MicroSD 카드에 녹화가 안 됩니다. | Card not formatted; card full; recording schedule not active; faulty card. | Format microSD card in camera settings; check recording schedule; replace card if faulty. |
8. 사양
Detailed technical specifications for the VIVOTEK FD9383-HTV camera.
| 특징 | 사양 |
|---|---|
| 이미지 센서 | 1/2.8" Type CMOS |
| 해결 | 2560 x 1920 30fps |
| 초점거리 | 2.8 to 12mm Motorized Varifocal Lens |
| 수평각 View | 95.4 ~ 28.7° |
| 나이트 비전 | IR LEDs up to 98 feet (30 meters) |
| 오디오 | 내장 마이크 |
| 저장 | Supports microSD Cards up to 1TB |
| 네트워크 인터페이스 | 1x RJ45 Input (PoE) |
| 환경 등급 | IP66(방진 및 방수) |
| 반달 저항 | IK10-Rated |
| ONVIF Compliance | 찬성files G, S, T |
| 제품 치수 | 5.3 x 4.1 x 4.1인치(13.5 x 10.4 x 10.4cm) |
| 품목 무게 | 1.9파운드(0.86kg) |
9. 보증 및 지원
VIVOTEK 제품은 제한적 보증이 적용됩니다. 구체적인 보증 조건은 제품에 동봉된 보증 카드를 참조하거나 VIVOTEK 공식 웹사이트를 방문하십시오. web대지.
For technical support, product documentation, and software downloads, please visit the VIVOTEK official support portal:
https://www.vivotek.com/support
When contacting support, please have your camera's model number (FD9383-HTV) and serial number ready.


