1. 서론
This manual provides detailed instructions for the installation, operation, and maintenance of your MAIMEIMI Universal Motorcycle Digital Speedometer. Please read this manual thoroughly before use to ensure proper functionality and safety.
2. 제품 오버view
The MAIMEIMI Universal Motorcycle Digital Speedometer is a multi-functional gauge cluster designed for motorcycles. It integrates several essential functions into a single, compact unit, providing clear digital readouts for various parameters.
주요 특징:
- 통합 디스플레이: Combines speedometer, tachometer, and gear indicator.
- 포괄적인 데이터: Displays oil level, steering indicators, and mileage (ODO/TRIP).
- 보편적 인 호환성 : Adjustable for various tire sizes (8-22 inch wheels) and compatible with 2-stroke and 4-stroke motorcycles (1, 2, and 4 cylinders).
- 방수 디자인 : Constructed from high-quality, rugged ABS material for durability in various weather conditions.
- 선명한 LCD 화면: Provides excellent visibility for data reading day or night.
패키지 내용:
- 1 x Digital Speedometer Unit
- 1 x Speed Sensor Cable
- 2 x 자석

Image 2.1: The MAIMEIMI Universal Motorcycle Digital Speedometer unit with its speed sensor cable and magnets.

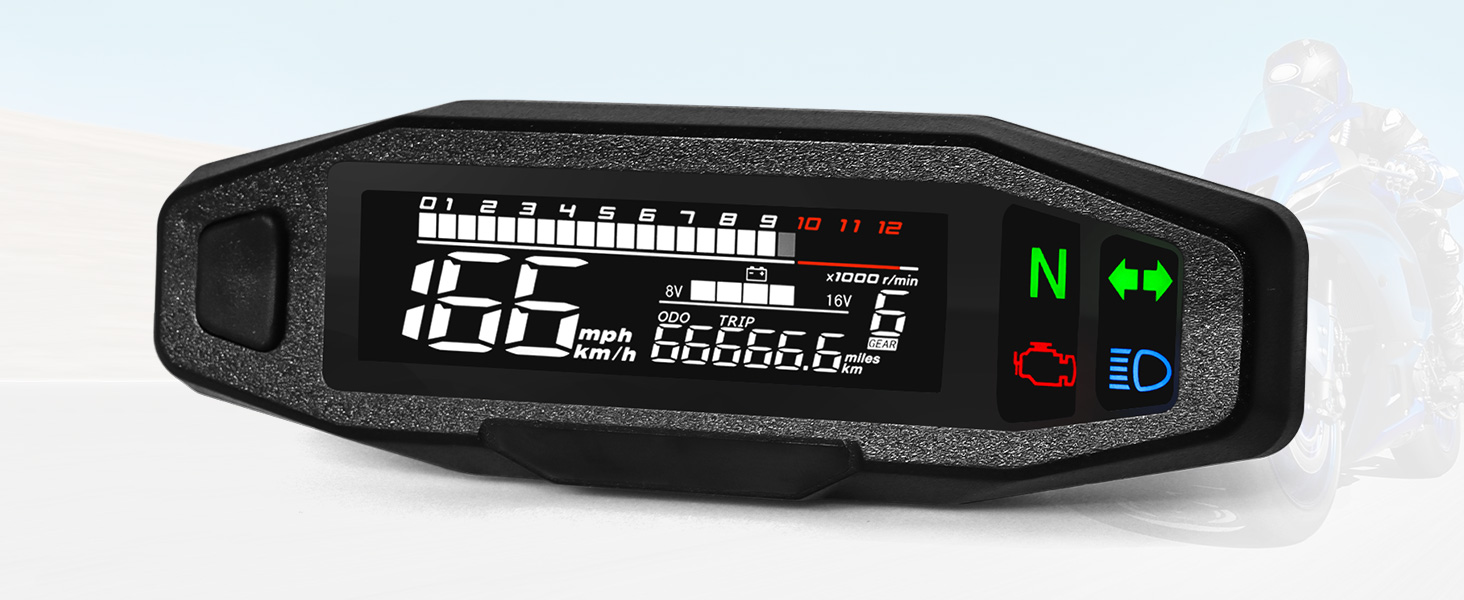
Image 2.2: Labeled interface display showing speed, unit, mileage, gear, voltage/fuel, engine fault light, and indicators.
3. 사양
| 제품 치수 | 6.33 x 1.4 x 1.81 인치 |
| 품목 무게 | 0.42파운드(6.72온스) |
| 재료 | 금속, 플라스틱(ABS) |
| 운영 볼륨tage | 9-16V |
| 휠 크기 호환성 | 8-22 inches (adjustable) |
| 엔진 유형 호환성 | 2-stroke and 4-stroke (1, 2, 4 cylinders) |
| RPM Functionality | Works with carburetor motors; does not work with Electric Fuel Injection (EFI) engines. |
4. 설정 및 설치
Careful installation is crucial for the correct operation of the speedometer. It is recommended that installation be performed by a qualified technician if you are unfamiliar with motorcycle electrical systems.
4.1 배선도
다음 그림을 참조하여 올바른 배선 연결을 하십시오. 모든 연결부가 단단히 고정되고 절연되었는지 확인하십시오.

Image 4.1: Wiring connections for the speedometer unit and speed sensor.
4.2 속도 센서 설치
- Mount the speed sensor cable securely near the wheel.
- Attach the two provided magnets to the brake disc, ensuring they are positioned 180 degrees apart. This spacing is critical for accurate speed readings.
- Ensure the sensor is aligned with the magnets and has a consistent, small gap for reliable detection.
4.3 Initial Power-Up and Wheel Size Adjustment
After wiring, turn on the ignition. The speedometer is adjustable for various wheel sizes (8-22 inches). Refer to the 'Parameter Settings' section for instructions on how to configure the tire circumference.

그림 4.2: 설치 계획을 위한 제품 치수.
이미지 4.3: Examples of compatible motorcycle types.
5. 사용 설명서
The speedometer features a single button for most operations and settings.
5.1 Operating Interface
- 짧은 보도: Switch between ODO (total mileage) and TRIP (trip mileage).
- Long Press in ODO Mode: Switch between metric (km/h) and imperial (mph) units for speed.
- Long Press in TRIP Mode: Reset the trip mileage.
5.2 Background Parameter Settings
고급 설정에 액세스하려면:
- Press and hold the button while turning on the ignition switch. Keep it pressed for 5 seconds.
- The screen will display "SETUP". Release the button.
- 짧은 보도: Enter the background parameter settings.
- Speed Sensor Magnet Number Setting: The interface "E - 2" will flash (factory setting is 2 magnets). Short press to increase the number by 1 (1 to 9). Long press to save and switch to the next parameter.
- Tire Circumference Setting: The interface will jump to "C - 1902" and flash (factory set tire circumference is 1902 mm). Short press to increase the value. Long press to move the cursor. After setting the fourth digit, long press to switch to the next parameter.
- Engine Stroke Setting: The interface "IP" will flash (factory setting is 1). Short press to switch between 1 - 4.
- After completing all parameter settings, long press the button to exit the parameter setting interface.
If there is no operation on the parameter setting interface for 20 seconds, it will automatically exit and return to the operating interface.
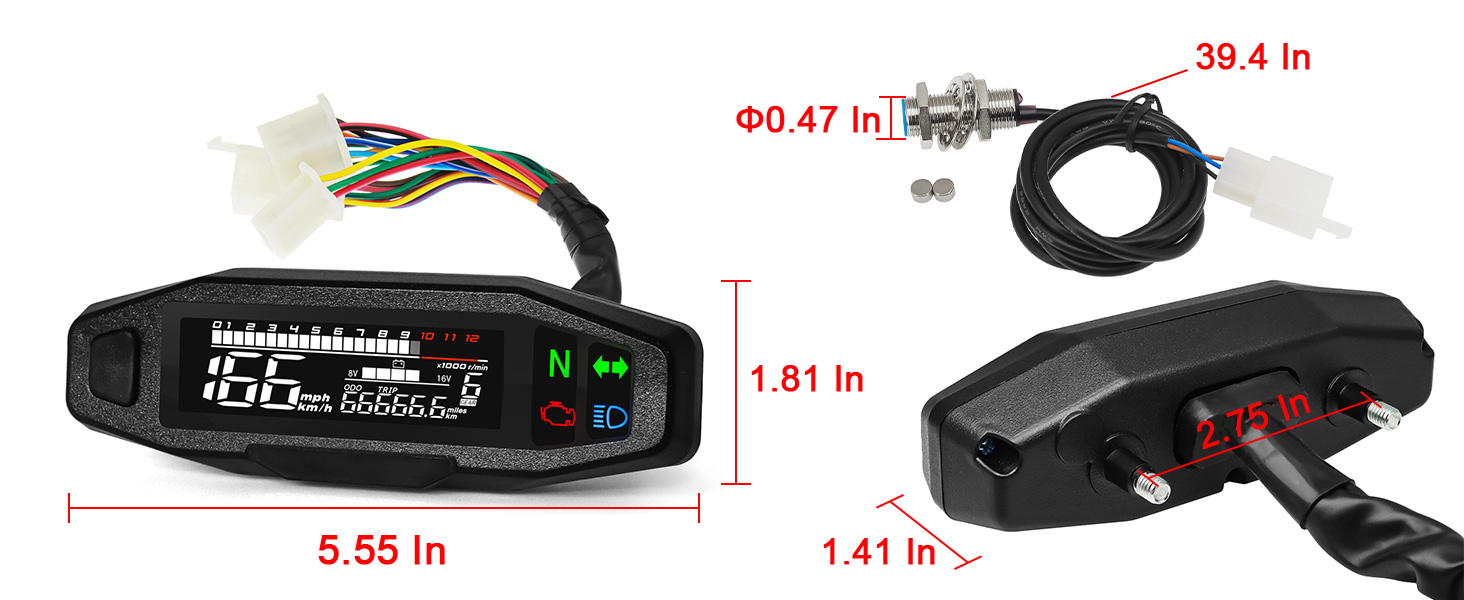
Image 5.1: Detailed instructions for parameter settings.
6. 유지관리
The MAIMEIMI Digital Speedometer is designed for durability and minimal maintenance.
6.1 방수 설계
The unit features a waterproof design, allowing normal operation in rainy conditions. However, avoid prolonged submersion or high-pressure water jets directly on the unit.

Image 6.1: The speedometer's waterproof capability.
6.2 일반 관리
- Clean the screen and housing with a soft, damp 옷감. 연마성 세제를 피하십시오.
- Regularly check wiring connections for security and signs of wear.

Image 6.2: Display visibility in varying light conditions.
7. 문제 해결
7.1 일반적인 문제
- RPM not working: The RPM function is designed for carburetor motors and is not compatible with Electric Fuel Injection (EFI) engines. Verify your engine type.
- 부정확한 속독: Check the speed sensor and magnet placement. Ensure magnets are 180 degrees apart and the sensor gap is consistent. Verify the tire circumference setting in the parameter menu.
- No Display/Intermittent Power: Check all wiring connections according to the diagram in Section 4.1. Ensure the operating voltage는 9~16V 범위 내에 있습니다.
7.2 재설정 절차
The unit includes a reset function for mileage. Note that once a reset is initiated, it cannot be undone.
- Press and hold the button while turning on the ignition switch and keep it pressed for 5 seconds.
- The screen will display "SETUP". Release the button.
- 길게 누르기 : Enter the reset procedure.
- 짧은 보도: This will reduce the total mileage by 200 kilometers. The number of resets will increase by 1.
- 길게 누르기 : Exit the reset procedure.
There are a total of three reset opportunities. If the total mileage is less than 200 kilometers, it will be directly reset. If it exceeds 200 kilometers, each press will reduce it by 200 kilometers.
If there is no action on the setting parameter buttons for 20 seconds, the system will automatically exit.
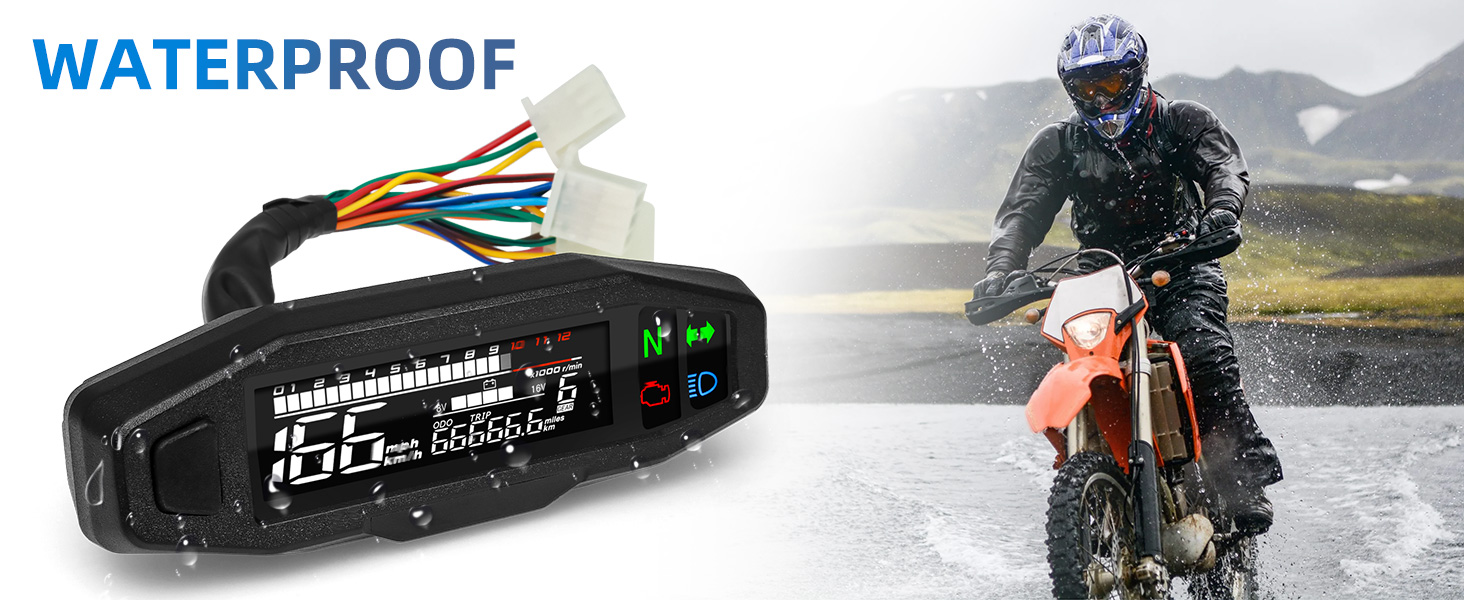
Image 7.1: Detailed instructions for the reset procedure.
8. 보증 및 지원
보증 정보 및 기술 지원은 판매자 또는 제조업체에 직접 문의하십시오. 구매 영수증을 보관하여 구매 증빙 자료로 활용하십시오.


