1. 서론
This manual provides detailed instructions for assembling, operating, and maintaining your ROBOTIME Sakura Journey 3D Wooden Tram Model Kit. This DIY model building toy features intricate wooden pieces, a movable tram, and integrated LED lighting to create a charming diorama scene.

Image 1.1: The fully assembled ROBOTIME Sakura Journey 3D Wooden Tram Model Kit.
2. 안전 정보
- 이 제품에는 작은 부품이 포함되어 있으며 질식 위험이 있으므로 3세 미만 어린이에게는 적합하지 않습니다.
- Adult supervision is recommended during assembly.
- Handle wooden pieces with care to prevent breakage.
- 화기나 고온의 열원에서 멀리하세요.
- 키트의 어떤 부분도 삼키지 마십시오.
3. 패키지 내용
Verify that all components are present before beginning assembly. The kit includes:
- Pre-cut wooden sheets for the tram, scenery, and base.
- LED light components.
- 조립 설명서.
- Other small accessories for decoration.

이미지 3.1: 이상view of the kit contents, showing the wooden sheets and instruction manual.
4. 설치 및 조립
Assembly instructions are included within the kit. Follow the step-by-step diagrams carefully. No glue is typically required for ROBOTIME kits, as pieces are designed to interlock. However, for added stability, a small amount of wood glue may be used on non-moving parts if desired.
4.1 준비
- 밝고 평평한 작업 공간을 확보하세요.
- Familiarize yourself with the instruction booklet and identify all parts.
- Have a Type C cable and a 5V charging head ready for the LED lights (not included).
4.2 조립 단계
- Carefully detach each wooden piece from its sheet. Use a craft knife if necessary to ensure clean breaks.
- Follow the numbered steps in the instruction manual to connect the pieces. Pay close attention to the orientation of each part.
- Assemble the tram body, ensuring all internal details and figures are correctly placed.
- Integrate the LED light wiring as indicated in the instructions. Ensure connections are secure.
- Construct the base and surrounding scenery, including the sakura trees and railway crossing.
- Attach the tram to the base, allowing for its movable function.
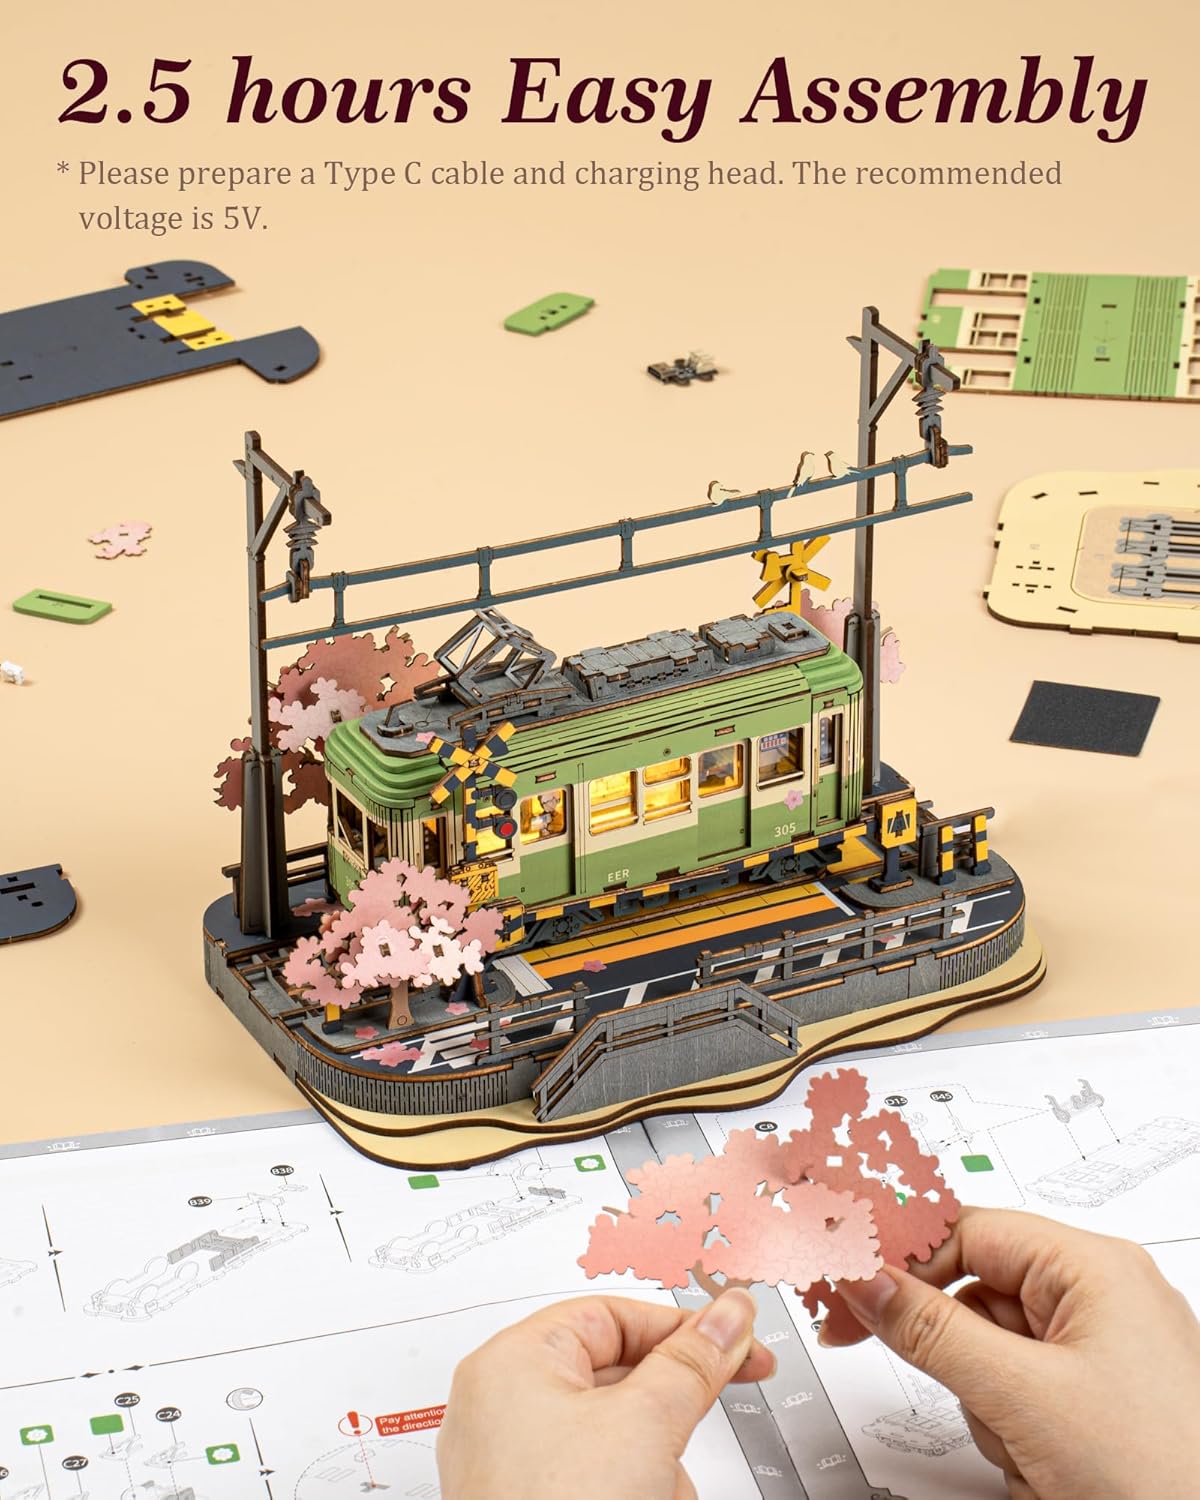
이미지 4.1: 전ample of the assembly process, highlighting the detailed wooden components.
Video 4.1: Official ROBOTIME assembly demonstration for the Sakura Tram TGS02 model. This video illustrates the step-by-step construction and highlights key features of the finished product, including the LED lights and movable tram.
5. 모델 작동
5.1 LED 조명
To activate the LED lights, connect a Type C cable (not included) to the designated port on the model and plug it into a 5V power source. The lights illuminate the interior of the tram, enhancing the diorama's ambiance.

Image 5.1: The model showcasing its LED lights, movable tram, and detailed sakura trees.
5.2 Movable Tram
The tram is designed to be movable along its track on the base. Gently slide the tram back and forth to simulate movement. Avoid excessive force to prevent damage to the wooden components.
6. 유지관리
- 청소: Use a soft, dry cloth or a small brush to gently remove dust from the model. Avoid using water or cleaning solutions, as they may damage the wood.
- 저장: 나무의 변형이나 변색을 방지하기 위해 모형은 직사광선과 급격한 온도 변화를 피해 건조한 곳에 보관하십시오.
- 손질: Always handle the model by its base to minimize stress on delicate parts.
7. 문제 해결
- 부서진 조각들: If a wooden piece breaks during assembly, wood glue can be used to repair it. Allow sufficient drying time.
- LED 조명이 작동하지 않음:
- Ensure the Type C cable is securely connected to both the model and a 5V power source.
- 전원 공급 장치가 정상적으로 작동하는지 확인하십시오.
- Verify that all internal wiring connections within the model are correctly made as per the instructions.
- 부품이 맞지 않음: Ensure you are using the correct parts for each step. Some pieces may require gentle pressure to fit, but avoid forcing them to prevent damage. Refer to the instruction diagrams for clarification.
8. 사양
| 특징 | 세부 사항 |
|---|---|
| 모델 번호 | RBT-TGS02 |
| 제품 치수 | 9 x 5.5 x 0.04 inches (assembled size will be larger) |
| 품목 무게 | 1.3파운드 |
| 제조업체 권장 연령 | 0 - 10 years (Note: Product description suggests 'Adults', please refer to packaging for definitive age guidance) |
| 재료 | 목재 |
| 조명 | Integrated LED (requires external 5V Type C power source, not included) |

Image 8.1: Visual representation of the assembled model's dimensions.
9. 보증 및 지원
For information regarding product warranty, returns, or technical support, please refer to the contact details provided on the product packaging or the official ROBOTIME web사이트. 구매 증빙 자료로 구매 영수증을 보관하세요.


