1. 서론
Thank you for choosing the Geek Smart L7 Robot Vacuum and Mop. This device is designed to provide efficient and thorough cleaning for your home, combining powerful vacuuming with intelligent mopping capabilities. Featuring advanced LDS navigation, Wi-Fi connectivity, and smart app control, the L7 ensures a customized cleaning experience for various floor types, including carpets and hard floors.
This manual provides essential information for the safe operation, setup, maintenance, and troubleshooting of your robot vacuum. Please read it carefully before use and retain it for future reference.
2. 안전 지침
To reduce the risk of injury or damage, read and follow all safety precautions when setting up, using, and maintaining your robot vacuum.
- 이 기기는 8세 이상의 어린이와 신체적, 감각적 또는 정신적 능력이 저하된 사람이나 경험과 지식이 부족한 사람이 사용할 수 있습니다. 단, 이 경우에도 기기를 안전하게 사용하는 방법에 대한 감독이나 지시를 받고 관련 위험을 이해한 경우에 한합니다.
- 어린이가 이 제품을 가지고 놀지 못하도록 감독해야 합니다.
- 어린이가 감독 없이 청소 및 사용자 유지관리를 해서는 안 됩니다.
- 제조사에서 제공한 정품 전원 어댑터만 사용하십시오.
- 화염이나 인화성 물질이 있는 환경에서 로봇을 사용하지 마십시오.
- 머리카락, 느슨한 옷, 손가락 및 신체의 모든 부분을 구멍이나 움직이는 부품에서 멀리 두십시오.
- 유아나 어린이가 잠자는 방에서는 로봇을 작동시키지 마십시오.
- 로봇을 사용하여 큰 파편, 액체 또는 불타는 물체를 집어 올리지 마십시오.
- Ensure the robot is placed on a stable surface and cannot fall from high places.
- Turn off the robot and unplug the charging dock before cleaning or maintenance.
3. 패키지 내용
포장을 풀 때 모든 구성품이 들어 있고 상태가 양호한지 확인하세요.
- Geek Smart L7 Robot Vacuum and Mop
- 충전 도크
- 전원 어댑터
- 사이드 브러시(2쌍)
- 메인 브러쉬
- Dust Bin (680ML)
- 2-in-1 Water Tank & Dust Bin (350ML water tank & 260ML dust bin)
- 걸레 (2)
- High-Efficiency Filter (pre-installed in dust bin)
- 청소 도구
- 사용자 설명서
4. 제품 오버view
로봇 청소기 부품

Image: The Geek Smart L7 Robot Vacuum, showcasing its top view with control buttons, LDS sensor, and accompanying accessories like the charging dock and replacement filters.
- LDS Navigation Sensor: Located on top, for precise mapping and navigation.
- 제어 버튼: 전력/청소, 가정/충전.
- 앞범퍼: 장애물을 감지합니다.
- 사이드 브러시: 쓰레기를 주요 수풀 통로로 쓸어 넣으세요.
- 메인 브러시: 먼지와 이물질을 모읍니다.
- 구동 바퀴: 다양한 표면에서 움직일 수 있도록 합니다.
- 충전 연락처: 충전 도크에 연결하세요.
- Dust Bin / Water Tank: Removable compartments for dust collection and water for mopping.
충전 도크
The charging dock provides power to recharge the robot's battery. It should be placed in an open area with sufficient clearance.
5. 설정
5.1 충전 도크 배치
- 충전 도크를 개방된 공간의 벽에 기대어 놓으세요.
- 부두 양쪽에 최소 0.5미터(1.6피트), 앞쪽에 1.5미터(4.9피트)의 여유 공간을 확보하십시오.
- 전원 어댑터를 충전 도크에 연결하고 벽면 콘센트에 꽂으세요.
- Ensure the power indicator on the charging dock illuminates.
5.2 초기 충전
- 로봇을 충전 도크에 올려놓고 충전 접점이 제대로 맞물리도록 하십시오.
- The robot will automatically begin charging. Allow it to fully charge before its first use (approximately 4-5 hours).
5.3 앱 연결 및 지도

Image: The Geek Smart L7 Robot Vacuum actively scanning its environment using LDS navigation to create a detailed map, with digital map representations floating above it.
- Download the Geek Smart app from your mobile device's app store (available for iOS and Android).
- 계정을 등록하고 로그인합니다.
- Follow the in-app instructions to add your L7 robot vacuum. This typically involves connecting to the robot's Wi-Fi hotspot and then connecting the robot to your home Wi-Fi network.
- Once connected, initiate a full cleaning cycle. The robot will use its LDS navigation to create an accurate map of your home. This map will be saved in the app for future use, allowing for features like selective room cleaning and setting no-go zones. The robot can save up to 5 different maps.
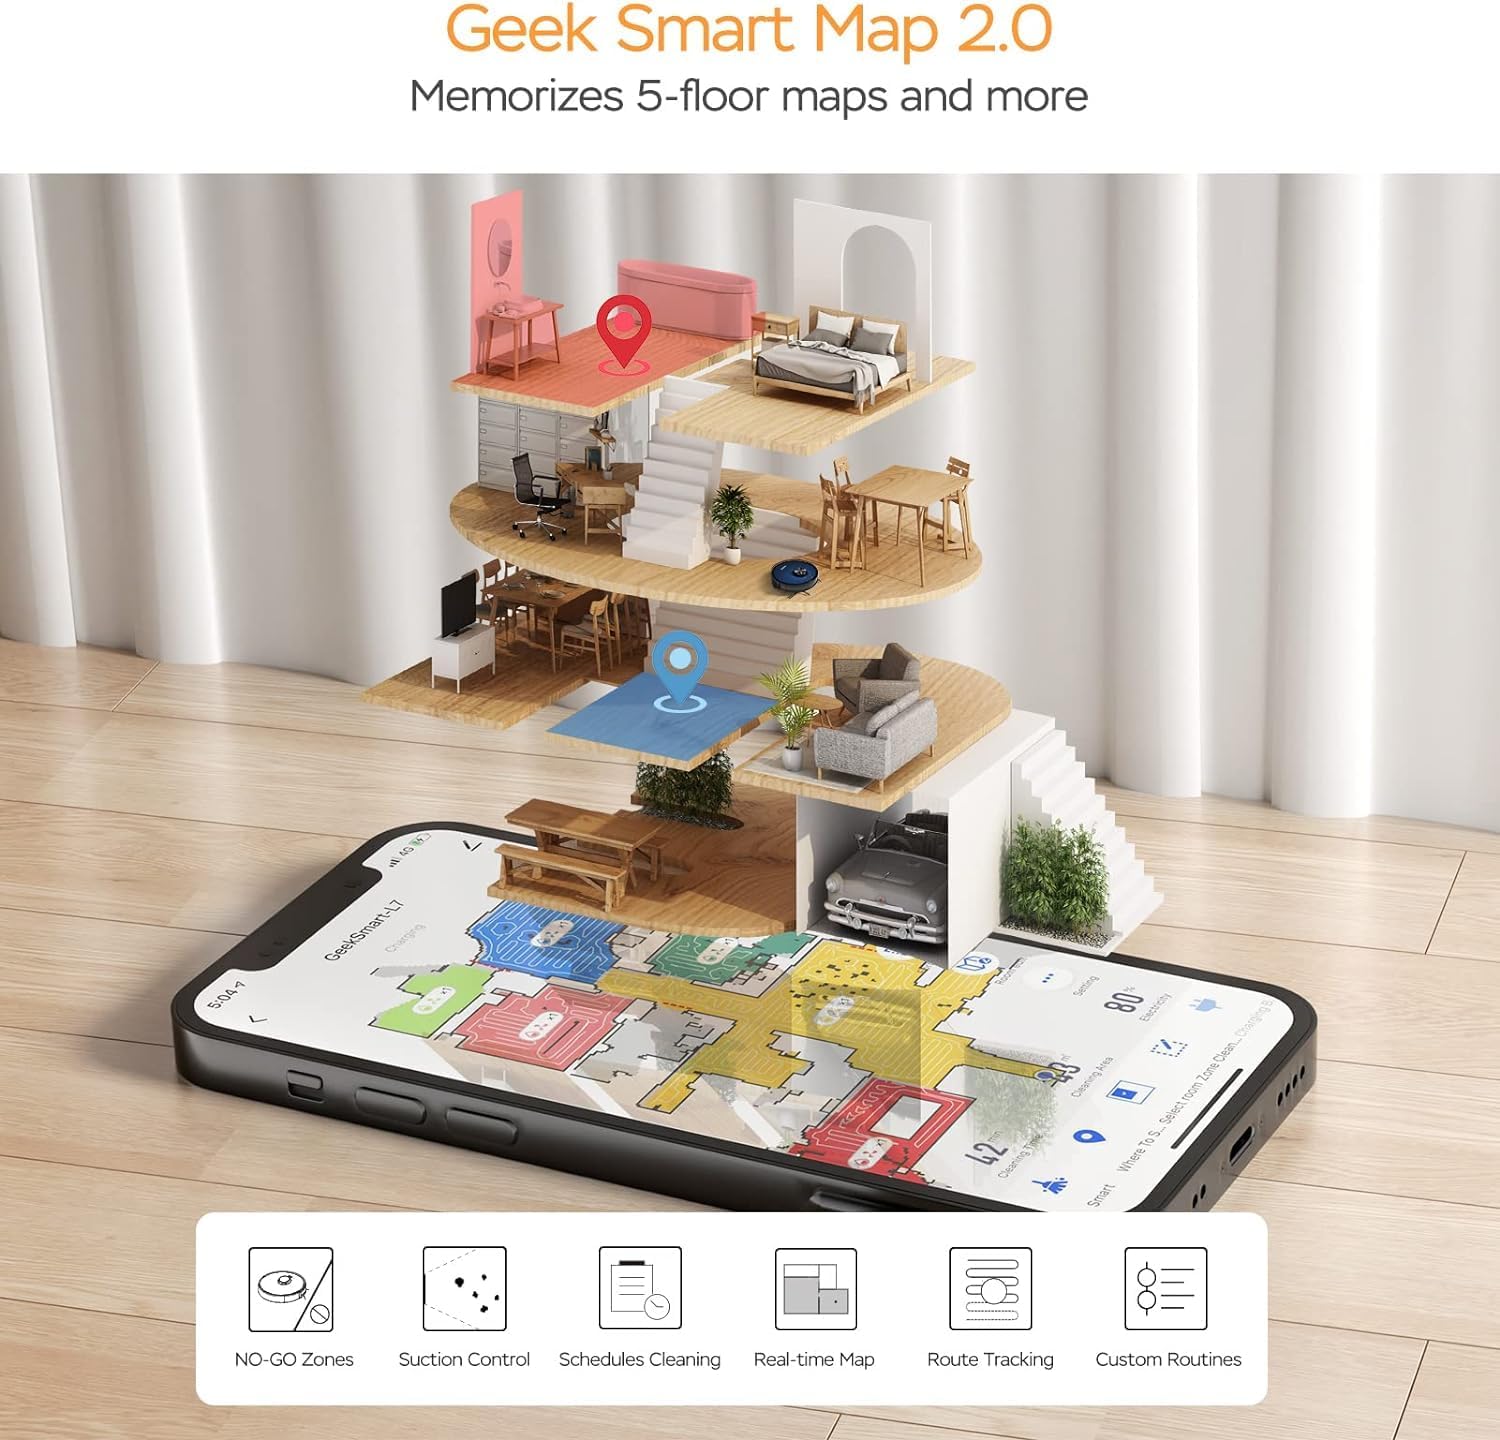
Image: A smartphone screen displaying the Geek Smart app interface, showing a color-coded floor plan map with various cleaning zones and controls.
6. 사용 설명서
6.1 청소 시작 및 중지
- 청소 시작: Press the Power/Clean button on the robot or tap "Start Cleaning" in the app. The robot will begin a full cleaning cycle.
- 청소 일시 중지: Press the Power/Clean button during operation or tap "Pause" in the app.
- 이력서 정리: Press the Power/Clean button again or tap "Resume" in the app.
- 부두로 돌아가기: Press the Home/Recharge button on the robot or tap "Recharge" in the app. The robot will return to its charging dock.
6.2 청소 모드
The L7 offers various cleaning modes to suit different needs.

Image: The Geek Smart L7 Robot Vacuum demonstrating its 2-in-1 sweeping and mopping capabilities on a hard floor, with debris being swept and a damp mop trail visible.
- 자동 청소: The robot intelligently plans its cleaning path using LDS navigation.
- 진공 청소: Utilizes up to 2700Pa suction power to clean dirt and debris from various surfaces.
- 걸레질: Attach the mop cloth and fill the 2-in-1 water tank. The electronic water tank allows for adjustable water output.
- 진공 청소 및 물걸레질 (동시): The robot can vacuum and mop simultaneously when the 2-in-1 tank is installed.
- 카펫 부스트 모드: The robot automatically increases suction power when it detects carpeted areas for deeper cleaning.

Image: The Geek Smart L7 Robot Vacuum actively cleaning a hard floor, with a visual representation of its powerful 2700Pa suction lifting debris.

Image: The Geek Smart L7 Robot Vacuum transitioning from a hard floor to a carpet, illustrating its Carpet Boost Mode with enhanced suction indicated by glowing lines.

Image: The Geek Smart L7 Robot Vacuum positioned on a floor split between marble and wood, illustrating its integrated mopping system and adjustable water output for different surfaces.
6.3 앱 제어 기능
The Geek Smart app unlocks advanced cleaning customization.
- 특정 객실 청소: Choose specific rooms or areas on the map for cleaning.
- No-Go Zones / No-Mop Zones: Draw virtual boundaries on the map to prevent the robot from entering certain areas or mopping carpets.
- Invisible Walls: Create virtual walls to restrict the robot's movement.
- 일정: Set cleaning schedules for automatic operation at desired times.
- 흡입력 조절: Manually adjust the suction level.
- 물 배출량 조절: Control the water flow for mopping.

Image: The Geek Smart L7 Robot Vacuum operating quietly (65dB) in a living room, demonstrating its low noise level suitable for homes with sleeping individuals or pets.
7. 유지관리
정기적인 유지 관리는 로봇 청소기의 최적 성능을 보장하고 수명을 연장합니다. 유지 보수를 하기 전에는 항상 로봇의 전원을 끄고 충전 도크의 플러그를 뽑으십시오.
7.1 먼지통 비우기
- 먼지통 분리 버튼을 누르고 먼지통을 당겨 빼내세요.
- Open the dust bin cover and empty the contents into a trash can.
- 제공된 청소 도구 또는 부드러운 브러시를 사용하여 필터와 먼지통을 청소하십시오.
- 먼지통을 다시 설치하십시오.
7.2 Cleaning the 2-in-1 Water Tank & Dust Bin
- 로봇에서 2-in-1 탱크를 제거합니다.
- Empty any remaining water from the water tank compartment.
- 먼지통을 비우고 필터를 청소하십시오.
- Rinse the water tank compartment with clean water. Do not immerse the entire tank in water, especially the electronic components.
- Allow all parts to air dry completely before reassembling and reinstalling.
7.3 메인 브러시 청소
- 로봇을 뒤집고 분리 탭을 눌러 메인 브러시 덮개를 제거하세요.
- 메인 브러시를 들어 올립니다.
- Use the cleaning tool to remove hair and debris tangled around the brush and its bearings.
- 메인 브러시와 덮개를 다시 설치하세요.
7.4 측면 브러시 청소
- 측면 브러시를 위쪽으로 살살 당겨 빼내세요.
- Remove any hair or debris. If brushes are bent, soak them in warm water for a few minutes to reshape.
- Press the brushes back into place until they click.
7.5 센서 및 충전 접점 청소
- Use a clean, dry cloth to wipe the cliff sensors (located on the bottom of the robot), wall sensors (on the side), and the charging contacts on both the robot and the charging dock.
- Ensure the LDS sensor on top is also clean and free of obstructions.
8. 문제 해결
로봇 진공 청소기에 문제가 발생하면 다음 표를 참조하여 일반적인 문제와 해결 방법을 확인하세요.
| 문제 | 가능한 원인 | 해결책 |
|---|---|---|
| 로봇이 켜지지 않음 | 배터리 부족; 전원 스위치 꺼짐 | Place robot on charging dock; Ensure power switch is on. |
| 로봇이 충전할 수 없습니다 | 충전 접점이 더럽습니다. 충전 도크에 전원이 공급되지 않습니다. | 로봇과 도킹 스테이션의 충전 접점을 청소하고, 도킹 스테이션이 전원에 제대로 연결되어 있는지 확인하십시오. |
| 로봇이 자주 멈춘다 | 바닥에 장애물 있음; 절벽 감지 센서가 더러움 | Clear cables and small objects; Clean cliff sensors. |
| 청소 성능이 좋지 않음 | Dust bin full; Brushes tangled; Filter clogged | Empty dust bin; Clean main and side brushes; Clean or replace filter. |
| 물걸레질 기능이 작동하지 않습니다 | Water tank empty; Mop cloth dry; Water outlet clogged | Fill water tank; Moisten mop cloth; Clean water outlet. |
| 앱 연결 문제 | 와이파이 비밀번호가 잘못되었습니다. 라우터가 너무 멀리 떨어져 있습니다. 로봇이 오프라인 상태입니다. | Wi-Fi 자격 증명을 확인하십시오. 로봇을 라우터에 더 가까이 이동시키십시오. 로봇과 라우터를 재시작하십시오. |
9. 사양
| 특징 | 사양 |
|---|---|
| 상표 | 괴짜 스마트 |
| 모델명 | L7 |
| 탐색 유형 | 360° LiDAR |
| 최대 흡입력 | 2700파스칼 |
| 배터리 용량 | 2600mAh |
| 최대 런타임 | 130 분 |
| 먼지통 용량 | 680ml |
| Water Tank Capacity (2-in-1) | 350ml |
| 소음 수준 | Sub-65 dB |
| 제품 치수 | 12.59인치 길이 x 12.59인치 너비 x 3.74인치 높이 |
| 품목 무게 | 13.39파운드 |
| 호환 장치 | 아마존 에코 |
| 한국어: | 764773837187 |
10. 보증 및 지원
Geek Smart products are manufactured to the highest quality standards. For warranty information, technical support, or customer service inquiries, please refer to the contact information provided on the product packaging or visit the official Geek Smart web대지.
보증 청구를 위해 구매 증명서를 보관하십시오.


