1. 서론
The Adiding TBD-56 Solar Outdoor LED Flood Light is a high-performance, solar-powered lighting solution designed for various outdoor applications. Featuring a motion sensor, remote control, and multiple lighting modes, it provides efficient and reliable illumination for areas such as patios, yards, garages, and fences. This manual will guide you through the proper setup, operation, and maintenance of your new solar flood light.
2. 안전 정보
- Ensure the product is installed securely to prevent falling.
- Do not submerge the light or solar panel in water. While water-resistant, prolonged submersion can cause damage.
- Keep the solar panel clean from dust, dirt, and debris to ensure optimal charging efficiency.
- Avoid installing the light near other strong light sources, as this may interfere with the motion sensor's functionality.
- Install the light with the vent holes facing downwards to allow for proper water drainage and prevent internal fogging. Do not install upside down or at an angle that traps water.
3. 패키지 내용
모든 품목이 들어 있는지 확인하려면 패키지를 확인하세요.
- 태양광 패널 (4개)
- Motion Sensor Light (4 units)
- Remote Controller (2 units)
- Installation Accessories (4 sets)

Image: Contents of the Adiding Solar Outdoor LED Flood Light 4-pack, showing the lights, solar panels, and remote controls.
4. 제품 특징
- 슈퍼 밝은 조명: Equipped with 202 high-quality LED beads, providing approximately 2800 lumens of brightness and 6500K daylight white light. Offers up to a 180° lighting angle for wide illumination.
- 고전환 태양광 패널: Efficiently converts solar energy into electricity, ensuring long working times.
- Remote Control & 3 Lighting Modes: Easily switch between lighting modes using the included remote control.
- 민감한 모션 센서: Detects motion to activate high brightness, enhancing security and convenience.
- 내구성 및 내후성: IP65 waterproof rating, frost-resistant, and heat-resistant, suitable for various weather conditions.
- 유연한 설치: Features a 16.5 ft detachable cable for separate mounting of the solar panel and light, or can be installed as an integrated unit.

Image: Illustration of the upgraded solar panel's 20% high conversion rate, indicating a 4-hour charging time for 400-500 detection cycles.
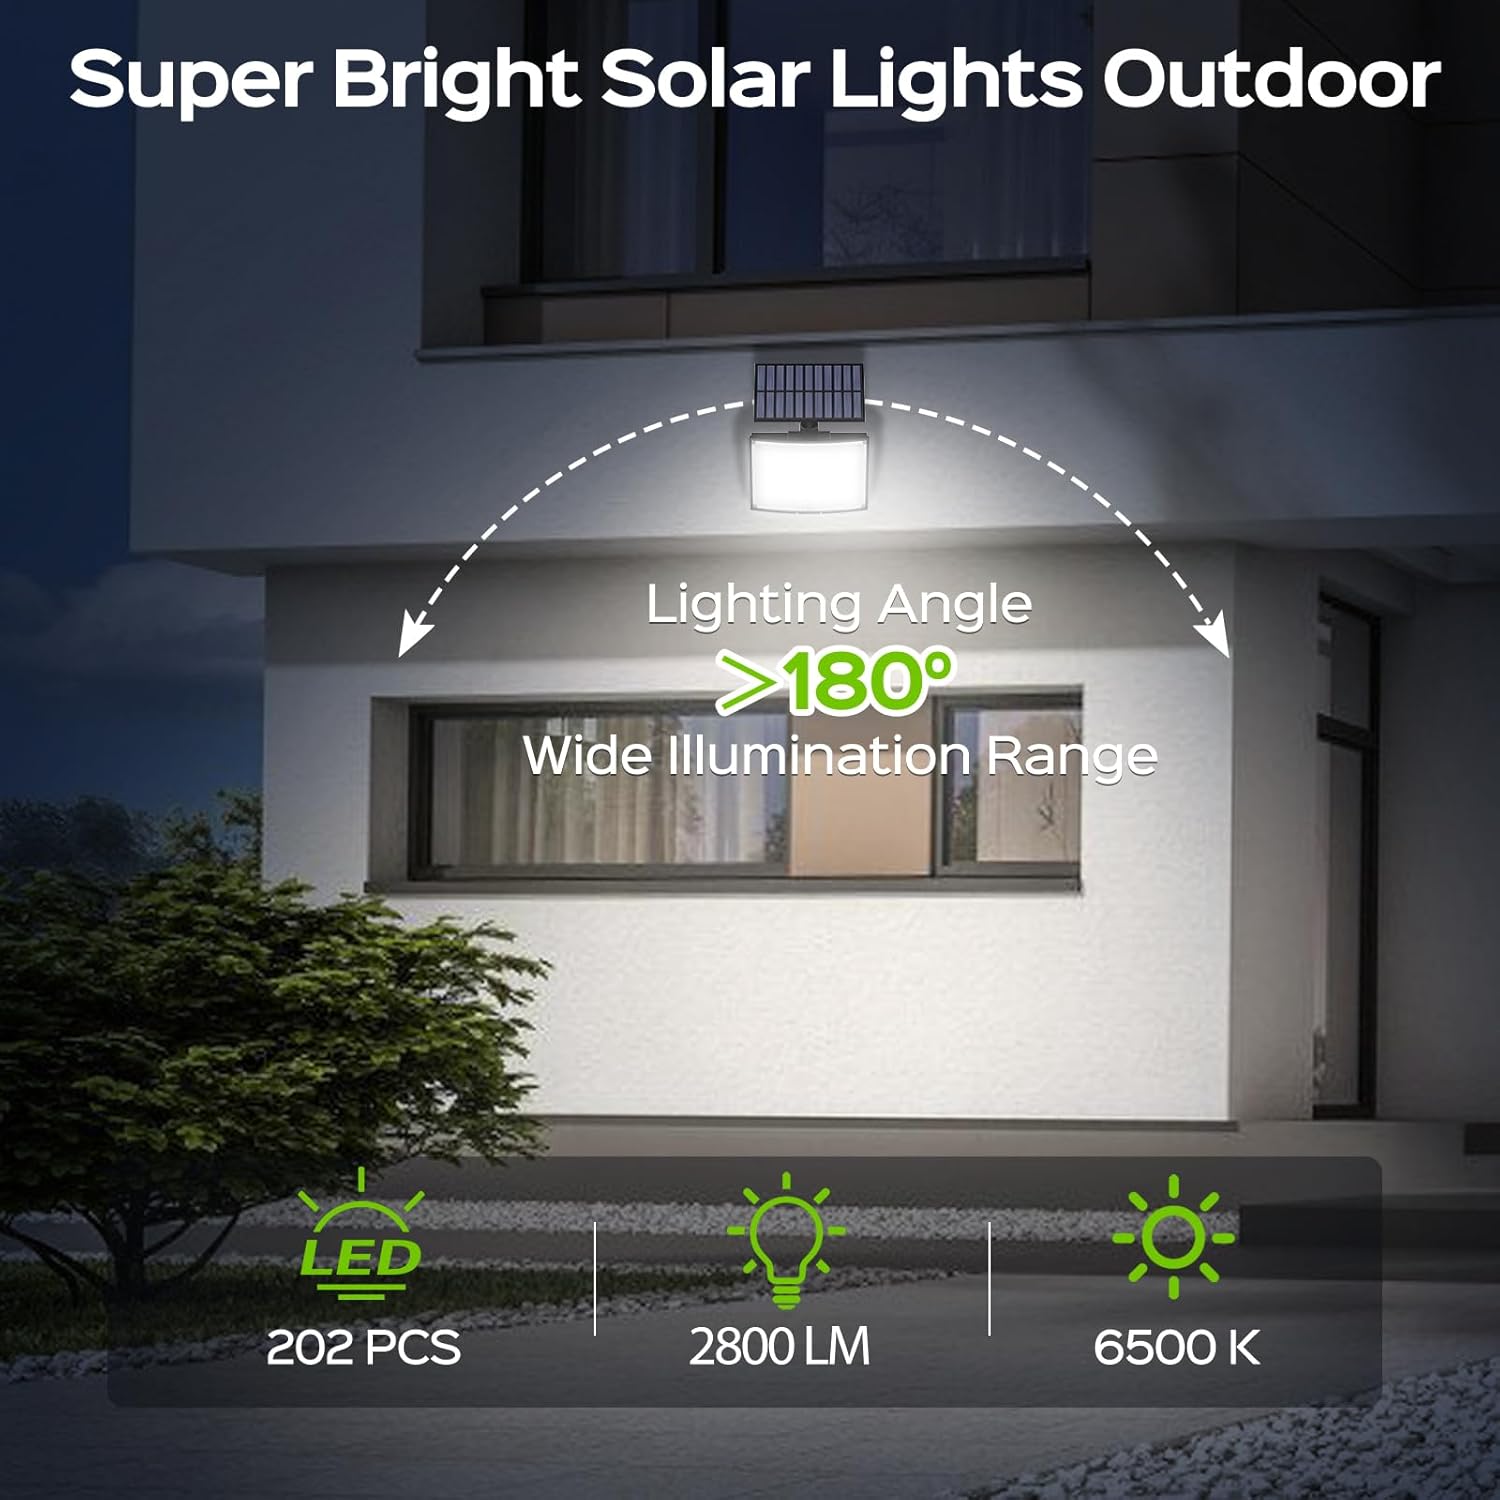
Image: Visual representation of the super bright outdoor solar lights, highlighting 202 LED beads, 2800 lumens, 6500K daylight, and a wide 180-degree lighting angle.

Image: Depiction of the upgraded motion sensor's 120-degree detection angle, illustrating its effectiveness as a car approaches a garage.
5. 설정 및 설치
5.1 초기 설정
- 초기 청구 : Upon receiving the solar light, connect the solar panel to the light unit. Place the solar panel in direct sunlight for 1-2 days to ensure a full initial charge.
- Activate Light Unit: The light is initially in an OFF state. Press the button on the back of the light body to activate it. This enables the light modes and remote control functionality.
- 원격 제어 활성화: Pull out the transparent isolation tab from the bottom of the remote controller to activate its battery.
5.2 설치 방법
The Adiding Solar Flood Light offers two installation options:
- Separated Installation: Use the 16.5 ft cable to mount the solar panel in a location with optimal direct sunlight, and the light unit in your desired area, even if it's shaded.
- 통합 설치: Attach the solar panel directly to the top of the light unit for a compact, all-in-one setup. This is suitable when the light's desired location also receives amp직사광선.

Image: A diagram illustrating the two installation types: integrated, where the solar panel is attached directly to the light, and separated, where the solar panel is connected via a cable.
5.3 장착 단계
- Choose a suitable installation location for the light unit and, if using separated installation, for the solar panel. Ensure the solar panel receives maximum direct sunlight throughout the day.
- 장착 브래킷의 드릴링 지점을 표시하세요.
- Drill holes at the marked positions and insert the provided plastic anchors.
- Secure the mounting bracket(s) to the wall using the screws.
- Attach the light unit and/or solar panel to the secured bracket(s). Adjust the angle as needed.
- If using separated installation, connect the solar panel cable to the light unit.
5.4 중요한 설치 참고 사항
- 정위: The light unit has two small vent holes at the bottom to prevent internal fogging and allow water to drain. Ensure the light is installed in an upright position, with the vent holes facing downwards. Do not install the solar light upside down or at an angle that would trap water.
- Avoid Light Interference: Install the light away from other strong light sources (e.g., streetlights) to ensure the motion sensor functions correctly at night.

Image: A diagram illustrating the correct installation direction for the solar light to allow water drainage from its vent holes, and incorrect orientations that could trap water.
5.5 설치 비디오
Video: Official Adiding video demonstrating the installation process for the solar motion sensor outdoor flood lights, including mounting and connecting the solar panel.
6. 사용 설명서
The Adiding Solar Flood Light is operated using the included remote control. Ensure the remote control's isolation tab has been removed before use.
6.1 리모콘 기능
- 켜기/끄기: 조명 장치를 켜거나 끕니다.
- 모드 1 : Activates Mode 1.
- 모드 2 : Activates Mode 2.
- 모드 3 : Activates Mode 3.
6.2가지 조명 모드
The light features three distinct operating modes:
- Mode 1 (Motion Sensor Only): The light remains OFF until motion is detected. Upon detection, it illuminates at 하이라이트 for approximately 20 seconds, then turns OFF again.
- Mode 2 (Dim + Motion Sensor): The light stays on at a 희미한 빛 level. When motion is detected, it switches to 하이라이트 for approximately 20 seconds, then returns to 희미한 빛.
- Mode 3 (Constant Dim Light): The light remains on at a 희미한 빛 level throughout the night, regardless of motion detection.

Image: A visual guide to Mode 1, showing the light remaining off until motion is detected, then activating to high brightness for 20 seconds before turning off again.

Image: A visual guide to Mode 2, showing the light staying dim, then activating to high brightness for 20 seconds upon motion detection, and finally returning to dim.

Image: A visual guide to Mode 3, showing the light remaining at a low brightness throughout the entire night.
6.3 Operating Modes Video
Video: Official Adiding video demonstrating the different motion sensor lighting modes of the solar outdoor light.
7. 유지관리
- 태양광 패널 청소: 부드러운 천으로 태양광 패널을 정기적으로 닦아주세요.amp cloth to remove any accumulated dust, dirt, or snow. A clean panel ensures maximum sunlight absorption and charging efficiency.
- 연결 확인 중: Periodically inspect the cable connection between the solar panel and the light unit to ensure it is secure and free from damage.
- 일반 청소: Clean the light unit's surface as needed to maintain optimal light output.
8. 문제 해결
| 문제 | 가능한 원인 | 해결책 |
|---|---|---|
| 밤에는 불이 켜지지 않습니다. | 태양광 충전이 부족합니다. | 태양광 패널이 매일 6~8시간 직사광선을 받을 수 있도록 설치하십시오. 태양광 패널을 청소하십시오. |
| 조명 장치가 작동하지 않습니다. | Press the activation button on the back of the light unit. | |
| 리모컨이 작동하지 않습니다. | Remove the transparent isolation tab from the remote. Ensure remote is pointed at the light. | |
| 모션 센서가 감지되지 않습니다. | Obstructions or incorrect installation height. | Clear any obstructions. Ensure installation height is within recommended range (6-10 ft). |
| 빛이 어둡거나 깜빡입니다. | 배터리 충전량이 적습니다. | Allow the solar panel to charge for a full 1-2 days in direct sunlight. Clean the solar panel. |
| Water accumulation inside the light. | Incorrect installation direction. | Re-install the light ensuring the vent holes are facing downwards and the unit is not upside down or at an angle that traps water. |
9. 사양
| 특징 | 세부 사항 |
|---|---|
| 상표 | 애디딩 |
| 모델 번호 | 미정-56 |
| 명도 | 2800 루멘(최대) |
| 색온도 | 6500 켈빈(주광 백색) |
| LED 비드의 수 | 202 |
| 전원 | 태양열 전원 |
| 제어 방법 | 원격 제어 |
| 모션 센서 각도 | 120° |
| 조명 각도 | 최대 180° |
| 케이블 길이 (태양광 패널용) | 16.5 피트 |
| 방수 레벨 | IP65 방수 |
| 재료 | 아크릴로니트릴 부타디엔 스티렌, 폴리카보네이트 |
| 제품 치수 | 6.1인치 길이 x 3.74인치 너비 x 7.68인치 높이 |
| 특별 기능 | Angle Adjustable, Motion Sensor, Solar Powered, Waterproof |
10. 보증 및 지원
Adiding offers 2 years replacement support for this solar outdoor flood light. If you encounter any issues or have questions regarding your product, please contact Adiding US customer service through your order platform. Our professional service team is available 24 hours a day to provide you with the best lighting solutions and support.


