1. 서론
The MARKLIFE P50 Label Maker Machine is a mini portable Bluetooth thermal label printer designed for a wide range of labeling needs. It utilizes thermal printing technology, supporting black and white printing, and is ideal for creating labels for addresses, clothing, jewelry, retail barcodes, small businesses, home organization, and office use. This manual provides comprehensive instructions for setting up, operating, and maintaining your P50 label maker.

Image: The MARKLIFE P50 label maker shown with different types of labels, including a "Thank You" label, a "Grapefruit Juice" label, and rolls of white gap, circle gap, and clear gap labels. An example label shows "Wireless Printer Built-in firewall SUPPORT WDS,WPS 123456".
2. 상자 안에 무엇이 들어있나요?
Upon unboxing your MARKLIFE P50 Label Maker, verify that all components are present:
- MARKLIFE P50 라벨 메이커 기계
- Labels (typically includes 3 tapes: 1.57"x1.18" white gap, 2"x2" circle gap, and 1.57"x0.79" transparent gap labels)
- USB-C 충전 케이블
3. 설정 가이드
3.1 장치 충전
The P50 label maker features a built-in 1200mAh rechargeable battery for portable use. Before first use, ensure the device is fully charged.
- Connect the provided USB-C charging cable to the charging port on the label maker.
- 케이블의 다른 쪽 끝을 호환되는 USB 전원 어댑터(포함되지 않음)나 컴퓨터의 USB 포트에 연결합니다.
- The charging indicator light will show the charging status. Refer to the device's LED indicator guide for specific light behaviors (e.g., solid light for charging, off when fully charged).
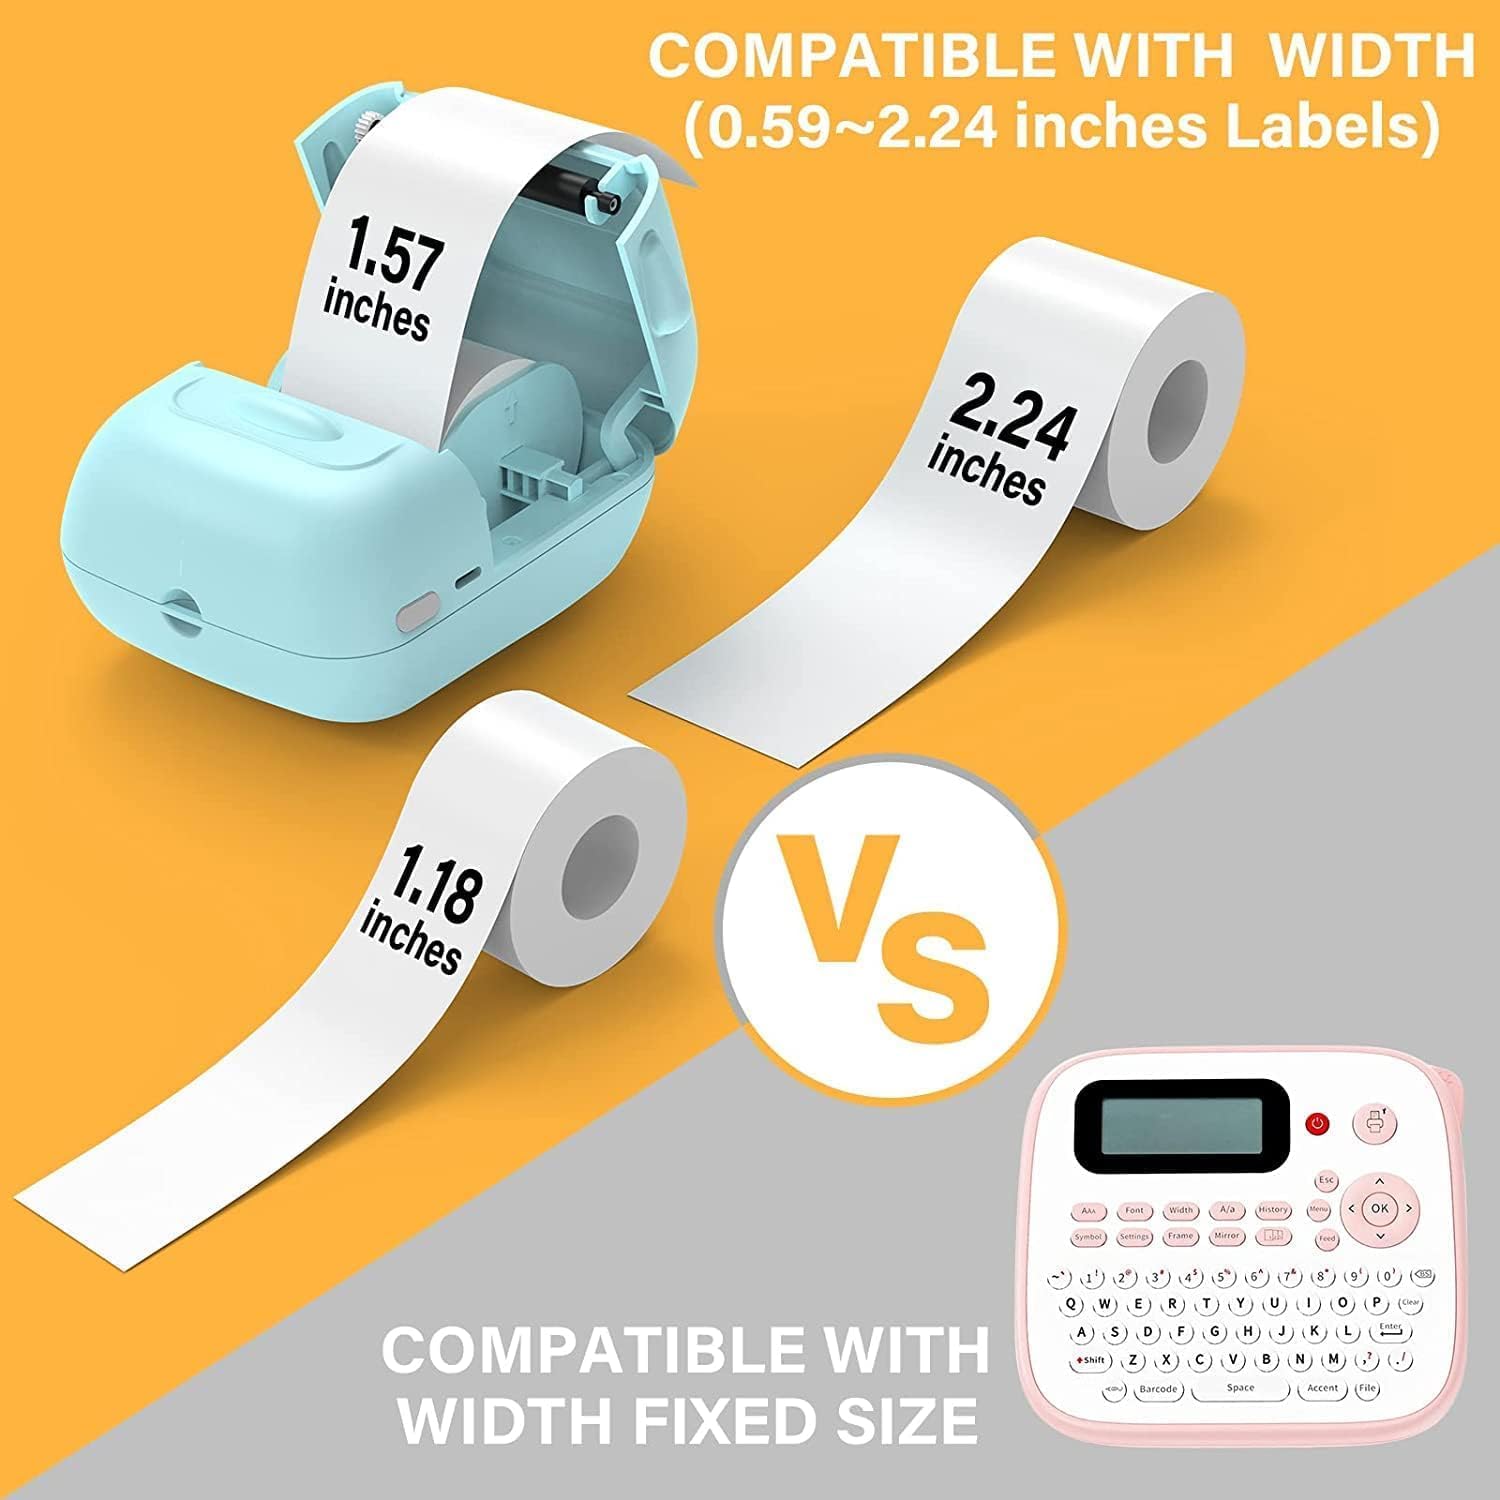
Image: A person placing the compact MARKLIFE P50 label maker into a handbag, highlighting its portability. Icons indicate "Portable", "Built-in 1200mAh Battery", and "Type-c Charging".
3.2 라벨 로딩
The P50 label maker supports label widths ranging from 0.59 inches to 2.24 inches. Ensure you use compatible thermal labels.
- 기기의 라벨 부착함 덮개를 여세요.
- Insert the label roll with the printing surface facing upwards, ensuring the roll is properly seated in the compartment.
- Pull a small portion of the label paper out of the slot, extending it slightly beyond the cutting edge.
- Close the label compartment cover firmly until it clicks into place. The printer will automatically detect the label size.

Image: Three rolls of labels are displayed, illustrating the different sizes available: 1.57"x0.78" (40x20mm) clear gap, 1.57"x1.18" (40x30mm) white gap, and 2"x2" (50x50mm) circle gap labels. The image emphasizes that these rolls "Meet More Needs".
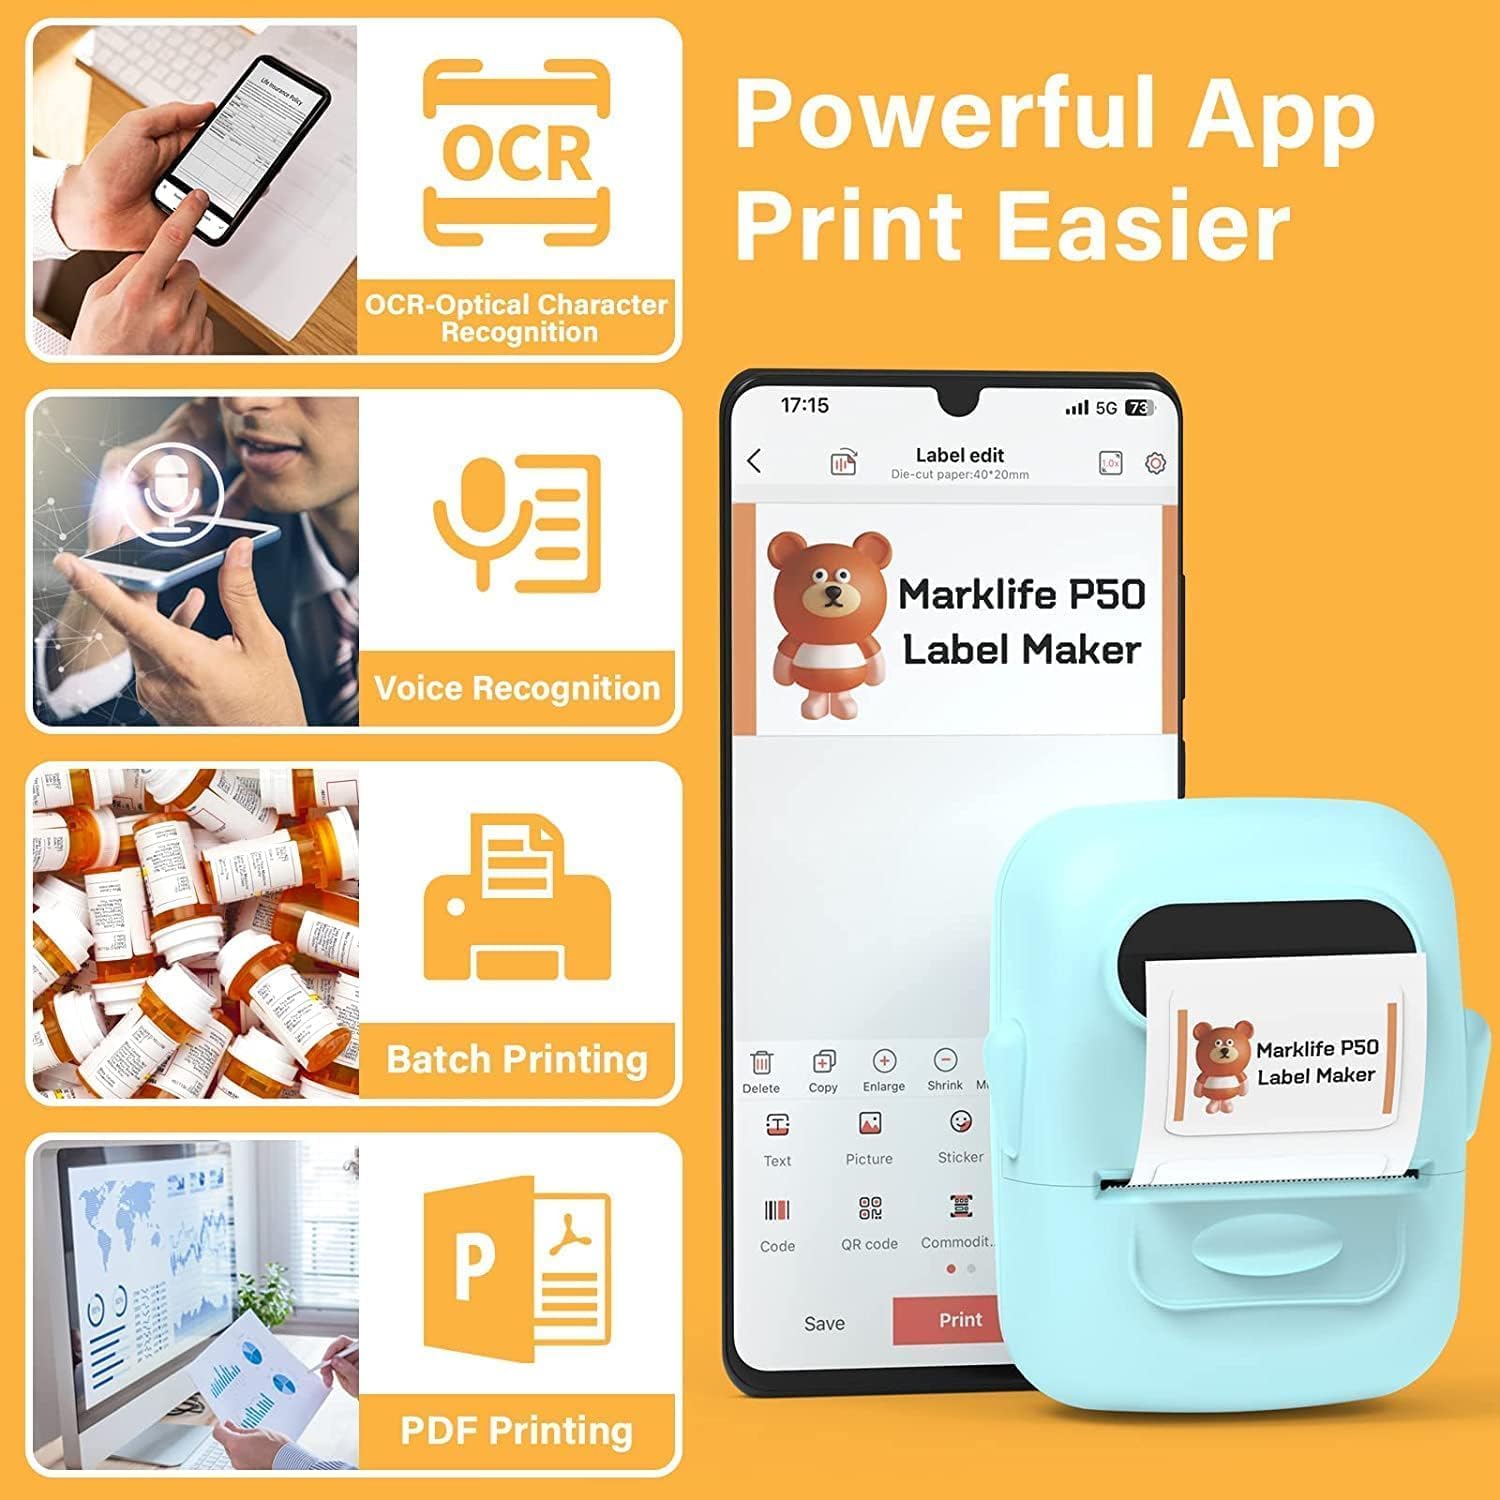
Image: The MARKLIFE P50 label maker is shown with a roll of labels, indicating compatibility with widths from 0.59 to 2.24 inches. It contrasts with a traditional label maker that has a fixed label size.
3.3 Connecting to Your Device (Smartphone/PC)
The P50 label maker offers wireless connectivity via Bluetooth for smartphones and USB connection for Windows PCs.
3.3.1 Smartphone Connection (Bluetooth)
- Download the "Marklife" application from your smartphone's app store (available for Android and iOS).
- 스마트폰에서 Bluetooth가 활성화되어 있는지 확인하세요.
- Turn on the P50 label maker.
- Open the Marklife app. The app will automatically search for and connect to the label maker via Bluetooth 4.0 within approximately 33 feet.
3.3.2 PC 연결(USB)
For Windows PC users, online software is available. Refer to the official MARKLIFE website or the app's help section for download and installation instructions for the PC software.
4. 사용 설명서
4.1 Marklife App Features
The Marklife app provides a powerful and user-friendly interface for label creation:
- OCR(광학 문자 인식): Scan text from images to convert it into editable text for your labels.
- 음성 인식: Convert spoken words into text for quick label input.
- 일괄 인쇄 : Print multiple copies of the same label efficiently.
- PDF 인쇄: PDF 문서에서 바로 라벨을 인쇄하세요.
- 이미지 삽입: Insert your own photos or images onto labels.
- 바코드/QR 코드 생성: Scan existing barcodes to generate new ones or create custom QR codes.
- 템플릿: Access a variety of pre-designed templates for different label types (clothing, price, cable, jewelry, address, ingredients, etc.).

Image: The MARKLIFE P50 label maker is shown printing a long strip of barcode labels, demonstrating its "Batch Printing" capability. An example barcode shown is "123456".

Image: A smartphone screen displays the Marklife app interface, highlighting features such as OCR (Optical Character Recognition), Voice Recognition, Batch Printing, and PDF Printing. The P50 label maker is shown next to the phone, printing a label.
4.2 라벨 생성 및 인쇄
- 라벨 디자인하기: Open the Marklife app and select a template or start a new design. Use the various editing tools to add text, images, barcodes, and other elements.
- 설정 조정: Before printing, you can adjust print density and photo quality settings within the app to enhance the print job.
- 인쇄: Once your design is complete, tap the "Print" button in the app. The label maker will quickly print your label.
- 라벨 자르기: Manually tear or cut the printed label from the printer's output slot.

Image: The MARKLIFE P50 label maker is shown printing a clothing tag with "NAME DRESS SIZE:16S/64A PRICE: $7.00" and a barcode "0123456789005". Other examples include labels on handmade soap and bakery items, demonstrating diverse applications.
5. 유지관리
Proper maintenance ensures the longevity and optimal performance of your MARKLIFE P50 Label Maker.
- 프린트 헤드 청소: 부드럽고 보풀 없는 천으로 감열 프린트 헤드를 정기적으로 가볍게 닦아주세요.ampened with isopropyl alcohol. Ensure the device is off and cool before cleaning.
- 외부 청소: Wipe the exterior of the device with a soft, dry cloth. Avoid using abrasive cleaners or solvents.
- 라벨 보관: Store thermal labels in a cool, dry place away from direct sunlight and heat to prevent premature fading or damage.
- 배터리 관리 : For long-term storage, charge the battery to about 50% and store in a cool, dry place. Recharge every few months to maintain battery health.
6. 문제 해결
If you encounter issues with your P50 label maker, refer to the following common problems and solutions:
| 문제 | 가능한 원인 | 해결책 |
|---|---|---|
| 프린터가 켜지지 않습니다. | 배터리가 부족하거나 충전되지 않았습니다. | Connect the device to a power source using the USB-C cable and charge it. |
| Bluetooth를 통해 연결할 수 없습니다. | Bluetooth is off on phone, app not open, or printer is too far. | Ensure Bluetooth is enabled on your phone, the Marklife app is open, and the printer is within 33 feet. Restart both devices if necessary. |
| 라벨이 없거나 흐릿합니다. | 라벨 롤이 잘못 삽입되었거나(거꾸로 삽입됨) 프린트 헤드가 더럽습니다. | Re-insert the label roll with the printing surface facing up. Clean the thermal print head as described in the Maintenance section. |
| Labels are misaligned or partially printed. | Label roll not properly seated or sliding within the compartment. | Open the label compartment, ensure the roll is pushed to the right and seated firmly. Close the cover. The printer should auto-calibrate. If issues persist, try re-calibrating via the app if available. |
| App crashes or requires frequent restarts for printing. | Software glitch or app cache issue. | Force close the Marklife app and reopen it. Clear the app's cache or reinstall the app if the problem persists. Ensure your phone's operating system is up to date. |
7. 사양
| 특징 | 세부 사항 |
|---|---|
| 상표 | 마크라이프 |
| 모델명 | P50 LABEL PRINTER |
| 인쇄 기술 | 열의 |
| 연결 기술 | 블루투스, USB |
| 최대 미디어 크기 | 2 inches (compatible with 0.59" - 2.24" width labels) |
| 최대 흑백 인쇄 해상도 | 300dpi |
| 프린터 출력 | Monochrome (Black and White) |
| 제어 방법 | 앱 (안드로이드, iOS) |
| 특징 | Lightweight, Portable, Scan function via app |
| 품목 무게 | 1.39파운드 |
| 제품 치수 | 4인치 깊이 x 3인치 너비 x 2인치 높이 |
| 배터리 | Built-in 1200mAh (rechargeable via USB-C) |
8. 보증 및 지원
MARKLIFE products are manufactured to high-quality standards. For warranty information, technical support, or service inquiries, please contact MARKLIFE customer support directly. Details can typically be found on the official MARKLIFE website or within the Marklife application's help section.
보증 청구를 위해 구매 증빙서류를 보관하세요.


