1. 서론
구매해주셔서 감사합니다asing the Audizio Adria DAB/Internet Radio Tuner. This device offers a versatile audio experience, combining Internet Radio, DAB+, FM radio, Bluetooth connectivity, and Spotify Connect. This manual provides essential information for setting up, operating, and maintaining your tuner to ensure optimal performance and longevity.
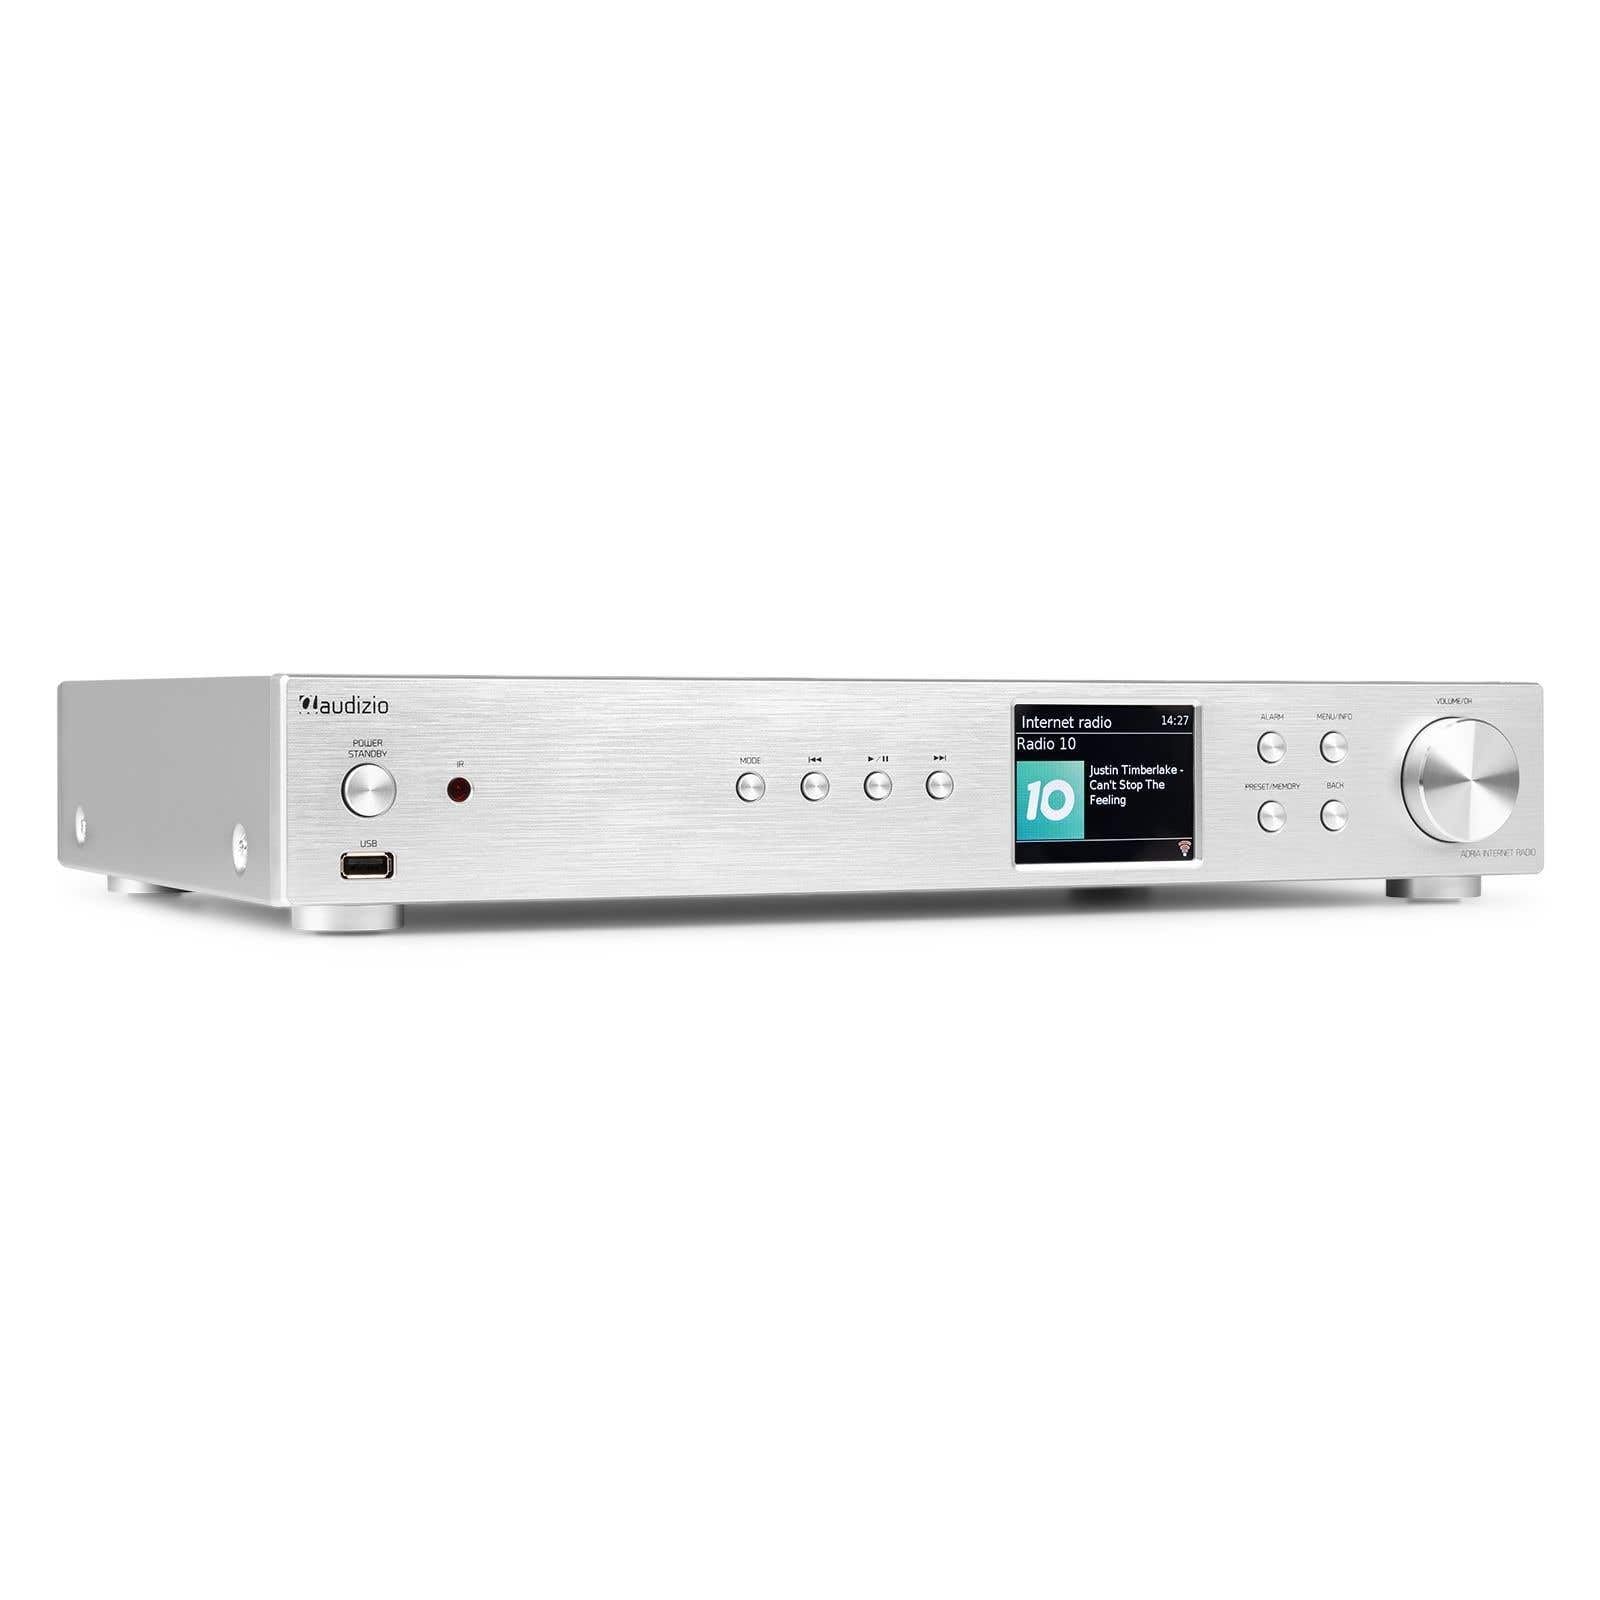
Figure 1.1: Audizio Adria DAB/Internet Radio Tuner with included remote control and antenna.
2. 안전 정보
- 사용하기 전에 모든 지침을 주의 깊게 읽으세요.
- Keep the unit away from water, moisture, and direct heat sources.
- 환기구를 막지 마십시오. 공기가 원활하게 흐르도록 장치 주변에 충분한 공간을 확보하십시오.
- 장치와 함께 제공된 전원 어댑터만 사용하십시오.
- 직접 수리하거나 개조하지 마십시오. 모든 정비는 자격을 갖춘 기술자에게 맡기십시오.
- Dispose of batteries responsibly. The remote control uses 1 AAA battery.
3. 패키지 내용
패키지에 모든 품목이 들어 있는지 확인하세요.
- Audizio Adria DAB/Internet Radio Tuner Unit
- Remote Control (requires 1x AAA battery, included)
- 전원 어댑터
- DAB/FM 안테나
- 사용자 설명서
4. 제품 오버view
4.1 전면 패널

그림 4.1: 전면 패널 제어 및 디스플레이
- Power / Standby Button: 장치를 켜거나 끕니다.
- USB 포트: USB 저장 장치의 미디어 재생용입니다.
- 모드 버튼: Switches between Internet Radio, DAB+, FM, Bluetooth, and Media Player modes.
- 재생/일시 정지 버튼: 미디어 모드에서의 재생을 제어합니다.
- 건너뛰기/튜닝 버튼: 트랙을 탐색하거나 라디오 주파수를 조정합니다.
- 디스플레이 화면: 방송국 정보, 메뉴 및 설정을 표시합니다.
- 알람 버튼: 알람 설정에 접근합니다.
- 메뉴/정보 버튼: Enters menu or displays information.
- Preset/Memory Button: 즐겨찾는 채널을 저장하거나 불러올 수 있습니다.
- 뒤로가기 버튼: 이전 메뉴나 화면으로 돌아갑니다.
- Volume / OK Knob: Rotates to adjust volume or navigate menus; presses to confirm selections.
4.2 후면 패널

그림 4.2: 후면 패널 연결
- 전원 입력: 여기에 제공된 전원 어댑터를 연결합니다.
- DAB/FM 안테나 입력: Connect the included DAB/FM antenna.
- 아날로그 출력(RCA): 에 연결 ampRCA 케이블을 사용하는 앰프 또는 액티브 스피커.
- 보조 입력: Connect external audio sources via a 3.5mm jack.
- USB 충전 포트: 외부 장치를 충전하는 데 사용됩니다.
- 광학 디지털 출력: 에 연결 amplifier or DAC with an optical cable.
- 동축 디지털 출력: 에 연결 amplifier or DAC with a coaxial cable.
5. 설정
5.1 Connecting Power and Antennas
- Connect the supplied DAB/FM antenna to the DAB/FM Antenna Input on the rear panel. Extend the antenna fully for best reception.
- Connect the power adapter to the Power Input on the rear panel, then plug it into a wall outlet.
5.2 오디오 시스템 연결
Choose one of the following methods to connect the Adria tuner to your amp리파이어 또는 액티브 스피커:
- 아날로그 출력(RCA): Use RCA cables to connect the Analog Output ports on the Adria to the corresponding input on your amp리퍼.
- 광학 디지털 출력: Use an optical cable to connect the Optical Digital Output to an optical input on your amplifier 또는 DAC.
- 동축 디지털 출력: Use a coaxial cable to connect the Coaxial Digital Output to a coaxial input on your amplifier 또는 DAC.
5.3 초기 전원 켜기 및 네트워크 설정
- Press the Power/Standby button on the front panel or remote control to turn on the unit.
- The display will show the Audizio logo, then guide you through the initial setup wizard.
- Follow the on-screen prompts to select your language, time zone, and connect to your Wi-Fi network. You will need your Wi-Fi network name (SSID) and password.
- Use the Volume/OK knob to navigate menus and confirm selections.
6. 사용 설명서
6.1 모드 선택
를 누르세요 방법 button on the front panel or remote control to cycle through available modes: Internet Radio, DAB+, FM, Bluetooth, and Media Player (USB).
6.2 인터넷 라디오
Figure 6.1: Internet Radio Mode Display
- Select Internet Radio mode.
- Use the Volume/OK knob to browse stations by location, genre, or search.
- Press the Volume/OK knob to select a station.
- 방송국을 사전 설정으로 저장하려면 다음을 길게 누릅니다. 프리셋/메모리 button. Select a preset number and confirm.
- 사전 설정을 불러오려면 누르세요. 프리셋/메모리 button briefly, then select the desired preset.
6.3 DAB/DAB+ 라디오

Figure 6.2: DAB Radio Mode Display
- Select DAB+ mode. The unit will automatically scan for available stations on first use.
- Use the Volume/OK knob to scroll through the list of stations.
- Press the Volume/OK knob to select a station.
- Saving and recalling presets works the same as for Internet Radio.
6.4 FM 라디오
In FM mode, use the Skip/Tune buttons to manually tune frequencies or press and hold to auto-scan. Saving and recalling presets works the same as for Internet Radio.
6.5 블루투스 연결
- Select Bluetooth mode. The unit will enter pairing mode automatically.
- On your smartphone, tablet, or other Bluetooth device, search for available devices and select "Audizio Adria".
- Once paired, you can stream audio from your device to the tuner.
6.6 스포티파이 커넥트
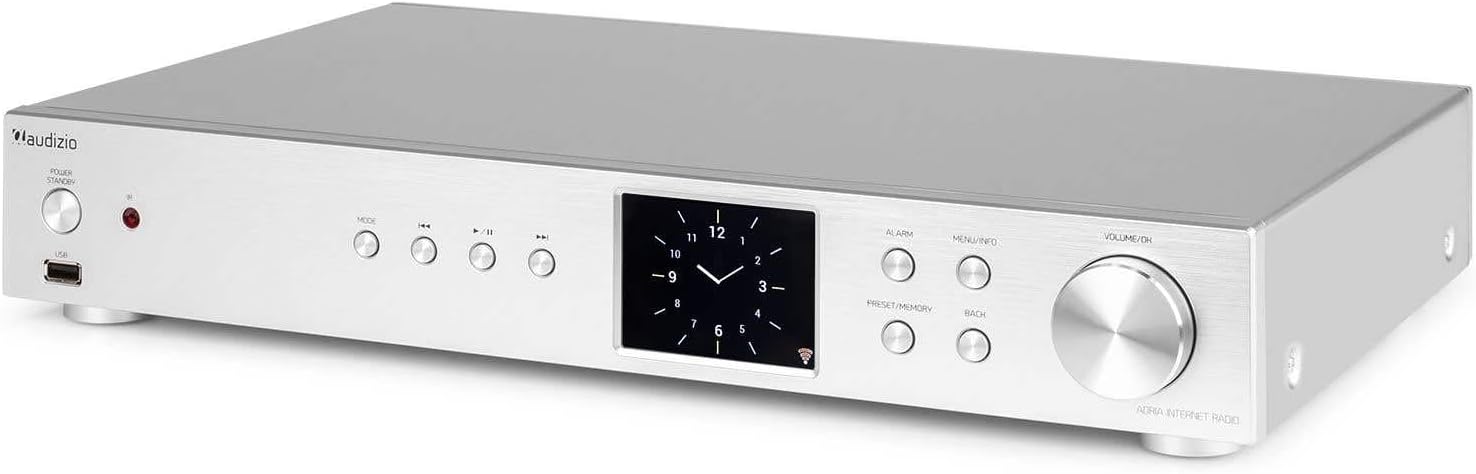
Figure 6.3: Spotify Connect Display
To use Spotify Connect:
- Ensure your Audizio Adria is connected to the same Wi-Fi network as your smartphone or tablet running the Spotify app.
- Open the Spotify app on your device and play a song.
- Tap the "Devices Available" icon (usually a speaker or computer icon) at the bottom of the screen.
- Select "Audizio Adria" from the list of available devices. The music will now play through your tuner.
6.7 알람 기능

Figure 6.4: Clock and Alarm Display
를 누르세요 경보 button to access and set up alarms. You can configure alarm time, source (buzzer, Internet Radio, DAB, FM), and frequency (daily, once, weekends, weekdays).
7. 원격 제어

그림 7.1: 원격 제어 레이아웃
The remote control provides full functionality for operating your Audizio Adria tuner. Ensure the included AAA battery is correctly inserted. Point the remote control directly at the unit's front panel for optimal response.
- 선잠: 일시적으로 경보음을 끕니다.
- 전원 버튼: 장치를 켜거나 끕니다.
- 탐색 버튼(위, 아래, 왼쪽, 오른쪽, 확인): 메뉴 탐색 및 선택을 위해.
- 볼륨+/-: 볼륨을 조정합니다.
- 오시는 길 : 입력 모드를 순환합니다.
- 메뉴: 주 메뉴에 액세스합니다.
- 뒤: 이전 화면으로 돌아갑니다.
- 정보: 현재 역 또는 선로에 대한 자세한 정보를 표시합니다.
- 주사: 라디오 방송국 검색을 시작합니다.
- EQ : 이퀄라이저 설정에 접근합니다.
- 숫자 키패드(0-9): 직접 입력하거나 사전 설정값을 선택할 수 있습니다.
- 사전 설정 : 즐겨찾는 채널을 저장하거나 불러올 수 있습니다.
8. 유지관리
To ensure the longevity and optimal performance of your Audizio Adria tuner, follow these maintenance guidelines:
- 청소: 제품 외부를 닦을 때는 부드럽고 마른 천을 사용하십시오. 연마성 세척제, 왁스 또는 용제를 사용하지 마십시오.
- 통풍: Ensure that the ventilation openings are not blocked. Dust accumulation can be removed with a soft brush or vacuum cleaner.
- 저장: 장기간 보관할 경우, 전원을 분리하고 서늘하고 건조한 곳에 보관하세요.
- 안테나 관리: Handle the antenna gently to avoid damage.
9. 문제 해결
If you encounter issues with your Audizio Adria tuner, consult the following table for common problems and solutions:
| 문제 | 가능한 원인 | 해결책 |
|---|---|---|
| 전원이 없습니다 | 전원 케이블이 연결되지 않았습니다. 전원 콘센트에 결함이 있습니다. | 전원 케이블 연결을 확인하고 다른 콘센트를 사용해 보세요. |
| 소리가 나지 않습니다 | 음량이 너무 작습니다. 잘못된 오디오 출력이 선택되었습니다. amplifier/speakers off or disconnected. | Increase volume; check audio cable connections; ensure amplifier/speakers are on and set to correct input. |
| Wi-Fi에 연결할 수 없습니다 | Incorrect password; weak signal; router issue. | Verify Wi-Fi password; move unit closer to router; restart router. |
| DAB/FM 수신 상태가 좋지 않음 | 안테나가 펼쳐지지 않았습니다. 신호가 약한 지역입니다. | Fully extend and reposition the antenna; consider an external antenna if available. |
| 블루투스 페어링 실패 | 기기가 페어링 모드가 아닙니다. 기기가 너무 멀리 떨어져 있습니다. 간섭이 발생하고 있습니다. | Ensure both devices are in pairing mode; move devices closer; turn off other Bluetooth devices. |
10. 사양
| 특징 | 사양 |
|---|---|
| 상표 | 오디지오 |
| 모델 번호 | 아드리아 |
| 색상 | 은 |
| 디스플레이 크기 | 3.2 인치 |
| 연결 기술 | Optical, Coaxial, Bluetooth |
| 특별 기능 | Bluetooth, Internet Radio, DAB+, FM, Spotify Connect |
| 지원되는 라디오 대역 | DAB, DAB+, FM |
| 전원 | 코드식 전기 |
| 제품 크기(L x W x H) | 43.4 x 7.5 x 31cm |
| 품목 무게 | 3.2 킬로그램 |
| 포함된 구성 요소 | 원격 제어 |
| 호환 장치 | 스마트폰, 태블릿, 노트북 |
11. 보증 정보
This product is covered by a manufacturer's warranty. Please refer to the warranty card included in your package or contact your retailer for specific terms and conditions. Keep your proof of purchase for warranty claims.
12. 지원
For technical assistance, troubleshooting beyond this manual, or service inquiries, please contact Audizio customer support or your local dealer. Contact information can typically be found on the manufacturer's web사이트 또는 구매 문서.


