1. 서론
Thank you for choosing the GenMachine Mini PC. This compact yet powerful computer is designed to deliver exceptional performance for a variety of tasks, including gaming, office productivity, and creative design. Equipped with an AMD Ryzen 7 3750H processor, ample memory, and fast storage, it offers a seamless computing experience. This manual provides essential information for setting up, operating, maintaining, and troubleshooting your new Mini PC.
2. 상자 안에 무엇이 들어있나요?
개봉 시 모든 구성품이 있는지, 그리고 양호한 상태인지 확인해 주십시오.
- 1 x GenMachine Mini PC
- 1 x HDMI 케이블
- 1 x 전원 어댑터
- 1 x 사용자 매뉴얼(이 문서)
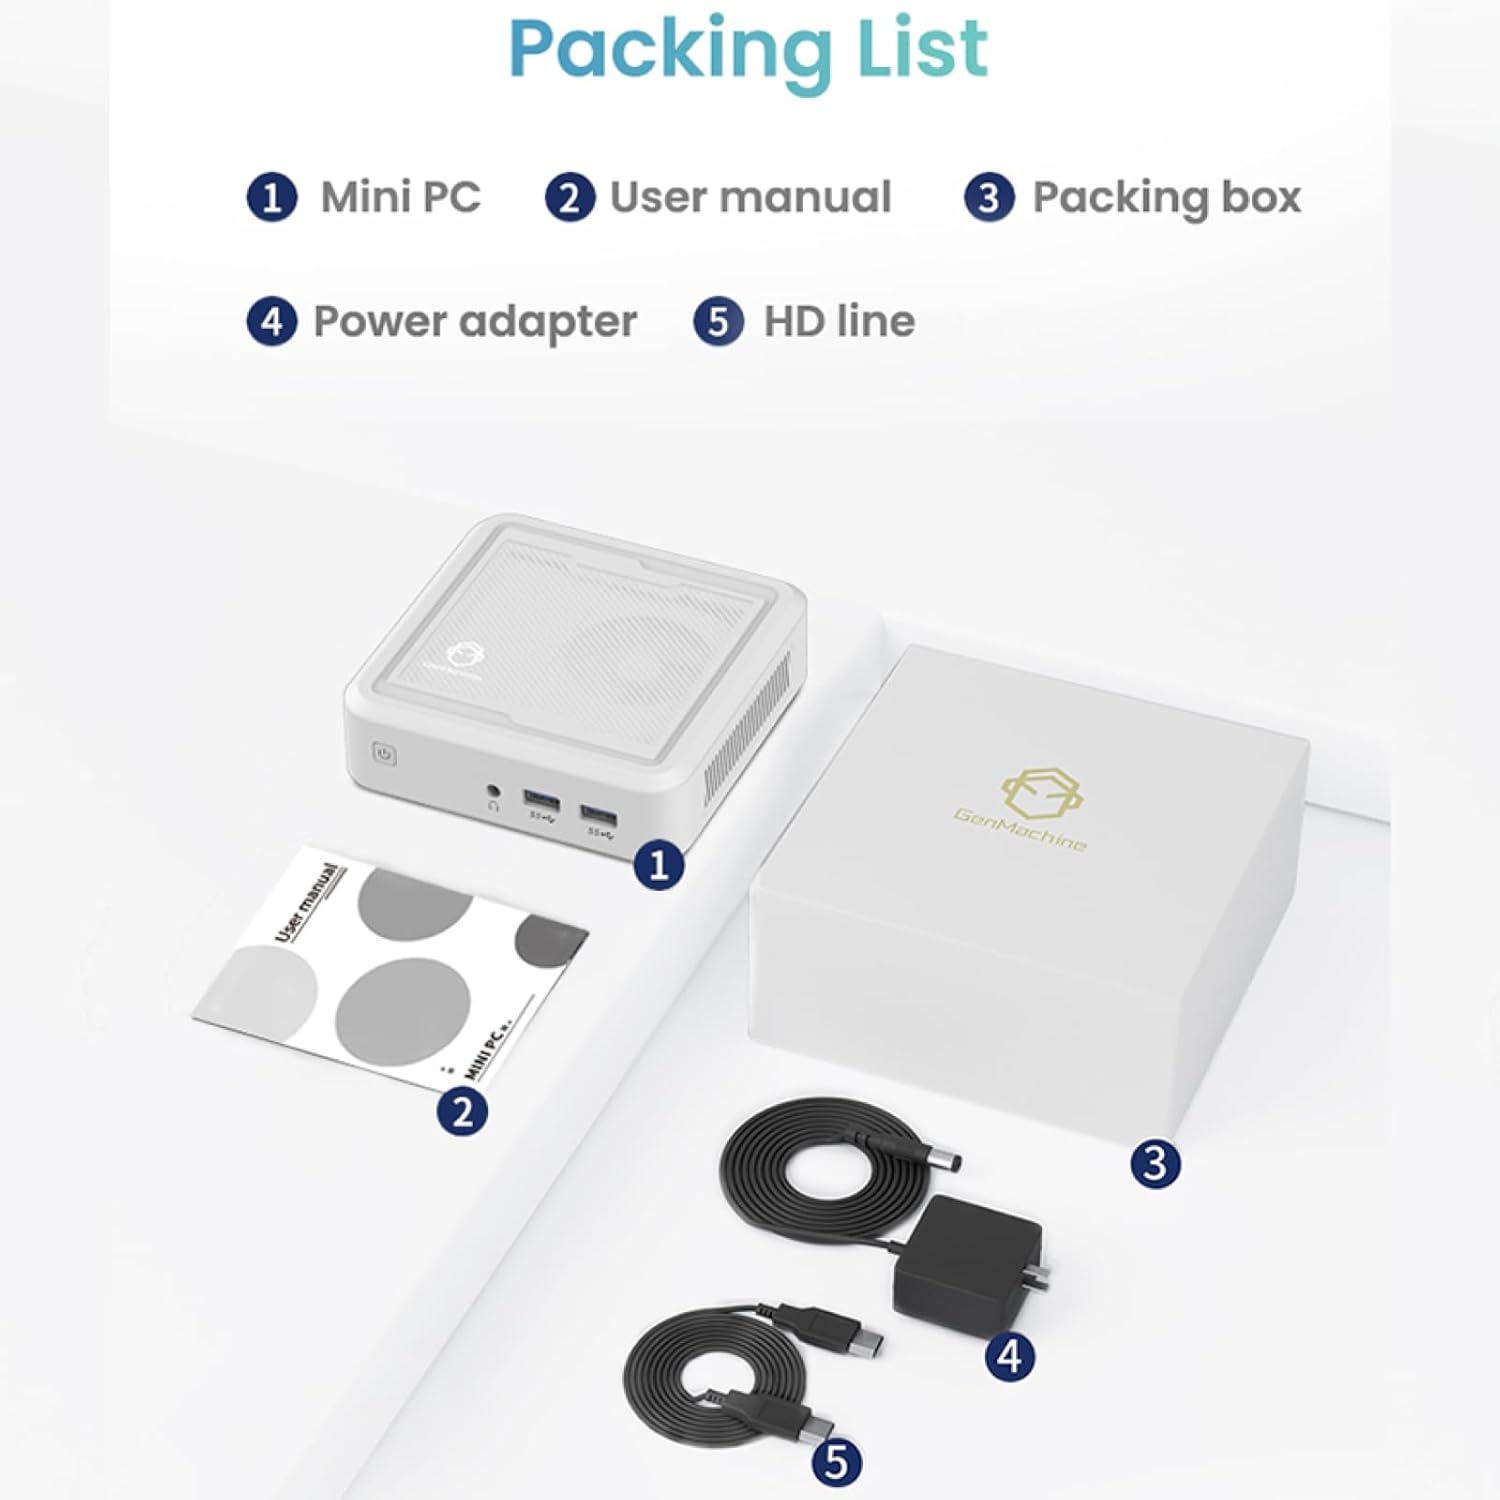
Figure 2.1: Packaging contents of the GenMachine Mini PC.
3. 제품 특징
The GenMachine Mini PC is engineered with features to enhance your computing experience:
- 강력한 성능: Equipped with an AMD Ryzen 7 3750H processor, delivering speeds up to 4.0GHz with 4 cores and 8 threads for demanding tasks.
- Ample Memory and Storage: Features 8GB of DDR4 RAM and a 256GB SSD with M.2 NVMe support for seamless multitasking and quick file 입장.
- 다양한 연결성: Advanced WiFi 6 and Bluetooth 5.2 capabilities ensure high-speed internet and smooth device pairing.
- 컴팩트한 디자인: A sleek, small form factor that fits easily into any workspace or gaming setup.
- 다양한 디스플레이 옵션: HDMI and DisplayPort outputs support dual 4K displays for expanded productivity and immersive visuals.

그림 3.1: 전면 view of the GenMachine Mini PC.
3.1 Rich Interface for Easy Connection
The Mini PC offers a comprehensive set of ports to meet various connectivity needs:
- USB 3.0 x 4
- HDMI x 1
- DisplayPort (DP) x 1
- LAN (Ethernet) x 1
- 3.5mm 오디오 잭 1개
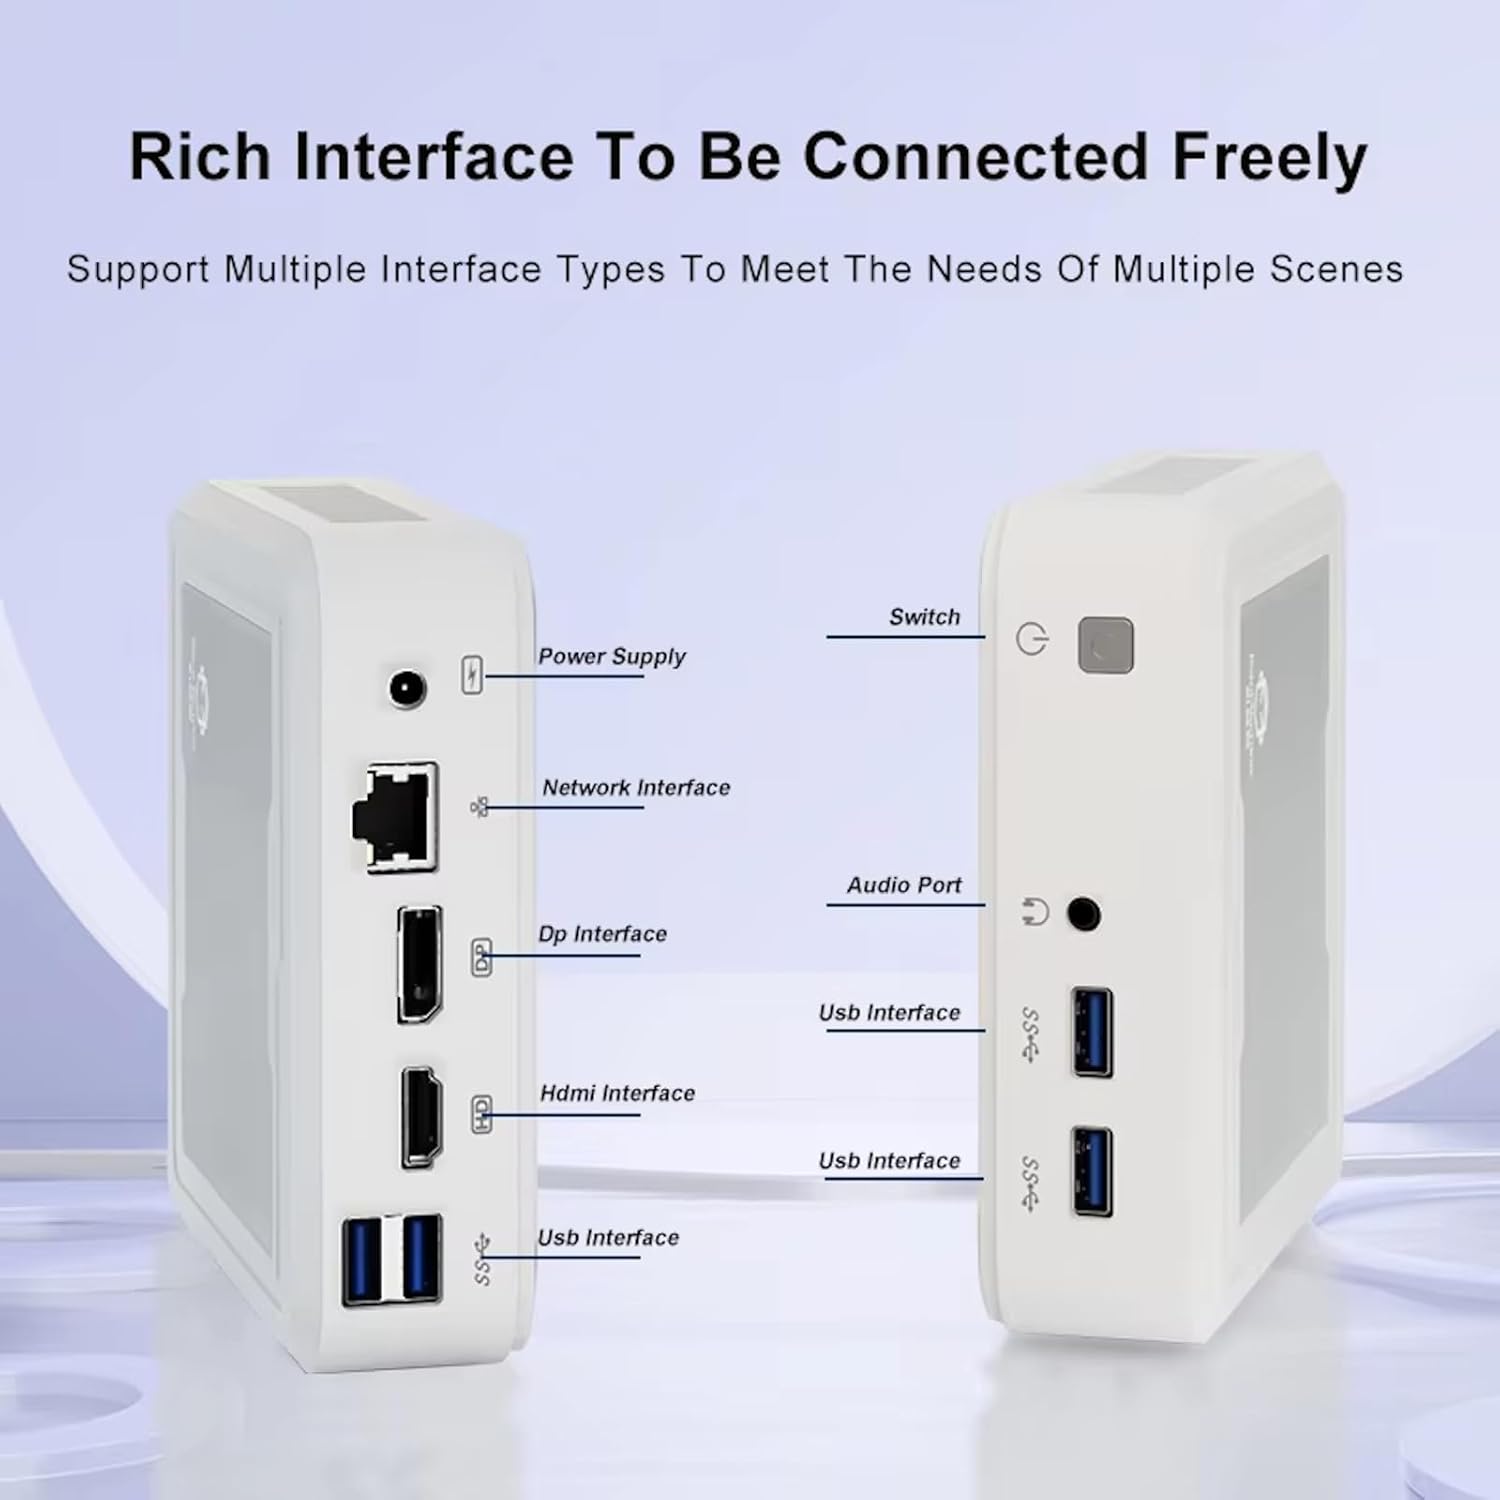
Figure 3.2: Available ports on the GenMachine Mini PC.
3.2 듀얼 모니터 지원
Enhance your productivity or gaming experience by connecting up to two 4K displays simultaneously using the HDMI and DisplayPort outputs.

Figure 3.3: Dual 4K display setup with the GenMachine Mini PC.
Video 3.1: Demonstration of the GenMachine Mini PC supporting two monitors simultaneously.
3.3 에너지 효율 및 저소음 작동
Designed for low noise operation, the Mini PC maintains a quiet environment, making it suitable for various settings.

Figure 3.4: Noise level comparison of the GenMachine Mini PC.
3.4 Compact and Durable Design
The Mini PC features an ultra-durable, lightweight metal casing, making it space-saving and robust for any work environment.
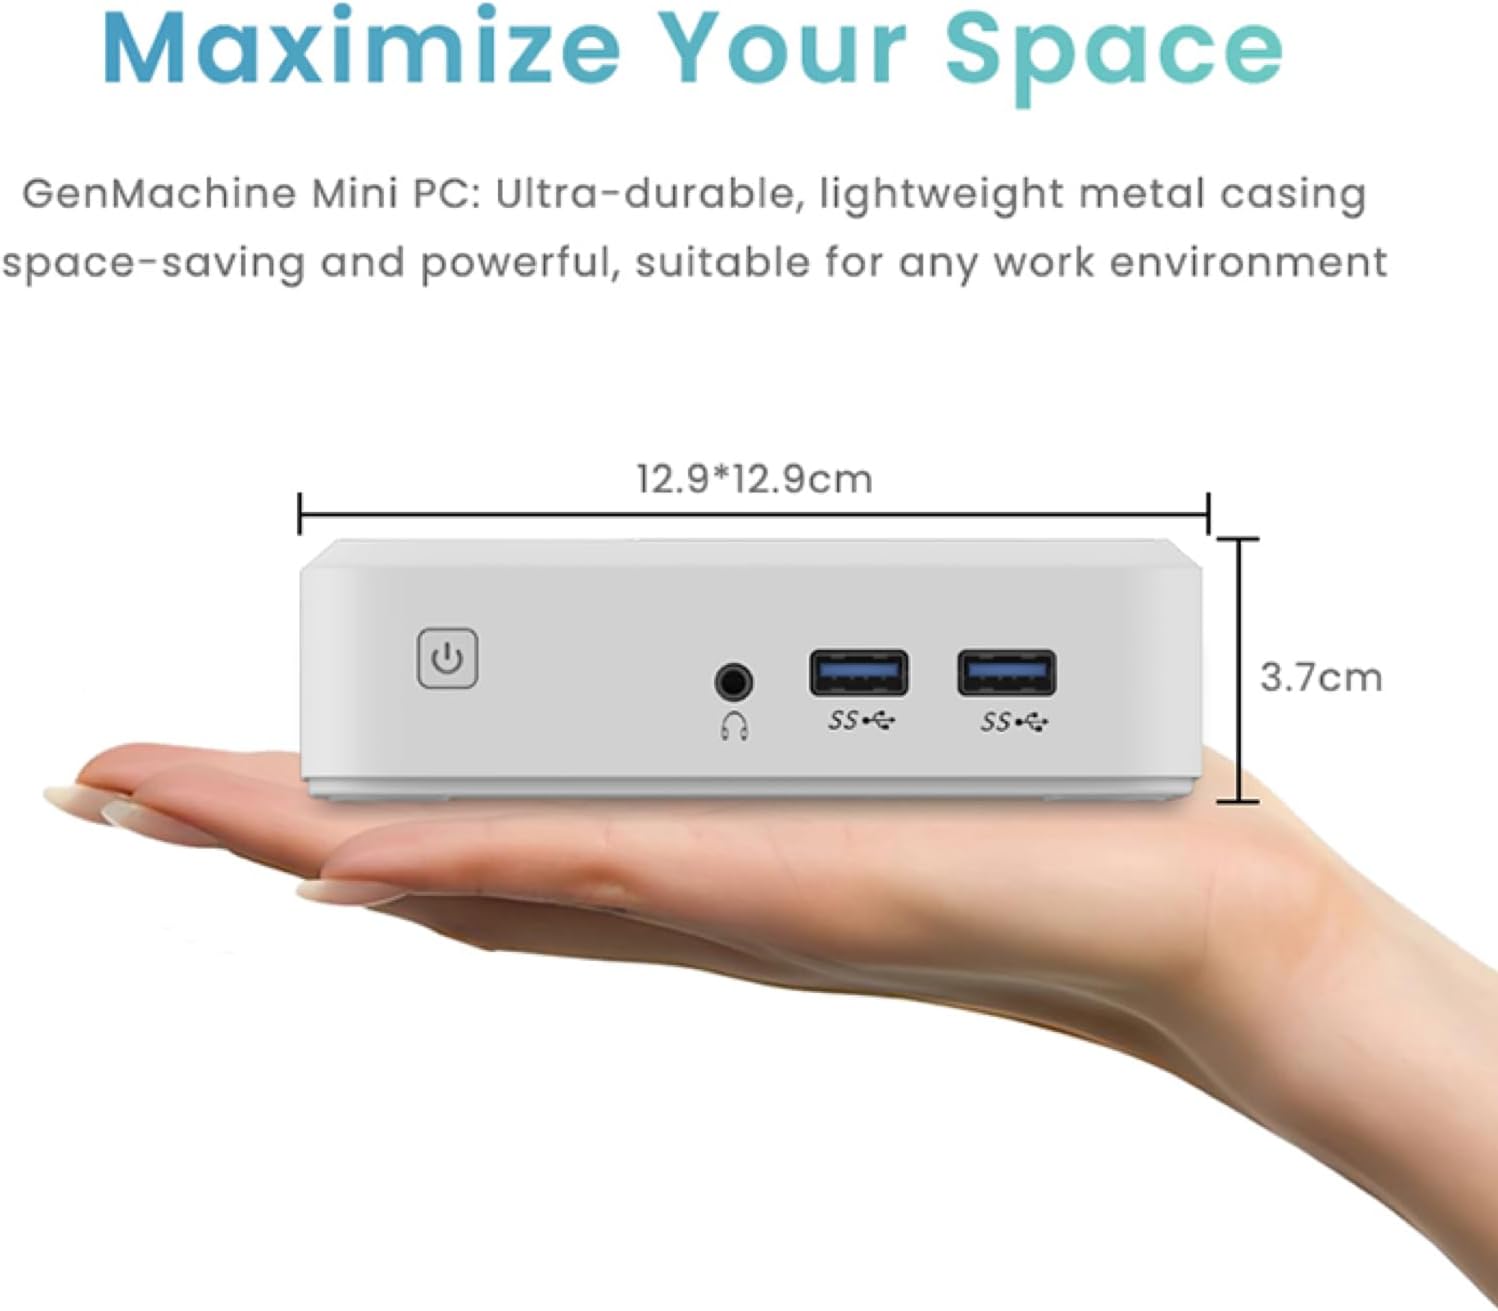
Figure 3.5: Compact size of the GenMachine Mini PC.
비디오 3.2: 끝view of the GenMachine Mini PC's features and compact design.
4. 설정 가이드
Follow these steps to set up your GenMachine Mini PC:
- 미니 PC 풀기: 포장에서 모든 구성 요소를 조심스럽게 제거합니다.
- 디스플레이에 연결: Use the provided HDMI cable to connect the Mini PC to your monitor or TV. If using a DisplayPort monitor, use a compatible DP cable (not included).
- 주변기기 연결: 키보드, 마우스 및 기타 USB 장치를 사용 가능한 USB 3.0 포트에 연결하십시오.
- 네트워크에 연결(선택 사항): For a wired internet connection, connect an Ethernet cable to the LAN port. For wireless, ensure your WiFi network is available during initial setup.
- 전원 연결: Plug the power adapter into the DC-in port on the Mini PC, then plug the adapter into a power outlet.
- 전원 켜기: Press the power button on the front of the Mini PC. The system should boot up.
5. 사용 설명서
5.1 초기 부팅 및 운영 체제 설정
Upon first power-on, the Mini PC will guide you through the operating system setup process. Follow the on-screen prompts to configure language, region, user accounts, and network settings.
5.2 전원 관리
- 전원 켜기: 전원 버튼을 한 번 누르세요.
- 종료: Access the power options through the operating system's start menu and select 'Shut down'.
- 다시 시작: Access the power options through the operating system's start menu and select 'Restart'.
- 수면 모드 : Access the power options through the operating system's start menu and select 'Sleep'.
5.3 Wi-Fi 및 Bluetooth에 연결
To connect to a wireless network or Bluetooth device, use the respective settings within your operating system. The Mini PC supports WiFi 6 and Bluetooth 5.2 for fast and reliable connections.
6. 유지관리
정기적인 유지 관리는 미니 PC의 수명과 최적의 성능을 보장하는 데 도움이 됩니다.
- 청소: Use a soft, dry cloth to clean the exterior. For dust in vents, use compressed air. Ensure the device is powered off and unplugged before cleaning.
- 통풍: Ensure the Mini PC is placed in a well-ventilated area. Do not block the air vents.
- 소프트웨어 업데이트: Regularly update your operating system, drivers, and applications to ensure security and performance.
- 데이터 백업: 중요한 데이터는 주기적으로 외장 드라이브나 클라우드 스토리지에 백업하세요.
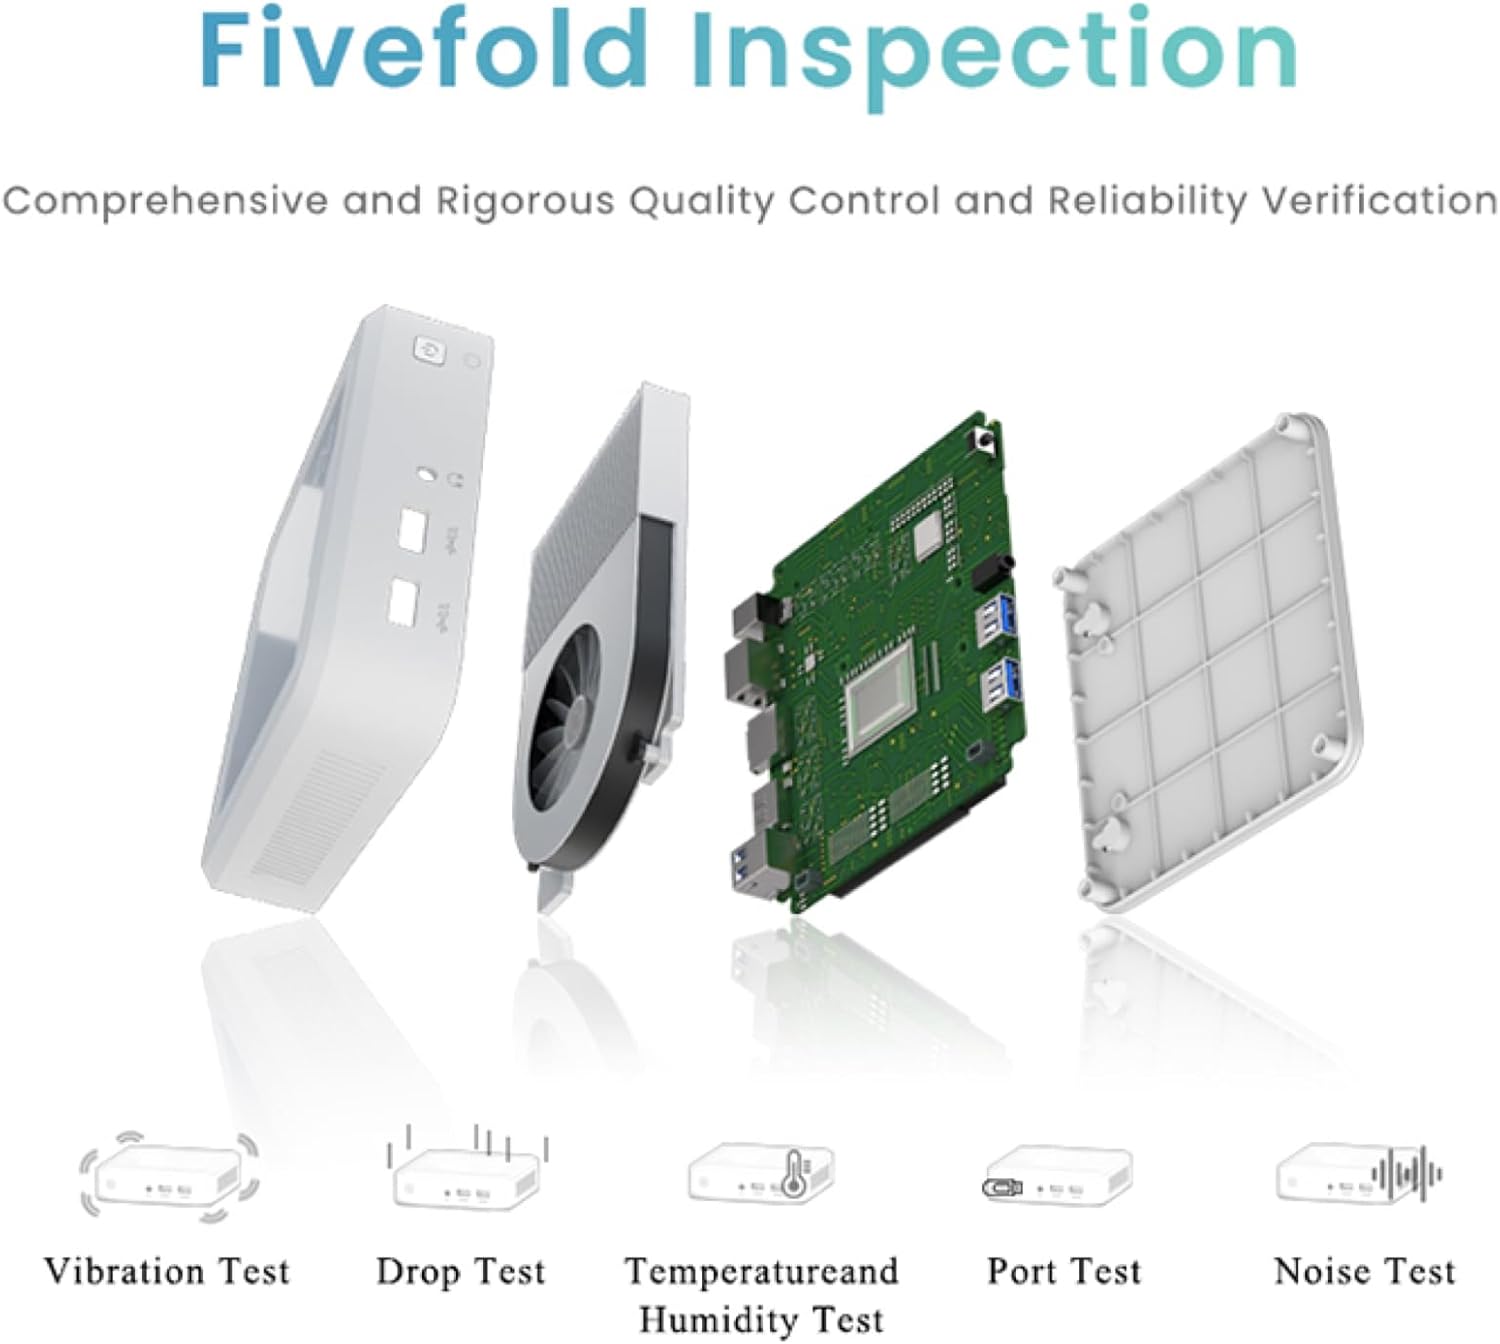
Figure 6.1: GenMachine's Fivefold Inspection process for quality control.
7. 문제 해결
미니 PC 사용 중 문제가 발생하면 다음의 일반적인 문제 및 해결 방법을 참조하십시오.
- 전원 없음:
- 전원 어댑터가 Mini PC와 작동하는 전원 콘센트에 모두 단단히 연결되어 있는지 확인하세요.
- 다른 전원 콘센트를 사용해 보세요.
- 디스플레이 없음:
- Verify that the HDMI or DisplayPort cable is securely connected to both the Mini PC and the monitor.
- 모니터의 전원이 켜져 있고 올바른 입력 소스로 설정되어 있는지 확인하세요.
- 가능하다면 다른 디스플레이 케이블이나 모니터를 사용해 보세요.
- System Freezes or Unresponsive:
- 기기의 전원이 완전히 꺼질 때까지 전원 버튼을 5~10초 동안 길게 눌러 하드 리셋을 수행한 다음 다시 시작하십시오.
- Ensure the operating system and drivers are up to date.
- Check for overheating; ensure proper ventilation.
- Run a system diagnostic or memory test if the issue persists.
- 인터넷에 연결되지 않음:
- 유선 연결의 경우 이더넷 케이블과 라우터 상태를 확인하세요.
- Wi-Fi를 사용하려면 운영 체제에서 Wi-Fi가 활성화되어 있는지, 그리고 올바른 네트워크에 올바른 비밀번호로 연결되어 있는지 확인하십시오.
- 라우터/모뎀을 다시 시작하세요.
8. 사양
| 특징 | 사양 |
|---|---|
| 프로세서 | AMD Ryzen 7 3750H (4 cores, 8 threads, up to 4.0GHz) |
| 숫양 | 8GB DDR4 |
| 저장 | 256GB SSD (with M.2 NVMe support) |
| 그래픽 코프로세서 | AMD 라데온 베가 10 그래픽 |
| 최대 화면 해상도 | 3840 x 2160 픽셀(4K) |
| 무선형 | 802.11ac(Wi-Fi 6), 블루투스 5.2 |
| USB 포트 | 4개의 USB 3.0 |
| 비디오 출력 | HDMI, 디스플레이포트 |
| 운영 체제 | 운영체제 (사전 설치됨) |
| 품목 무게 | 2.1파운드 |
| 제품 치수 | 4.9 x 4.9 x 1.4 인치 |
| 색상 | 검은색 |
9. 보증 및 지원
For warranty information and technical support, please refer to the warranty card included with your product or visit the official GenMachine web사이트. 보증 청구를 위해 구매 증빙 자료로 구매 영수증을 보관하세요.
If you require further assistance, please contact GenMachine customer support through the channels provided on their official web대지.


