1. 서론
구매해주셔서 감사합니다asing the AFEXOA Digital Alarm Clock, Model RE02. This multifunctional alarm clock is designed to provide a clear time display, customizable alarms, soothing sounds for sleep, and dynamic RGB night lighting. Please read this manual carefully to ensure proper setup and operation of your device.
2. 제품 오버view
The AFEXOA Digital Alarm Clock features a large LED display, a mirror surface, and intuitive controls. It combines several functions into one compact device:
- 디지털 시간 표시: Clear LED display with 12/24-hour format options.
- 이중 경보: Set two independent alarms with three working modes (Daily, Weekdays, Weekends).
- 스누즈 기능 : 9분 더 잠을 잘 수 있게 해줍니다.
- 7가지 알람 소리: Choose from a variety of sounds including bell, ocean, waves, bird, piano, beep, and soft music.
- 8 Soothing White Noises: Features sounds like church bells, bonfire, rain, insects, forest, waves, and two piano melodies to aid sleep.
- 조정 가능한 볼륨: 16 levels of volume adjustment for both alarms and soothing sounds.
- RGB Night Light: 8 dynamic RGB color modes with 10 levels of brightness.
- 밝기 조절이 가능한 디스플레이: 0-100% continuous dimming for the LED time display.
- 수면 타이머 : Automatic shut-off for soothing sounds and lights, adjustable from 10 to 120 minutes.
- USB 충전 포트 : Convenient port for charging external devices.
- 거울 표면: The display surface can also function as a mirror.
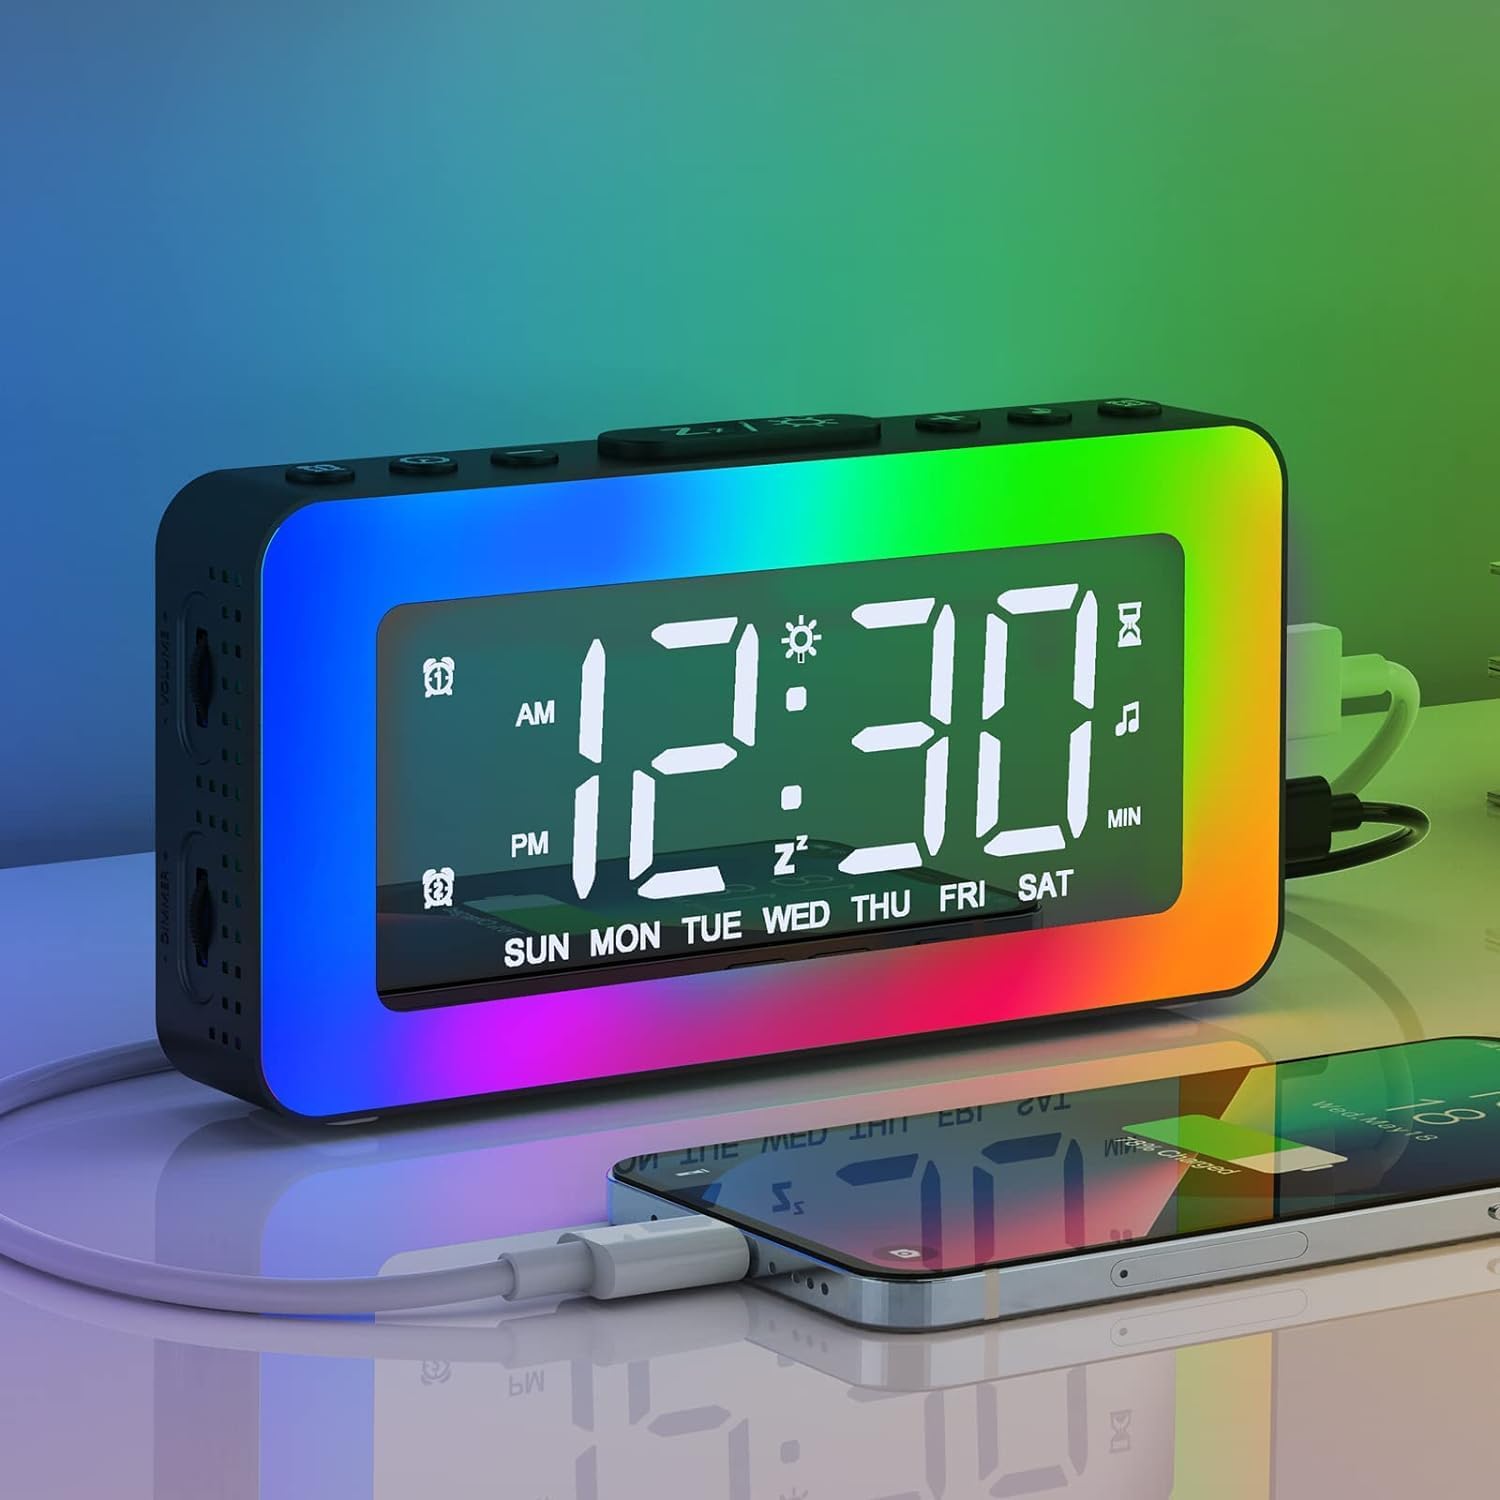
Image 2.1: The AFEXOA Digital Alarm Clock displaying time with vibrant RGB lighting and a smartphone connected for charging.
3. 설정
3.1 상자 내용물
- AFEXOA Digital Alarm Clock (Model RE02)
- USB Power Cable (Note: Power adapter not included)
- 사용자 설명서

Image 3.1: Contents of the product package, including the alarm clock, USB cable, and user manual.
3.2 전원 연결
- Connect the provided USB power cable to the DC 5V input port on the back of the alarm clock.
- USB 케이블의 다른 쪽 끝을 표준 USB 전원 어댑터(별도 구매) 또는 전원이 공급되는 USB 포트에 연결하십시오.
- 시계 전원이 켜지고 디스플레이에 불이 들어옵니다.
중요한: The clock requires continuous power via the USB cable to function. The included CR2032 lithium metal battery serves as a memory backup for time and settings during power outages, but does not power the display or functions independently.

Image 3.2: The alarm clock connected via USB, demonstrating its power input and ability to charge other devices.
3.3 배터리 설치 (메모리 백업)
The alarm clock comes with a pre-installed CR2032 lithium metal battery for memory backup. If you need to replace it:
- 시계 아래쪽에 있는 배터리함을 찾으세요.
- 작은 드라이버를 사용하여 수납칸을 엽니다.
- 새 CR2032 배터리를 양극(+)이 위를 향하게 하여 삽입하세요.
- 배터리 칸을 단단히 닫으세요.

Image 3.3: Detail of the CR2032 battery compartment, indicating its location for memory backup.
4. 사용 설명서
4.1 시간 및 날짜 설정
- Press and hold the 'SET' button (usually labeled with a gear icon) to enter time setting mode.
- '+' 및 '-' 버튼을 사용하여 시간을 조정하세요. 'SET' 버튼을 눌러 확인하세요.
- '+' 및 '-' 버튼을 사용하여 분을 조정하세요. 'SET' 버튼을 눌러 확인하세요.
- Continue pressing 'SET' to cycle through year, month, and day settings, adjusting with '+' and '-' as needed.
- Press 'SET' one last time to exit time setting mode.
- To switch between 12-hour and 24-hour format, briefly press the 'SET' button outside of setting mode.
4.2 이중 알람 설정
이 시계는 두 개의 독립적인 알람(알람 1과 알람 2)을 지원합니다.
- Press the 'ALARM 1' button (often labeled with an alarm icon and '1') to select Alarm 1. The alarm icon will flash.
- Press and hold the 'ALARM 1' button to enter Alarm 1 setting mode.
- Use '+' and '-' to set the alarm hour, then press 'ALARM 1' to confirm.
- Use '+' and '-' to set the alarm minute, then press 'ALARM 1' to confirm.
- Alarm Mode Selection: Use '+' and '-' to choose from three modes:
- 일일: 알람이 매일 울립니다.
- 주중: 알람은 월요일부터 금요일까지 울립니다.
- 주말: 알람은 토요일과 일요일에 울립니다.
- Press 'ALARM 1' to confirm the alarm mode and exit setting.
- Repeat steps 1-6 for 'ALARM 2' using the 'ALARM 2' button.
- To activate/deactivate an alarm, briefly press its respective 'ALARM' button. The alarm icon will appear/disappear on the display.

Image 4.1: Visual representation of the dual alarm function with options for everyday, weekdays, and weekends.

Image 4.2: Icons illustrating the three available alarm modes: Weekday, Weekend, and Daily.
4.3 스누즈 기능
경보음이 울릴 때:
- Press the 'SNOOZE/Z' button (often labeled with 'Z' or a sun icon) on the top of the clock.
- The alarm will pause and sound again after 9 minutes. This can be repeated indefinitely.
- If no button is pressed, the alarm will automatically turn off after 20 minutes.
- To completely turn off the alarm for the day, press any other button (e.g., 'ALARM 1' or 'ALARM 2' button) instead of 'SNOOZE/Z'.

Image 4.3: The alarm clock highlighting the snooze function and displaying icons for the 7 available alarm sounds.
4.4 Setting Alarm Sounds and Volume
- While in alarm setting mode (see 4.2), after setting the alarm time and mode, you will be prompted to select an alarm sound.
- Use the '+' and '-' buttons to cycle through the 7 available alarm sounds (Bell, Ocean, Waves, Bird, Piano, Beep, Soft Music).
- Press the 'ALARM' button to confirm your selection.
- Next, use the '+' and '-' buttons to adjust the alarm volume from level 1 to 16.
- Press the 'ALARM' button to confirm the volume and exit alarm setting.
4.5 RGB Night Light Operation
The clock features 8 dynamic RGB night light modes and 10 brightness levels.
- Press the 'Z/☀' button (often the same as Snooze) on the top to turn the night light ON/OFF or to change between the 8 color modes.
- To adjust the brightness of the night light, repeatedly press the '+' or '-' buttons while the light is on. There are 10 brightness levels.
- To turn off the night light, press and hold the 'Z/☀' button for 3 seconds.

Image 4.4: The alarm clock's one-button control for cycling through various lighting modes and adjusting brightness.

이미지 4.5: 알람 시계가 보여줍니다.asing its 8 distinct color modes for the night light, each with 10 adjustable brightness levels.
4.6 Soothing White Noises and Sleep Timer
The clock offers 8 soothing sounds to help with sleep, along with a customizable sleep timer.
- Press the 'SOUND' button (often labeled with a music note icon) to activate the soothing sounds.
- Press the 'SOUND' button repeatedly to cycle through the 8 available white noises (Church bells, Bonfire, Rain, Insects, Forest, Waves, Piano 01, Piano 02).
- Adjust the volume of the soothing sounds using the volume wheel located on the left side of the alarm clock (1-16 levels).
- To set the sleep timer, press the 'TIMER' button (often labeled with a clock icon).
- Use the '+' and '-' buttons to set the desired duration from 10 to 120 minutes (in 10-minute increments). The sound and light will automatically turn off after the set time.
- To turn off the soothing sounds and timer manually, press the 'SOUND' button until the sound stops.

Image 4.6: The alarm clock illustrating its 8 soothing sounds for sleep and the timer function, shown with a child and adult.
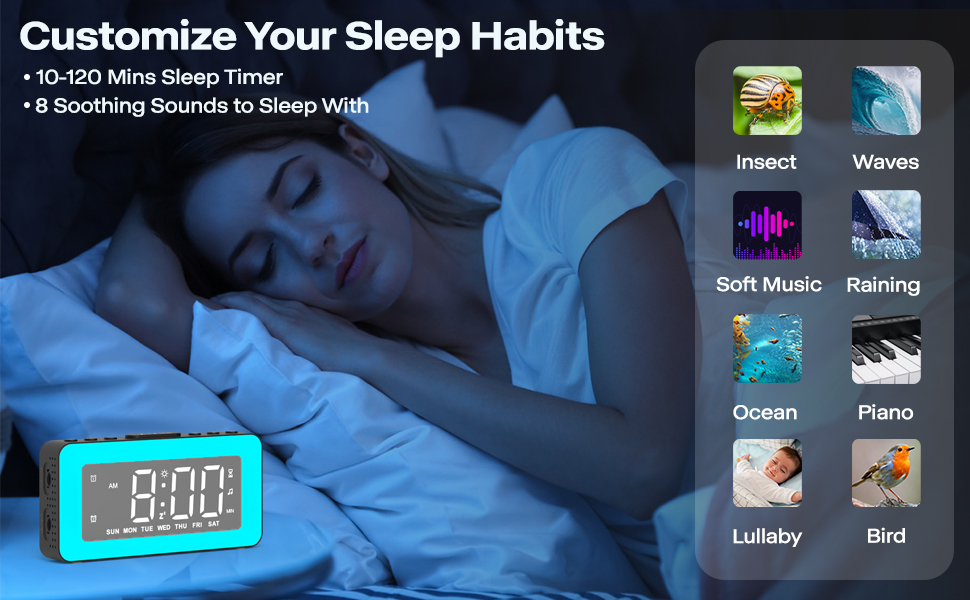
Image 4.7: The alarm clock demonstrating its sleep timer feature (10-120 minutes) and the selection of 8 soothing sounds to aid sleep.
4.7 디스플레이 밝기 조정
The LED time display brightness can be adjusted from 0% to 100%.
- Locate the dimmer wheel on the left side of the alarm clock.
- Slide the wheel to the left or right to continuously adjust the display brightness to your preferred level.

Image 4.8: The alarm clock illustrating its 0-100% adjustable dimmer function via a wheel on the side, showing varying display brightness.

Image 4.9: The alarm clock demonstrating its 0-100% dimmable display and 16-level adjustable volume.

Image 4.10: Comparison of the alarm clock's display brightness in a well-lit room versus a dark room, showcasing its dimming capability.
4.8 USB 충전 포트 사용
The alarm clock includes a USB port on the side that can be used to charge other small electronic devices, such as smartphones or tablets. Simply connect your device's charging cable to this port.
Image 4.11: The alarm clock providing power to a smartphone through its integrated USB charging port.
4.9 Mirror Surface Display
The front display surface of the alarm clock is designed with a mirror finish, allowing it to be used as a convenient mirror when the display is off or dimmed.

Image 4.12: A woman using the mirror surface of the alarm clock for personal grooming, highlighting its dual functionality.
5. 유지관리
5.1 청소
- 부드럽고 마른 천으로 시계를 닦으세요.
- 연마성 세제나 용제는 표면을 손상시킬 수 있으므로 사용하지 마십시오.
5.2 배터리 교체
The CR2032 battery is for memory backup only. Replace it when the clock loses time or settings after a power outage. Refer to Section 3.3 for instructions.
6. 문제 해결
| 문제 | 가능한 원인 | 해결책 |
|---|---|---|
| 시계 표시가 꺼져 있거나 작동하지 않습니다. | 전원이 연결되지 않았거나 케이블에 결함이 있습니다. | Ensure the USB cable is securely connected to a working power source. Try a different USB cable or power adapter. |
| 알람이 울리지 않습니다. | 경보가 작동하지 않거나, 소리가 너무 작거나, 경보 모드가 잘못되었습니다. | Verify the alarm icon is displayed. Check alarm volume (Section 4.4). Ensure the correct alarm mode (Daily, Weekdays, Weekends) is selected. |
| 전원을 끄면 시간/설정이 초기화됩니다.tage. | CR2032 memory backup battery is dead or missing. | CR2032 배터리를 교체하십시오(3.3절 참조). |
| Night light is too bright/dim. | 밝기 조절이 필요합니다. | Adjust night light brightness using the '+' or '-' buttons (Section 4.5). |
| 디스플레이가 너무 밝거나 어둡습니다. | Display brightness needs adjustment. | Adjust display brightness using the dimmer wheel on the left side (Section 4.7). |
| USB 충전 포트가 작동하지 않습니다. | Clock not powered, or device cable is faulty. | Ensure the alarm clock is powered on. Try a different charging cable for your device. |
7. 사양
| 특징 | 세부 사항 |
|---|---|
| 상표 | AFEXOA |
| 모델 번호 | RE02 (also CH-06) |
| 색상 | 검은색 |
| 제품 크기(L x W x H) | 15.01 x 3.81 x 8cm |
| 품목 무게 | 240그램 |
| 재료 | 플라스틱 |
| 디스플레이 유형 | 디지털 LED |
| 전원 | Electric Cable (USB DC 5V) |
| 백업 배터리 | 1 x CR2032 리튬 금속(포함) |
| 특별 기능 | Dual Alarm, RGB Night Light, Dimmable Display, Adjustable Volume, White Noise, Sleep Timer, USB Charging Port, Mirror Surface |
8. 보증 및 지원
This product is covered by a standard manufacturer's warranty. For specific warranty details, please refer to the product packaging or contact your retailer. For technical support or further assistance, please reach out to the AFEXOA customer service team through the contact information provided with your purchase or on the official AFEXOA web대지.


