1. 서론
This manual provides detailed instructions for the safe and effective operation of your VETEK A06-2 8K Camcorder. Please read this manual thoroughly before using the device to ensure proper functionality and to prevent damage. This camcorder is designed for amateur use and may not include advanced professional features such as autofocus or optical zoom.

Image: The VETEK A06-2 8K Camcorder, showcasing its 8K Ultra HD video resolution, 48.0 megapixels still image recording, 3.0-inch IPS touch screen, and WiFi capabilities. The camera is positioned against a backdrop of mountains.
2. 패키지 내용
아래 나열된 모든 품목이 패키지에 포함되어 있는지 확인하세요.
- VETEK A06-2 8K Camcorder
- 2 x 리튬 폴리머 배터리
- USB 케이블
- 사용 설명서 (본 문서)
3. 제품 오버view
3.1 카메라 구성 요소

Image: A diagram illustrating the front and top controls of the VETEK A06-2 camcorder. Key components include the Power/OK button, Mode button, UP/WiFi button, Menu button, DOWN button, Built-in flash, Built-in microphone sound, and IR Night Vision Function.
- 전원/확인 버튼: Used to power on/off the camera and confirm selections. Short press to display night vision or built-in flash functions. Long press to shut down.
- MODE 버튼: 카메라 모드 간 전환 기능을 제공합니다.
- UP/WiFi Button: Navigates up in menus or activates WiFi function.
- 메뉴 버튼: Accesses the camera's menu settings.
- 다운 버튼: 메뉴에서 아래로 이동합니다.
- 내장 플래시 : Provides illumination for photos and videos in low light.
- 내장 마이크: 오디오를 캡처합니다.
- 적외선 야간 투시 기능: Enables recording in low-light or dark conditions.

Image: A diagram illustrating the side ports and controls of the VETEK A06-2 camcorder. Key components include the Zoom Key, Quick photo key, Hot boots, Fast video key, Microphone interface, HDMI interface, and USB interface.
- 줌 키: 디지털 줌 레벨을 조정합니다.
- Quick Photo Key: 정지 사진을 찍습니다.
- 핫슈: 마이크나 조명과 같은 외부 액세서리를 부착하는 데 사용합니다.
- Fast Video Key: Quickly starts video recording.
- 마이크 인터페이스: Connects an external microphone for improved audio.
- HDMI 인터페이스: Connects the camera to a TV or monitor for playback.
- USB 인터페이스: Connects to a computer for charging, data transfer (storage mode), or webcam functionality (PC camera mode).
4. 설정
4.1 배터리 설치 및 충전
The camcorder uses Lithium Polymer batteries. Ensure batteries are fully charged before first use.

Image: A visual representation of the two charging methods for the VETEK A06-2 camcorder batteries. One method shows batteries being charged in an external dual charger, and the other shows a battery installed in the camera being charged via a USB cable.
- 배터리 설치 : Open the battery compartment and insert the battery according to the polarity indicators.
- 충전 방법:
- Use the dual charger to charge the batteries directly.
- Install a battery in the camera and connect the camera to a power source using the provided USB cable.
4.2 메모리 카드 설치
The camcorder supports SD flash memory cards (4-128GB SD Card Class 10 or higher recommended). A memory card is required for recording.
- 카메라에서 메모리 카드 슬롯을 찾으세요.
- SD 카드의 금속 접촉면이 올바른 방향을 향하도록 하여 딸깍 소리가 나면서 제자리에 고정될 때까지 삽입하십시오.
- For first-time use, format the memory card through the camera's menu settings. This ensures compatibility and optimal performance.
5. 사용 설명서
5.1 기본 작업
- 전원 켜기/끄기: Long press the Power/OK button to turn the camera on or off.
- 모드 선택: Press the MODE button to switch between video recording, photo taking, and playback modes.
- 메뉴 탐색: Use the MENU button to access settings. Use the UP/WiFi and DOWN buttons to navigate, and the Power/OK button to confirm.
5.2 비디오 녹화
Ensure the camera is in video recording mode.
- Press the Fast Video Key or the Power/OK button to start recording.
- 녹음을 중지하려면 같은 버튼을 다시 누르세요.
- The camcorder records in 8K video resolution.

Image: A visual demonstrating the ULTRA HD 8K video resolution and 48MP image resolution capabilities of the VETEK A06-2 camcorder. It also highlights the 18x digital zoom feature with comparative shots.
5.3 사진 촬영
Ensure the camera is in photo taking mode.
- Press the Quick Photo Key to capture a still image.
- The camcorder supports 48MP image resolution.

Image: Three sequential images demonstrating time-lapse photography with the VETEK A06-2 camcorder, showing options for 2-second, 5-second, and 10-second intervals.
5.4 야간 투시경
The camera features IR Night Vision for recording in low-light conditions.
- Short press the Power/OK button to activate the night vision function.
- The camera will record in black and white in night vision mode.

Image: The VETEK A06-2 camcorder displaying an image captured using its IR Night Vision feature, showing a vivid black and white scene in the dark.

Image: A split image comparing the view from the VETEK A06-2 camcorder in Night Vision mode (left, monochrome) versus Normal mode (right, color) of a city skyline at night.
5.5 WiFi 연결
The camcorder features built-in WiFi for remote control and sharing.
- Press the UP/WiFi button to activate the WiFi function.
- Connect your smartphone or tablet to the camera's WiFi network.
- Use the dedicated app to control the camera remotely and share photos/videos.

Image: The VETEK A06-2 camcorder on a tripod, being controlled remotely by a smartphone and a physical remote control, demonstrating its WiFi connectivity for sharing content on social media.

Image: A user interacting with the VETEK A06-2 camcorder's touch screen while a smartphone displays the camera's WiFi connection interface and live view, illustrating remote control via an app.
5.6 Web캠 기능
캠코더는 다음과 같은 용도로 사용할 수 있습니다. webcam for video calls and live streaming.
- USB 케이블을 통해 카메라를 컴퓨터에 연결하십시오.
- Select "PC camera mode" when prompted on the camera screen.
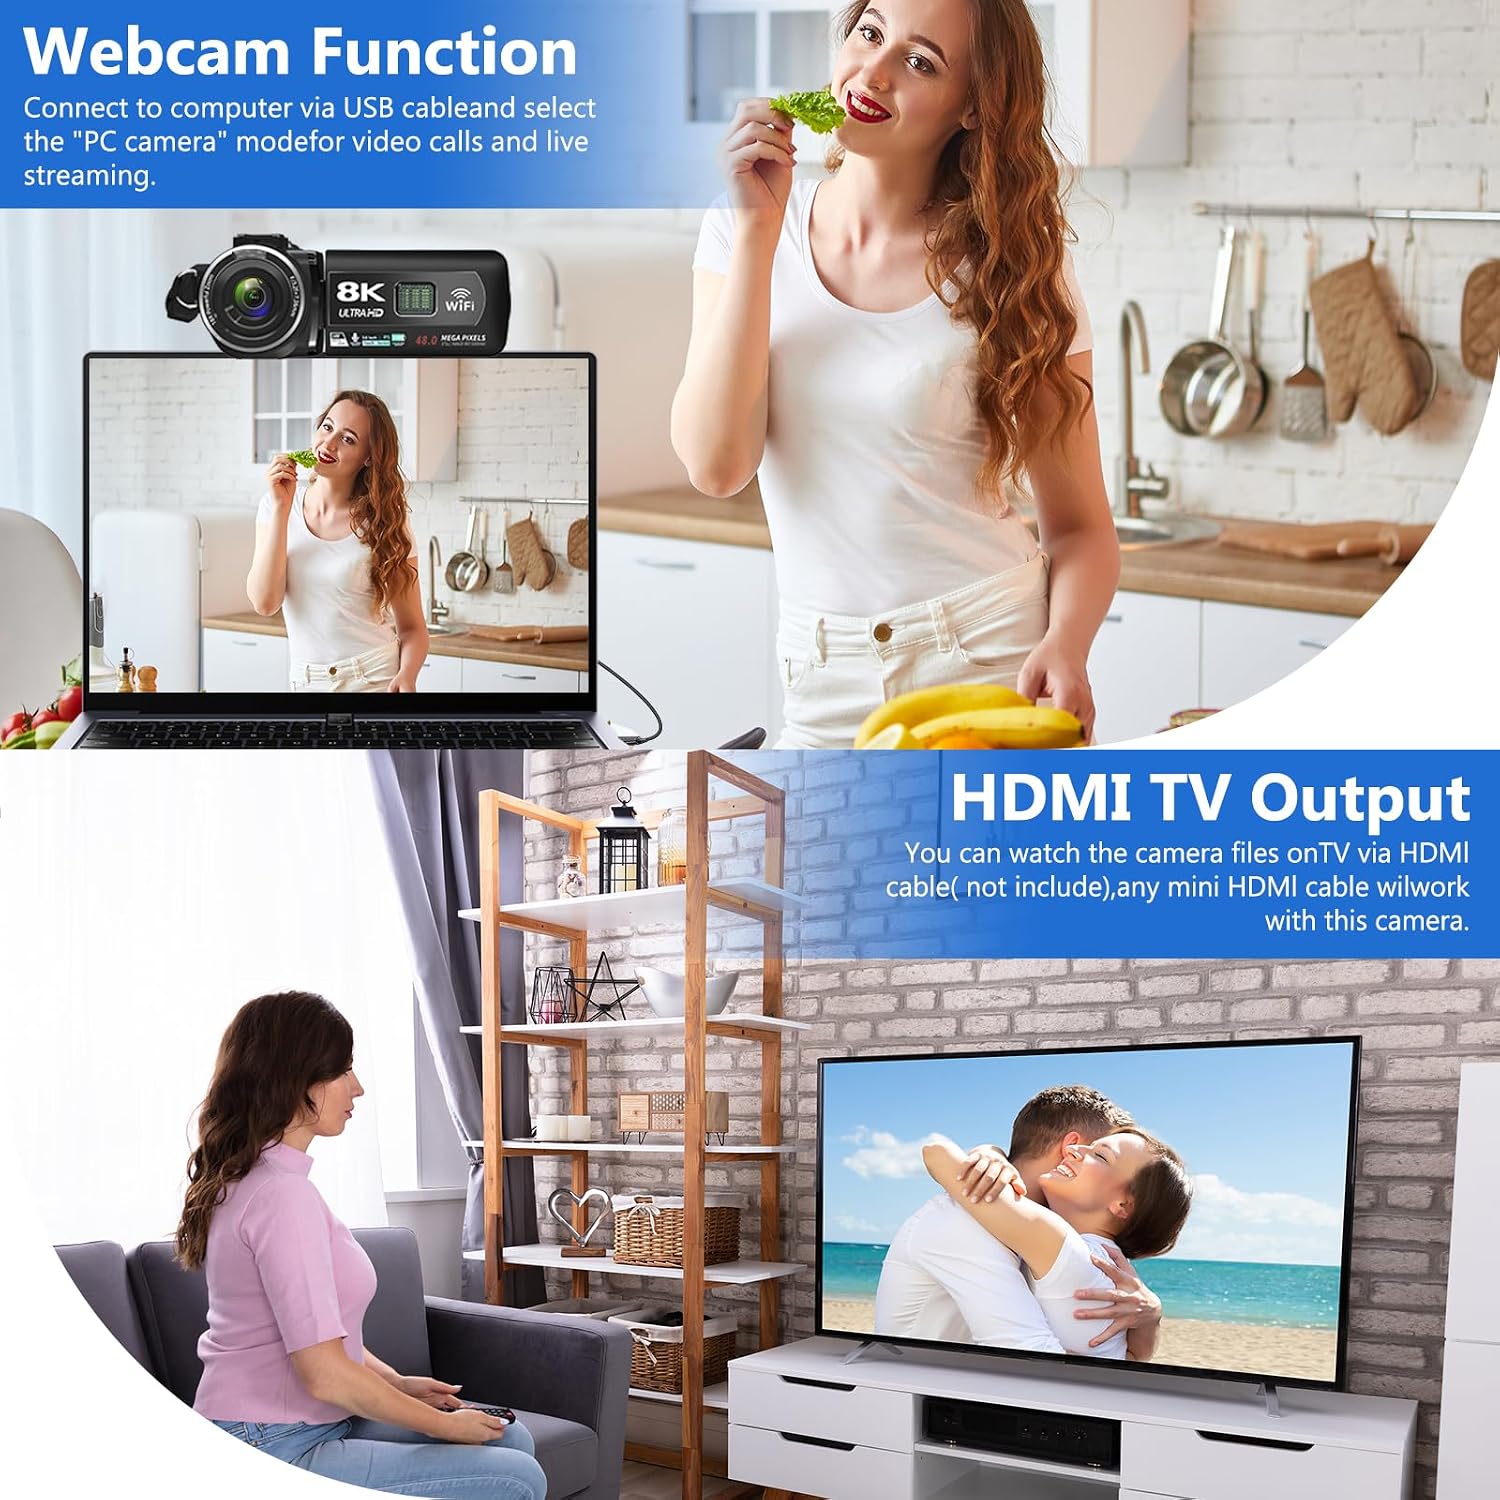
Image: The VETEK A06-2 camcorder connected to a laptop via USB, demonstrating its webcam function for video calls. Below, the camera is connected to a television via HDMI for viewing recorded content.
5.7 HDMI TV Output
View your recorded videos and photos on a larger screen.
- Connect the camera to a TV or monitor using an HDMI cable (not included).
- TV에서 적절한 HDMI 입력을 선택합니다.

Image: The VETEK A06-2 camcorder connected to a large television screen via an HDMI cable, showing content from the camera being displayed on the TV for a family to watch.
5.8 노이즈 감소
The camcorder includes a built-in noise reduction function to improve audio quality.
- Activate the noise reduction function in the camera's settings menu.
- For enhanced audio, an external microphone can be connected to the microphone interface.

Image: A woman playing a guitar, with a VETEK A06-2 camcorder recording her. Text indicates that the camera's built-in noise reduction and external microphone support help improve audio quality.
6. 유지관리
6.1 청소
- 부드럽고 마른 천을 사용하여 카메라 본체를 청소하세요.
- For the lens, use a specialized lens cleaning cloth and solution. Avoid touching the lens directly.
6.2 보관
- 카메라는 직사광선과 극한의 온도를 피해 시원하고 건조한 곳에 보관하세요.
- 장기간 카메라를 사용하지 않을 경우 배터리를 제거하십시오.
7. 문제 해결
캠코더 사용 중 문제가 발생하면 다음의 일반적인 문제 및 해결 방법을 참조하십시오.
| 문제 | 가능한 원인 | 해결책 |
|---|---|---|
| 카메라의 전원이 켜지지 않습니다. | 배터리가 방전되었거나 잘못 설치되었습니다. | 배터리를 충전하거나 올바르게 다시 설치하세요. |
| 영상을 녹화하거나 사진을 찍을 수 없습니다. | 메모리 카드가 가득 찼거나, 삽입되지 않았거나, 포맷되지 않았습니다. | Insert a memory card, format it, or delete unnecessary files. |
| 이미지/비디오 품질이 좋지 않습니다. | Insufficient lighting, dirty lens, or shooting too close. | Ensure adequate lighting, clean the lens, and maintain a shooting distance of over 1.5m/4ft. |
| WiFi 연결 문제. | Incorrect password or app issues. | Verify WiFi password, restart camera and device, or reinstall the app. |
문제가 지속되면 고객 지원팀에 문의하세요.
8. 사양
| 특징 | 세부 사항 |
|---|---|
| 상표 | 베텍 |
| 모델 번호 | A06-2 |
| 비디오 캡처 해상도 | 8K |
| 포토 센서 기술 | CMOS |
| 이미지 해상도 | 48메가픽셀 |
| 화면 크기 | 3 인치 |
| 연결 기술 | USB, 와이파이 |
| 플래시 메모리 유형 | SD (Supports 4-128GB Class 10 or higher) |
| 특별 기능 | Face Detection, Night Vision, Anti-Shake, Image Stabilization, Time Lapse, Low Light, Noise Reduction |
| 배터리 | 2 리튬 폴리머 배터리(포함) |
| 제품 치수 | 5.12 x 2.36 x 2.17 인치 |
| 품목 무게 | 2.2파운드 |
9. 중요 사항
- This camcorder is designed for amateurs and does not feature autofocus or optical zoom.
- The camera does not have a focus function. Maintain a shooting distance above 1.5m (4ft) for clear pictures or videos.
- After recording video, check the video effect on a computer. Checking it on the camera reduces the resolution of the video.
- To connect to a computer, use the digital cable provided, select the storage method, and then view the video on the computer.

Image: A graphic titled 'Warm Tips' reiterating key usage instructions such as reading the manual, the camera being for amateurs, lack of autofocus, checking video on a computer, maintaining shooting distance, and formatting the memory card.
10. 고객 지원
For any questions, technical assistance, or warranty claims, please contact VETEK customer service. All products are eligible for a free return within 30 days of purchase.

Image: A smiling customer service representative wearing a headset, indicating 24-hour customer service availability.


