1. 제품 오버view
The Tera Pro 1300 is a compact and versatile barcode scanner designed for efficient data capture. It supports 1D and 2D barcodes, including QR codes, from both printed materials and digital screens. This device offers multiple connection options and features a long-lasting battery for extended use.

Image: The Tera Pro 1300 barcode scanner, a compact device designed for portability and ease of use.
패키지 내용:
- 바코드 스캐너 (1개)
- USB 케이블(x1)
- 2.4G USB 동글 (1개)
- 사용 설명서(x1)
2. 설정 및 연결
The Tera Pro 1300 offers three connection methods: Bluetooth, 2.4GHz Wireless, and USB Wired. Choose the method that best suits your device and environment.

Image: Visual representation of the three connection modes: Bluetooth, 2.4GHz Wireless via USB dongle, and USB Wired connection.
2.1. 스캐너 충전
Before first use, fully charge the scanner using the provided USB cable. Connect the small end of the USB cable to the scanner's charging port and the other end to a USB power adapter or a computer's USB port. A full charge typically takes 3-4 hours.
2.2. 블루투스 연결
- 스캐너의 전원이 켜져 있는지 확인하세요.
- Scan the 'Bluetooth Pairing' barcode (refer to the included quick start guide or the full manual for specific barcode).
- 호스트 장치(노트북, PC, 휴대폰, 태블릿)에서 Bluetooth를 활성화하고 사용 가능한 장치를 검색합니다.
- Select 'Tera 1300' or a similar name from the list of devices to pair.
- The scanner will indicate successful pairing (e.g., a beep or LED change).
Supports HID, SPP, and BLE modes. Transmission distance is approximately 10m (33ft) in environments with obstacles.
2.3. 2.4GHz 무선 연결
- 2.4G USB 동글을 컴퓨터의 사용 가능한 USB 포트에 삽입합니다.
- 스캐너의 전원이 켜져 있는지 확인하세요.
- The scanner should automatically connect to the dongle. A successful connection is typically indicated by a beep or LED change.
This mode works with Windows XP/7/8/10, Mac OS, and Linux. The transmission distance can reach up to 60m (200ft) in open, barrier-free environments.
2.4. USB 유선 연결
- 제공된 USB 케이블을 사용하여 스캐너를 컴퓨터에 연결합니다.
- 이 스캐너는 유선 장치로 작동하며 동시에 충전도 가능합니다.
3. 사용 설명서
3.1. 기본 스캐닝
Point the scanner's window at the barcode you wish to scan and press the trigger button. A successful scan will typically result in a beep and/or vibration, and the data will be transmitted to your connected device.
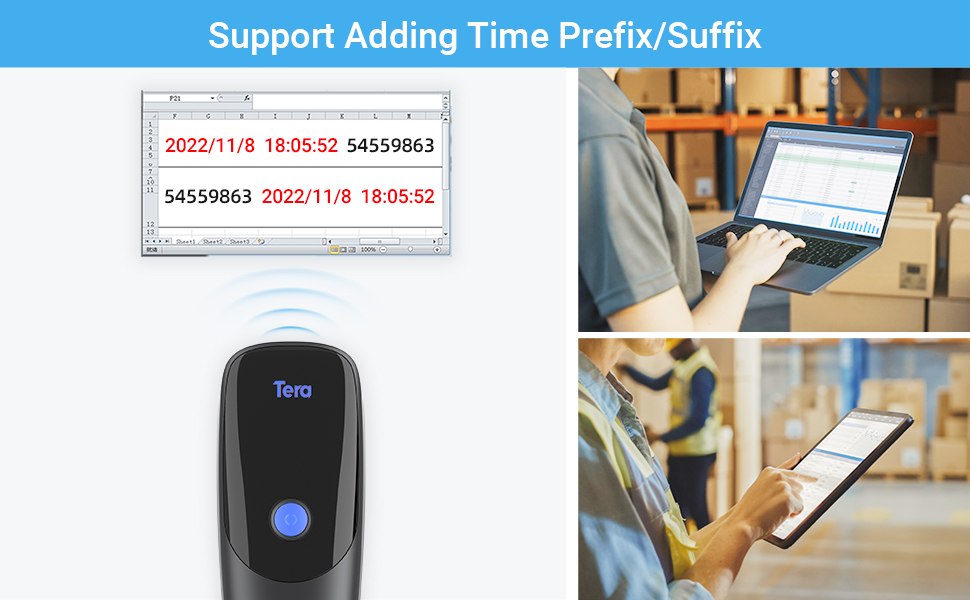
Image: The scanner demonstrates its ability to read various 1D and 2D barcodes, including those that are blurred, damaged, or have wide scanning angles.
3.2. Time Prefix/Suffix Function
This function allows you to add the current time as a prefix or suffix to scanned barcode data. This is useful for tracking the exact time of each scan.
- To enable/disable this feature, scan the specific setting barcodes provided in the full user manual.

이미지: 전ample of barcode data being scanned and displayed on a computer screen, demonstrating the time prefix/suffix function.
3.3. Vibration Alert & Upload Modes
The scanner features a vibration alert, which can be used in quiet environments where audible beeps are undesirable. You can turn off the volume and rely on vibration for scan confirmation.
The scanner supports two upload modes:
- 자동 업로드 모드: Barcode data is transmitted immediately after scanning.
- 저장 모드 : Barcode data is stored internally in the scanner's memory. This mode is useful when the scanner is out of range of the receiver. The internal storage can hold up to 20,000 barcodes. Data can be batch uploaded to your device when reconnected.
3.4. 다국어 지원
The scanner supports various keyboard layouts for different languages, including English, German, Spanish, Italian, French, Japanese, Belgian, Portuguese, and Dutch. Refer to the full manual for instructions on how to configure the scanner for your desired language.

Image: The scanner supports multiple languages, indicated by flags of various countries.
4. 유지관리
4.1. 배터리 관리
The Tera Pro 1300 is equipped with a 1200mAh battery, providing approximately 12 hours of continuous scanning or up to two weeks of daily use on a full charge. Standby time is approximately 96 hours.
- 배터리 수명을 연장하려면 배터리를 자주 완전히 방전시키지 마세요.
- 장시간 사용하지 않을 때는 스캐너를 서늘하고 건조한 곳에 보관하세요.
- 배터리 수명 유지를 위해 스캐너를 자주 사용하지 않더라도 정기적으로 충전하십시오.
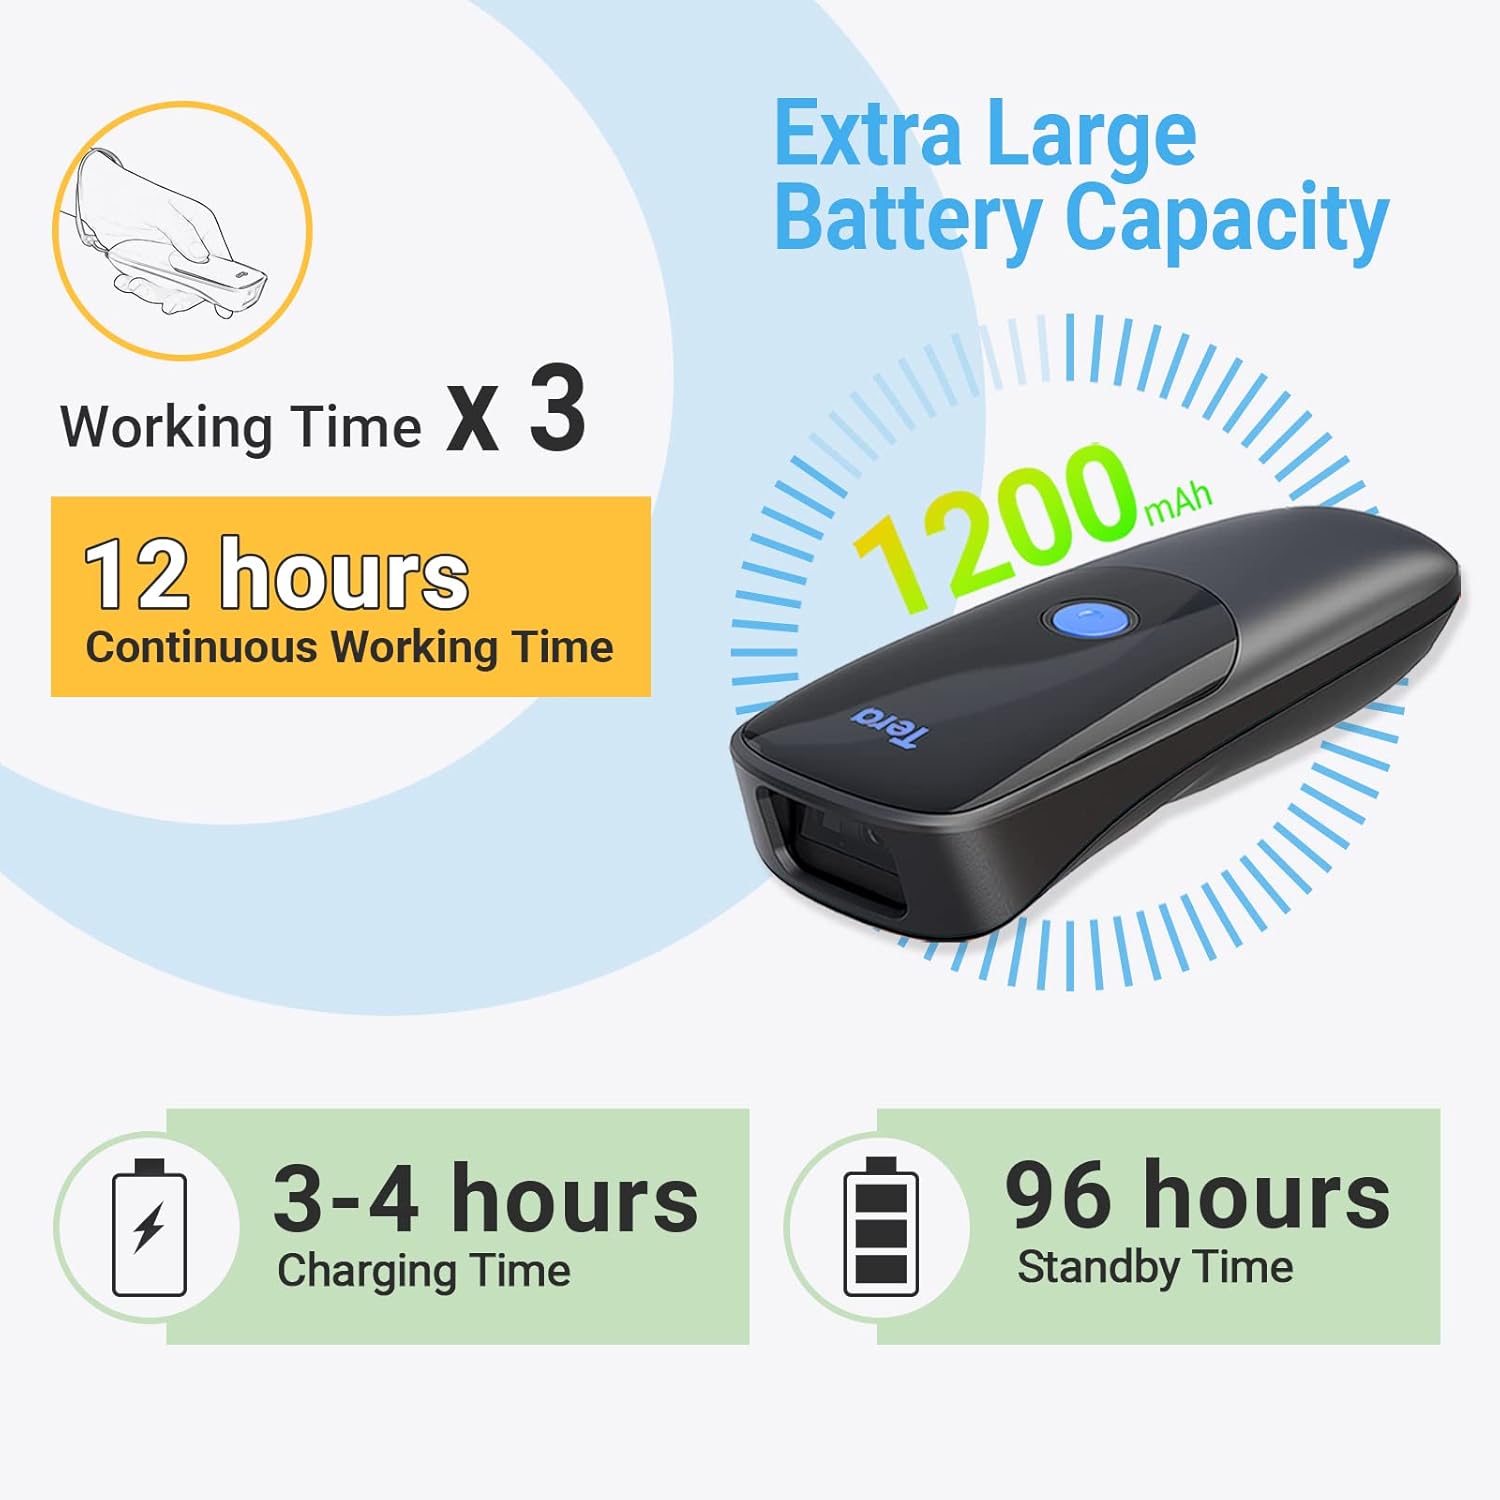
Image: Details on the scanner's 1200mAh battery, offering 12 hours of continuous operation and 3-4 hours charging time.
4.2. 청소
스캐너를 청소하려면 부드럽고 마른 천을 사용하십시오. 잘 지워지지 않는 오염의 경우,amp cloth can be used, followed by a dry cloth. Avoid using harsh chemicals or abrasive materials, as these can damage the device.
5. 문제 해결
If you encounter issues with your Tera Pro 1300 scanner, refer to the following common problems and solutions:
| 문제 | 가능한 해결책 |
|---|---|
| 스캐너의 전원이 켜지지 않습니다. | 배터리가 충전되어 있는지 확인하세요. USB 케이블을 사용하여 스캐너를 전원에 연결하세요. |
| 스캐너가 Bluetooth/2.4GHz를 통해 연결되지 않습니다. | Verify the scanner is in the correct pairing mode. Ensure the dongle is properly inserted for 2.4GHz. Check Bluetooth settings on your host device. Try restarting both the scanner and the host device. |
| Scanned data is incorrect or inconsistent. | Ensure the barcode is clean and undamaged. Try scanning from a different angle or distance. Check if the scanner's configuration (e.g., prefix/suffix settings, keyboard layout) is correct for your needs. Perform a factory reset if necessary (refer to the full manual for the reset barcode). |
| Scanner adds extra characters (e.g., 'a') to scanned data. | This often indicates an incorrect keyboard language setting. Scan the appropriate language setting barcode from the full user manual to match your computer's keyboard layout. |
| Scanner does not read certain barcode types. | Ensure the barcode type is supported by the Tera Pro 1300 (see Specifications section). Some less common barcode types may require specific enabling scans from the manual. |
6. 사양
| 특징 | 세부 사항 |
|---|---|
| 모델 번호 | 1300 |
| 치수 | 6.65 x 4.61 x 1.65 인치 |
| 품목 무게 | 7.4 온스 |
| 전원 | 배터리 전원, 유선 전기 |
| 배터리 용량 | 1200mAh |
| 연속 작업 시간 | 최대 12시간 |
| 충전 시간 | 3-4시간 |
| 대기 시간 | 최대 96시간 |
| 연결 기술 | 2.4G 무선, 블루투스, USB 케이블 |
| 호환 장치 | Desktop, Laptop, Smartphone, Tablet (Windows XP/7/8/10, Mac OS, Windows Mobile, Android OS, iOS) |
| 1D 디코딩 기능 | 코다바, 코드 11, 코드 93, MSI, 코드 128, UCC/EAN-128, 코드 39, EAN-8, EAN-13, UPC-A, ISBN, 인더스트리얼 25, 인터리브드 25, 스탠다드 25, 2/5 매트릭스 |
| 2D 디코딩 기능 | QR, PDF417, 데이터 매트릭스, 아즈텍 코드, 맥시 코드 |
| 실제 각도 View | 10도 |
7. 보증 및 지원
보증 정보 및 기술 지원에 대해서는 공식 Tera를 참조하세요. web사이트 또는 고객 서비스에 직접 문의하세요. 연락처 정보는 일반적으로 제품 포장이나 제조업체의 web대지.
You can visit the Tera Store for additional product information and support resources: 아마존에서 테라 스토어를 만나보세요


