1. 서론
The xTool 1064nm Infrared Laser Module is designed to enhance the capabilities of your xTool D1 Pro laser engraver, specifically for engraving on various metals and plastics. This module features a 0.03mm ultra-fine laser spot and 15KW peak power, enabling precise and detailed work on materials typically challenging for blue diode lasers.
This manual provides essential information for the safe and effective use of your laser module, including setup, operation, and maintenance guidelines.
2. 안전수칙
- Always wear safety goggles: Infrared lasers are invisible and can cause severe eye damage. Ensure appropriate laser safety goggles are worn by all individuals in the operating area.
- 통풍: Operate the laser engraver in a well-ventilated area to dissipate fumes and smoke produced during engraving.
- 인화성 물질: Avoid engraving flammable materials or operating near combustible substances.
- 무인 작동: Never leave the device unattended while it is working.
- 전원 끄기: Always power off and unplug the device before performing any maintenance or module changes.
3. 설정 가이드
3.1 포장 풀기 및 구성품
시작하기 전에 모든 구성 요소가 있는지 확인하세요.
- xTool 1064nm Infrared Laser Module
- 안전 고글
- 청소 도구
- xTool D1 Pro (main unit, sold separately)
- Laptop with xTool Creative Space software
- RA2 Pro Rotary Attachment (optional, for cylindrical objects)
3.2 레이저 모듈 설치
The 1064nm Infrared Laser Module is designed for quick and easy installation on your D1 Pro. This process involves replacing the existing laser module.
- Remove Existing Module: Loosen the toggle screw on the current laser module. Gently pull the module upwards to detach it from the machine. Disconnect the cable from the top of the module.
- Connect New Module: Connect the cable to the top of the 1064nm Infrared Laser Module.
- 새로운 모듈 설치: Insert the new module into the machine's carriage. Tighten the toggle screw to secure it in place.
동영상: xTool 1064 Laser Module for xTool D1 Pro Laser Engraver. This video demonstrates the quick installation process of the 1064nm laser module onto the D1 Pro machine.

영상: One-step installation of the xTool 1064nm Infrared Laser Module. This image illustrates the simple process of installing the laser module onto the D1 Pro, highlighting its ease of setup.
3.3 Connecting RA2 Pro (for Rings)
For engraving cylindrical objects like rings, the RA2 Pro rotary attachment is required. Ensure the honeycomb panel is removed and the D1 Pro is raised to accommodate the RA2 Pro.
- Prepare RA2 Pro: Secure the ring onto the appropriate pillars of the RA2 Pro, ensuring it is stable.
- Connect RA2 Pro: Disconnect the Y-axis motor cable from the D1 Pro. Connect the RA2 Pro cable to the Y-axis port on the D1 Pro.
- Place RA2 Pro: Position the RA2 Pro onto the D1 Pro's working area.
4. 사용 설명서
4.1 재료 호환성
The 1064nm Infrared Laser Module is specifically designed for engraving on a wide range of materials, including:
- 궤조: Gold, Silver, Platinum, Copper, Aluminum, Zinc, Titanium, Iron, Stainless Steel, Metal Oxides, and Alloys.
- 플라스틱: Various types of plastic and acrylic, including opaque plastic and opaque acrylic.
- 기타 자료: Leather, Painted Ceramics, Rock, Glass, Circuit Boards, Paper.
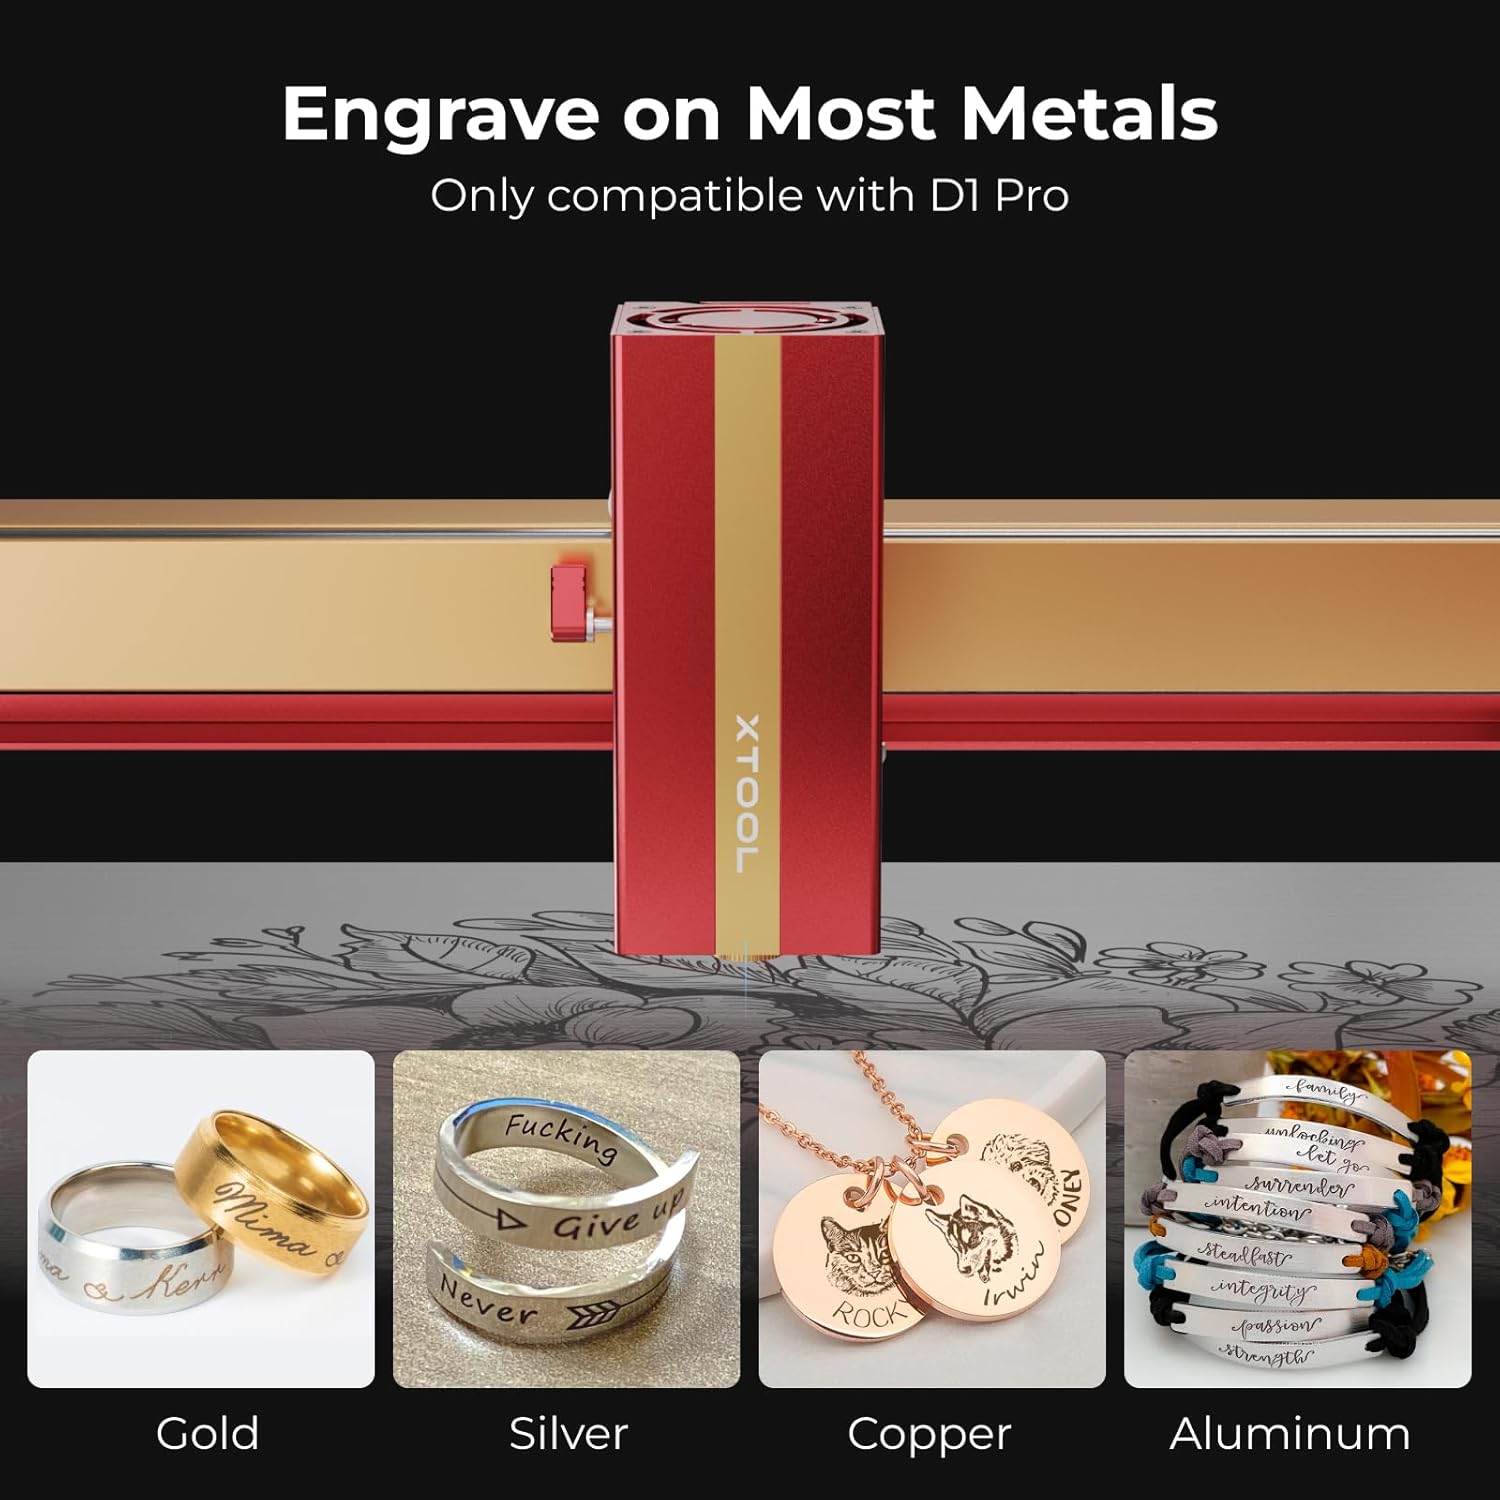
영상: Engraving on Most Metals. This image showcases the module's capability to engrave on different metal types, including gold, silver, copper, and aluminum.
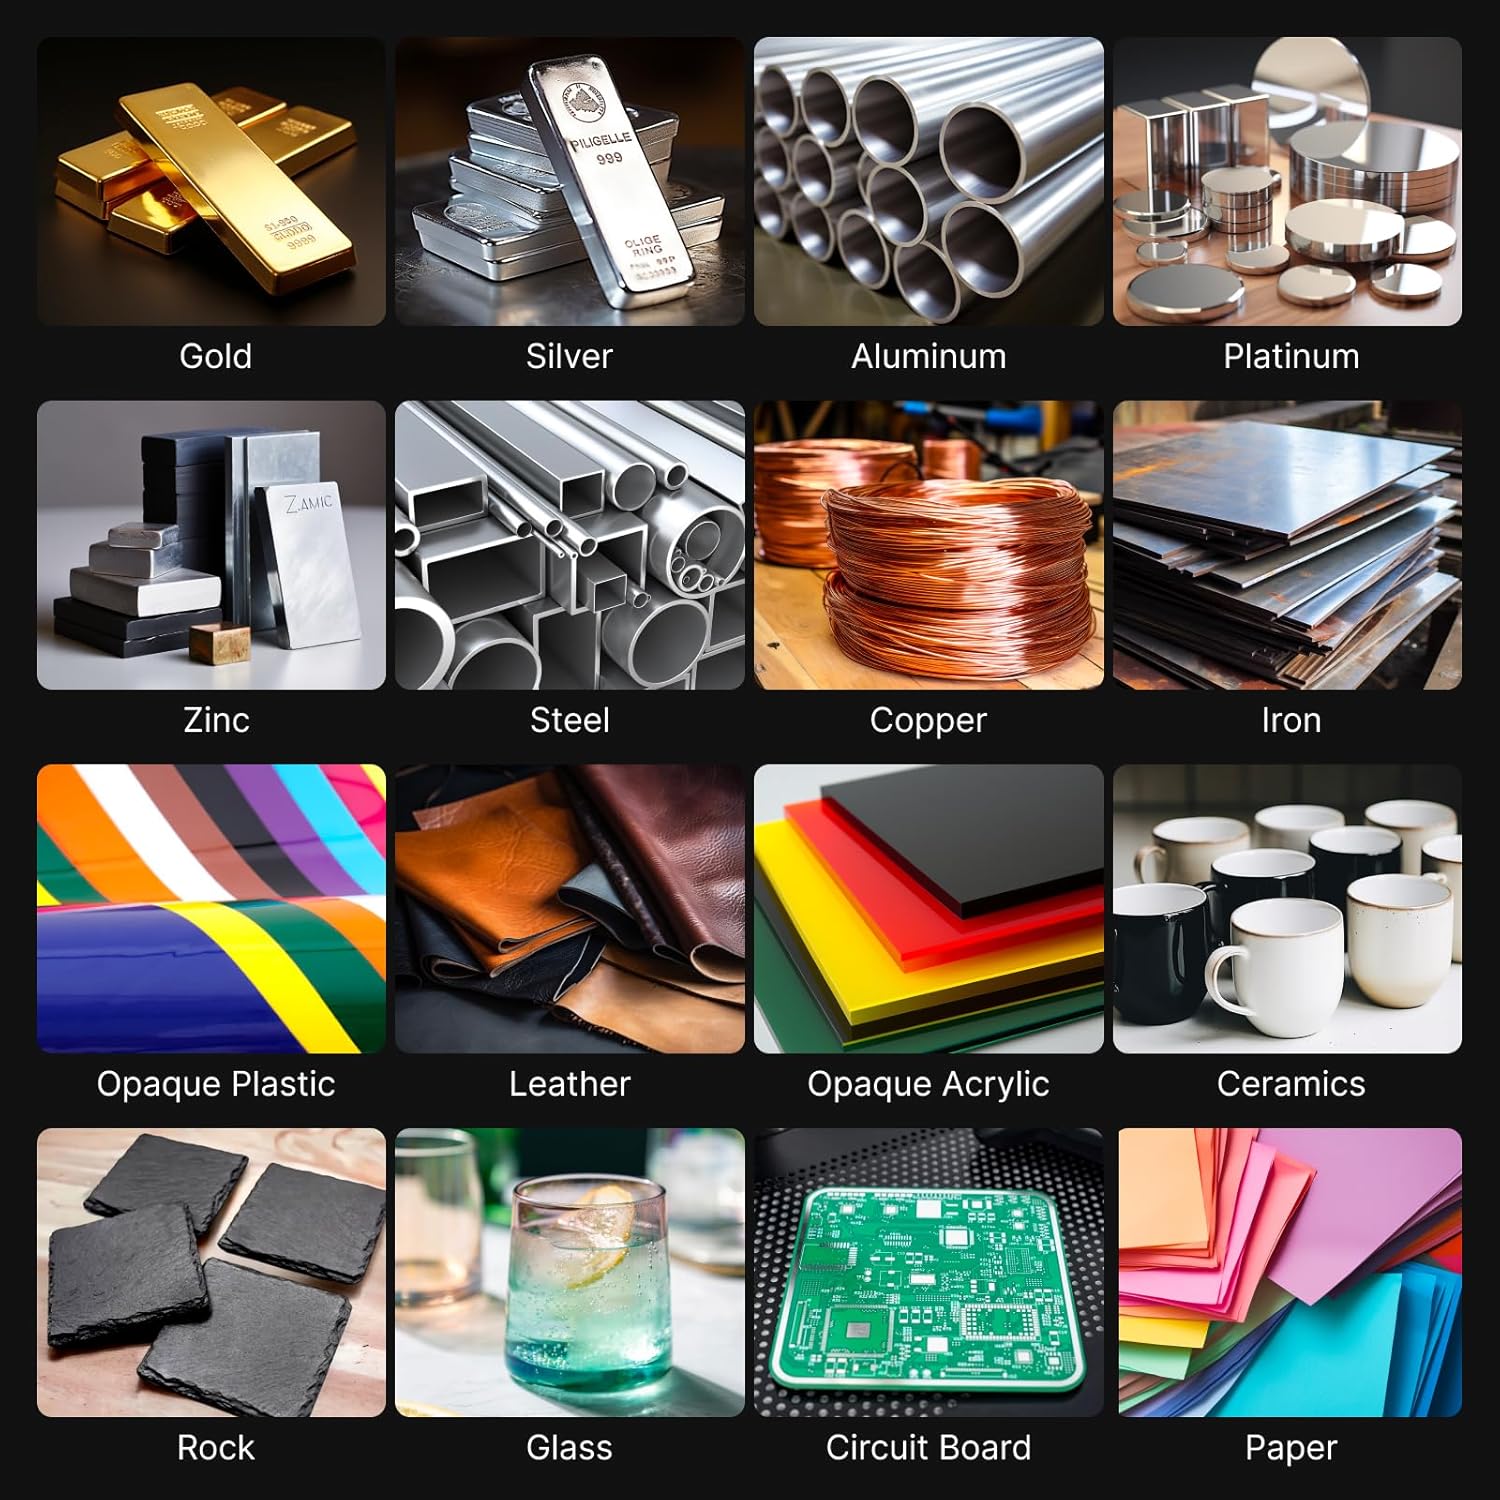
영상: Diverse Material Compatibility. This image displays a wide array of materials that can be engraved with the 1064nm laser module, from various metals to plastics, leather, and more.
4.2 레이저 초점 맞추기
Accurate focusing is crucial for optimal engraving results.
- Lower Setting Bar: Pull down the setting bar located on the side of the laser module.
- 높이 조정: Loosen the toggle screw and move the laser module up or down until the tip of the setting bar just touches the highest surface of your material.
- 보안 모듈: Tighten the toggle screw to lock the module in place.
- Retract Setting Bar: Push the setting bar back up into its original position.
4.3 Using xTool Creative Space Software
The xTool Creative Space software is used to design and control your engraving projects.
- 장치 연결: Ensure your D1 Pro is connected to your computer via USB.
- 오픈소스 소프트웨어: Launch xTool Creative Space.
- 디자인/수입: Create your design or import an existing one. For text, use the text tool and input your desired message.
- 매개변수 설정:
- 크기: Adjust the size of your design. Ensure the lock icon is engaged to maintain aspect ratio.
- 레이저 모드: Select "Laser flat" for flat materials or "Laser cylindrical" for use with the RA2 Pro. If using RA2 Pro, select "Chuck" mode and input the diameter of your object (e.g., 24mm for a ring).
- 재료: Choose "stainless steel (304)" or the appropriate material from the dropdown. The software will automatically suggest reference parameters.
- 작업: Select "Engrave".
- 파워/스피드: Adjust power and speed settings as needed. For stainless steel, typical settings might be 100% power and 80mm/s speed.
- 프레이밍: Click the "Framing" button in the software. The laser will outline the engraving area on your material. Adjust the material's position if necessary. Press the button on the D1 Pro to start framing.
- 조각 시작: Once framing is complete and you are satisfied with the placement, click "Start" in the software, then press the button on the D1 Pro to begin the engraving process.
동영상: How to engrave with the 1064nm laser module? This detailed video guides users through the software interface, parameter settings, and the engraving process for various items like necklaces, bracelets, and rings.

영상: Ultra-Fine Engraving Result. This image highlights the precision of the 0.03mm laser spot, demonstrating significantly finer detail compared to larger spot sizes.

영상: No Burn Marks on Materials. This image illustrates the clean engraving results on acrylic and plastic using the 1064nm laser, contrasting with the burn marks left by a 455nm laser.
5. 유지관리
정기적인 유지보수는 레이저 모듈의 수명 연장과 최적의 성능을 보장합니다.
- Cleaning Engraved Items: After engraving, use alcohol wipes or a soft cloth with alcohol to clean the engraved surface of your material. This removes any residue and enhances the clarity of the engraving.
- 레이저 렌즈 세척: Periodically inspect the laser lens for dust or debris. Use a specialized lens cleaning kit or a soft, lint-free cloth with lens cleaning solution to gently clean the lens. Avoid abrasive materials.
- 일반 청소: Keep the D1 Pro machine and the laser module free from dust and debris. Use a soft brush or compressed air to clean surfaces.
6. 사양
| 상표 | 메이크블록 |
| 모델 번호 | 피5010177 |
| 레이저 타입 | 1064nm Infrared Laser |
| 레이저 스팟 크기 | 0.03mm x 0.03mm |
| 피크 파워 | 15KW |
| 작업 속도 | 최대 400mm/s |
| Moving Accuracy | 0.01mm |
| 제품 치수 | 35.1 x 14.6 x 5.1 인치 |
| 품목 무게 | 3.83파운드 |
| 호환성 | xTool D1 Pro only |
7. 보증 정보
The xTool 1064nm Infrared Laser Module comes with a 1년 제조사 보증. Please retain your proof of purchase for warranty claims. For detailed terms and conditions, refer to the official xTool web사이트를 방문하거나 고객 지원팀에 문의하세요.
8. 고객 지원
질문, 기술 지원 또는 기타 문의 사항이 있으시면 다음 자료를 활용해 주십시오.
- 이메일 지원: 자세한 문의 사항은 이메일로 연락주세요.
- 라이브 채팅: Access live chat for immediate assistance.
- 전화 지원: Contact our technical service team by phone.
- 온라인 커뮤니티: Join the xTool Facebook group for community support and tips.

영상: Multi-Channel Service. This image illustrates the various support channels available for xTool users, including email, live chat, phone, and community forums.

영상: Technical Service Team. A friendly face from the xTool technical support team, emphasizing readily available assistance.


