PeriPage A6 미니 휴대용 열전사 프린터 사용 설명서
상표: 페리페이지 | 모델: A6
1. 서론
Thank you for choosing the PeriPage A6 Mini Portable Thermal Printer. This compact and versatile device allows you to print photos, labels, notes, lists, and more directly from your smartphone or PC. With its high-resolution thermal printing technology, you can enjoy clear and crisp prints without the need for ink cartridges. This manual provides essential information on setting up, operating, maintaining, and troubleshooting your new printer.
3. 패키지 내용
패키지에 모든 품목이 들어 있는지 확인하세요.
- PeriPage A6 Mini Printer
- 감열지 롤
- USB 케이블
- 사용자 설명서

Image: Contents of the PeriPage A6 Mini Printer package, showing the printer, a roll of thermal paper, a USB charging cable, and the user manual.
4. 제품 오버view
4.1 주요 특징
- Ultra HD Printing: 304 DPI resolution for clear and detailed prints.
- 잉크 없는 열전사 인쇄: No ink cartridges required, reducing operating costs.
- 다기능: Supports printing of photos, labels, notes, lists, QR codes, web 페이지 등.
- 블루투스 연결: Seamless wireless connection to iOS and Android smartphones.
- 휴대성 있는 디자인: Compact and lightweight with a built-in 1000mAh rechargeable battery.
- 다양한 용지 지원 기능: Compatible with various thermal paper types including standard, sticky, transparent, and colorful options.
4.2 프린터 구성 요소
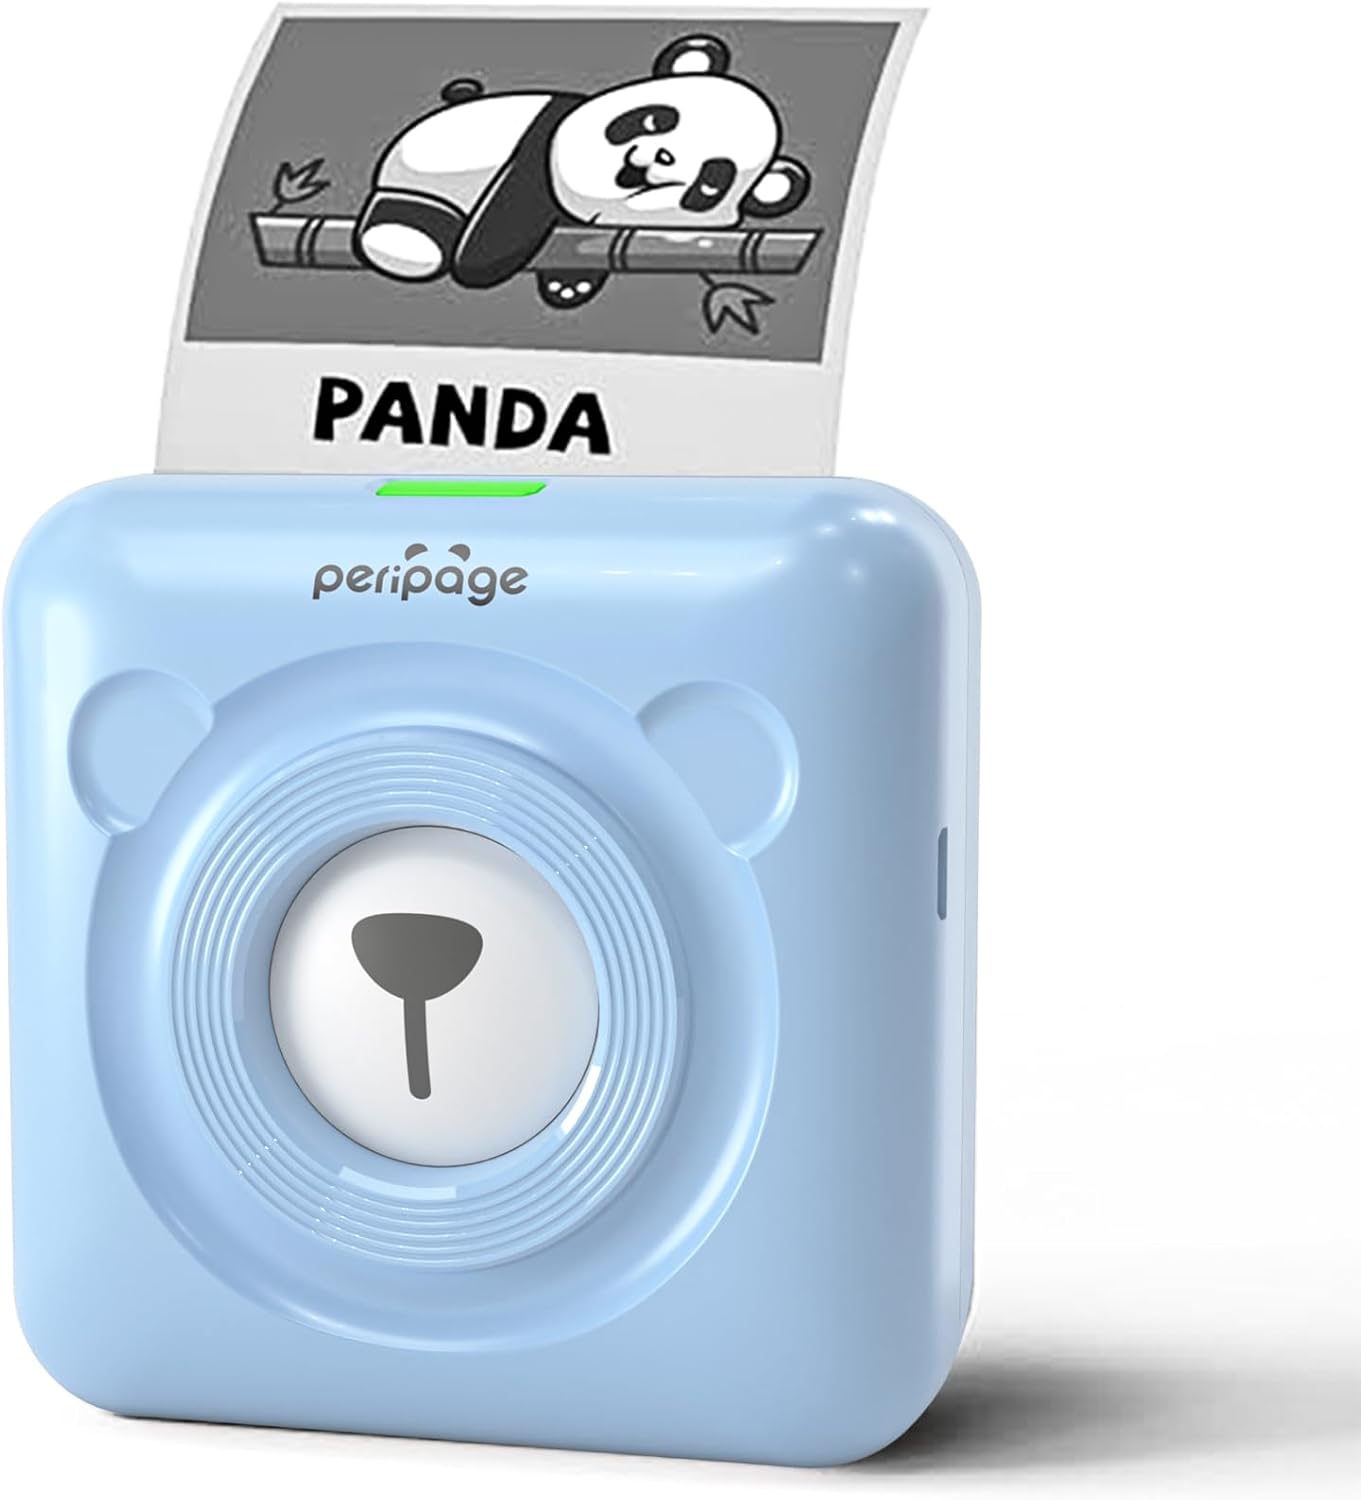
Image: The PeriPage A6 Mini Printer in blue, demonstrating a printed output. The printer features a bear-like design on its front.

Image: A visual comparison highlighting the superior print resolution of the PeriPage A6 Mini Printer (304 DPI) compared to a standard definition printer, showing finer details in the printed image.
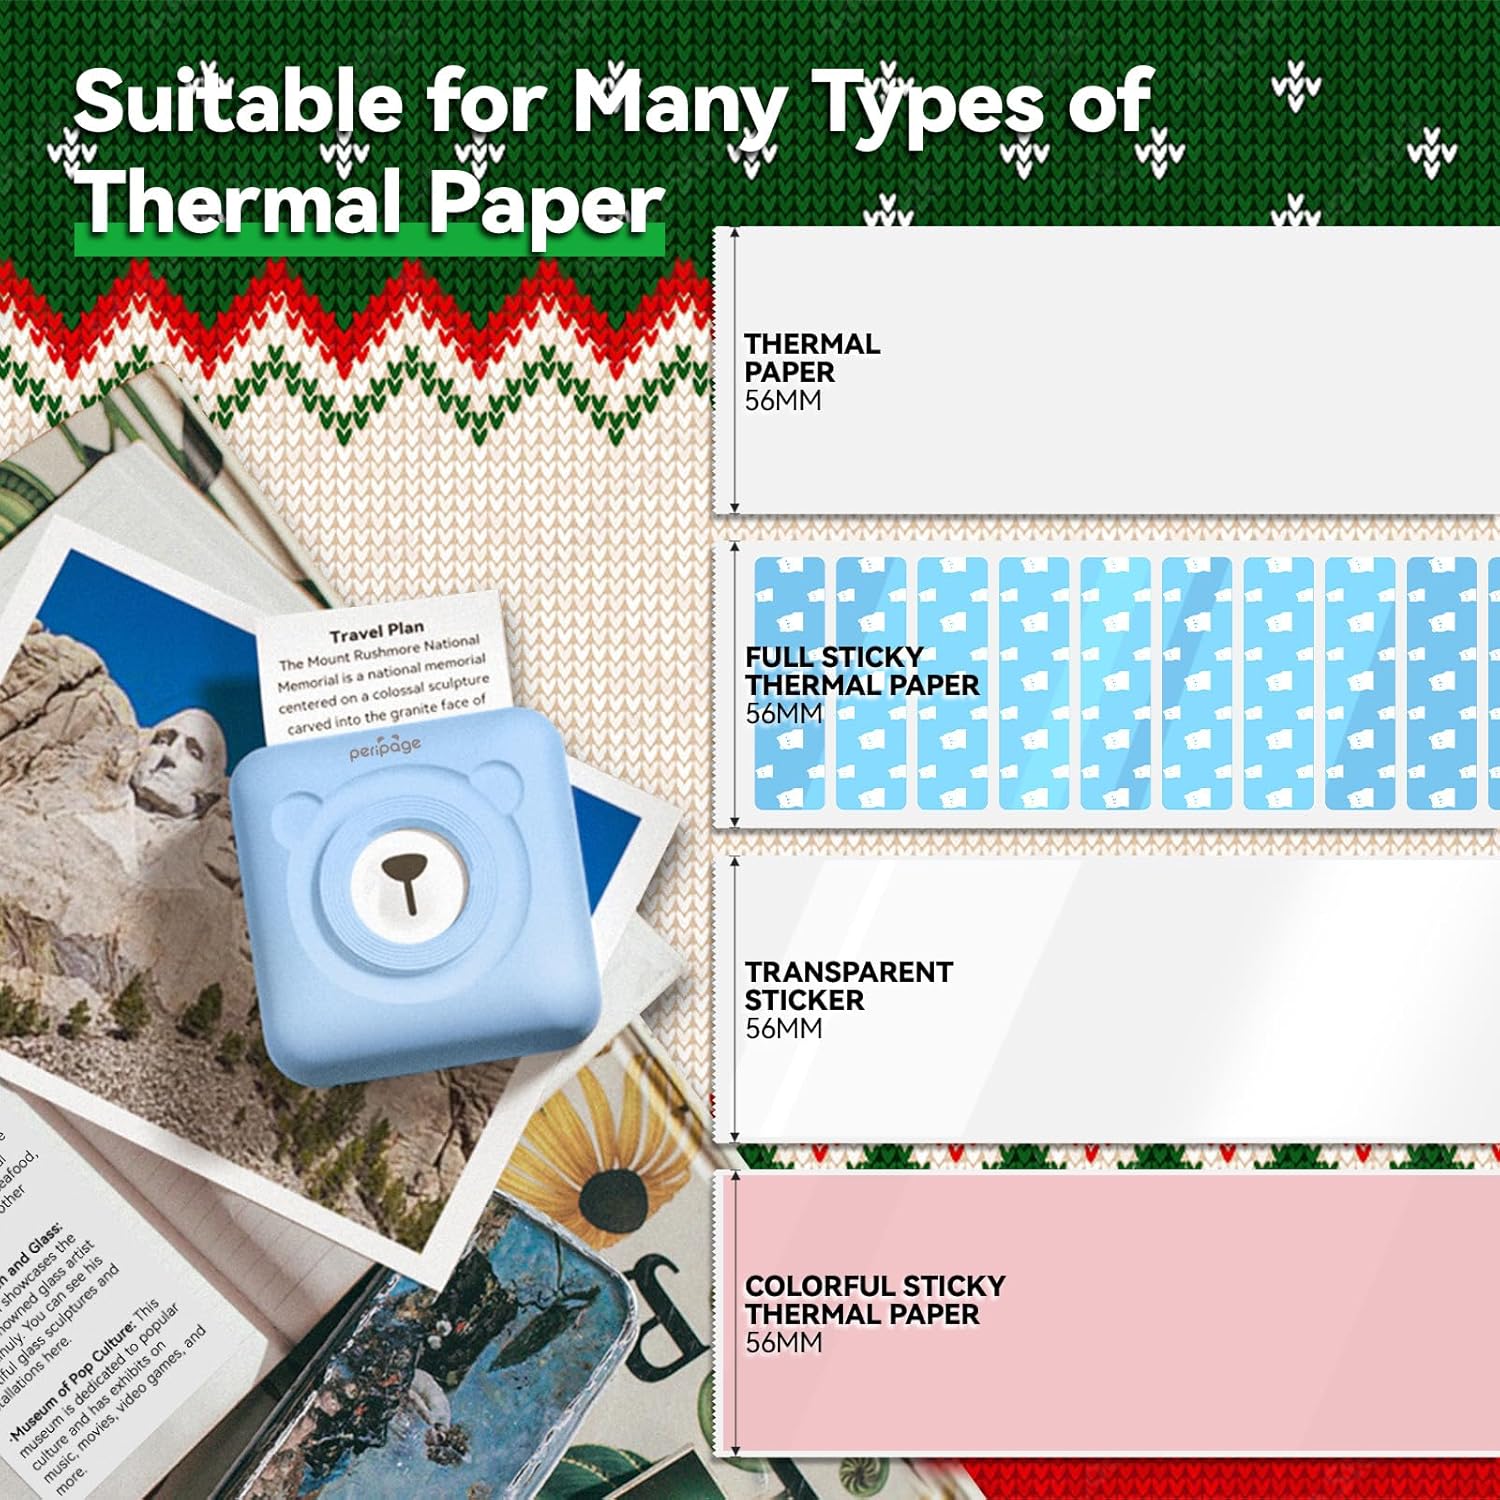
Image: An illustration showing the different types of thermal paper that can be used with the PeriPage A6 Mini Printer, such as standard thermal paper, full sticky thermal paper, transparent stickers, and colorful sticky thermal paper, all 56mm wide.
5. 설정 가이드
5.1 프린터 충전
Before first use, fully charge the printer using the provided USB cable. Connect the USB cable to the printer's charging port and the other end to a USB power adapter (not included) or a computer's USB port. The indicator light will show charging status.
5.2 감열지 설치
- Open the printer cover by gently sliding the release button or pressing the designated area.
- Insert the thermal paper roll into the paper compartment, ensuring the printing side faces the print head.
- Pull a small amount of paper out beyond the print head.
- 프린터 덮개를 딸깍 소리가 날 때까지 단단히 닫습니다.
5.3 Downloading the PeriPage App
The PeriPage A6 Mini Printer requires the official PeriPage APP for full functionality. You can download it via:
- Searching for "PeriPage" in your device's APP store (Apple App Store for iOS, Google Play Store for Android).
- Scanning the QR code provided in the instruction manual or on the product packaging.
- Visiting the official download page: https://www.ileadtek.com/download/app/peripage.html

Image: A guide illustrating two methods to download the PeriPage App: searching on Google Play or Apple App Store, or scanning a QR code.
5.4 Connecting to Your Device (Bluetooth)
- Ensure your PeriPage A6 printer is turned on.
- 스마트폰에서 블루투스를 활성화하세요.
- Open the PeriPage App. The app will guide you to connect to the printer.
- Select your printer from the list of available Bluetooth devices within the app. The printer's name usually starts with "PeriPage".
- 연결이 완료되면 앱에 연결 성공 메시지가 표시됩니다.

Image: A visual representation of connecting the PeriPage A6 Mini Printer to a smartphone via the PeriPage App, showing the app interface and Bluetooth icon.
6. 사용 설명서
The PeriPage App offers a wide range of functions to maximize your printer's utility.
6.1 Basic Printing Steps (via App)
- 프린터를 켭니다. 프린터의 전원 버튼을 누릅니다.
- Open the PeriPage App: Ensure your printer is connected via Bluetooth.
- Select Printing Type: On the app's homepage, choose the type of content you wish to print (e.g., Photo Print, Label Print, Notes, Web Page Printing, OCR Text Recognition).
- Import/Create Content: Select the image, text, or template you want to print. The app provides various fonts and themes.
- 설정 조정(선택 사항): Modify print density, size, or other parameters as needed.
- 인쇄: Tap the print button in the app. The printer will begin printing.

Image: A five-step visual guide demonstrating the printing process using the PeriPage App: 1. Press button to boot, 2. Enter PeriPage app, 3. Import file, 4. Connect via Bluetooth, 5. Get printed document.
6.2 사용 시나리오
The PeriPage A6 is suitable for a variety of applications:
- 주방: Print labels for jars and containers.
- 공부하다: Print study notes, lists, or quick references.
- 사진: Print black and white photos for journaling or scrapbooking.
- DIY 스티커: Create custom stickers for various purposes.

이미지: 전amples of the PeriPage A6 Mini Printer's use in multiple scenarios, including creating kitchen labels, printing study notes, printing photos, and enhancing scrapbooks.
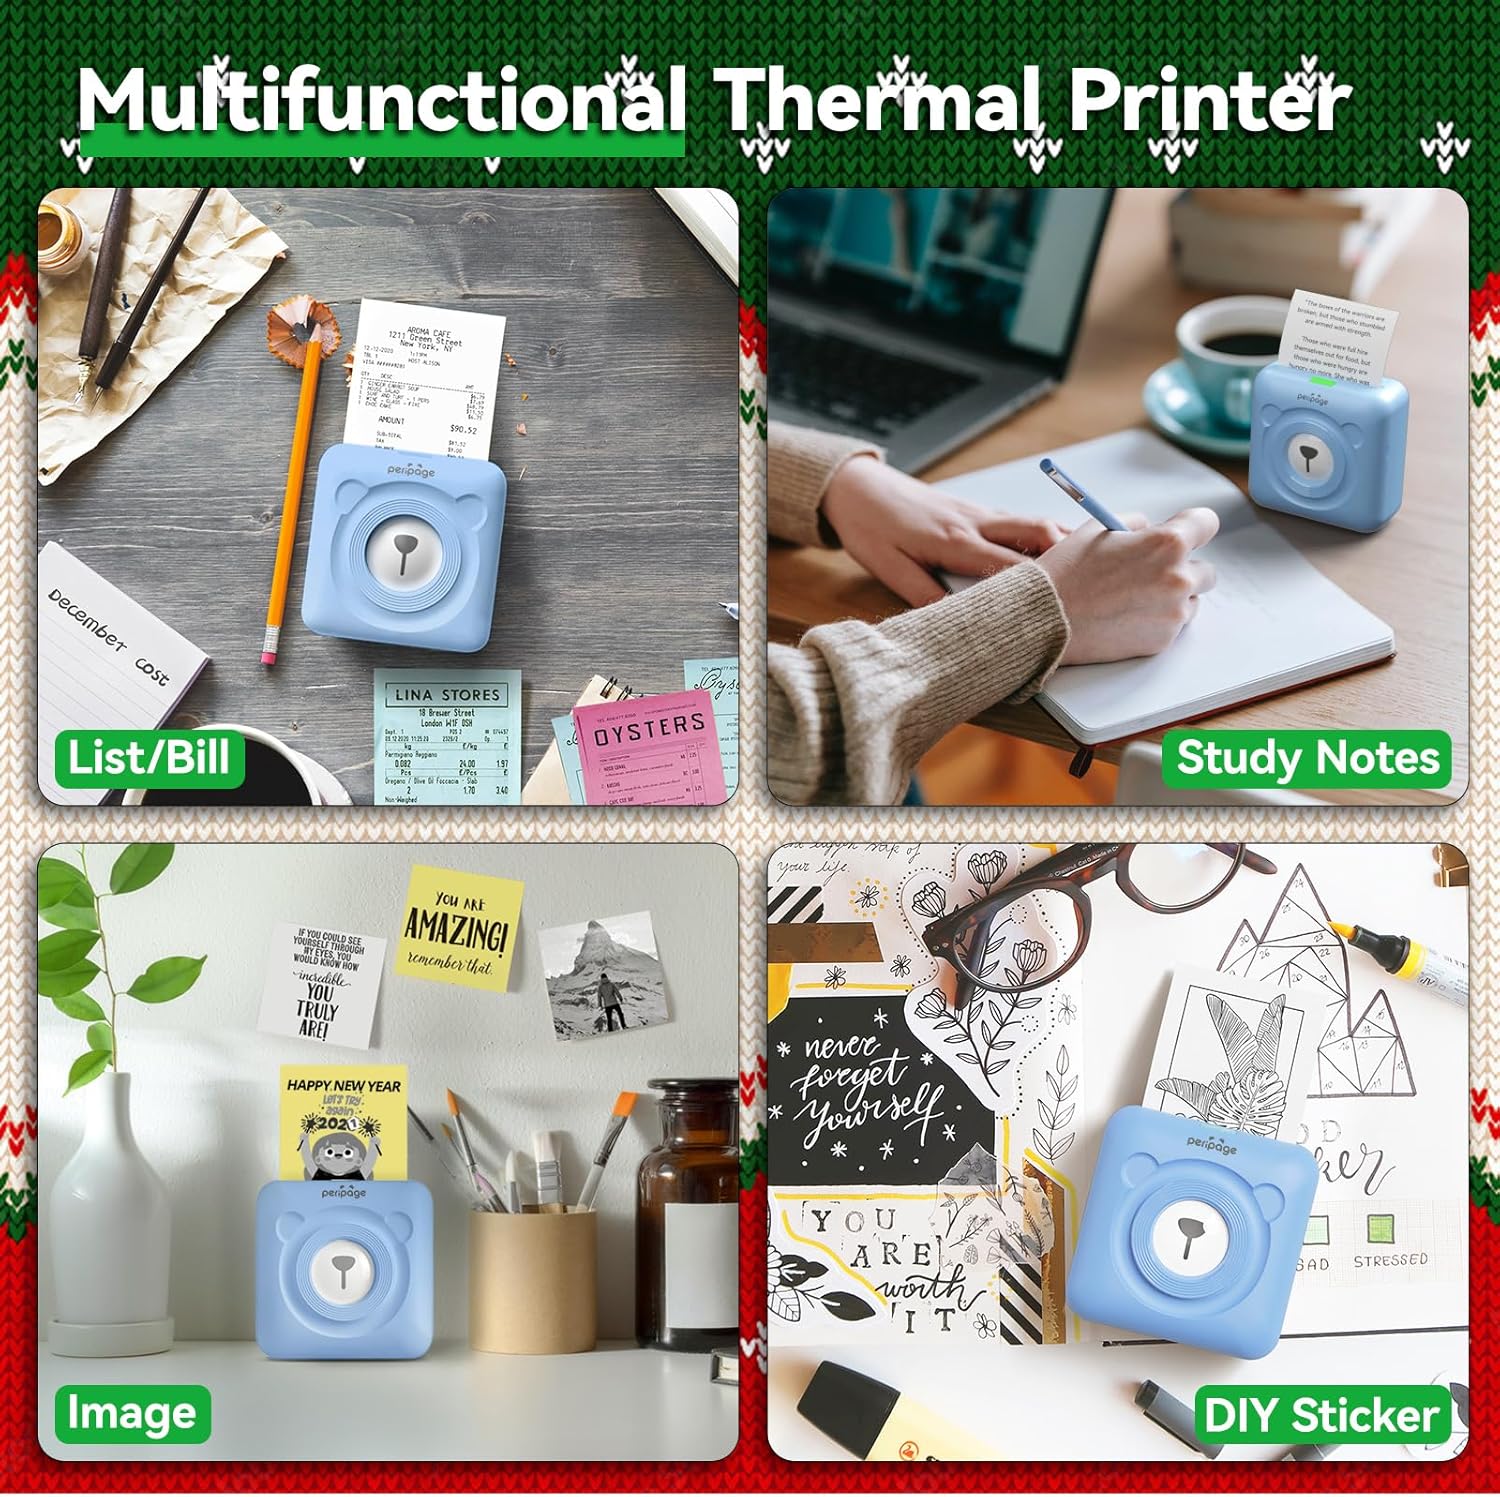
Image: A display of the PeriPage A6 Mini Printer's multifunctional thermal printing capabilities, showing its use for lists/bills, study notes, images, and DIY stickers.
7. 유지관리
7.1 프린터 청소
To ensure optimal print quality and prolong the life of your printer, regular cleaning is recommended.
- Turn off the printer and disconnect the power cable before cleaning.
- 프린터 외부를 닦을 때는 부드럽고 마른 보풀 없는 천을 사용하십시오.
- For the print head, gently wipe it with a cotton swab lightly damp이소프로필 알코올로 마무리하십시오. 사용하기 전에 완전히 건조시키십시오.
- 연마성 세척제나 용제를 사용하지 마십시오.
7.2 배터리 관리
- 배터리 수명 유지를 위해 사용하지 않을 때에도 정기적으로 프린터를 충전하십시오.
- 배터리를 자주 완전히 방전시키지 마세요.
- 장기간 사용하지 않을 때는 프린터를 서늘하고 건조한 곳에 보관하십시오.
8. 문제 해결
If you encounter issues with your PeriPage A6 Mini Printer, refer to the following common problems and solutions:
| 문제 | 가능한 원인 | 해결책 |
|---|
| 프린터가 켜지지 않음 | 배터리 부족; 전원 버튼을 제대로 누르지 않았습니다 | 프린터를 충전하려면 전원 버튼을 몇 초 동안 길게 누르십시오. |
| 블루투스로 연결할 수 없습니다 | 블루투스 꺼짐; 프린터를 찾을 수 없음; 앱 문제 | Ensure Bluetooth is enabled on your phone; Restart printer and phone; Reinstall PeriPage App. |
| Poor print quality / Faint prints | Paper installed incorrectly; Low battery; Dirty print head; Expired thermal paper | Reinstall paper with printing side facing up; Charge printer; Clean print head; Use new thermal paper. |
| 종이 걸림 | Paper not inserted straight; Too much paper pulled out | Open cover and carefully remove jammed paper; Reinsert paper correctly. |
| App is buggy or freezes | 소프트웨어 오류; 앱 버전이 오래되었습니다 | Close and reopen the app; Check for app updates; Reinstall the app. |
9. 사양
| 특징 | 세부 사항 |
|---|
| 상표 | 페리페이지 |
| 모델명 | PeriPage A6 |
| 인쇄 기술 | 열의 |
| 해결 | 304DPI |
| 연결성 | 블루투스, USB |
| 호환 장치 | Smartphones (iOS & Android), PC, Laptops |
| 최대 미디어 크기 | 57mm (width) x 30mm (roll diameter) |
| 배터리 | 1000mAh 리튬 이온(포함) |
| 품목 무게 | 5.6온스(160그램) |
| 제품 치수 | 2.95인치 깊이 x 2.95인치 너비 x 1.57인치 높이 |
| 포함된 구성 요소 | 종이 |
10. 보증 및 지원
10.1 보증 정보
Please note that this product is listed with 보증 없음. For specific details regarding returns or defects, please refer to the retailer's policy where the product was purchased.
10.2 고객 지원
For further assistance, technical support, or inquiries not covered in this manual, please contact PeriPage customer service through their official website or the contact information provided by your retailer. Ensure you have your product model number (A6) and purchase details ready when contacting support.


