소개
This manual provides essential instructions for the installation, operation, and maintenance of your VANBAR 2.5K Rear Camera, designed for use with VANBAR DC209 and DC209pro dash cam models. Please read this manual thoroughly before use to ensure proper functionality and longevity of the product.
제품 끝view
The VANBAR 2.5K Rear Camera is an accessory designed to extend the recording capabilities of compatible VANBAR dash cam systems. It captures high-resolution video from the rear of your vehicle, providing comprehensive coverage. The camera comes with a 5.5-meter cable for flexible installation.
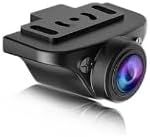
그림 1: The VANBAR 2.5K Rear Camera unit. This compact camera is designed to be mounted at the rear of a vehicle to record footage, connecting to a compatible main dash camera unit via its cable.
설정 및 설치
- 준비: Ensure your vehicle's engine is off and the main dash cam unit (DC209 or DC209pro) is powered down.
- 후방 카메라 장착:
- 뒷유리에서 시야가 잘 확보되는 적절한 위치를 찾으세요. view and does not obstruct the driver's vision.
- Clean the mounting surface thoroughly to ensure optimal adhesion for the adhesive mount.
- Attach the rear camera to the chosen location using the adhesive mount. Adjust the camera angle for the desired field of view.
- 케이블 라우팅:
- Carefully route the 5.5-meter camera cable from the rear camera to the location of your main dash cam unit.
- Tuck the cable neatly along the vehicle's headliner, A-pillars, or under floor mats to keep it out of sight and prevent interference with vehicle operation.
- Use cable clips or ties if necessary to secure the cable.
- 본체에 연결:
- Locate the dedicated rear camera input port on your VANBAR DC209 or DC209pro dash cam.
- Connect the rear camera cable securely into this port.
- 테스트: Power on your main dash cam unit. The rear camera feed should appear on the dash cam's display. Adjust the camera angle if needed.
작동 지침
The VANBAR 2.5K Rear Camera operates in conjunction with your main VANBAR DC209 or DC209pro dash cam unit. Once properly installed and connected, it will automatically begin recording when the main unit is powered on and recording. Refer to your main dash cam's instruction manual for specific settings related to dual-channel recording, viewing rear camera footage, and playback options.
- 자동 녹음: The rear camera records simultaneously with the front camera of your main dash cam.
- 디스플레이 모드 : Your main dash cam may offer various display modes, such as front-only, rear-only, or picture-in-picture views. Consult your main unit's manual to switch between these modes.
- File 저장: 후면 카메라 footage is typically stored on the same memory card as the front camera footage, often in separate folders or as combined files.
유지
- 렌즈 청소: 깨끗한 화질을 유지하려면 부드럽고 보풀이 없는 천으로 카메라 렌즈를 정기적으로 닦으세요. 연마재나 강한 화학 물질은 사용하지 마세요.
- 케이블 검사: Periodically check the camera cable for any signs of wear, damage, or loose connections. Ensure it remains securely tucked away.
- 장착 보안: Verify that the camera remains firmly attached to its mounting surface. Re-secure if necessary.
- 온도 고려 사항: Avoid exposing the camera to extreme temperatures for prolonged periods, as this can affect its performance and lifespan.
문제 해결
| 문제 | 가능한 원인 | 해결책 |
|---|---|---|
| No rear camera display/recording. |
|
|
| Poor video quality from rear camera. |
|
|
| 케이블이 손상된 것 같습니다. |
|
|
명세서
| 특징 | 세부 사항 |
|---|---|
| 상표 | 반바 |
| 모델 번호 | dc2k |
| 호환성 | VANBAR DC209, DC209pro Dash Cams |
| 해결 | 2.5K (as per product description) |
| 케이블 길이 | 5.5 미터 |
| 장착 유형 | 접착식 마운트 |
| Screen Size (Main Unit) | 5.5 inches (referring to compatible main unit display) |
| 배터리 사용 | No (powered by main dash cam) |
보증 정보
VANBAR products are manufactured to high-quality standards. For specific warranty terms and conditions, please refer to the warranty card included with your main VANBAR dash cam unit or visit the official VANBAR web사이트. 보증 청구를 위해 구매 증빙 자료를 보관하세요.
고객 지원
If you encounter any issues or have questions regarding your VANBAR 2.5K Rear Camera, please contact VANBAR customer support through the following channels:
- Web대지: Visit the official VANBAR webFAQ, 지원 리소스, 문의 양식을 제공하는 사이트입니다.
- 이메일: Refer to your product packaging or main dash cam manual for the customer support email address.
- 온라인 소매업체: For purchase-related inquiries, you may contact the retailer where the product was purchased.


