1. 서론
The XPG Levante X 360 is an All-in-One (AIO) ARGB CPU Liquid Cooler designed to provide efficient and reliable thermal management for high-performance CPUs. This cooler features a 360mm radiator equipped with three 120mm Fluid Dynamic Bearing (FDB) ARGB fans and an Asetek-powered pump, ensuring optimal heat dissipation and quiet operation. This manual provides essential information for the proper installation, operation, and maintenance of your XPG Levante X 360 liquid cooler.
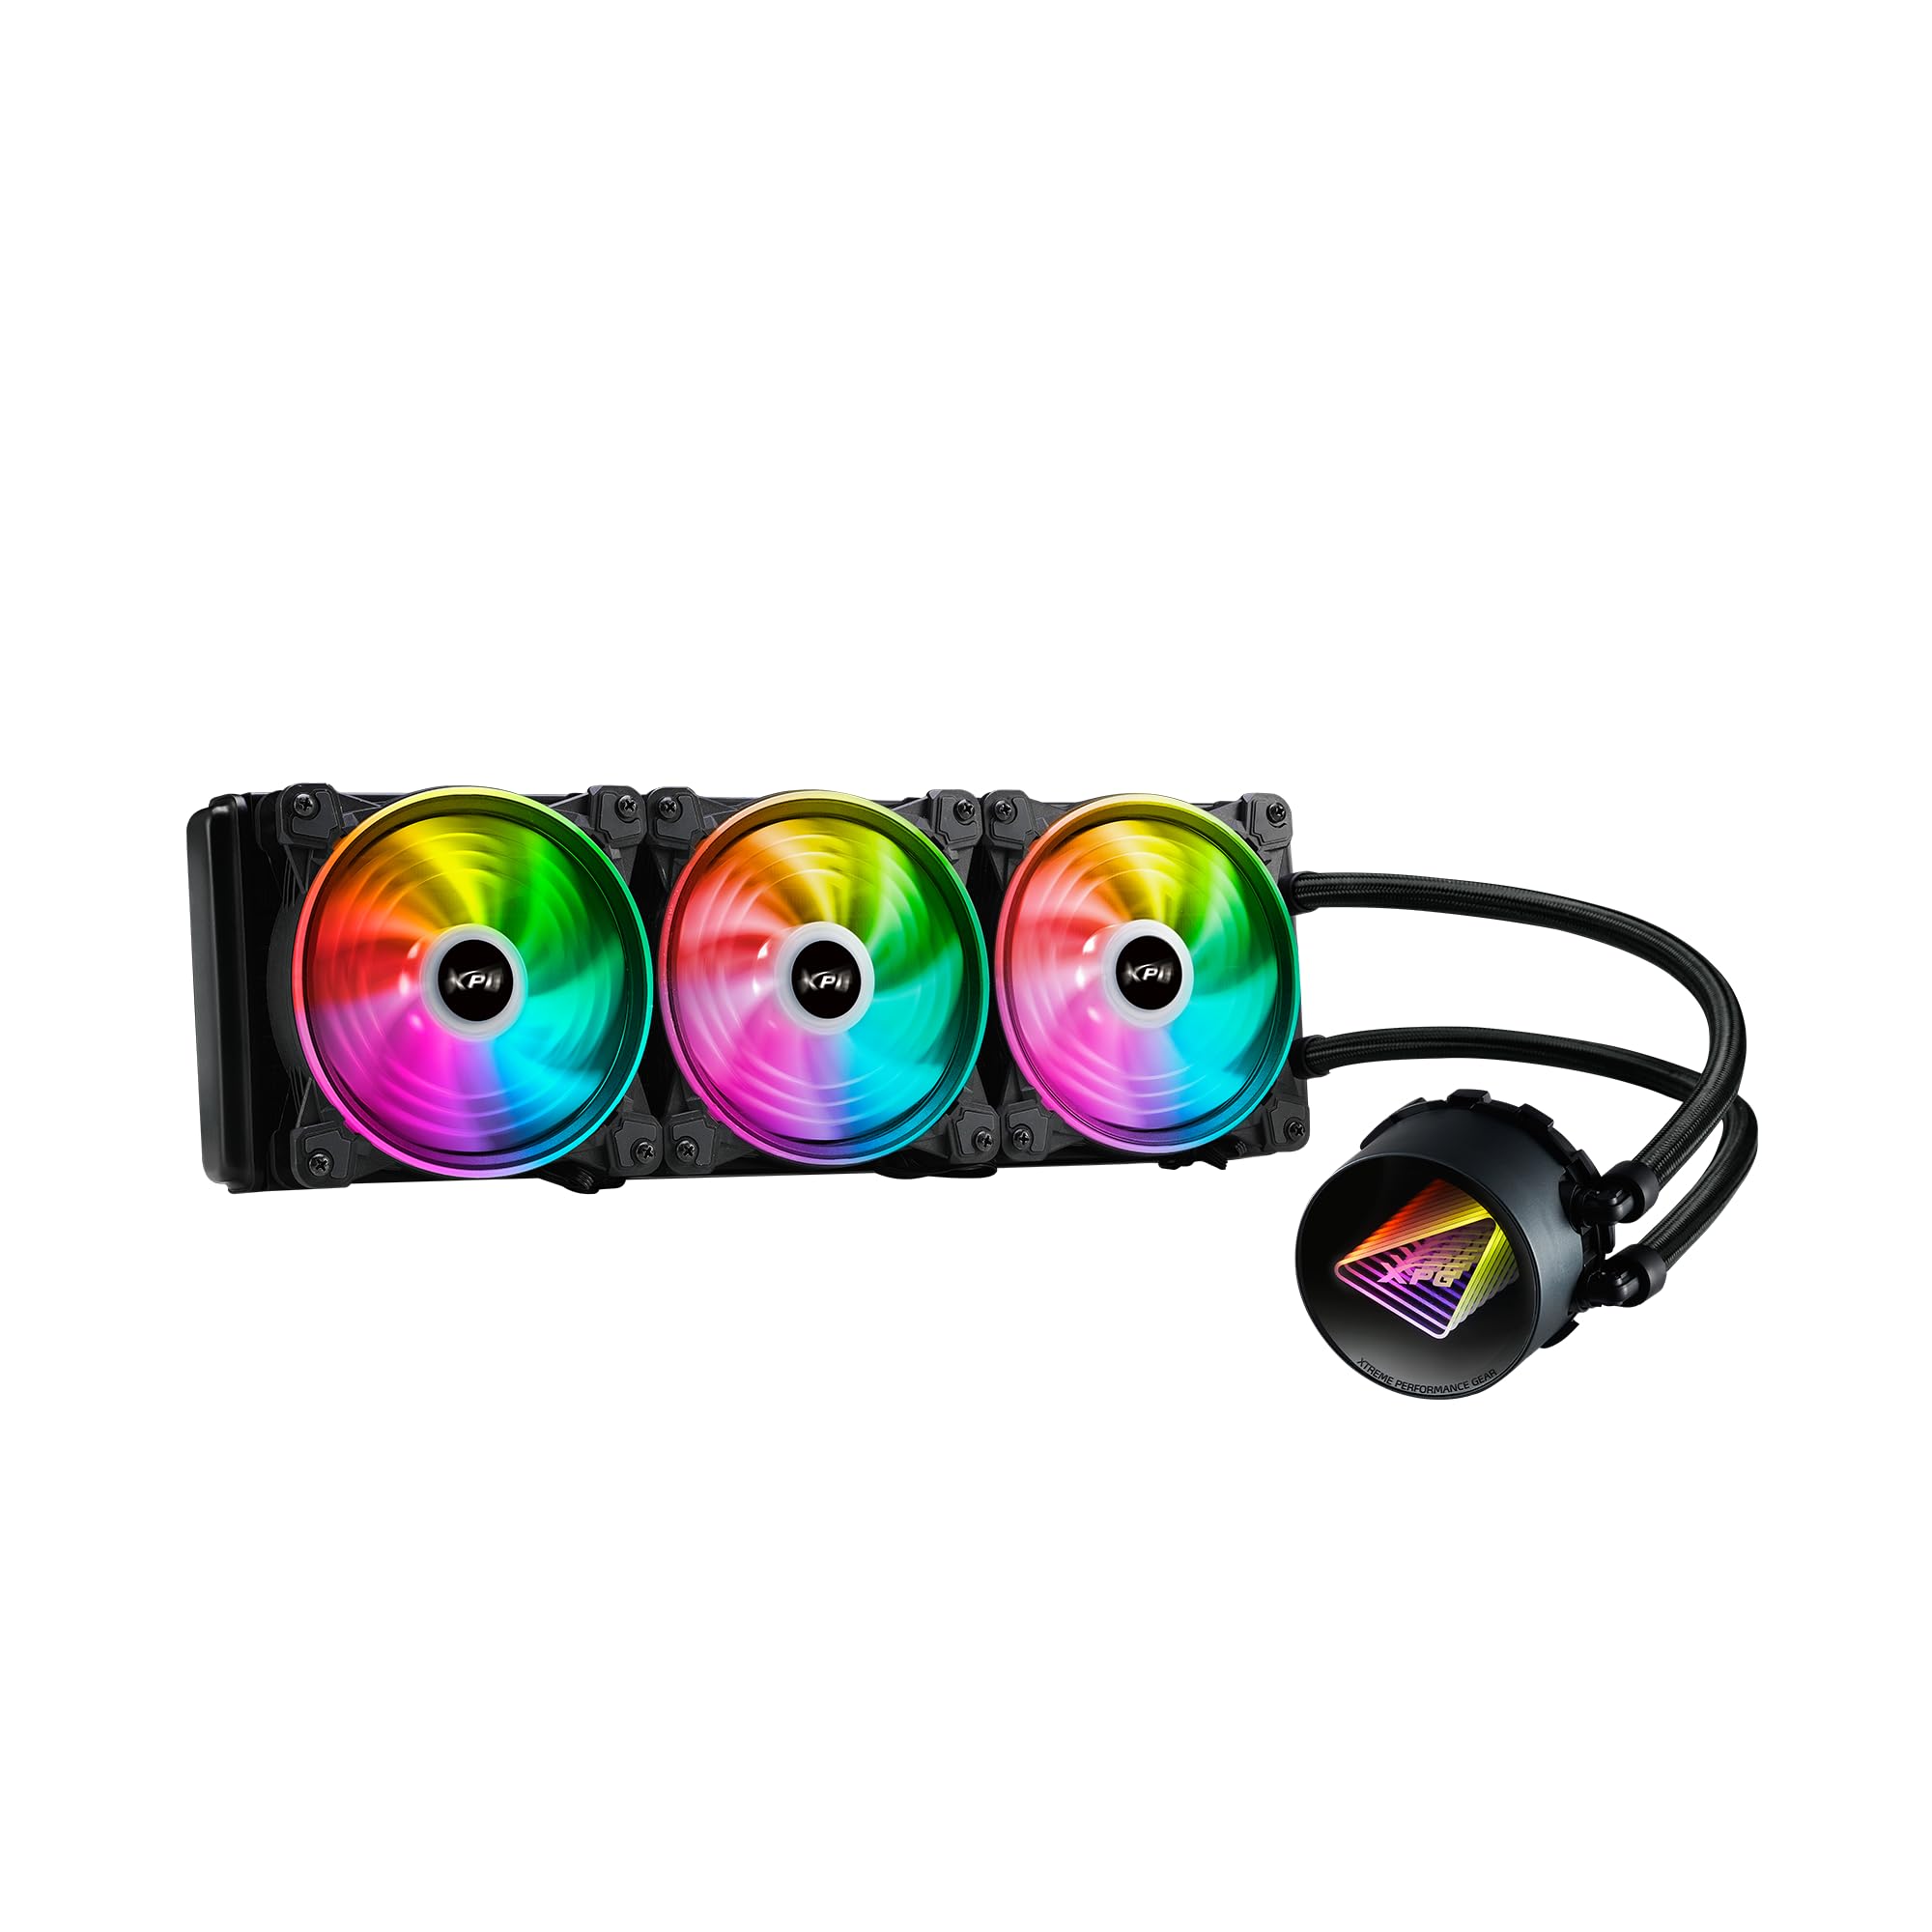
Image 1.1: XPG Levante X 360 All-in-One ARGB CPU Liquid Cooler. This image displays the complete liquid cooler unit, including the 360mm radiator, three 120mm ARGB fans, and the pump/cold plate assembly with braided tubing.
2. 패키지 내용
Verify that all components are present and in good condition before proceeding with installation.
- XPG Levante X 360 CPU Liquid Cooler (Radiator, Pump, Tubing, 3x 120mm ARGB Fans)
- Mounting Bracket Kit for Intel (LGA 1700, 1200, 115X, 2066, 2011-3, 2011)
- Mounting Bracket Kit for AMD (AM5, AM4, TR4)
- 팬 나사 및 라디에이터 나사
- ARGB Controller/Cables
- 써멀 페이스트(미리 도포된 형태 또는 튜브형)
- 사용 설명서 (본 문서)

Image 2.1: Package contents. This image shows the radiator with fans, pump, various mounting brackets, screws, and cables included in the box.
3. 안전 정보
Please read and understand the following safety precautions before installing or operating the XPG Levante X 360 liquid cooler.
- 전원 차단: 설치나 유지관리를 하기 전에는 반드시 컴퓨터의 전원을 분리하세요.
- 정전기 방전(ESD): Take precautions against ESD by grounding yourself before handling components.
- 액체 취급: While the cooler is a sealed unit, handle it with care to prevent damage to the tubing or radiator, which could lead to leaks.
- 날카로운 모서리: Be aware of sharp edges on computer cases and cooler components during installation.
- 통풍: Ensure adequate airflow within your computer case for optimal cooling performance.
- 호환성: Verify compatibility with your CPU socket and computer case before installation.
4. 설정 및 설치
The XPG Levante X 360 is designed for hassle-free installation. Follow these steps carefully for proper setup.
4.1 시스템 준비
- 컴퓨터의 전원을 끄고 모든 케이블을 분리하세요.
- 컴퓨터 케이스를 열어 마더보드와 CPU 영역에 접근하세요.
- 기존 CPU 쿨러를 제거하십시오. CPU 표면을 깨끗이 청소하여 기존 써멀 페이스트를 완전히 제거하십시오.
4.2 장착 하드웨어 설치
Select the appropriate mounting bracket for your CPU socket (Intel or AMD). The cooler supports LGA 1700, 1200, 115X, 2066, 2011-3, 2011 for Intel, and AM5, AM4, TR4 for AMD.
- Attach the correct backplate to the rear of your motherboard (for Intel sockets). AMD AM4/AM5 typically uses the stock backplate.
- CPU 쿨러 장착 구멍을 통해 스탠드오프를 마더보드에 고정하십시오.
- Attach the chosen CPU bracket to the pump head.

Image 4.1: Key features highlighting support for LGA 1700 and AM5 sockets, along with low noise fan, aluminum radiator, high quality low noise pump, and hassle-free installation.
4.3 라디에이터 및 팬 장착
Determine the optimal mounting location for the 360mm radiator within your case (e.g., front, top).
- If not pre-attached, mount the three 120mm ARGB fans to the radiator using the provided fan screws. Ensure correct airflow direction (intake or exhaust) based on your case's ventilation strategy.
- Secure the radiator assembly to your chosen mounting location in the PC case using the longer radiator screws.
4.4 Install the Pump Head
Carefully place the pump head onto the CPU, aligning the mounting holes with the standoffs.
- If thermal paste is not pre-applied, apply a small pea-sized amount to the center of the CPU's integrated heat spreader (IHS).
- Place the pump head onto the CPU, ensuring even contact.
- Tighten the thumbscrews or nuts in a diagonal pattern until snug. Do not overtighten.
4.5 케이블 연결
Connect the pump and fan cables to your motherboard or ARGB controller.
- Connect the pump's 3-pin or 4-pin power cable to the motherboard's CPU_FAN or AIO_PUMP header.
- Connect the 4-pin PWM fan cables from the three 120mm fans to available fan headers on your motherboard or to a fan hub/controller.
- Connect the ARGB cables from the fans and pump head to an ARGB header on your motherboard (5V 3-pin) or to the included ARGB controller.

Image 4.2: The XPG Levante X 360 cooler installed inside a computer case, showcasing the illuminated pump head and ARGB fans.
5. 사용 설명서
Once installed, the XPG Levante X 360 operates automatically to cool your CPU.
- 초기 전원 켜기: After installation, power on your computer. The pump and fans should start operating. Check for any unusual noises or leaks.
- 팬 및 펌프 제어: The 4-pin PWM fans and pump allow for speed control via your motherboard's BIOS/UEFI settings or dedicated software. Adjust fan curves to balance cooling performance and noise levels.
- ARGB 조명: The Addressable RGB (ARGB) lighting on the fans and pump head can be controlled via your motherboard's ARGB software (e.g., ASUS Aura Sync, MSI Mystic Light Sync, GIGABYTE RGB Fusion, ASRock Polychrome Sync) or through the included ARGB controller.

이미지 5.1: 클로즈업 view of the XPG Levante X 360's ARGB fans and pump, illustrating the vibrant lighting effects.
6. 유지관리
정기적인 유지 관리는 액체 냉각기의 최적 성능과 수명 연장에 도움이 됩니다.
- 먼지 제거: 주기적으로 압축 공기나 부드러운 브러시를 사용하여 라디에이터 핀과 팬 블레이드의 먼지를 청소하십시오. 과도한 먼지는 공기 흐름을 방해하고 냉각 효율을 떨어뜨릴 수 있습니다.
- 튜빙 검사: Occasionally check the tubing for any signs of kinks, cracks, or leaks.
- 팬 작동 : Ensure all fans are spinning freely and quietly. Replace any fans that become excessively noisy or stop functioning.
- 펌프 작동: Listen for any unusual noises from the pump. A properly functioning pump should operate quietly.
7. 문제 해결
If you encounter issues with your XPG Levante X 360, refer to the following common problems and solutions.
| 문제 | 가능한 원인 | 해결책 |
|---|---|---|
| CPU 과열 | Poor thermal paste application, pump not running, fans not spinning, insufficient mounting pressure. | Reapply thermal paste, check pump and fan connections, ensure pump head is securely mounted. Verify fan direction. |
| 팬이 회전하지 않음 | Loose fan cable connection, incorrect fan header, faulty fan. | Check fan cable connections to motherboard/controller. Ensure correct fan headers are used. Test fans individually if possible. |
| 펌프가 작동하지 않음 | Loose pump power cable, incorrect pump header, faulty pump. | Verify pump power cable is securely connected to the CPU_FAN or AIO_PUMP header. Check BIOS settings for pump control. |
| ARGB 조명이 작동하지 않습니다 | Loose ARGB cable connection, incorrect ARGB header (5V vs 12V), software issue. | Ensure ARGB cables are connected to a 5V 3-pin ARGB header. Check motherboard ARGB software. Verify connections to the ARGB controller. |
| 과도한 소음 | Fan speed too high, pump noise, air bubbles in the loop. | Adjust fan curves in BIOS/software. Orient radiator to ensure pump is not the highest point to minimize air bubbles. |
8. 사양
Detailed technical specifications for the XPG Levante X 360 All-in-One ARGB CPU Liquid Cooler.
- 모델: LEVANTEX360-BKCWW
- Cooler Type: All-in-One Liquid CPU Cooler
- Radiator Size: 360mm
- 팬 크기 : 120mm(x3)
- 팬 유형: ARGB Fluid Dynamic Bearing (FDB) Fans
- 팬 커넥터: 4 핀 PWM
- 최대 회전 속도: 2000 RPM
- 기류 수용량: 61.5 분당 입방피트(CFM)
- 소음 수준: 18.17데시벨(dBA)
- 펌프 유형 : Asetek-powered High-Performance Pump
- 펌프 볼륨tage: 12 볼트
- 냉각 방식: 액체
- 재료: 알루미늄(라디에이터), 구리(냉각판)
- Compatible CPU Sockets:
- Intel: LGA 1700, 1200, 115X, 2066, 2011-3, 2011
- AMD: AM5, AM4, TR4
- 제품 크기(패키지): 18.9 x 5.91 x 7.48 인치
- 품목 무게: 4.71파운드
- 한국어: 842243029062
- 제조업체: 아다타

Image 8.1: Graph illustrating the relationship between PWM duty cycle, fan speed (RPM), fan air flow (CFM), and fan noise (dBA) for the XPG Hurricane 120 ARGB PWM fans.
9. 보증 및 지원
XPG products are manufactured to the highest quality standards. For warranty information, technical support, or service inquiries, please refer to the official XPG web사이트를 방문하거나 고객 지원팀에 문의하세요. 보증 청구를 위해 구매 증빙 자료를 보관하세요.
Official XPG Web대지: www.xpg.com


