소개
The Premier 1 Supplies Borotto® Lumia 16 Automatic Egg Incubator is designed to provide an optimal environment for hatching various types of poultry eggs. Its advanced features, including a universal egg tray system and automatic turning, simplify the incubation process, leading to better hatch rates. This manual will guide you through the proper setup, operation, and maintenance of your incubator to ensure successful results.
설정
1. 개봉 및 검사
Carefully remove all components from the packaging. Verify that all parts are present and undamaged. The package should include the incubator base, transparent lid, egg turning mechanism, and water filling accessories.
2. 배치
Place the incubator on a stable, level surface away from direct sunlight, drafts, and extreme temperature fluctuations. Ensure the room temperature remains consistent, ideally between 68°F and 77°F (20°C and 25°C).
3. 물 채우기
Proper humidity is crucial for successful hatching. Fill the external water reservoirs as needed. The incubator features an external filling port to add water without opening the lid, maintaining stable internal conditions.
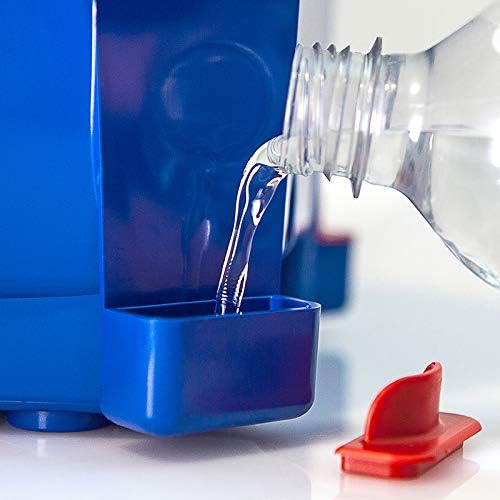
영상: Adding water to the external reservoir. This feature allows for humidity adjustment without disturbing the internal environment.
4. Egg Placement
The universal egg tray system is designed to securely hold various egg sizes, from quail to duck eggs, in a vertical position. Place the eggs gently into the designated slots. Ensure the larger end of the egg is facing upwards.
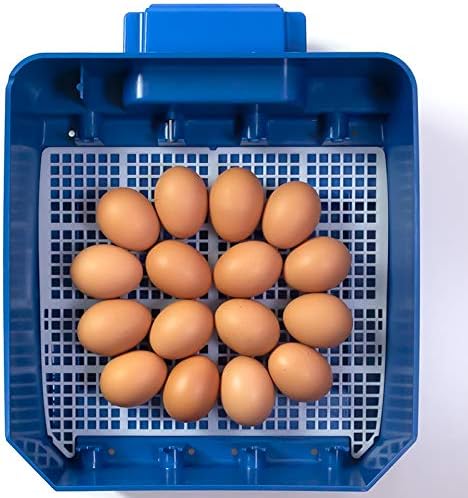
영상: Chicken eggs correctly positioned in the incubator's universal tray.

영상: The versatile tray accommodates different egg sizes, such as chicken and quail eggs, simultaneously.
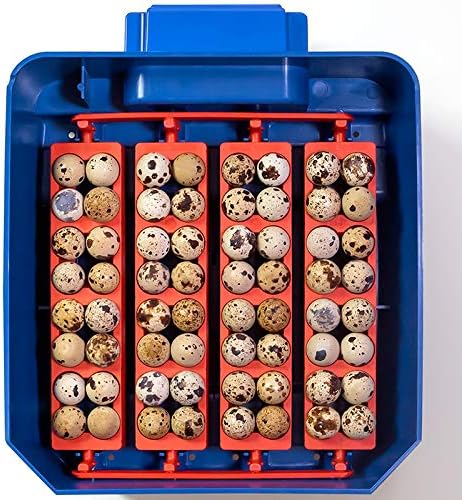
영상: Quail eggs neatly arranged in the incubator's specialized sections of the tray.
작동 지침
1. 전원 켜기
Once eggs are placed and water reservoirs are filled, connect the incubator to a power source. The digital display will illuminate, showing the current temperature and humidity levels.
2. Temperature and Humidity Control
The incubator is designed to maintain optimal conditions automatically. Refer to the specific requirements for the type of eggs you are incubating. The insulated ventilation system ensures consistent air movement and precise temperature/humidity control.
3. 자동 계란 회전
The automatic egg turning system gently rotates the eggs left to right. Each turning cycle lasts approximately one hour. This continuous movement prevents the embryo from sticking to the shell and promotes healthy development.
4. Monitoring the Hatching Process
The transparent windows on the lid allow for easy observation of the hatching process without disturbing the internal environment. Avoid opening the lid frequently, especially during the final days of incubation, to maintain stable conditions.

영상: Chicks hatching inside the incubator, demonstrating the successful culmination of the incubation process.
유지
1. 청소
After each hatch, thoroughly clean the incubator. Disconnect from power before cleaning. Use a mild disinfectant solution and a soft cloth to wipe down all surfaces, including the egg trays and water reservoirs. Ensure all parts are completely dry before reassembly or storage.
2. 보관
Store the incubator in a clean, dry place, away from direct sunlight and extreme temperatures. Keep it in its original packaging if possible to protect it from dust and damage.
문제 해결
| 문제 | 가능한 원인 | 해결책 |
|---|---|---|
| 낮은 부화율 | Incorrect temperature/humidity; infertile eggs; improper egg handling. | Verify temperature and humidity settings. Ensure eggs are fertile and handled gently. |
| 온도 변화 | Room temperature instability; incubator placed in drafty area. | Move incubator to a stable environment. Avoid opening lid unnecessarily. |
| 계란이 부풀지 않음 | Turning mechanism obstructed or malfunctioning. | Check for obstructions. Contact customer support if issue persists. |
If you encounter issues not listed here, or if solutions do not resolve the problem, please contact Premier 1 Supplies customer support for assistance.
명세서
- 모델: Borotto® Lumia 16
- 용량: Up to 16 hen eggs (or equivalent in other sizes)
- Egg Tray System: Universal, vertical egg placement
- 선회: Automatic, left to right, hourly cycle
- 습도 조절: External water filling ports
- 시계: Two transparent view창문
- 통풍: Insulated for optimal air movement
- 제조업체: 보로토
- ASIN: B09JHSLWND
보증 및 지원
Premier 1 Supplies stands behind the quality of its products. For warranty information, technical support, or replacement parts, please contact Premier 1 Supplies directly. You can find contact details on our official web사이트나 구매 문서를 통해 확인하세요.
Premier 1 Supplies Customer Service: Visit Premier 1 Supplies Web대지


