1. 서론
This manual provides essential information for the safe and efficient operation, maintenance, and troubleshooting of your Profile GE Automatic Espresso Machine + Milk Frother. Please read these instructions thoroughly before first use and retain for future reference.

Image 1.1: The Profile GE Automatic Espresso Machine with a prepared espresso and a latte.
2. 안전 정보
화재, 감전, 부상의 위험을 줄이기 위해 전기 제품을 사용할 때는 항상 기본적인 안전 예방 조치를 따르세요.
- Ensure the appliance is connected to a grounded outlet.
- 기기, 코드, 플러그를 물이나 기타 액체에 담그지 마십시오.
- 사용하지 않을 때와 세척 전에는 콘센트에서 플러그를 뽑아두세요.
- 코드나 플러그가 손상된 제품은 작동하지 마세요.
- 손과 코드를 뜨거운 표면에서 멀리하세요.
- 제조업체가 권장하는 부착물만 사용하세요.
3. 제품 오버view
프로file GE Automatic Espresso Machine is designed for convenience and quality, featuring an integrated grinder, milk frother, and smart connectivity.
3.1개의 구성요소
- 제어판: Touch-sensitive buttons for various drink selections and functions.
- 콩 호퍼: Stores whole coffee beans for grinding.
- 물 저장고: 물 공급을 위한 분리형 탱크.
- 커피 주둥이: 추출된 커피를 제공합니다.
- 스팀 완드: 우유 거품을 만드는 데 사용.
- 드립 트레이: 과도한 액체를 수집합니다.
- 찌꺼기 용기: 사용한 커피 찌꺼기를 모읍니다.

Image 3.1: The top control panel with buttons for Espresso, Americano, My Brew, Steam, and Hot Water.

Image 3.2: The integrated bean hopper with whole coffee beans and grind size adjustment knob.

Image 3.3: The removable water reservoir being lifted from the machine.
4. 설정
4.1 풀기 및 초기 배치
- 모든 포장재를 조심스럽게 제거하세요.
- Place the machine on a stable, level surface away from heat sources and direct sunlight.
- 환기와 구성 요소에 대한 접근을 위해 기계 주변에 충분한 공간을 확보하세요.
4.2 초기 청소
Before first use, clean all removable parts with warm water and mild detergent. Rinse thoroughly and dry. Wipe the exterior of the machine with a damp 옷감.
4.3 물 저장고 채우기
- Remove the water reservoir from the machine (refer to Image 3.3).
- Fill with fresh, cold drinking water up to the MAX line.
- Replace the reservoir securely into the machine.
4.4 커피 원두 추가
- Open the lid of the bean hopper (refer to Image 3.2).
- 원두커피를 호퍼에 넣으세요. 너무 많이 넣지 마세요.
- 뚜껑을 단단히 닫으세요.
4.5 전원 켜기 및 초기 세척
- 전원 코드를 접지된 콘센트에 꽂으세요.
- Press the power button on the control panel. The machine will perform an initial rinse cycle.
- Place a container under the coffee spout to collect the rinse water.
4.6 SmartHQ App Connection
For enhanced customization and software updates, connect your espresso machine to the SmartHQ app.
- Download the SmartHQ app from your device's app store.
- Follow the in-app instructions to pair your espresso machine.
- Customize drink preferences, volume, and strength through the app.

Image 4.1: Using the SmartHQ app to control and customize the espresso machine.
5. 사용 설명서
5.1 커피 끓이기
The machine offers Espresso, Americano, Lungo, and Hot Water options. The 'My Cup' setting is pre-set to Ristretto and can be adjusted via the SmartHQ app.
- Ensure the water reservoir is filled and the bean hopper contains coffee beans.
- 커피 추출구 아래에 컵을 놓습니다.
- Select your desired drink (Espresso, Americano, Lungo, My Cup) from the control panel.
- 이 기계는 자동으로 커피콩을 갈아서, 커피를 내리고, 커피를 제공합니다.

Image 5.1: The espresso machine dispensing a fresh shot of espresso.
5.2 분쇄 입자 크기 조절
The integrated conical burr grinder allows for 5 levels of grind size adjustment, from coarsest to finest, to optimize flavor extraction.
- Locate the grind size adjustment knob inside the bean hopper (refer to Image 3.2).
- Turn the knob to select your desired grind setting. Finer grinds are suitable for espresso, while coarser grinds are better for longer coffee types.
5.3 Using the Steam Frother
The steam frother creates various milk textures for cappuccinos, lattes, and more.
- Fill the included stainless steel frothing pitcher with cold milk.
- 스팀 막대를 우유에 넣으세요.
- 제어판에서 'Steam' 버튼을 누르세요.
- Move the pitcher to achieve desired foam texture.
- Once finished, press the 'Steam' button again to stop.
- Immediately clean the steam wand after each use to prevent milk residue buildup.
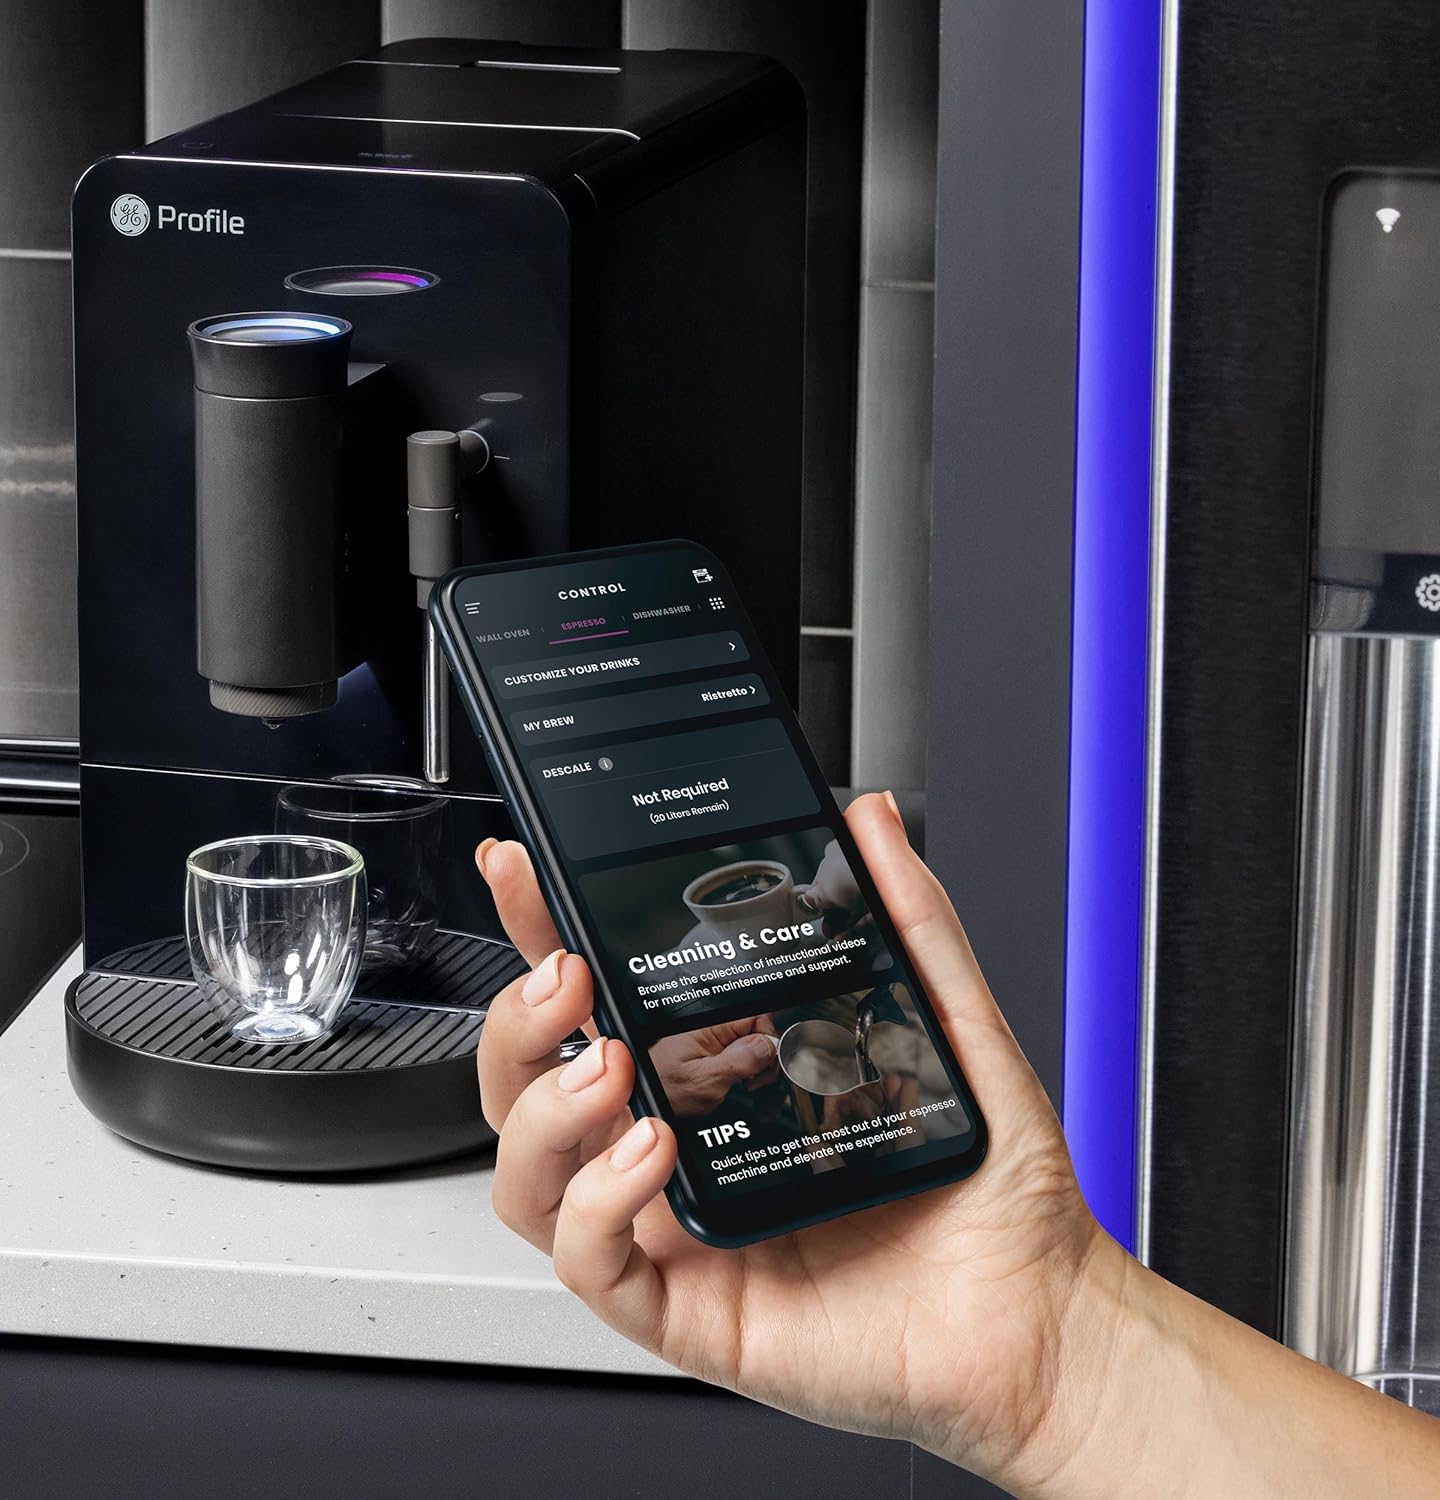
Image 5.2: A hand using the steam wand to froth milk in a stainless steel pitcher.
6. 유지관리
정기적인 청소와 유지관리를 통해 에스프레소 머신의 최적의 성능과 수명을 보장하세요.
6.1 일일 청소
- 스팀 완드: 사용 후에는 스팀완드를 물로 닦아주세요.amp 천을 사용하십시오. 노즐에 남아 있는 우유 찌꺼기를 제거하기 위해 스팀을 잠시 분사하십시오.
- 물받이와 찌꺼기 용기: 매일 비우고 헹구세요. 찌꺼기 용기를 비워야 할 때 기기에 표시됩니다.
- 물 저장고: 매일 헹구고 깨끗한 물을 다시 채워주세요.
6.2 주간 청소
- 양조 장치: The brew unit is typically removable for rinsing under running water. Refer to the included cleaning kit instructions for detailed steps.
- 콩 호퍼: Periodically clean out any oil residue or old beans.
6.3 석회질 제거
The machine will prompt you when descaling is required. Use a descaling solution specifically designed for espresso machines and follow the instructions provided with the descaling agent or in the SmartHQ app.
7. 문제 해결
이 섹션에서는 에스프레소 머신 사용 중 발생할 수 있는 일반적인 문제에 대해 설명합니다.
| 문제 | 가능한 원인 | 해결책 |
|---|---|---|
| No coffee dispensed / "Add Beans" message | Bean hopper empty or beans not feeding correctly. | Refill bean hopper. Gently stir beans to ensure they feed into the grinder. |
| 커피가 너무 약하거나 물った다 | Grind size too coarse, insufficient coffee dose, or descaling needed. | Adjust grind size to a finer setting. Check SmartHQ app for strength settings. Perform descaling if prompted. |
| 우유 거품이 제대로 나지 않음 | Steam wand clogged, milk type unsuitable, or insufficient steam pressure. | Clean steam wand thoroughly. Use fresh, cold milk. Ensure machine is heated to steam temperature. |
| 기계가 켜지지 않습니다 | 플러그가 꽂혀 있지 않음, 전원이 꺼짐tage, 또는 회로 차단기가 트립되었습니다. | Check power connection. Verify power outlet functionality. Reset circuit breaker if necessary. |
| SmartHQ app connectivity issues | Incorrect Wi-Fi password, network interference, or app bug. | Verify Wi-Fi credentials. Ensure machine is within Wi-Fi range. Restart app and machine. Check for app updates. |
8. 사양
- 상표: 찬성file
- 모델 이름: GE 프로file Automatic Espresso Machine + Frother
- 품목 모델 번호: P7CEBBS6RBB
- 색상: 검은색
- 제품 크기: 7인치 깊이 x 16인치 너비 x 12.5인치 높이
- 품목 무게: 16파운드
- 권tage: 120V
- 작동 모드: 완전 자동
- 특별 기능: Built-In Bean Hopper, Built-In Conical Burr Grinder & Adjustable Grind Size, Programmable My Brew Setting, Steam Frother & Frothing Pitcher, WiFi Connected
- 포함된 구성 요소: 청소 도구 세트, 커피 원두 용기, 에스프레소 머신, 스팀 완드, 우유 용기, 물탱크
- 커피 입력 유형: 통콩
- 휴먼 인터페이스 입력: 터치스크린

Image 8.1: Product dimensions of the espresso machine.
9. 보증 및 지원
This product is covered by a manufacturer's warranty. For specific warranty details, registration, or technical support, please refer to the warranty card included with your product or visit the official GE Profile website. You may also contact customer service through the SmartHQ app for assistance.


