소개
The aigo P6 CPU Air Cooler is engineered to provide superior thermal performance for a wide range of Intel and AMD processors. Featuring 6 heat pipes and a 120mm PWM fan with Addressable RGB lighting, this cooler ensures efficient heat dissipation and quiet operation, enhancing your system's stability and aesthetics. This manual provides comprehensive instructions for proper installation, operation, and maintenance to ensure optimal performance and longevity of your aigo P6 CPU Air Cooler.
안전 정보
- Ensure your system is powered off and unplugged from the wall outlet before beginning installation or maintenance.
- Handle components with care to avoid damage to the cooler or motherboard.
- Thermal paste is conductive; avoid excessive application or contact with electrical components.
- 작은 부품과 포장재는 어린이의 손이 닿지 않는 곳에 보관하세요.
- Refer to your motherboard manual for specific CPU socket and fan header locations.
패키지 내용
설치를 진행하기 전에 모든 구성 요소가 있는지 확인하세요.
- aigo P6 CPU Air Cooler Heatsink
- 120mm PWM Fan with ARGB
- Universal Backplate (for Intel/AMD)
- Intel Mounting Brackets and Screws
- AMD Mounting Brackets and Screws
- 써멀 페이스트 튜브
- 팬 클립
- ARGB Controller (if not using motherboard ARGB)
- 사용 설명서 (본 문서)
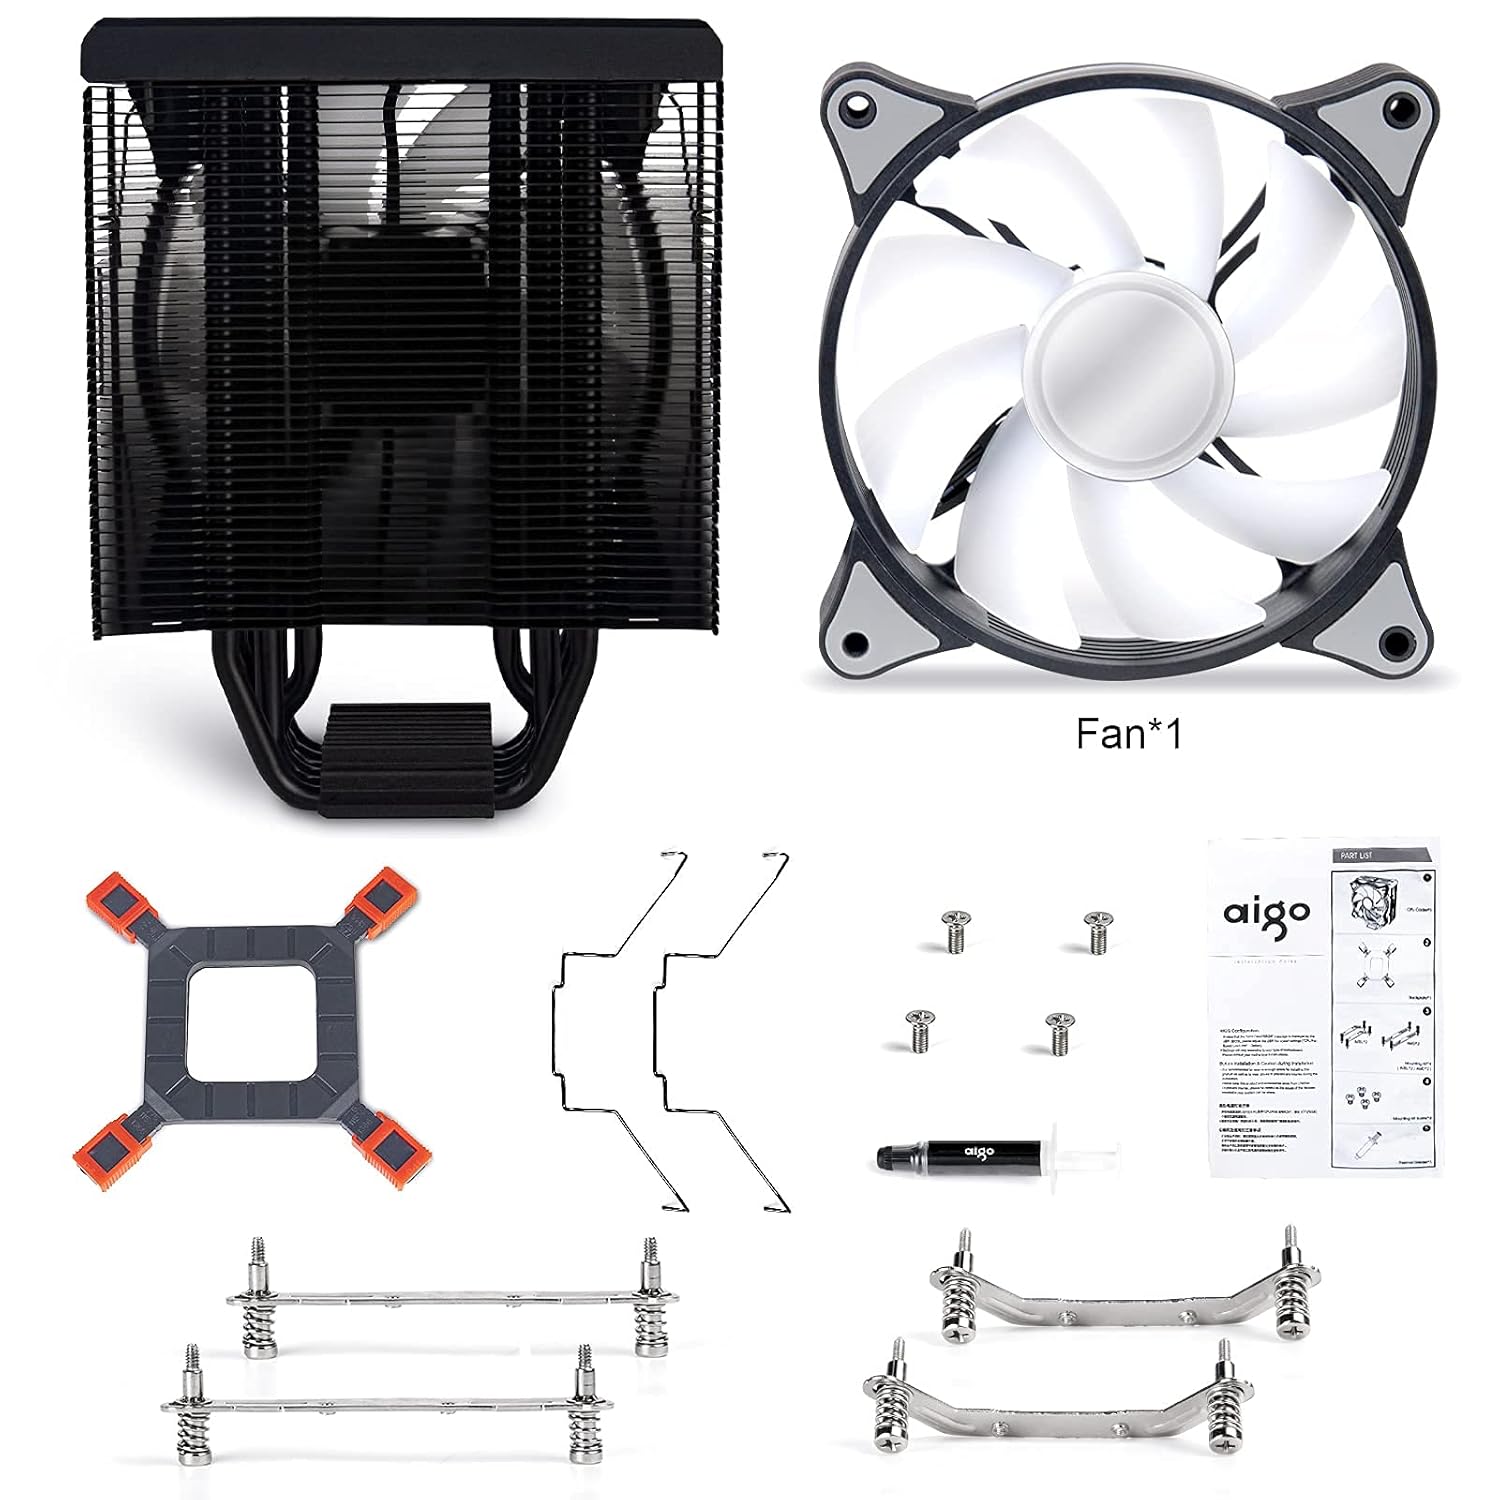
그림 1: All components included with the aigo P6 CPU Air Cooler. This image displays the heatsink, fan, universal backplate, various mounting brackets for Intel and AMD, screws, thermal paste, and fan clips.
설정 및 설치
Follow these steps carefully for proper installation of your aigo P6 CPU Air Cooler. Ensure your system is powered off and unplugged before starting.
1. 마더보드 준비
Depending on your CPU socket type (Intel or AMD), you will use different mounting hardware. The installation video below demonstrates both processes.
동영상 1 : Official installation guide for the aigo P6 CPU Air Cooler, covering both Intel and AMD platforms. This video provides a visual walkthrough of each step, from preparing the motherboard to mounting the heatsink and connecting the fan.
For Intel Sockets (LGA 775/115X/1200/1366)
- Attach the Intel mounting brackets to the heatsink base using the provided screws. Ensure they are securely fastened.
- Adjust the universal backplate to match your Intel socket's mounting holes. Insert the four standoffs through the backplate and the motherboard's CPU cooler mounting holes.
- Apply a small amount of thermal paste to the center of your CPU's integrated heat spreader (IHS). A pea-sized or X-pattern application is generally sufficient.
- Carefully place the heatsink onto the CPU, aligning the screws on the heatsink brackets with the standoffs on the motherboard. Tighten the screws in a diagonal pattern until snug, ensuring even pressure.
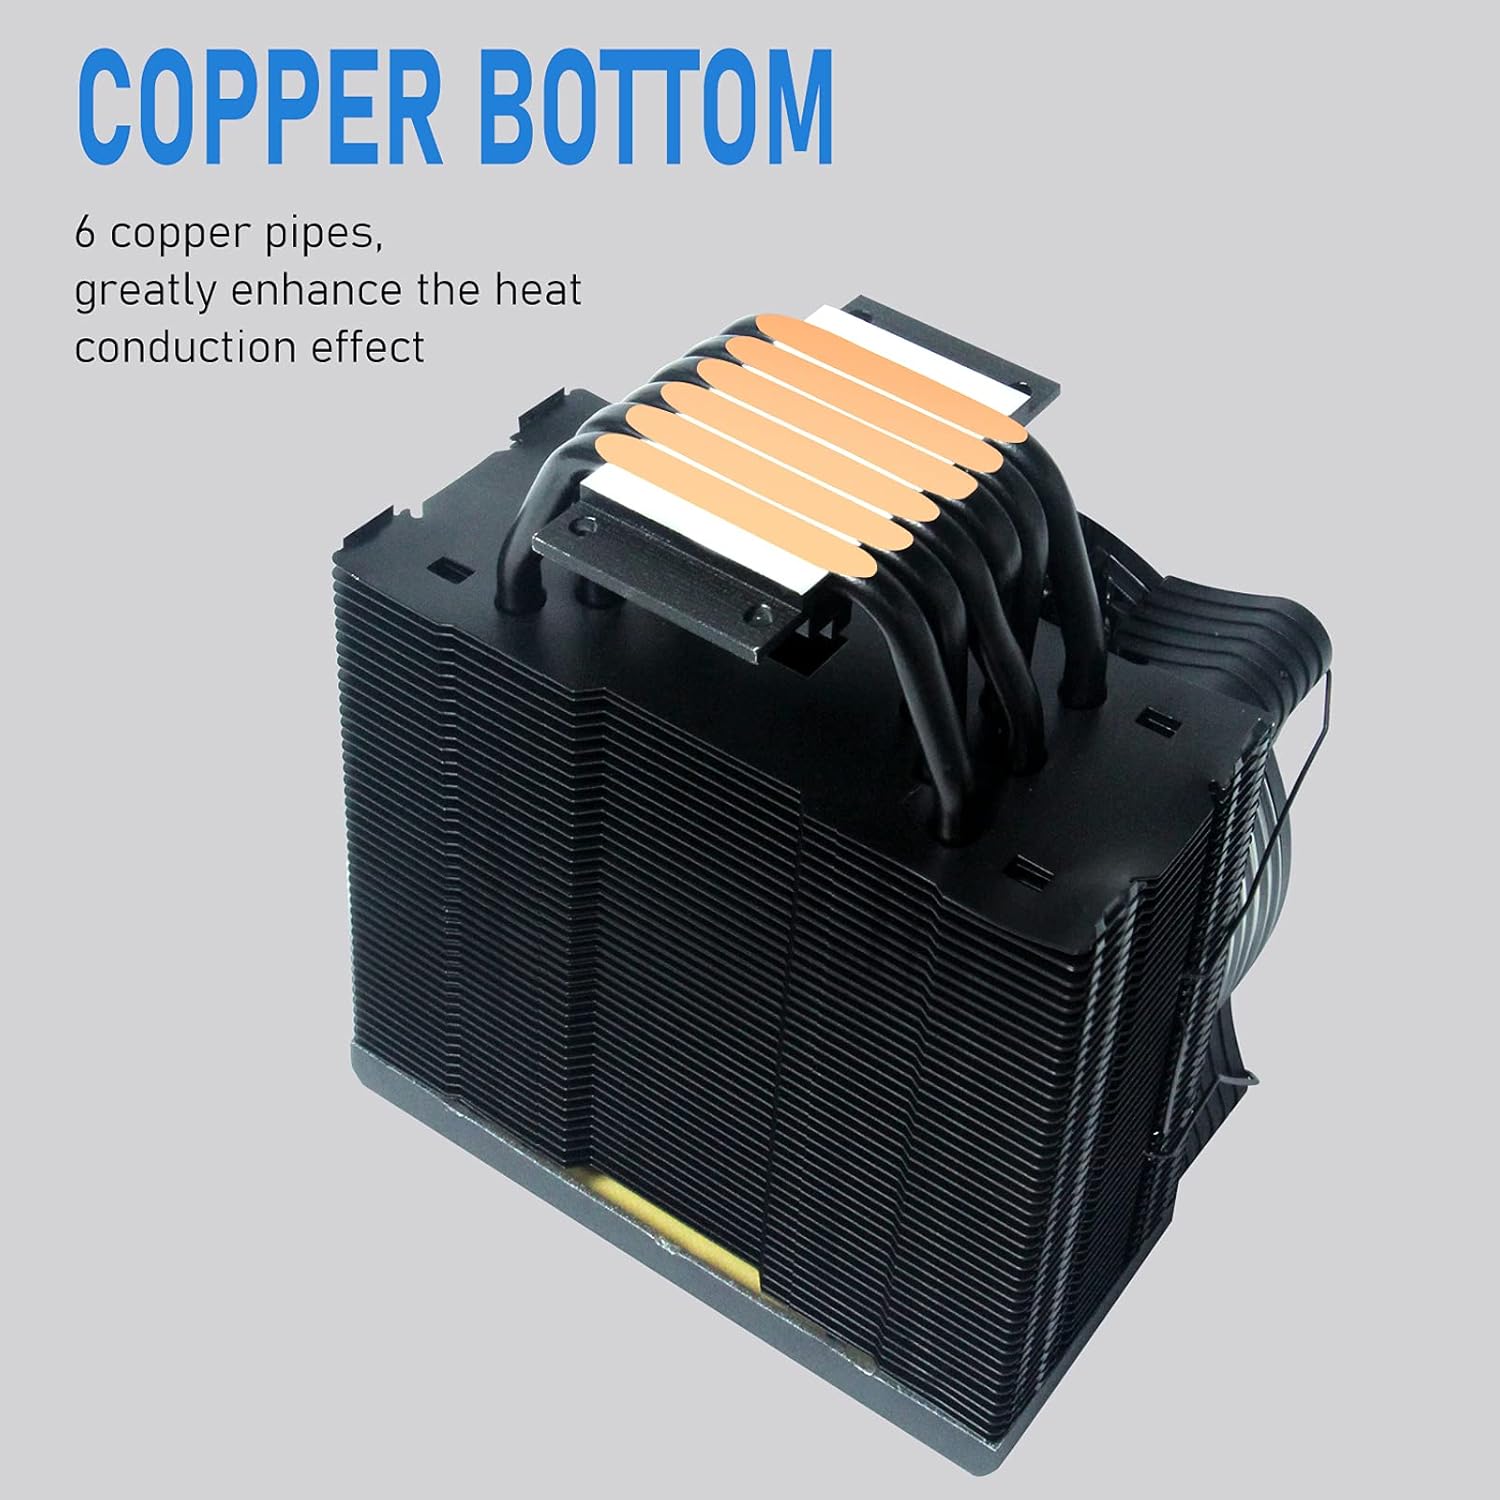
그림 2: The copper base of the aigo P6 CPU Air Cooler, showing the direct contact heat pipes. This surface makes direct contact with the CPU for efficient heat transfer.
For AMD Sockets (AM4/AM3+/AM3/AM2+/AM2)
- Remove the existing plastic retention clips from the motherboard's CPU socket. Keep the original backplate if your motherboard has one.
- Attach the AMD mounting brackets to the heatsink base using the provided screws. Ensure they are securely fastened.
- Apply a small amount of thermal paste to the center of your CPU's integrated heat spreader (IHS). A pea-sized or X-pattern application is generally sufficient.
- Carefully place the heatsink onto the CPU, aligning the screws on the heatsink brackets with the motherboard's original backplate screw holes. Tighten the screws in a diagonal pattern until snug, ensuring even pressure.
2. Install the Fan
Once the heatsink is securely mounted, attach the 120mm PWM fan to the heatsink using the provided fan clips. Ensure the fan is oriented to blow air through the heatsink fins towards the rear of your PC case for optimal airflow.

그림 3: The aigo P6 CPU Air Cooler with its 120mm PWM fan attached, showcasing the vibrant RGB lighting capabilities.
3. 케이블 연결
- Connect the 4-pin PWM fan cable to the "CPU_FAN" header on your motherboard.
- Connect the 3-pin Addressable RGB (ARGB) cable to a 5V 3-pin ARGB header on your motherboard. If your motherboard does not have a 5V 3-pin ARGB header, use the included ARGB controller and connect it to a SATA power connector from your power supply.

그림 4: 클로즈업 view of the 3-pin ARGB connector and 4-pin PWM connector for the aigo P6 CPU Air Cooler. These are essential for fan speed control and lighting synchronization.
작동 지침
팬 제어(PWM)
The 120mm fan supports Pulse Width Modulation (PWM), allowing your motherboard to automatically control the fan speed based on CPU temperature. This ensures optimal cooling performance while minimizing noise. You can typically adjust fan curves and settings within your motherboard's BIOS/UEFI or through manufacturer-provided software.
- 팬 속도: 800-1600RPM ±20%
- 공기 흐름: 74CFM(최대)
- 소음 수준: 14~25.8dB(A)
주소 지정 가능한 RGB 조명
The integrated Addressable RGB lighting provides vibrant and customizable lighting effects. Control of the ARGB lighting depends on your connection method:
- 마더보드 동기화: If connected to a 5V 3-pin ARGB header, you can control the lighting effects using your motherboard's RGB software (e.g., ASUS Aura Sync, MSI Mystic Light Sync, Gigabyte RGB Fusion, ASRock Polychrome Sync).
- ARGB 컨트롤러: If using the included ARGB controller, you can cycle through various lighting modes and colors using the physical buttons on the controller. Refer to the controller's specific instructions for detailed operation.
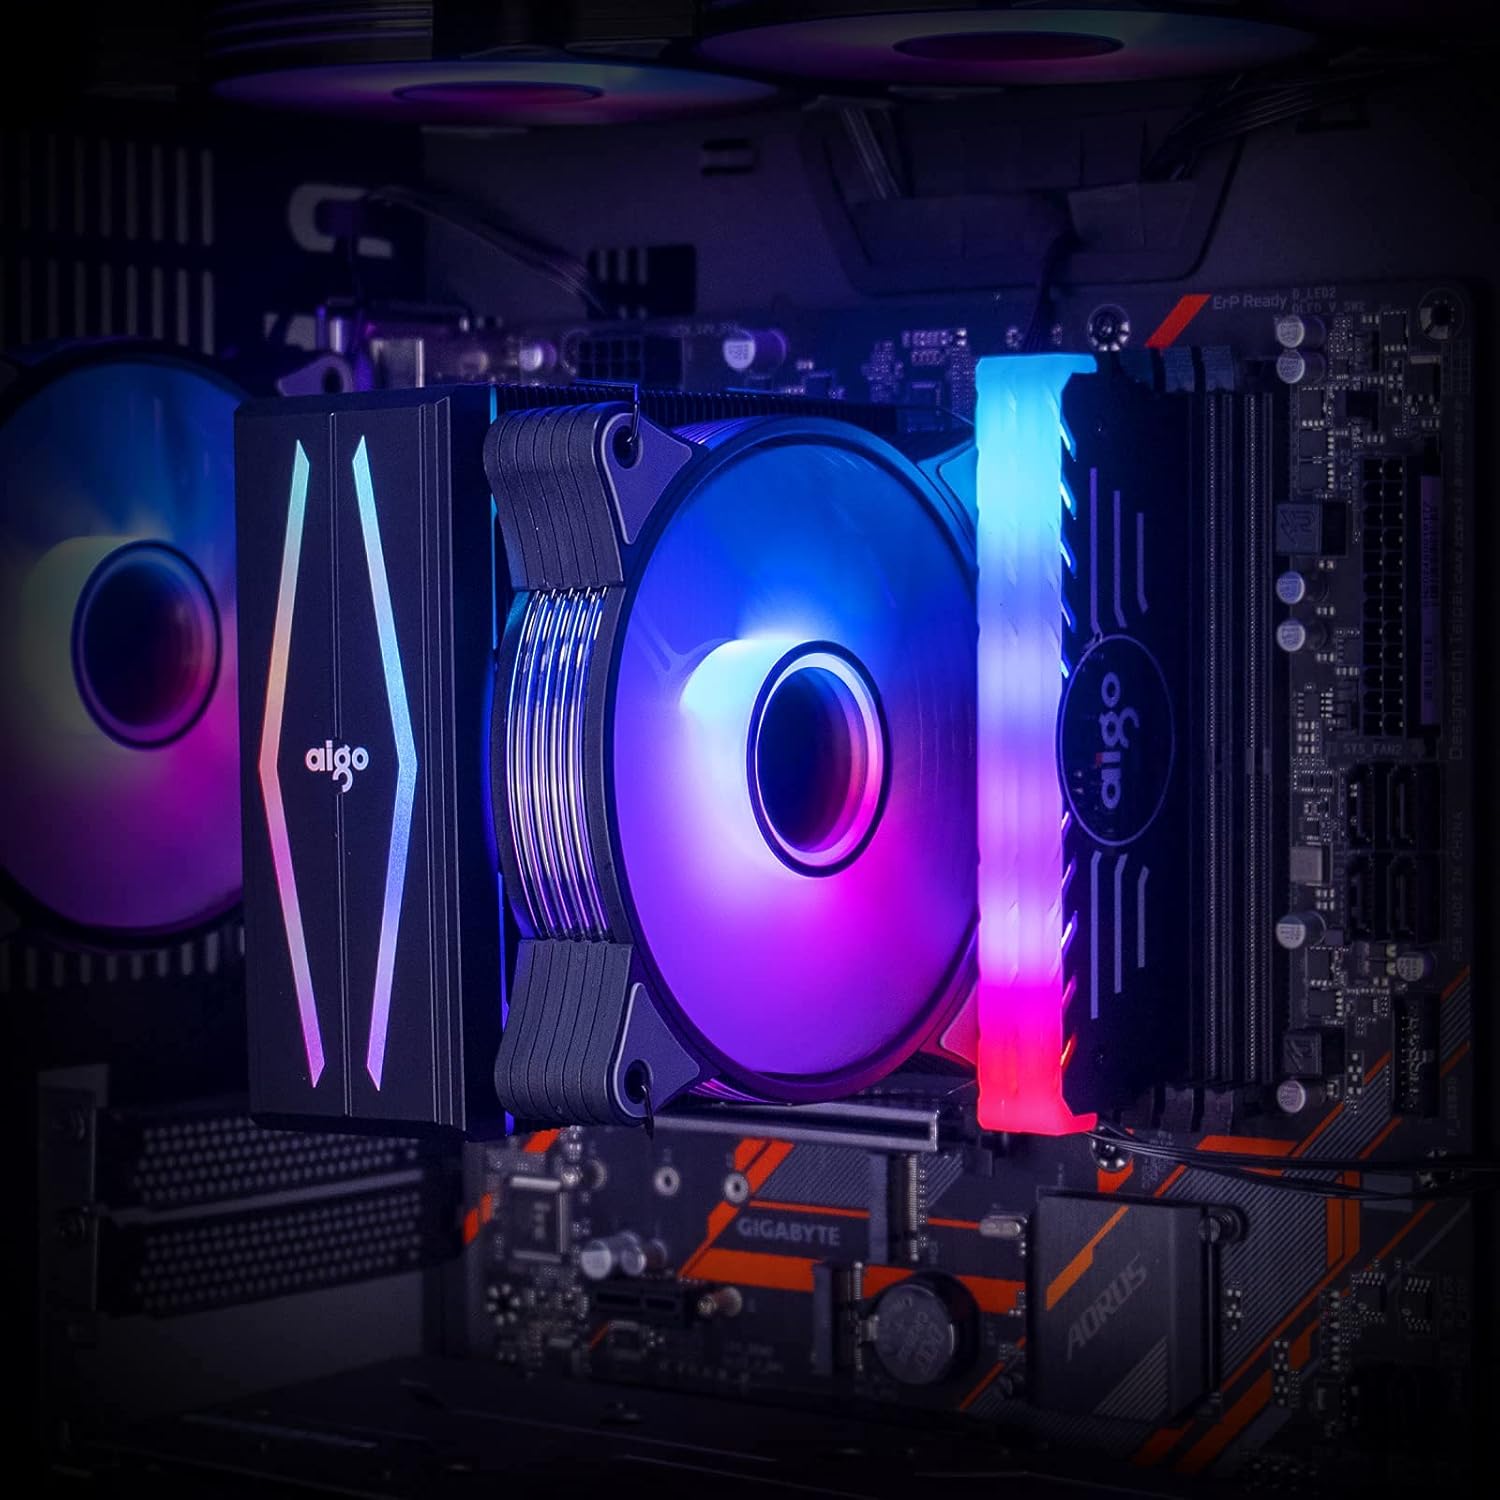
그림 5: The aigo P6 CPU Air Cooler installed within a computer system, demonstrating its illuminated fan and top cover, contributing to the overall aesthetic of the build.
유지
정기적인 유지관리는 CPU 쿨러의 수명과 최적의 성능을 보장하는 데 도움이 됩니다.
- 먼지 청소: 주기적으로 압축 공기나 부드러운 브러시를 사용하여 방열판 핀과 팬 블레이드의 먼지를 청소하십시오. 베어링 손상을 방지하기 위해 청소하는 동안 팬이 회전하지 않도록 하십시오.
- 열전도 페이스트: Reapply thermal paste if you remove the cooler from the CPU. Old thermal paste can dry out and reduce cooling efficiency.
- 팬 검사: Check the fan for any unusual noises or wobbling. If the fan is damaged or excessively noisy, consider replacing it.
문제 해결
| 문제 | 가능한 원인 | 해결책 |
|---|---|---|
| 선풍기가 돌아가지 않거나 아주 느리게 돌아갑니다. | Incorrect fan header connection, insufficient power, or BIOS settings. | Ensure 4-pin PWM cable is connected to "CPU_FAN" header. Check BIOS/UEFI settings for fan speed control. Verify power supply connections. |
| RGB 조명이 작동하지 않습니다. | Incorrect ARGB header connection, incompatible header (12V RGB vs. 5V ARGB), or software issue. | Ensure 3-pin ARGB cable is connected to a 5V 3-pin ARGB header. Do NOT connect to a 12V 4-pin RGB header. If using controller, ensure it's powered via SATA. Check motherboard RGB software. |
| CPU 온도가 높습니다. | Improper thermal paste application, loose heatsink mounting, insufficient airflow in case, or fan not spinning optimally. | Reapply thermal paste. Ensure heatsink is securely mounted with even pressure. Check case airflow and fan orientation. Verify fan speed settings. |
| 팬 소음이 심합니다. | High fan speed, dust accumulation, or faulty fan bearing. | Adjust fan curve in BIOS/UEFI to lower speeds at idle. Clean fan blades. If noise persists, the fan may need replacement. |
명세서
| 특징 | 세부 사항 |
|---|---|
| 모델 번호 | aigo P6 CPU Air Cooler |
| 치수(길이 x 너비 x 높이) | 4.72"L x 0.98"W x 4.72"H (Fan) / 6.5 x 4.1 x 6.7 inches (Product) |
| 열 파이프 | 6 x 6mm Direct Contact Copper Heat Pipes |
| 열전도율 | 180와트 |
| 팬 크기 | 120mm PWM |
| 팬 속도 | 800-1600RPM ±20% |
| 공기 흐름 | 74CFM(최대) |
| 소음 수준 | 14~25.8dB(A) |
| 전원 커넥터 | 4 핀 PWM |
| RGB 커넥터 | 3-Pin Addressable RGB (5V) |
| 호환 소켓 | Intel: LGA 1366/1200/1156/1155/1151/1150/775 AMD: AM4/AM3+/AM3/AM2+/AM2/FM2+/FM2 |
| 재료 | Aluminum (fins), Copper (heat pipes/base) |

그림 6: Detailed dimensions of the aigo P6 CPU Air Cooler, including height, width, and depth measurements for compatibility assessment within PC cases.
보증 및 지원
The aigo P6 CPU Air Cooler is covered by the standard manufacturer's warranty. For specific warranty terms, technical support, or service inquiries, please refer to the official aigo web사이트를 방문하거나 고객 지원팀에 직접 문의하세요. 보증 청구를 위해 구매 증빙 자료를 보관하세요.
자세한 정보와 연락처는 다음에서 확인할 수 있습니다. aigo Store.


