1. 서론
Thank you for choosing the Lepro WL5000 Solar Motion Sensor Security Light. This manual provides essential information for the safe and efficient use of your new solar-powered lighting system. Please read these instructions carefully before installation and operation, and retain them for future reference.
The Lepro WL5000 features 72 ultra-bright LEDs, three adjustable light heads for 270° wide lighting, and a separate solar panel for optimal sun exposure. It is equipped with a PIR motion sensor for enhanced security and is designed for outdoor use with an IP65 waterproof rating.

Image: Two Lepro WL5000 Solar Motion Sensor Security Lights with separate solar panels.
2. 제품 오버view 및 구성 요소
The Lepro WL5000 Solar Motion Sensor Security Light system includes the main light unit, a separate solar panel, and mounting hardware. The light unit features three adjustable heads and an integrated motion sensor.

Image: Detailed diagram of the Lepro WL5000 components and dimensions, including the solar light, solar panel, connection cable, wall plugs, wall brackets, mounting screws, and instruction manual.
패키지 내용:
- Solar Light Unit (x2 for 2-pack)
- Separate Solar Panel (x2 for 2-pack)
- Connection Cable (16ft / 4.8m)
- 벽면 플러그(x8)
- 벽걸이 브라켓(x4)
- 장착 나사 (x8)
- 사용 설명서
3. 설정 및 설치
The Lepro WL5000 is designed for easy installation without complex wiring. Ensure the installation location receives amp태양광 패널에 직접적인 햇빛이 닿지 않도록 해야 합니다.
설치 단계:
- 설치 위치 선택: Select a location for the light unit between 1.5-3.5 meters (5-12 feet) high on an exterior wall. The solar panel should be placed in a location that receives maximum direct sunlight throughout the day, such as a roof or an unobstructed wall. The 16ft (4.8m) connection cable allows for flexible placement.
- 조명 장치를 설치하세요: Using the provided screws and wall plugs, fix the wall bracket for the light unit to your chosen exterior wall. Securely attach the solar light unit to the bracket.
- 태양 전지판 장착: Fix the wall bracket for the solar panel to your chosen sunny location. Securely attach the solar panel to its bracket.
- 케이블 연결: Connect the cable from the solar panel to the input port on the solar light unit. Ensure a secure connection.
- 빛을 활성화하세요: Locate the power switch on the back of the main light unit. Press the switch to the 'ON' position to activate the light.
- 라이트 헤드 조정: Adjust the three light heads vertically and horizontally to achieve the desired 270° wide lighting angle for your area.

Image: Step 1 of installation, showing the solar light unit being fixed to a wall.
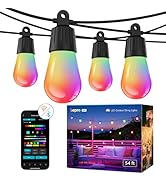
Image: Step 2 of installation, showing the separate solar panel being fixed to a roof.

Image: Steps 3 and 4 of installation, showing cable connection and turning on the power switch.

Image: The three adjustable light heads can be rotated to achieve a wide illumination angle.
유연한 설치 옵션:
The separate solar panel design offers flexibility. You can install the solar panel integrated with the light unit or separately, allowing optimal sun exposure for charging even if the light unit is in a shaded area.

Image: Flexible installation styles, showing integrated and separate solar panel mounting options.
4. 사용 설명서
The Lepro WL5000 operates automatically based on light conditions and motion detection.
자동 작동:
- 낮: The solar panel converts sunlight into electricity, charging the internal battery. The light remains off during the day.
- Nighttime (Motion Activated): At night, the integrated PIR motion sensor detects movement within a 16-26ft (5-8m) distance and a 120° detection angle. Upon detection, the light automatically turns on.
- 자동 종료: If no further motion is detected for approximately 20 seconds, the light will automatically turn off to conserve energy.

Image: Operational sequence of the solar light, demonstrating daytime charging, motion-activated illumination, and automatic shut-off.
Motion Sensor Performance:
The upgraded PIR motion sensor provides reliable detection. Factors such as ambient temperature, object size, and speed can influence detection range and sensitivity.

Image: Motion detection range and angle of the security light, covering up to 8 meters within a 120-degree field.
5. 유지관리
To ensure optimal performance and longevity of your Lepro WL5000 solar light, follow these simple maintenance guidelines:
- 깨끗한 태양광 패널: 부드러운 천으로 태양광 패널 표면을 주기적으로 닦아주세요.amp 먼지, 흙, 낙엽, 눈을 제거하는 천을 사용하세요. 깨끗한 패널은 햇빛 흡수를 극대화하고 충전 효율을 높여줍니다.
- 장애물 제거: Ensure no trees, bushes, or other objects are blocking direct sunlight from reaching the solar panel, especially during peak sunlight hours.
- 연결 검사: Occasionally check the connection cable between the solar panel and the light unit to ensure it is secure and free from damage.
- 내후성: The light is IP65 waterproof, heat-resistant, and frost-resistant, designed to withstand various outdoor weather conditions. However, extreme conditions may temporarily affect performance.

Image: The Lepro WL5000 is IP65 waterproof, heat-resistant, and frost-resistant for all-weather durability.
6. 문제 해결
If your Lepro WL5000 solar light is not functioning as expected, please refer to the following common issues and solutions:
- 밤에 불이 켜지지 않습니다:
- Ensure the power switch on the back of the light unit is in the 'ON' position.
- Verify the solar panel is receiving sufficient direct sunlight for at least 8 hours during the day. Relocate the panel if necessary.
- Check the connection cable between the solar panel and the light unit for proper connection and any damage.
- Confirm there are no external light sources (e.g., streetlights, other outdoor lights) near the motion sensor that might prevent it from activating.
- 조명이 어둡거나 짧은 시간 동안만 켜져 있습니다.
- The battery may not be fully charged. Ensure the solar panel is clean and exposed to direct sunlight for a full day.
- Consider environmental factors such as cloudy weather or shorter daylight hours, which can reduce charging efficiency.
- 동작 센서가 움직임을 감지하지 못하고 있습니다.
- 동작 감지 센서 렌즈가 깨끗하고 장애물이 없는지 확인하십시오.
- Verify the light unit is installed within the recommended height range (1.5-3.5m / 5-12ft).
- Test the sensor by walking across its detection path, not directly towards it.
If these steps do not resolve the issue, please contact Lepro customer support for further assistance.
7. 사양
| 특징 | 사양 |
|---|---|
| 상표 | 나병 |
| 모델 번호 | PR640004-DW-2 (WL5000) |
| 광원 유형 | LED(72개 LED) |
| 명도 | 1000루멘 |
| 색온도 | 6500 켈빈(주광 백색) |
| 왓tage | 14 와트 |
| 권tage | 120 볼트 |
| 조명 각도 | 270° Wide Lighting Angle (3 adjustable heads) |
| 모션 센서 감지 각도 | 120° |
| 모션 센서 감지 거리 | 16-26피트(5-8m) |
| 방수 레벨 | IP65 방수 |
| 재료 | GPPS+ABS (Plastic) |
| 전원 | 태양열 전원 |
| 제품 치수 | 8.66인치 길이 x 5.12인치 너비 x 8.66인치 높이 |
| 품목 무게 | 2.05파운드 |
| 배터리 유형 | 2 Lithium Ion batteries (internal, not user-replaceable) |
| 평균 배터리 수명 | 12개월 (예상) |
| 품목 패키지 수량 | 2 |
| 첫 번째 가능한 날짜 | 17년 2021월 XNUMX일 |
8. 보증 및 지원
The Lepro WL5000 Solar Motion Sensor Security Light comes with a 12개월 사후 서비스 보증 구매일로부터. 본 보증은 제조상의 결함 및 정상적인 사용으로 인해 발생하는 문제에 적용됩니다.
For warranty claims, technical support, or any questions regarding your product, please contact Lepro customer service. Have your purchase details and model number (WL5000 or PR640004-DW-2) ready when contacting support.
Contact information can typically be found on the product packaging or the official Lepro web대지.


