1. 중요 안전 지침
기기를 사용하기 전에 모든 지침을 주의 깊게 읽으십시오. 나중에 참조할 수 있도록 이 설명서를 보관하십시오.
- 전기 안전: 볼륨을 확보하세요tage indicated on the appliance matches your local power supply before connecting. Do not operate with a damaged cord or plug.
- 놓기: Place the dehumidifier on a stable, level surface. Maintain adequate clearance around the unit for proper airflow (at least 20 cm from walls or furniture). Do not block air inlets or outlets.
- 물 취급: Always empty the water tank before moving the unit. Do not drink the collected water.
- Refrigerant Gas (R290): This appliance contains R290 refrigerant gas. R290 is a flammable gas. Handle with care and ensure the appliance is not damaged during transport or installation. Do not attempt to service the unit yourself if you suspect a refrigerant leak.
- 어린이와 애완동물: 어린이와 애완동물의 손이 닿지 않는 곳에 보관하세요. 어린이가 기기를 가지고 놀지 않도록 감독해 주세요.
- 청소: 청소나 유지관리 작업을 하기 전에는 전원 공급장치를 분리하세요.
2. 제품 오버view
2.1개의 구성요소
- 제어판
- 공기 흡입구(후면)
- Air Outlet (top/front)
- Water Collection Tank (front/bottom)
- Removable Air Filter (side/rear)
- 이동이 편리한 바퀴가 달려 있습니다.
2.2 제어판

이미지: 상단 view 제어판의.
제어판에는 다양한 기능을 위한 디지털 디스플레이와 터치 감지 버튼이 있습니다.
- 전원 버튼: 장치를 켜거나 끕니다.
- 습도 표시: Shows the current ambient humidity level and the set target humidity.
- 습도 설정 버튼: Adjust the desired humidity level.
- 팬 속도 버튼: Selects fan speed (if available).
- 타이머 버튼: 24시간 자동 작동 타이머를 설정합니다.
- 물이 가득 찬 표시기: Illuminates when the water tank is full, triggering automatic shut-off.
3. 설정
3.1 풀기
Carefully remove the dehumidifier from its packaging. Retain the packaging materials for future storage or transport. Check for any signs of damage. If the unit appears damaged, do not operate it and contact customer support.
3.2 배치
For optimal performance, place the dehumidifier in a central location within the room. Ensure the room size does not exceed 25 square meters for effective dehumidification.
- Place the unit on a firm, level surface to prevent vibrations and ensure proper water collection.
- Allow at least 20 cm of space around the air inlet and outlet to ensure unrestricted airflow.
- 장치를 열원 근처나 직사광선에 노출시키지 마십시오.
3.3 전원 연결
Plug the power cord into a grounded electrical outlet. Ensure the outlet meets the power requirements of the dehumidifier (210W, 240V).
4. 사용 설명서
4.1 전원 켜기/끄기
Press the Power button on the control panel to turn the dehumidifier on or off. The unit will start operating in its default mode or resume previous settings.
4.2 원하는 습도 수준 설정
The dehumidifier features a humidity sensor that detects the ambient humidity. Use the humidity setting buttons to adjust your desired humidity level. The unit will operate until this level is reached, then cycle on and off to maintain it. Recommended humidity levels are typically between 40% and 60%.
4.3 타이머 기능 사용
Press the Timer button to set the 24-hour timer. This allows you to program the unit to turn on or off automatically after a set number of hours, providing flexible operation.
4.4 물탱크 관리
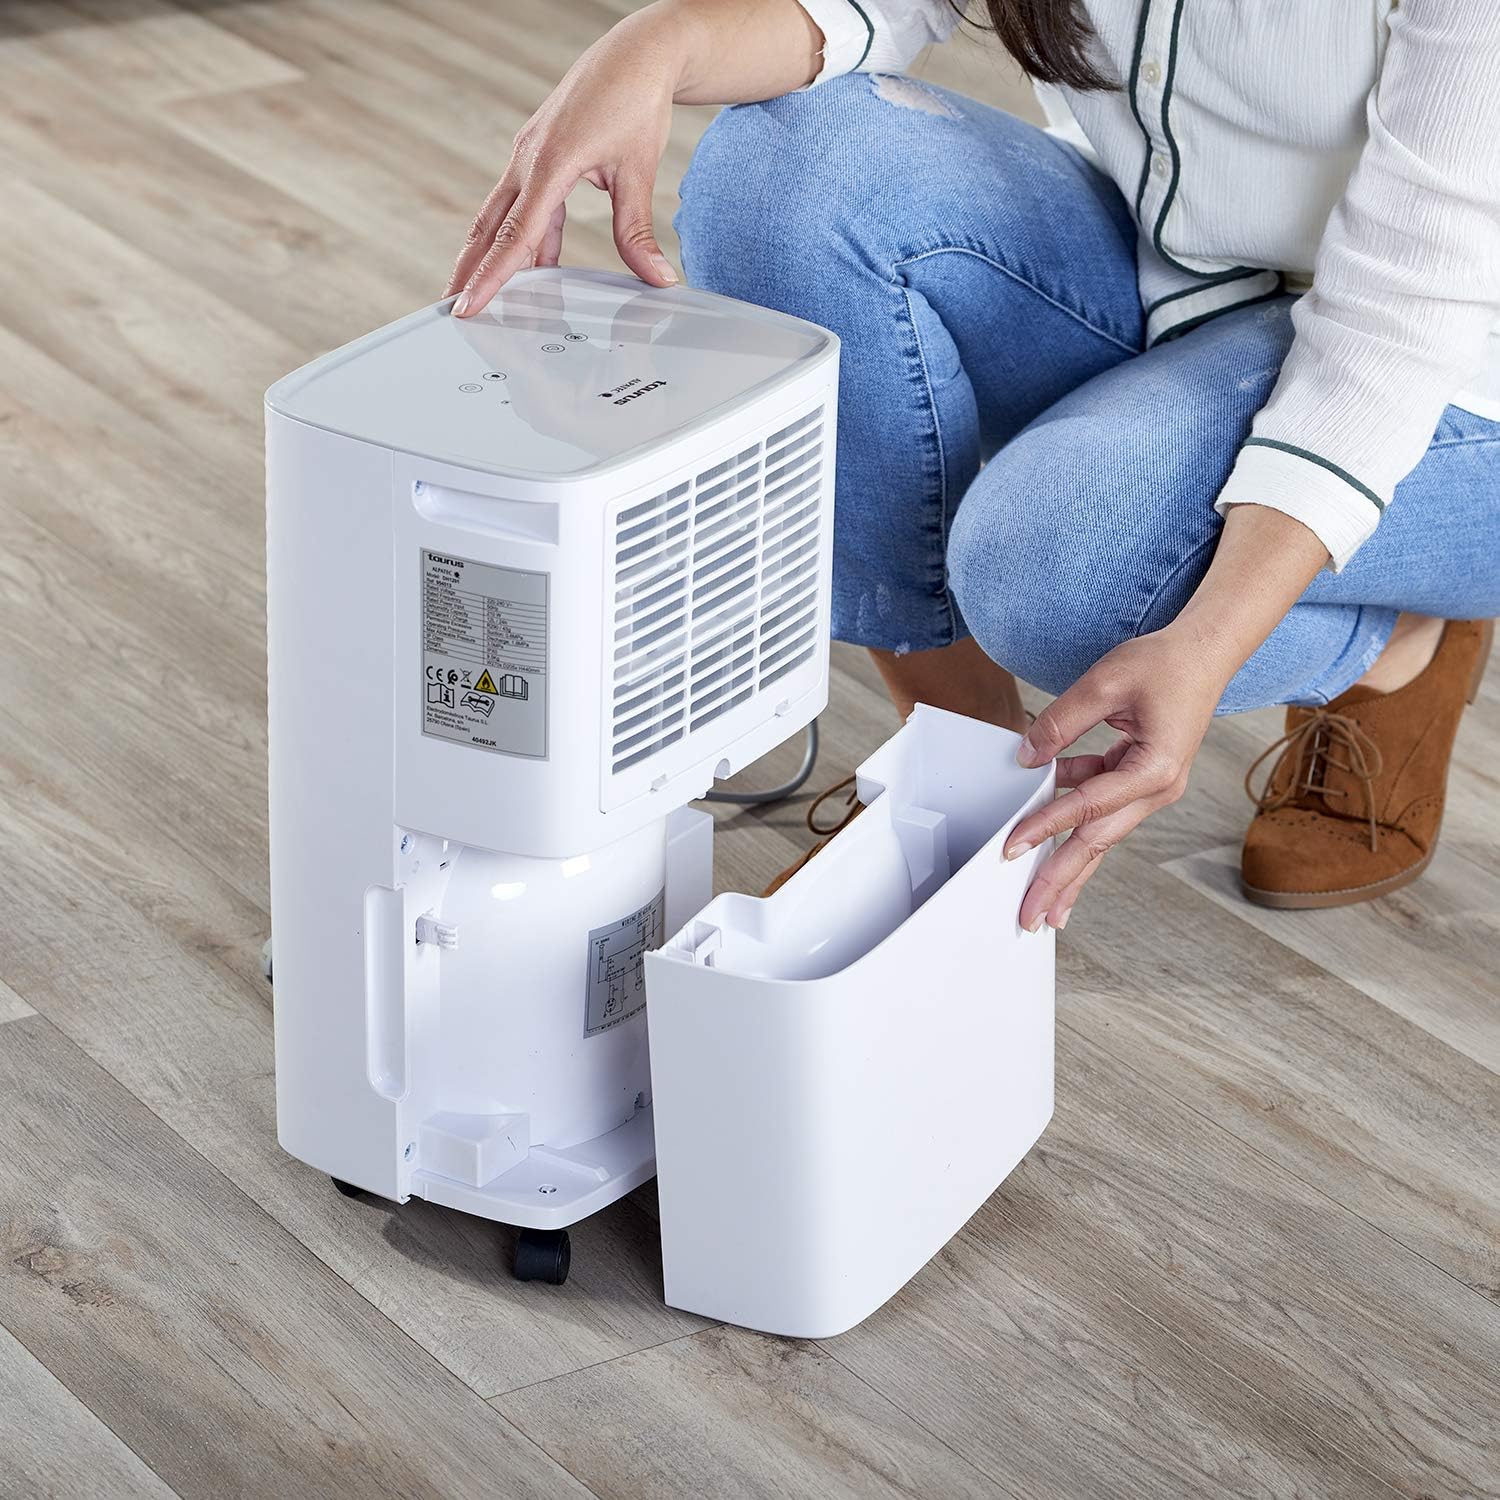
Image: Removing the water collection tank.
- 물이 가득 찬 표시기: The dehumidifier has a 2.5-liter water tank. When the tank is full, the Water Full Indicator light will illuminate, and the unit will automatically shut off to prevent overflow.
- 탱크 비우기: Carefully pull out the water tank from the front of the unit. Dispose of the collected water. Reinsert the empty tank firmly until it clicks into place. The unit will resume operation.
- 연속 배수: For continuous operation without needing to empty the tank, connect a drainage hose (not included) to the continuous drainage outlet (usually located at the back or side of the unit). Ensure the hose is sloped downwards to allow gravity drainage into a suitable receptacle.
5. 유지관리
5.1 에어 필터 청소

Image: Removing the air filter for cleaning.
Regular cleaning of the air filter is essential for efficient operation.
- 제습기를 끄고 전원 콘센트에서 플러그를 뽑으세요.
- Locate the air filter cover (typically on the side or rear of the unit) and remove it.
- Carefully pull out the air filter.
- 필터를 따뜻한 비눗물로 씻거나 진공청소기로 먼지와 이물질을 제거하십시오.
- 필터를 깨끗이 헹구고 완전히 말린 후 다시 삽입하세요.
- 건조된 필터를 제자리에 다시 넣고 덮개를 닫으세요.
5.2 장치 외부 청소
부드러운 천으로 제습기의 외부를 닦고 damp 천을 사용하십시오. 연마성 세제, 용제 또는 독한 화학 물질은 표면을 손상시킬 수 있으므로 사용하지 마십시오.
5.3 Automatic Defrost Control
The dehumidifier is equipped with an automatic defrost function. If frost builds up on the evaporator coils, the unit will temporarily stop dehumidifying and run the fan to melt the frost. This is a normal operation and ensures efficient performance in cooler environments.
6. 문제 해결
고객 서비스에 연락하기 전에 다시view 다음은 일반적인 문제와 해결책입니다.
| 문제 | 가능한 원인 | 해결책 |
|---|---|---|
| 장치가 켜지지 않습니다 | No power supply; Power cord not plugged in; Water tank full or not correctly inserted. | 전원 연결을 확인하십시오. 물탱크를 비우고 올바르게 다시 설치하십시오. |
| 제습 기능이 없거나 효율이 낮습니다. | Air filter clogged; Room temperature too low; Air inlet/outlet blocked; Desired humidity level already reached. | Clean the air filter; Ensure room temperature is above 5°C; Clear obstructions; Lower the desired humidity setting. |
| Water Full Indicator is on, but tank is not full | Water tank not correctly positioned; Float switch malfunction. | Remove and reinsert the water tank firmly; If problem persists, contact support. |
| 작동 중 이상한 소음 | 장치가 수평면에 있지 않음; 내부 구성 요소 문제. | Ensure unit is on a flat, stable surface; If noise is excessive or persistent, discontinue use and contact support. |
7. 사양
7.1 기술 데이터
| 특징 | 세부 사항 |
|---|---|
| 상표 | 황소자리 |
| 모델 번호 | 954513000 (PLEASANT) |
| 색상 | 하얀색 |
| 치수(길이 x 너비 x 높이) | 34.5 x 20 x 10cm |
| 무게 | 9.5 킬로그램 |
| 물탱크 용량 | 2.5리터 |
| 제습 능력 | Up to 12 liters/24 hours |
| 힘 | 210 와트 |
| 권tage | 240V |
| 재료 | 플라스틱 |
| 에너지 클래스 | A에서 G까지 |
| 권장 바닥 면적 | 최대 25제곱미터 |
| 특별 기능 | Humidity level detector, 24h timer, R290 refrigerant gas, Easy maintenance, Washable filters, Automatic defrost |
8. 보증 및 지원
This product is covered by a manufacturer's warranty. Please refer to the warranty card included with your purchase or contact your retailer for specific warranty terms and conditions. For technical support, spare parts, or service inquiries, please contact the Taurus customer service department or your local distributor. Information regarding spare parts availability is not provided in this manual.