소개
This manual provides detailed instructions for the proper installation and maintenance of your ICT Billet LS Swap Engine Conversion Mount Kit (Part Number 5510-KIT002EM). This kit is specifically designed to facilitate the installation of an LS series engine into 4WD 1988-1998 Chevrolet OBS trucks, while preserving the original Small Block Chevy (SBC) crankshaft and bellhousing position. Please read all instructions carefully before beginning the installation process to ensure a successful and safe conversion.
안전 정보
- 설치하는 동안 안전 안경과 장갑을 포함한 적절한 개인 보호 장비(PPE)를 항상 착용하세요.
- 차량 하부에서 작업하기 전에 잭 스탠드나 리프트를 사용하여 차량을 안전하게 고정하십시오. 절대로 잭에만 의존하지 마십시오.
- 감전 사고를 예방하기 위해 작업을 시작하기 전에 차량 배터리를 분리하십시오.
- Exercise caution when handling heavy engine components. Seek assistance if necessary.
- 설치 과정 중 어느 단계라도 확실하지 않은 부분이 있으면 자격을 갖춘 자동차 정비사에게 문의하십시오.
- Keep all fasteners and small parts organized to prevent loss.
패키지 내용
Verify that all components listed below are present in your kit before beginning installation. If any parts are missing or damaged, contact ICT Billet customer support.

영상: All components included in the ICT Billet LS Swap Engine Conversion Mount Kit, featuring two rubber mounts, two upper mounts (engine clamshells), and various bolts, nuts, and washers.
- 2 x OE-style Rubber Mounts (attaches to frame)
- 2 x Upper Mounts (engine clamshells, black powder coated)
- Necessary Mounting Hardware (bolts, nuts, washers)
설치 지침
This kit is specifically designed for 4WD 1988-1998 Chevy OBS Trucks. It ensures the original SBC crankshaft and bellhousing position is maintained during the LS engine swap.
- 차량 준비: Safely lift and support the front of the vehicle. Disconnect the battery. Drain engine fluids if necessary and remove the existing engine and transmission assembly.
- Install Upper Mounts to LS Engine: Attach the two black powder-coated upper mounts (engine clamshells) to the sides of your LS engine block. Ensure proper orientation as depicted in the images. Use the provided hardware and tighten to manufacturer specifications.
- Install OE-Style Rubber Mounts to Frame: Secure the two OE-style rubber mounts to the frame of your 4WD 1988-1998 Chevy OBS truck. These mounts are designed to attach directly to the frame. Ensure they are correctly positioned and tightened according to vehicle specifications.
- Lower LS Engine into Vehicle: Carefully lower the LS engine, with the upper mounts attached, into the engine bay. Align the upper mounts with the OE-style rubber mounts on the frame.
- 안전한 마운트: Once aligned, insert the long bolts through the upper mounts and the rubber frame mounts. Secure with the provided nuts and washers. Tighten all mounting hardware to the vehicle manufacturer's recommended torque specifications.
- 재조립: Reconnect the transmission, driveshafts, exhaust, wiring, and all other components removed during the engine swap. Refill all necessary fluids.

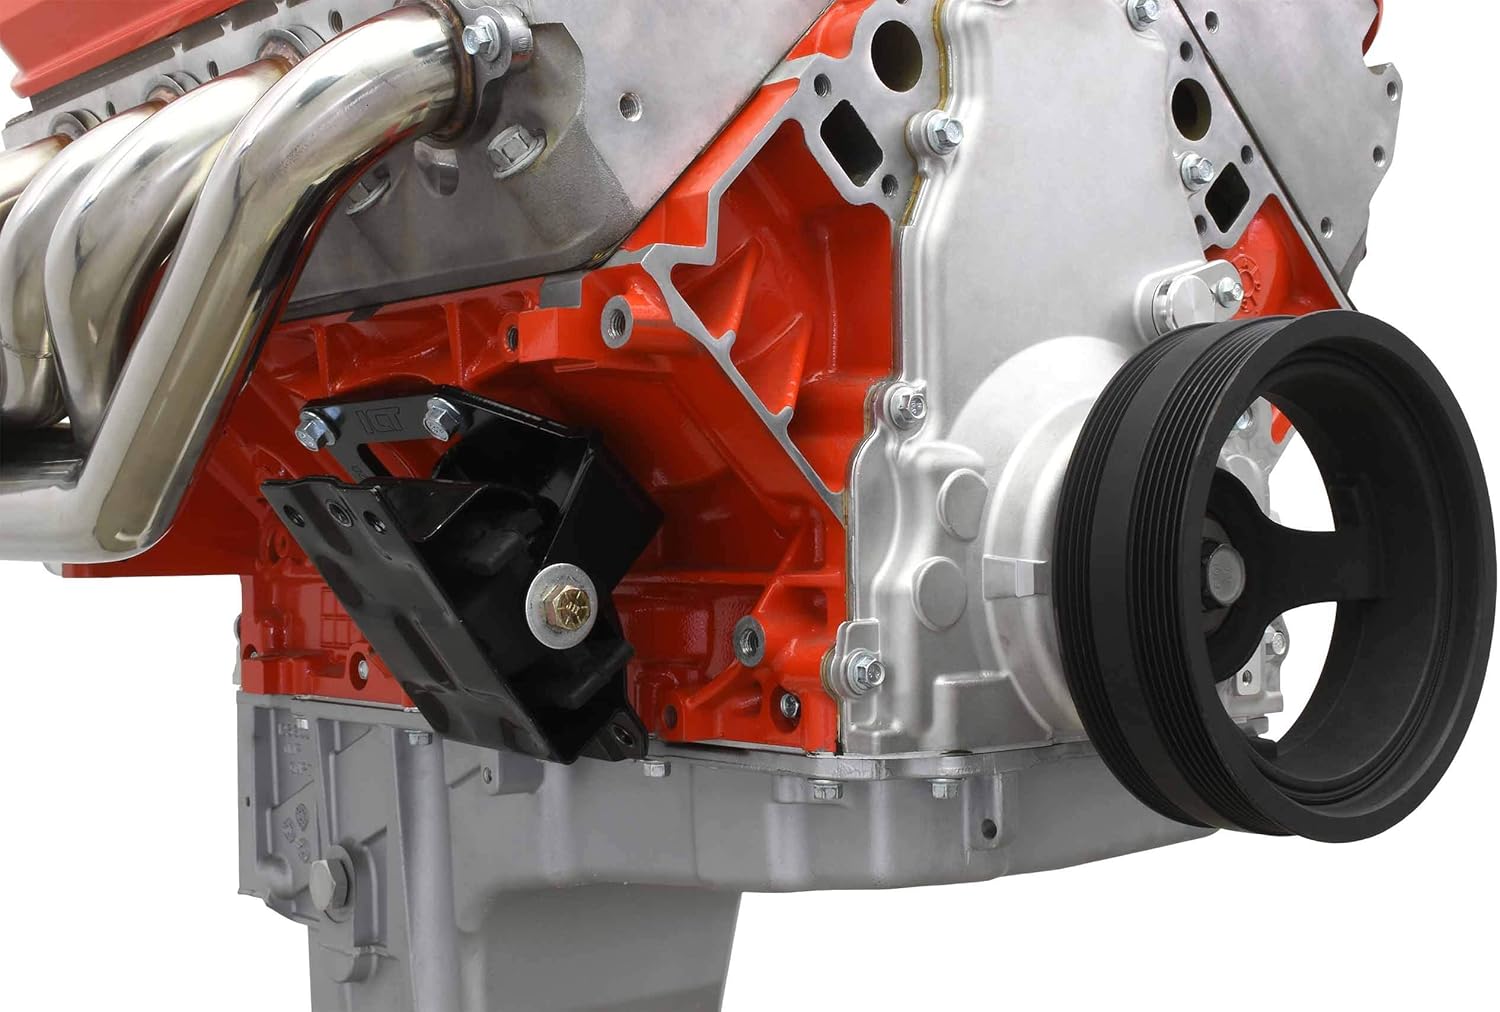
영상: 클로즈업 view of an upper mount (engine clamshell) securely bolted to the side of an LS engine block, ready for installation into the vehicle frame.

영상: Driver's side view of the LS engine installed in the vehicle, showing the engine mount connecting the engine block to the frame, with exhaust headers visible.
영상: Passenger's side view of the LS engine installed, illustrating the engine mount connection between the engine and the vehicle frame, with the crankshaft pulley visible.
설치 후 점검
- 모든 패스너의 토크가 적절한지 다시 한번 확인하세요.
- Ensure there is adequate clearance around the engine and mounts, with no components rubbing or interfering.
- Verify that all hoses, wires, and lines are properly connected and routed away from hot or moving parts.
- Start the engine and check for any unusual noises, vibrations, or fluid leaks.
- Perform a short test drive to confirm proper operation and stability of the engine and vehicle.
유지
Regular inspection of your engine mounts is recommended to ensure long-term performance and safety.
- Periodically inspect the rubber mounts for signs of cracking, tearing, or excessive wear.
- Check all mounting bolts for tightness during routine vehicle maintenance.
- Clean any accumulated dirt or debris from the mounts to prevent corrosion and premature wear.
문제 해결
| 문제 | 가능한 원인 | 해결책 |
|---|---|---|
| 과도한 진동 | Loose mounting hardware; Worn rubber mounts; Improper engine alignment. | Check and tighten all bolts. Inspect rubber mounts for damage and replace if necessary. Verify engine alignment. |
| Mounts do not fit chassis correctly | Manufacturing variation in chassis mounts; Incorrect application. | Double-check part numbers for compatibility with your specific vehicle year and model. If fitment issues persist, contact ICT Billet support for guidance. Note: Some aftermarket chassis mounts may require minor modification or alternative solutions. |
| Unusual Noises (e.g., clunking) | Loose components; Interference with other vehicle parts. | Inspect all connections and surrounding areas for contact points. Ensure adequate clearance. |
명세서
- 부품 번호: 5510-KIT002EM
- 상표: ICT Billet
- 장착 유형: 프레임 및 엔진 마운트
- 호환성: 4WD 1988-1998 Chevy OBS Truck (LS Swap)
- 엔진 호환성: LS1, LM7, LR4, LQ4, LS6, L59, LQ9, LM4, L33, LS2, LH6, L92, L76, LY2, LY5, LY6, LC9, LFA, LH8, LMG, LS3, L98
- 재료: 고무, 금속
- 마치다: Black Powder Coat (Upper Mounts)
- 포함된 구성 요소: 2 rubber mounts, 2 upper mounts, mounting hardware
- 품목 무게: 4.75kg
- 소포 크기: 24.61 x 24.31 x 8.51cm
보증 정보
For specific warranty details regarding the ICT Billet LS Swap Engine Conversion Mount Kit, please refer to the official ICT Billet website or contact their customer support directly. Warranty terms and conditions may vary based on purchase location and date.
고객 지원
If you have any questions, require technical assistance, or need to report a missing or damaged part, please contact ICT Billet customer support through their official web제품을 구매한 사이트 또는 소매업체.
온라인 리소스: www.ictbillet.com


