1. 서론
This manual provides detailed instructions for the installation, configuration, and operation of your Lorex 2K Dual Lens Indoor Wi-Fi Security Camera, model W463AQD-E. Please read this manual thoroughly before using the product to ensure proper functionality and safety. Keep this manual for future reference.

Image 1.1: Lorex 2K Dual Lens Indoor Wi-Fi Security Camera with its retail packaging.
2. 패키지 내용
Verify that all items listed below are included in your package. If any items are missing or damaged, please contact Lorex customer support.
- 1 × 2K Dual-Lens Indoor Pan-Tilt Camera
- 1 × 32GB MicroSD Card (pre-installed)
- 1 × 6.5 ft (2 m) Power Cable
- 1 × 마운팅 브래킷
- 3 × 앵커 및 나사
- 1 × 전원 어댑터
3. 제품 오버view
Familiarize yourself with the components and features of your Lorex security camera.
3.1 카메라 구성 요소

이미지 3.1: 앞면 view of the camera, showing the dual lenses and call button.

이미지 3.2: 측면 view of the camera, highlighting its dome shape.

이미지 3.3: 뒤 view of the camera, showing the power input and reset button.

Image 3.4: Bottom label displaying model number W463AQD-E and other regulatory information.
3.2 주요 특징
- 2K 쿼드 HD 비디오: 선명하고 상세한 영상을 캡처합니다.tage.
- 이중 렌즈 디자인: 향상된 감시 기능을 제공합니다.
- 360° Pan-Tilt: 카메라 설정을 원격으로 조정하세요 viewing angle to cover a full 360-degree area.
- 자동 추적: Automatically follows detected movement within its field of view.
- Smart Person & Pet Detection: Differentiates between human and pet activity to reduce false alerts.
- IR 나이트 비전 : Provides clear video in low-light conditions up to 33 feet.
- 양방향 대화: Allows for real-time communication through the camera's built-in microphone and speaker.
- Quick Call Button: Enables visitors to initiate a call to your connected device.
- 유연한 스토리지: Supports local storage via an included 32GB MicroSD card and optional cloud storage or Lorex Fusion recorders.
- 개인정보 보호 모드: Physically hides the camera lens for enhanced privacy when needed.
- Wi-Fi 연결: Connects to your home network wirelessly (2.4GHz).
4. 설정
4.1 초기 설정 및 앱 연결
- 전원 켜기: 카메라에 전원 어댑터를 연결하고 전원 콘센트에 꽂으세요. 카메라 전원이 켜지고 시작 시퀀스가 시작됩니다.
- Lorex Home 앱을 다운로드하세요: 스마트폰이나 태블릿에서 App Store(iOS) 또는 Google Play Store(Android)에서 Lorex Home 앱을 다운로드하세요.
- 계정 생성: Lorex Home 앱을 열고 화면의 지시에 따라 새 계정을 만들거나 기존 계정에 로그인하세요.
- 장치 추가: Tap the '+' icon in the app to add a new device. Scan the QR code located on the bottom of your camera or on its packaging.
- Wi-Fi에 연결: Follow the app's prompts to connect the camera to your 2.4GHz Wi-Fi network. Ensure your mobile device is connected to the same Wi-Fi network during setup.
- 설정 완료: Once connected, follow the remaining steps in the app to name your camera and finalize the setup process.

Image 4.1: The Lorex Home application interface for managing camera feeds.
4.2 카메라 장착
The camera can be placed on a flat surface or mounted to a ceiling or wall using the included mounting bracket.
- 위치를 선택하십시오 : Select a suitable indoor location with a clear view and within range of your Wi-Fi network.
- 구멍 표시하기: Place the mounting bracket at the desired location and mark the screw holes with a pencil.
- 드릴 구멍: Drill pilot holes at the marked spots. If mounting on drywall, insert the included anchors.
- 안전한 브라켓: Align the mounting bracket with the holes and secure it using the provided screws.
- 카메라 부착: Twist the camera onto the mounting bracket until it clicks securely into place.
5. 운영
5.1 라이브 View 및 제어
라이브 액세스 view of your camera through the Lorex Home app. From the live view screen, you can control various camera functions.
- 팬 및 틸트: Use the directional controls in the app to remotely adjust the camera's horizontal (pan) and vertical (tilt) angles.
- 디지털 줌: Pinch to zoom in or out on the live video feed.
- 듀얼 렌즈 View: The app may offer options to switch between or combine views from the dual lenses.

Image 5.1: Camera shown with a smartphone displaying the dual lens live view 로렉스 홈 앱에서
5.2 Two-Way Talk and Call Button
The camera features two-way audio for communication and a physical call button.
- 양방향 대화: 라이브에서 view, tap the microphone icon to speak through the camera's speaker. Tap again to end.
- 호출 버튼: A person near the camera can press the physical call button on the camera to initiate a call to your connected mobile device.

Image 5.2: Demonstrating two-way talk functionality via the Lorex Home app.

Image 5.3: A user pressing the quick call button on the camera.
5.3 동작 감지 및 알림
The camera uses smart detection to identify important events.
- 스마트 감지: The camera can detect and differentiate between people and pets, sending specific alerts to your phone.
- 자동 추적: When motion is detected, the camera can automatically pan and tilt to follow the subject.
- 사용자 정의: Adjust motion detection zones and sensitivity settings within the Lorex Home app to minimize unwanted alerts.

Image 5.4: Auto-tracking feature following a baby's movement.

이미지 5.5: 또 다른 view of the auto-tracking feature in action.

Image 5.6: Smart motion detection alerting to a person's presence.

Image 5.7: Pet detection and auto-tracking following a dog.
5.4 Night Vision and Smart Lighting
The camera provides clear surveillance even in low-light conditions.
- IR 나이트 비전 : Infrared LEDs provide black and white video up to 33 feet in complete darkness.
- Smart Security Lighting: The camera features integrated lighting that can be configured to activate upon motion detection or on a schedule.

Image 5.8: Comparison of daytime and IR night vision footage of a sleeping baby.

Image 5.9: Clear night vision image of a baby sleeping.

Image 5.10: The camera's smart security lighting feature in action.
5.5 기록 및 저장
Your camera offers multiple options for storing recorded video footage.
- 로컬 스토리지: A 32GB MicroSD card is pre-installed for local recording. This ensures your footage is stored directly on the device.
- 클라우드 스토리지: Optional cloud storage plans are available for off-site backup of your recordings. Refer to the Lorex Home app for details.
- 로렉스 퓨전 레코더: The camera is compatible with Lorex Fusion recorders for integrated system storage.

Image 5.11: The included 32GB MicroSD card for private and secure local storage.
5.6 개인 정보 보호 모드
Activate Privacy Mode to physically conceal the camera lens when surveillance is not desired.
- 활성화: Privacy Mode can be activated through the Lorex Home app. When active, the camera lens will rotate downwards, blocking its view.
- 비활성화: Deactivate Privacy Mode via the app to resume normal operation.
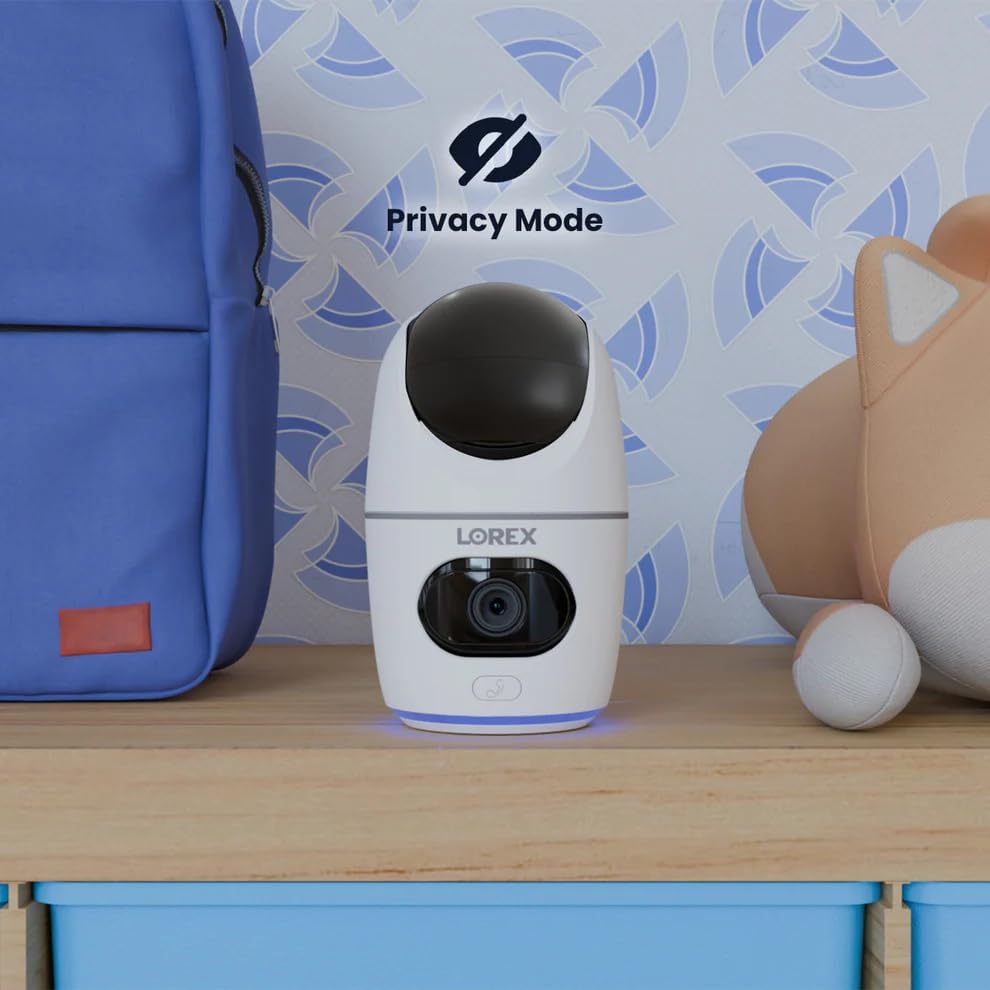
Image 5.12: The camera in Privacy Mode, with the lens retracted.
6. 유지관리
- 청소: 부드럽고 마른 천을 사용하여 카메라 렌즈와 본체를 닦으세요. 연마성 세척제나 용제는 사용하지 마세요.
- 펌웨어 업데이트: Regularly check the Lorex Home app for available firmware updates to ensure optimal performance and security.
- MicroSD 카드: Periodically check the status of the MicroSD card in the app. If the card is full and continuous recording is enabled, older footage will be overwritten. Back up important footag전자 필요에 따라.
- 전원 공급 장치: Ensure the camera is connected to a stable power source. Avoid using third-party power adapters that are not specified for this device.
7. 문제 해결
| 문제 | 해결책 |
|---|---|
| Camera is offline or disconnected. |
|
| Wi-Fi에 연결할 수 없습니다. |
|
| No video or poor video quality. |
|
| Motion alerts are too frequent or not received. |
|
8. 사양
| 특징 | 세부 사항 |
|---|---|
| 모델 번호 | W463AQD-E |
| 비디오 해상도 | 2K(1440p) |
| 효과적인 스틸 해상도 | 4 MP |
| View잉 각도 | 360 Degrees (Pan-Tilt), 135 Degrees (Field of View) |
| 나이트 비전 범위 | 33 Feet (IR Night Vision) |
| 연결성 | 와이파이(2.4GHz) |
| 저장 | 32GB MicroSD Card (included), supports up to 256GB, Cloud Storage (optional), Lorex Fusion compatible |
| 오디오 | 양방향 통화 (내장 마이크 및 스피커) |
| 발각 | Smart Person & Pet Detection, Auto-Tracking |
| 전원 | Corded Electric (5V=2A) |
| 치수(길이 x 너비 x 높이) | 5 x 6 x 5 인치 |
| 품목 무게 | 15.2 온스 |
| 실내/실외 사용 | 실내 전용 |
| 포함된 구성 요소 | Camera, 32GB MicroSD Card, Power Cable, Mounting Bracket, Power Adapter |
9. 보증 및 지원
For warranty information, technical support, or additional resources, please visit the official Lorex web사이트 또는 고객 서비스 부서에 문의하십시오.
- 로렉스 Web대지: www.lorex.com
- 고객 지원: Lorex를 참조하십시오. web연락처 정보 및 지원 시간은 해당 사이트를 참조하십시오.
Product registration is recommended to receive updates and support.


