1. 서론
This manual provides detailed instructions for the installation, operation, and maintenance of your ZEBRONICS H81 LGA 1150 Socket Motherboard. Designed for Intel Core i7/i5/i3 processors, this ATX motherboard supports DDR3 memory and features an Intel H81 Chipset. Please read this manual thoroughly before proceeding with installation to ensure proper functionality and to prevent damage.

이미지 1: 메인 view of the ZEBRONICS H81 LGA 1150 Motherboard, showcasin레이아웃과 구성 요소에 관해서.
2. 사양
The following table outlines the key technical specifications of the ZEBRONICS H81 Motherboard:
| 특징 | 설명 |
|---|---|
| 프로세서 지원 | Intel Core i7/i5/i3 processors (LGA 1150 Socket) |
| 칩셋 | 인텔 H81 |
| 메모리 지원 | 2 x DDR3 dual-channel slots, 1066/1333/1600MHz, Max 32GB |
| 랜 | Realtek 8105E 100/1000 Mbps |
| 오디오 | Realtek 662, 3x Audio Jacks for 6 channel HD Audio |
| 후면 패널 포트 | 1x USB Mouse/Keyboard, 1x VGA, 1x HDMI, 2x USB 3.0, 2x USB 2.0, 1x LAN, 3x Audio Jacks |
| 온보드 커넥터 | Front panel, Speaker, Front panel audio, USB 2.0, 4x SATA, 4-pin CPU fan, SYS fan, 24-pin ATX power, 4-pin ATX 12V power, Clear CMOS header |
| 확장 슬롯 | 1 x PCI Express x16 슬롯 |
| 폼 팩터 | 에이티엑스 |
| 치수 | 21.3 x 5.7 x 26.8cm |
| 무게 | 560g |

Image 2: Visual representation of key features including H81 Chipset, DDR3 support, LGA 1150 socket, HDMI, 5.1 Audio, 100/1000 LAN, 4 SATA ports, and PCIe slot.
3. 설정 가이드
메인보드와 구성품을 올바르게 설치하려면 다음 단계를 따르십시오.
- 준비: Ensure your computer case is compatible with the ATX form factor. Gather necessary tools including a screwdriver, thermal paste, and anti-static wrist strap.
- CPU 설치: Open the CPU socket lever. Carefully align the CPU with the socket (match the golden triangle on the CPU with the triangle on the socket) and gently place it in. Close the lever to secure the CPU. Apply a thin, even layer of thermal paste to the CPU's heat spreader.
- CPU 쿨러 설치: Mount the CPU cooler according to its manufacturer's instructions, ensuring good contact with the CPU and proper fan orientation. Connect the CPU fan cable to the 4-pin CPU fan connector on the motherboard.
- RAM 설치: Open the clips on both ends of the DDR3 memory slots. Align the RAM modules with the slots, ensuring the notch on the module matches the key in the slot. Press down firmly on both ends until the clips snap into place.
- 마더보드 장착: Install the I/O shield into the rear opening of your computer case. Carefully place the motherboard into the case, aligning the screw holes with the standoffs. Secure the motherboard with screws.
- 전원 연결: Connect the 24-pin ATX main power connector and the 4-pin ATX 12V CPU power connector from your power supply to the corresponding ports on the motherboard.
- 저장 장치 연결: Use SATA cables to connect your hard drives or SSDs to the SATA ports on the motherboard. Connect the power cables from your power supply to these devices.
- 전면 패널 케이블 연결: Connect the power switch, reset switch, HDD LED, power LED, and front panel audio/USB cables from your case to the respective headers on the motherboard. Refer to the motherboard diagram for correct pin assignments.
- 확장 카드 설치(선택 사항): If installing a graphics card or other PCI Express cards, insert them into the appropriate slots and secure them with a screw.
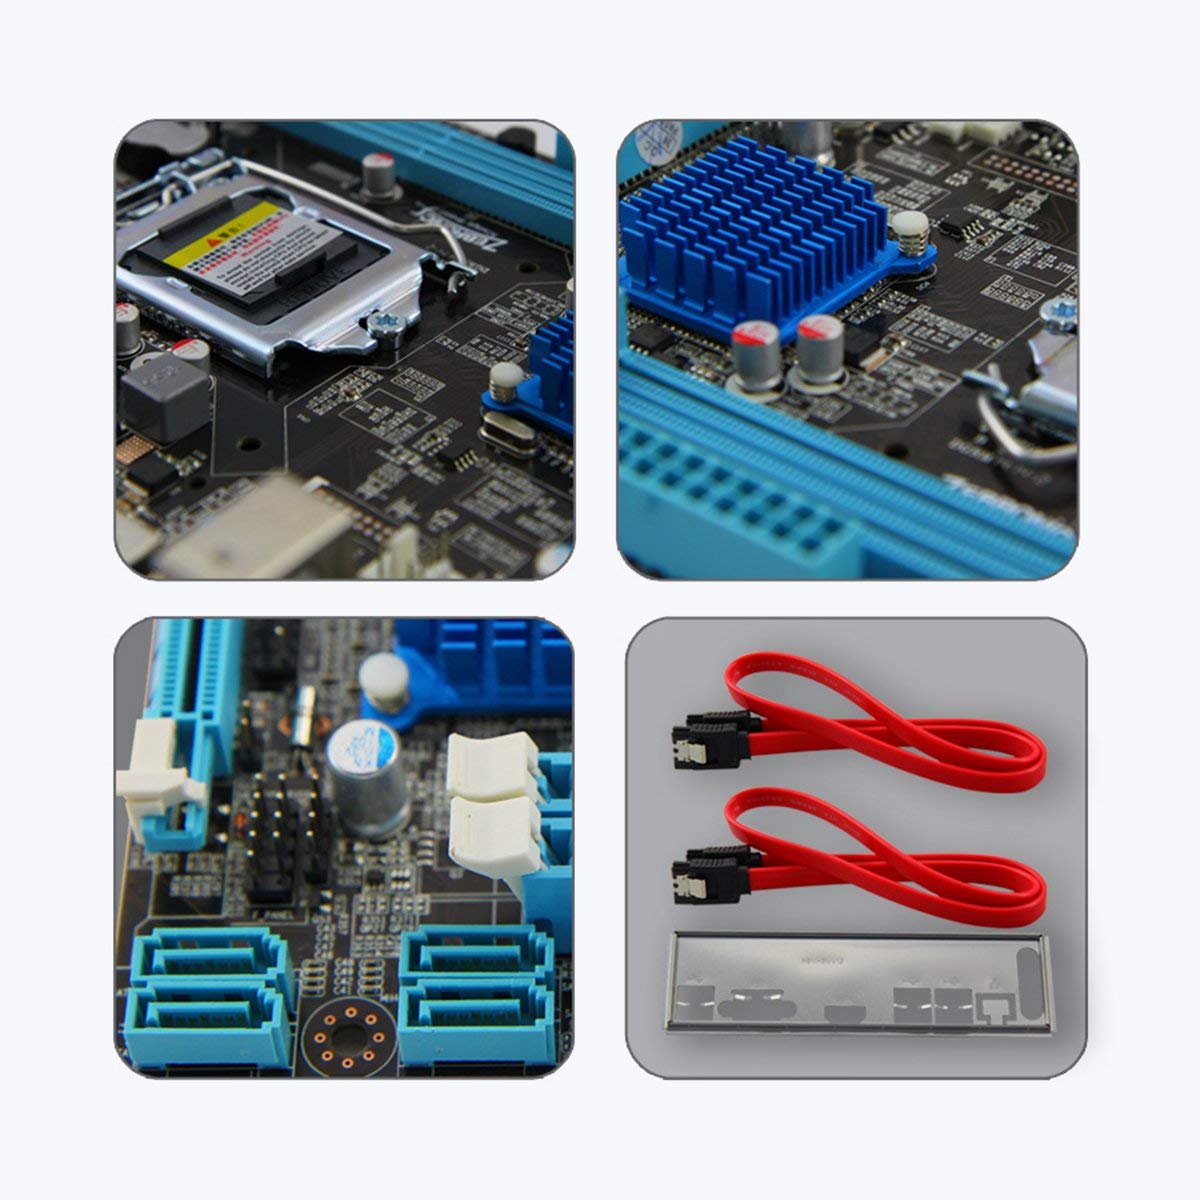
이미지 3: 클로즈업 views of motherboard components such as the CPU socket, chipset heatsink, SATA ports, and included accessories like SATA cables and the I/O shield.
4. 사용 설명서
모든 구성 요소가 설치 및 연결되면 시스템 전원을 켤 수 있습니다.
- 초기 전원 켜기: After ensuring all connections are secure, connect your monitor, keyboard, and mouse. Plug in the power cord and press the power button on your computer case.
- BIOS/UEFI 설정: During startup, repeatedly press the designated key (usually 델 or F2) to enter the BIOS/UEFI setup utility. Here you can configure boot order, system time, and other advanced settings. Save changes and exit to continue booting.
- 운영 체제 설치: 운영체제 설치 미디어(USB 드라이브 또는 DVD)를 삽입하고 화면의 안내에 따라 운영체제를 설치하십시오.
- 드라이버 설치: After OS installation, install the necessary drivers for your motherboard (chipset, LAN, audio, graphics) from the included driver CD or the ZEBRONICS web대지.
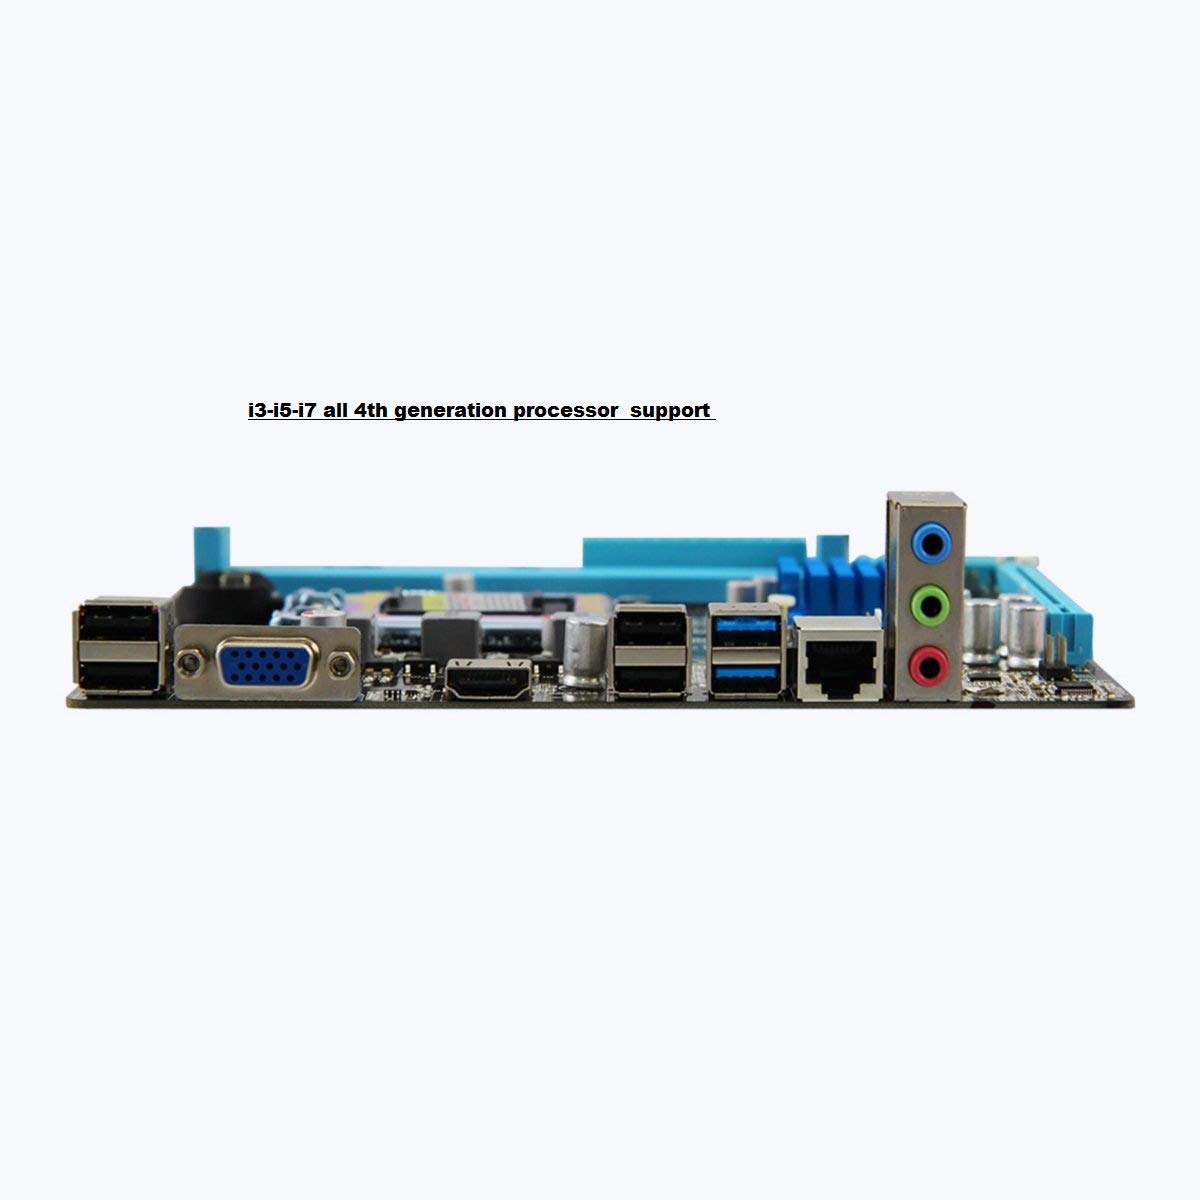
Image 4: Rear I/O panel of the ZEBRONICS H81 Motherboard, showing ports for USB, VGA, HDMI, LAN, and audio.
5. 유지관리
정기적인 유지보수는 마더보드의 수명과 최적의 성능을 보장하는 데 도움이 됩니다.
- 먼지 제거: 컴퓨터 케이스 내부, 특히 방열판과 팬의 먼지를 압축 공기를 사용하여 주기적으로 청소하세요. 청소하기 전에 시스템 전원을 끄고 플러그를 뽑으세요.
- 드라이버 업데이트 : Keep your motherboard drivers (chipset, LAN, audio) updated to the latest versions available from the ZEBRONICS official web사이트 호환성 및 성능을 보장합니다.
- BIOS/UEFI 업데이트: Only update the BIOS/UEFI if necessary, following the instructions provided by ZEBRONICS carefully. Incorrect BIOS updates can render your motherboard inoperable.
- 케이블 관리 : 공기 흐름을 개선하고 간섭을 방지하기 위해 내부 케이블이 깔끔하게 배선되어 있는지 확인하세요.
6. 문제 해결
메인보드에 문제가 발생하면 다음의 일반적인 문제 해결 단계를 참조하십시오.
- 전원 없음/부팅 불가:
- Check all power connections (24-pin ATX, 4-pin ATX 12V, CPU fan).
- 전원 공급 장치가 켜져 있고 정상적으로 작동하는지 확인하십시오.
- 전면 패널 전원 스위치의 연결 상태를 확인하십시오.
- Try clearing the CMOS (refer to the Clear CMOS header on the motherboard).
- 디스플레이 없음:
- Ensure the monitor is connected to the correct video output (VGA or HDMI on the motherboard, or dedicated graphics card).
- RAM 모듈을 다시 장착하십시오. RAM 모듈 하나만 장착한 상태로 부팅을 시도해 보십시오.
- 전용 그래픽 카드를 사용하는 경우 카드가 제대로 장착되고 전원이 공급되는지 확인하세요.
- 시스템 불안정/충돌:
- 과열 여부를 확인하십시오. CPU 쿨러가 제대로 설치되었는지, 팬이 정상적으로 작동하는지 확인하십시오.
- 메모리 진단 도구를 실행하여 RAM 무결성을 확인하세요.
- 메인보드 드라이버와 BIOS/UEFI를 업데이트하세요.
- Peripheral Issues (USB, LAN, Audio):
- Ensure drivers for these components are installed and up to date.
- 케이블과 장치의 물리적 연결을 확인하세요.
- Test with different peripherals to isolate the issue.
7. 보증 및 지원
Your ZEBRONICS H81 Motherboard comes with a 2년 보증 provided by CORE COMPUTERS. Please retain your proof of purchase for warranty claims.
기술 지원, 드라이버 다운로드 또는 추가 지원이 필요한 경우 공식을 방문하세요. ZEBRONICS support web대지 또는 고객 서비스에 문의하세요.


