1. 서론
The Samson AirLine 99m AH9 Headset Wireless System is a compact and versatile wireless microphone solution designed for active performers, presenters, and educators. This system provides high-definition audio transmission without the need for cables or belt packs, offering freedom of movement and ease of use. It operates on a frequency-agile UHF band, ensuring reliable performance across 100 selectable channels.
The system comprises three main components:
- AH9 Micro Transmitter: A lightweight, rechargeable transmitter integrated into the headset.
- AR99m Micro Receiver: A compact receiver with multiple output options for versatile connectivity.
- DE10x Headset Microphone: 로우 프로file, comfortable headset microphone designed for clear vocal reproduction.
2. 시스템 구성 요소 이상view

그림 2.1: The complete Samson AirLine 99m AH9 Headset Wireless System, showing the AR99m receiver, AH9 micro transmitter, and DE10x headset microphone.

그림 2.2: 클로즈업 view of the AH9 micro transmitter integrated with the DE10x headset microphone. The green light indicates power status.

그림 2.3: 맨 위 view of the AR99m micro receiver, showing the volume knob, SET button, channel display, and status indicators (READY, IR, PEAK).
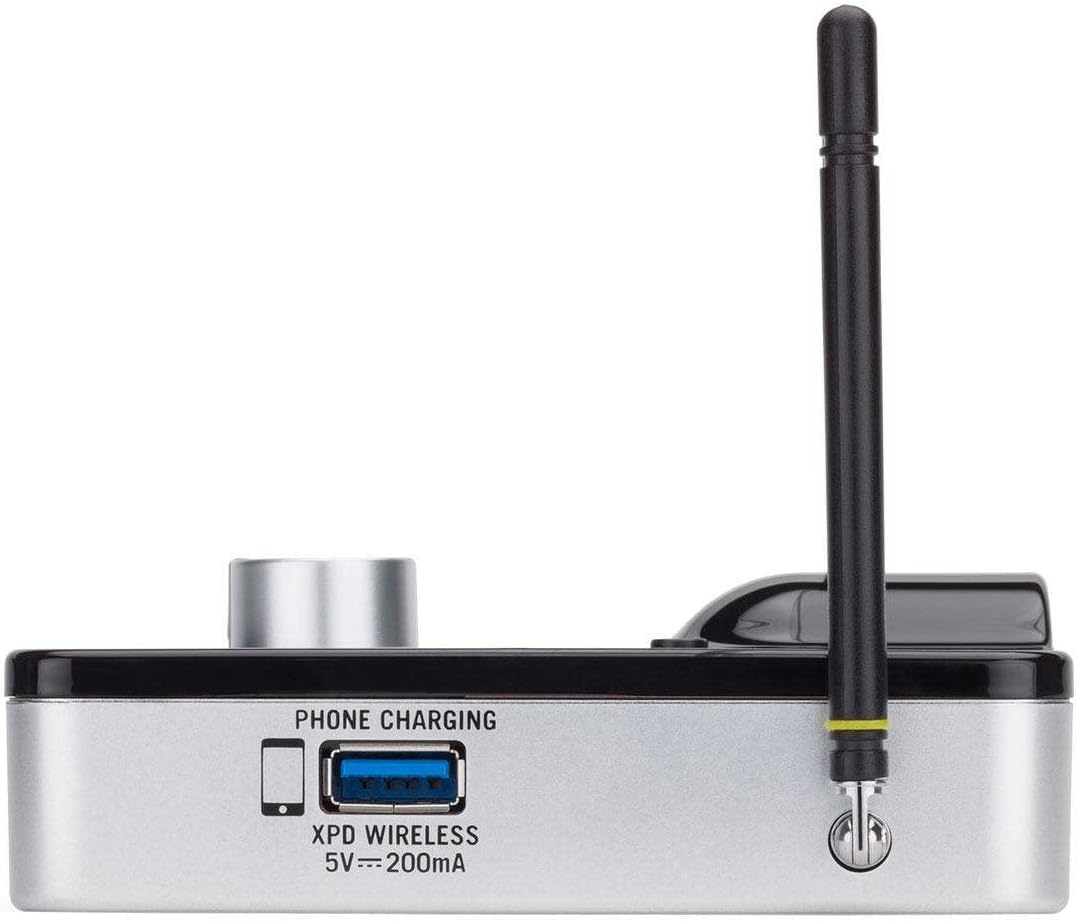
그림 2.4: 옆 view of the AR99m micro receiver, highlighting the 'PHONE CHARGING' USB port (5V --- 200mA) and antenna connection.

그림 2.5: 각진 view of the AR99m micro receiver, showing the DC IN port, 1/8" unbalanced output, and XLR balanced output.

그림 2.6: 뒤쪽 view of the AH9 micro transmitter, showing the charging contacts and the integrated headset cable connection.

그림 2.7: 뒤쪽 view of the AR99m micro receiver, detailing the DC IN (15V === 600mA), 1/4" unbalanced output, and XLR balanced output ports.

그림 2.8: The DE10x headset microphone, showing its lightweight design and adjustable ear hooks.
3. 설정 지침
3.1. Charging the AH9 Micro Transmitter
- Connect the supplied USB charging cable to the AH9 micro transmitter.
- USB 케이블의 다른 쪽 끝을 표준 USB 전원 어댑터(별도 구매) 또는 전원이 공급되는 USB 포트에 연결하십시오.
- The LED indicator on the AH9 will show charging status. A full charge provides up to 8 hours of operation.
3.2. Connecting the AR99m Micro Receiver
- Connect the included power adapter to the DC IN port (15V === 600mA) on the AR99m receiver.
- 전원 어댑터를 AC 콘센트에 꽂으세요.
- Connect the AR99m receiver to your audio mixer, PA system, or recording device using one of the following outputs:
- 균형 잡힌 XLR 출력: 전문가용 오디오 장비용입니다.
- Unbalanced 1/4" Output: For standard instrument inputs or line-level inputs.
- Unbalanced 1/8" Output: For consumer-grade audio devices or computer inputs.
- Extend the antennas on the AR99m receiver for optimal signal reception.
3.3. Wearing the DE10x Headset Microphone
- Carefully place the headset over your ears, ensuring a comfortable and secure fit.
- Position the microphone element approximately 1-2 inches from the corner of your mouth for best sound quality.
- Use the included windscreens to reduce plosives and wind noise, if necessary.
4. 사용 설명서
4.1. 전원 켜기 / 끄기
- AH9 Micro Transmitter: Press and hold the power button on the transmitter until the LED illuminates. Press and hold again to power off.
- AR99m Micro Receiver: Turn the VOLUME knob clockwise to power on. Turn counter-clockwise until it clicks to power off.
4.2. 채널 선택 및 페어링
The AirLine 99m system features 100 operating channels across a 24MHz bandwidth.
- Turn on the AR99m receiver. The channel display will show the current channel.
- 를 누르세요 세트 button on the AR99m receiver to cycle through available channels. Select a clear channel with no interference.
- Once a channel is selected on the receiver, turn on the AH9 transmitter.
- The AH9 transmitter will automatically scan and pair with the receiver on the selected channel. The 'READY' indicator on the receiver will illuminate when a successful connection is established.
4.3. 볼륨 조절
사용하세요 용량 knob on the AR99m receiver to adjust the output level of the wireless system. Start with a low volume and gradually increase it to avoid sudden loud audio.
4.4. Monitoring Signal Status
- 준비 표시기: Illuminates when the transmitter and receiver are successfully paired and receiving a signal.
- 피크 지표: Illuminates when the audio input from the transmitter is too high, indicating potential clipping. Reduce the input gain on your mixer or adjust the microphone position if this occurs.
- IR 지표: Used during initial setup for infrared pairing (if applicable, though this model typically auto-pairs).
5. 유지관리
- 청소: Use a soft, dry cloth to clean the surfaces of the transmitter and receiver. Avoid using abrasive cleaners or solvents.
- 배터리 관리 : Recharge the AH9 transmitter regularly. For long-term storage, ensure the battery is partially charged (around 50%) to prolong its lifespan.
- 저장: 시스템은 직사광선과 극한의 온도를 피해 서늘하고 건조한 곳에 보관하세요.
- 앞유리: Replace windscreens on the DE10x headset microphone as needed to maintain hygiene and acoustic performance.
6. 문제 해결
| 문제 | 가능한 원인 | 해결책 |
|---|---|---|
| 수신기에서 소리가 나지 않습니다. |
|
|
| 간섭 또는 연결 끊김 |
|
|
| 왜곡된 오디오 |
|
|
| 배터리 수명이 짧음 |
|
|
7. 사양
| 특징 | 세부 사항 |
|---|---|
| 모델 번호 | SW9A9SDE10-K |
| 운영 채널 | 100 (across 24MHz bandwidth) |
| 작동 범위 | 최대 300피트(시야) |
| AH9 Transmitter Battery Life | Up to 8 hours (Lithium-Ion, rechargeable) |
| AR99m Receiver Outputs | Balanced XLR, Unbalanced 1/4", Unbalanced 1/8" |
| 마이크 유형 | DE10x Headset Microphone |
| 포함된 액세서리 | 4 Windscreens, USB charging cable, Power adapter |
| 품목 무게 | 1 파운드 |
| 제품 치수 | 3 x 3 x 3 인치 |
| 재료 유형 | 플라스틱 |
| 전원 | 배터리 구동 |
| 호환 장치 | Mixers, Audio Interfaces, PA Systems, Computers, Recording Devices |
8. 보증 및 지원
보증 정보 및 기술 지원에 대해서는 Samson Technologies 공식 웹사이트를 참조하십시오. web사이트를 방문하거나 고객 서비스에 직접 문의하세요. 보증 청구에 대비해 구매 증빙 자료로 구매 영수증을 보관하세요.
온라인 리소스: 방문하세요 Samson Brand Store on Amazon 추가 제품 정보 및 지원은 여기를 참조하세요.


