소개
This manual provides detailed instructions for the LUME CUBE 1.0 Professional LED Lighting Kit, Model LC-PROLK. This kit is designed to provide versatile and high-quality lighting for various photography and videography applications. Please read this manual thoroughly before using the product to ensure proper operation and longevity.
패키지 내용
The LUME CUBE 1.0 Professional LED Lighting Kit includes the following components:
- 2x LUME CUBE 1.0 LED Lights
- 2x USB 충전 케이블
- 운반 케이스
- DSLR Mount
- Diffusion Gels
- 컬러 젤
- 스누츠
- 헛간 문
- 벌집형 격자
- Dome Diffusers
- Modi Frames (for attaching accessories)

Image: All components of the LUME CUBE 1.0 Professional LED Lighting Kit, including two Lume Cubes, various diffusers, gels, snoots, barn doors, and charging cables.

Image: The LUME CUBE 1.0 Professional LED Lighting Kit with its components, including two Lume Cubes, diffusers, and snoots, organized within the custom-fit carry case.
설정
1. Charging the Lume Cubes
Before initial use, fully charge both Lume Cubes. Connect the provided USB charging cables to the charging port on each Lume Cube and to a standard USB power source. The indicator light will show charging status. A full charge typically takes 45-60 minutes.
2. 액세서리 부착
The Lume Cube 1.0 uses a magnetic system for attaching various light modifiers. Ensure the Modi Frame is securely attached to the Lume Cube before adding other accessories.
- Diffusers and Gels: Place the desired diffuser or gel into the Modi Frame. The magnetic attachment will secure it.
- 스누트: Attach the snoot to the Modi Frame to create a focused beam of light.
- 헛간 문: Attach the barn doors to the Modi Frame to control light spill and shape the light output.
- 벌집형 격자: Use the honeycomb grid to further control light direction and reduce spill.

Image: A LUME CUBE 1.0 with a snoot accessory attached, designed to narrow and direct the light output.

Image: A LUME CUBE 1.0 with barn doors attached, providing adjustable flaps to shape and control the light beam.

Image: A LUME CUBE 1.0 with a honeycomb grid accessory, used to create a more focused and directional light output.

Image: A LUME CUBE 1.0 with a dome diffuser attached, designed to soften and spread the light for a more even illumination.
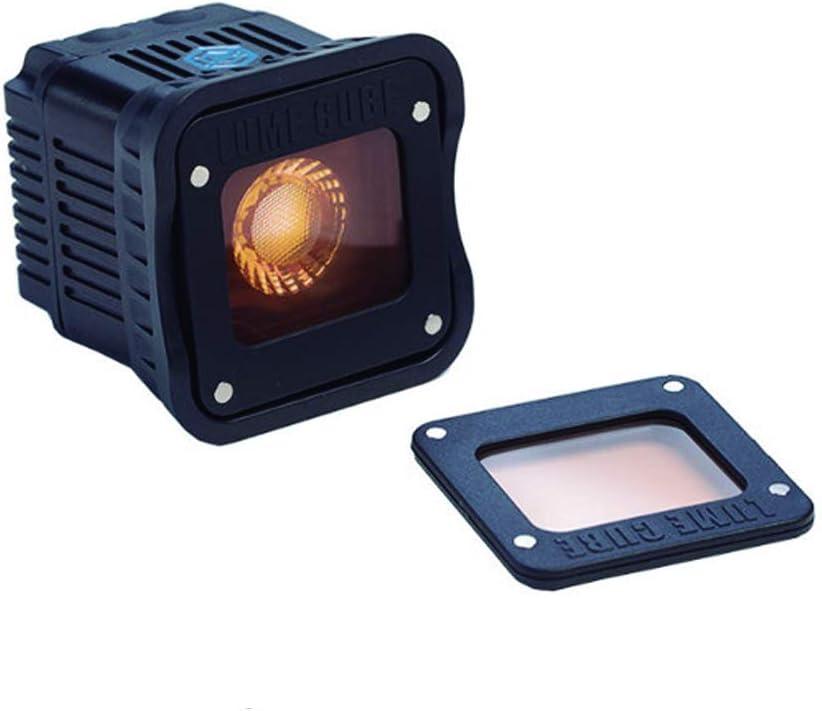
Image: A LUME CUBE 1.0 with an orange color gel attached, used to modify the color temperature of the light.

Image: A LUME CUBE 1.0 shown with a selection of color gels (blue, red, yellow) that can be attached to alter the light's hue.
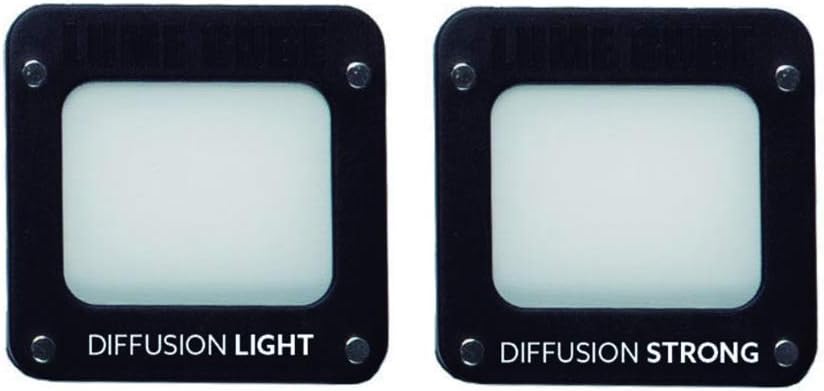
Image: Two LUME CUBE diffusers, labeled "DIFFUSION LIGHT" and "DIFFUSION STRONG," offering varying levels of light softening.
3. Mounting the Lume Cubes
The Lume Cubes feature a standard 1/4"-20 tripod mount on the bottom, allowing attachment to various camera accessories, including the included DSLR Mount or other compatible tripods and stands.
- DSLR Mount: Attach the Lume Cube to your camera's hot shoe using the provided DSLR Mount.
- 기타 탈것: Secure the Lume Cube to any compatible mount with a 1/4"-20 screw.
작동 지침
1. 전원 켜기/끄기 및 밝기 조절
Each Lume Cube has a power button and controls for brightness adjustment.
- 전원 켜기: Press and hold the power button until the light illuminates.
- 밝기 레벨: Cycle through 4 distinct brightness levels by pressing the brightness control buttons.
- 스트로브 모드: Activate strobe mode for special effects by pressing the designated strobe button or cycling through modes.
- 전원 끄기 : 전원 표시등이 꺼질 때까지 전원 버튼을 길게 누르세요.
2. 블루투스 연결 및 앱 제어
The Lume Cubes can be controlled wirelessly via the Lume-X App, available for both iPhone and Android devices.
- Download the Lume-X App from your device's app store.
- 스마트폰이나 태블릿에서 Bluetooth가 활성화되어 있는지 확인하세요.
- Power on your Lume Cubes.
- Open the Lume-X App and follow the on-screen instructions to pair your Lume Cubes.
- Once paired, you can control brightness, modes, and other settings directly from the app.
3. 방수 작동
The Lume Cube 1.0 is designed with a durable housing that provides waterproof capabilities up to 10 meters (30 feet) depth. Ensure all port covers are securely closed before submerging the device in water.
유지
- 청소: Use a soft, dry cloth to clean the exterior of the Lume Cubes and accessories. For stubborn dirt, a slightly damp cloth can be used, ensuring no moisture enters the charging port.
- 배터리 관리 : To prolong battery life, avoid fully discharging the Lume Cubes frequently. Store them with a partial charge if not used for extended periods.
- 저장: Store the Lume Cubes and accessories in the provided carry case to protect them from dust and physical damage.
문제 해결
- Lume Cube does not turn on:
- Ensure the Lume Cube is fully charged. Connect it to a power source using the USB cable and check the charging indicator.
- Bluetooth를 통해 연결할 수 없습니다:
- 모바일 기기에서 Bluetooth가 활성화되어 있는지 확인하세요.
- Ensure the Lume Cube is powered on and within range.
- Restart both the Lume Cube and your mobile device.
- Try unpairing and re-pairing the device in the Lume-X App.
- Lume Cube overheats and shuts off:
- High brightness settings or prolonged use in warm environments can cause the Lume Cube to heat up. If it shuts off due to overheating, allow it to cool down before resuming use. Consider reducing brightness or operating in a cooler environment.
- 액세서리가 제대로 부착되지 않습니다.
- Ensure the Modi Frame is correctly attached to the Lume Cube. Check that the magnets on both the Modi Frame and the accessory are clean and free from debris.
명세서
| 모델 번호 | LC-PROLK |
| 상표 | 루미 큐브 |
| 광 출력 | Daylight Balanced 5600K |
| 밝기 레벨 | 4 levels + Strobe mode |
| 연결성 | 블루투스 |
| 방수 깊이 | 최대 10미터(30피트) |
| 배터리 | 리튬 폴리머 2개(포함) |
| 충전 시간 | 약 45~60분 |
| 품목 무게 | 6.7 ounces (per Lume Cube) |
| 제품 치수 | 10.24 x 4.33 x 8.66인치 (포장/키트 크기) |
| Compatible Mount Type | Hot Shoe (with adapter), 1/4"-20 Thread |
보증 및 지원
The LUME CUBE 1.0 Professional LED Lighting Kit comes with a one-year limited warranty. For warranty claims or technical support, please refer to the official LUME CUBE web해당 웹사이트를 방문하거나 고객 서비스 부서에 문의하십시오. 보증 적용을 위해 구매 증빙 자료를 보관하십시오.
추가 지원을 받으려면 다음을 방문하세요. 아마존의 LUME CUBE 스토어.


