소개
The Fluidmaster 703AP4 Specialty Toilet Fill Valve is designed as a direct replacement for old or inefficient fill valves in Glacier Bay and Niagara Flapperless Toilets. This valve optimizes your toilet's refill performance, ensuring fast and efficient operation. It is built with corrosive-resistant materials for durability and offers a cost-effective solution for common toilet fill problems.

Image: Packaging for the Fluidmaster 703AP4 Specialty Toilet Fill Valve, showing two units.
안전 정보
- 설치 또는 유지 보수 작업을 시작하기 전에 항상 변기의 급수 밸브를 잠그십시오.
- Wear appropriate personal protective equipment, such as gloves and eye protection, when handling plumbing components.
- 모든 연결 부분이 안전하게 되어 누출을 방지하세요.
- 작은 부품은 어린이의 손이 닿지 않는 곳에 보관하세요.
- 어떤 단계에 대해 확신이 없다면 자격을 갖춘 배관공에게 문의하세요.
제품 끝view 및 구성 요소
The Fluidmaster 703AP4 fill valve consists of several key components designed for efficient water flow and level control within your toilet tank.

이미지: 자세한 view of the Fluidmaster 703AP4 fill valve, showing the main body and the float arm mechanism.

Image: Another perspective of the Fluidmaster 703AP4 fill valve, highlighting its compact design.
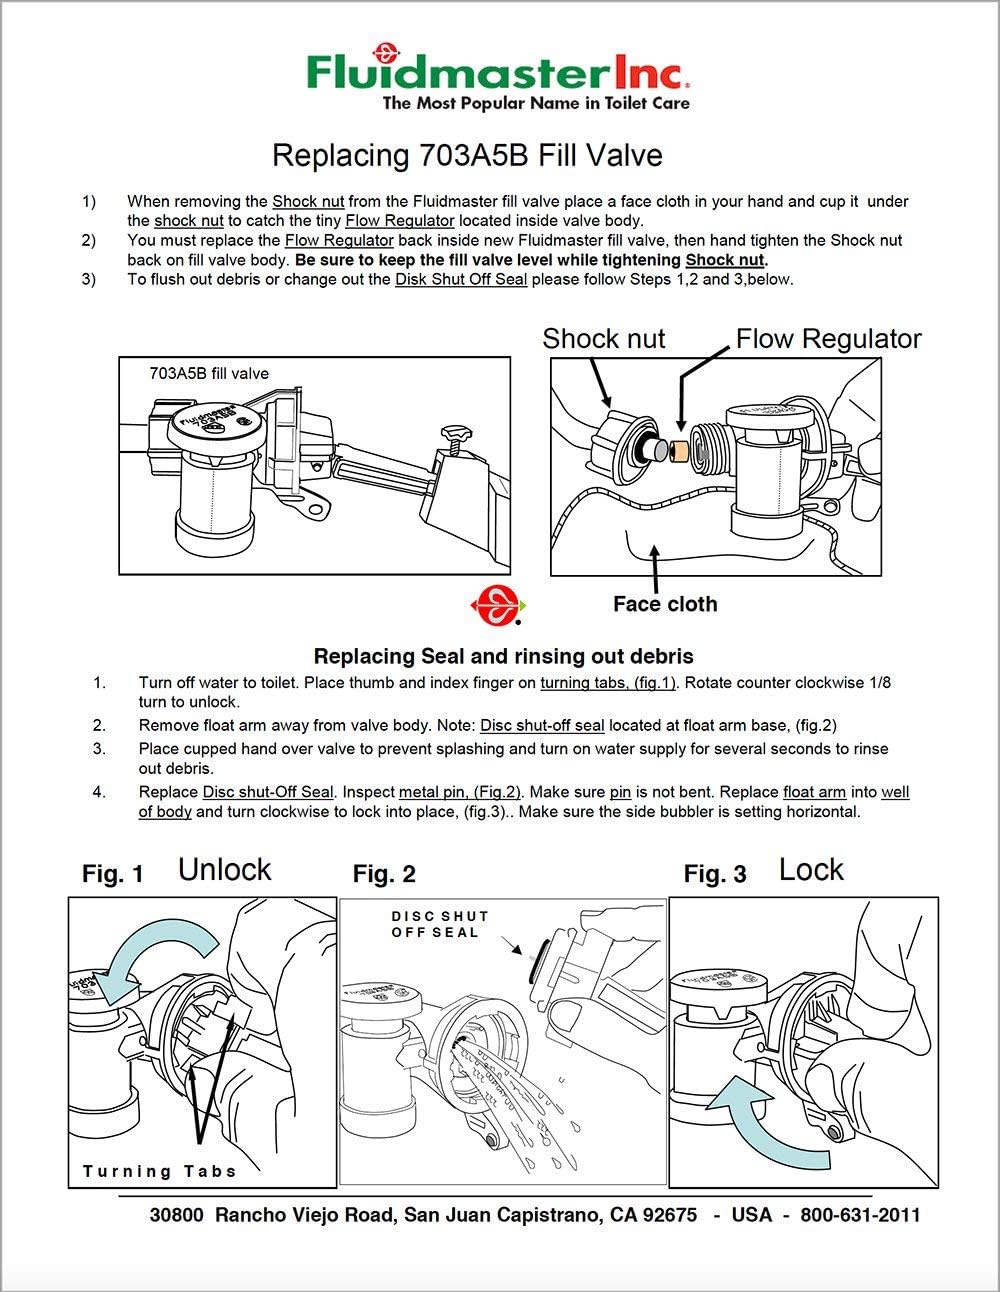
Image: An illustrative diagram showing the Fluidmaster fill valve correctly installed inside a toilet tank, with water level indicated.
설치 지침
Follow these steps for a quick and easy installation of your new Fluidmaster 703AP4 fill valve.
- 물 공급을 차단하세요: Locate the water supply valve behind or near the toilet and turn it clockwise until the water flow stops. Flush the toilet to empty the tank.
- 기존 주입 밸브를 제거하십시오. Disconnect the water supply line from the bottom of the old fill valve. Unscrew the mounting nut holding the old fill valve in place and carefully remove it from the tank.
- 탱크 바닥 청소: Clean any debris or mineral buildup from the hole at the bottom of the toilet tank where the fill valve sits.
- 새 주입 밸브를 설치하세요: Insert the new Fluidmaster 703AP4 fill valve into the hole at the bottom of the tank. Ensure the shank washer is properly seated on the outside of the tank.
- Secure Fill Valve: Hand-tighten the mounting nut onto the threaded shank of the new fill valve from underneath the tank. Do not overtighten.
- 물 공급 연결: Reconnect the water supply line to the bottom of the new fill valve. Hand-tighten, then use a wrench to tighten an additional quarter turn. Do not overtighten.
- 물 공급을 켜세요: Slowly turn the water supply valve counter-clockwise to restore water flow to the toilet tank. Check for leaks.
- (필요한 경우) 수위를 조절하십시오. The valve is designed to optimize refill. If adjustment is needed, refer to the diagram below for components like the shock nut and flow regulator.

Image: A visual three-step guide illustrating the installation process: 1. Flush out dump tank, 2. Remove old fill valve, 3. Install new fill valve.
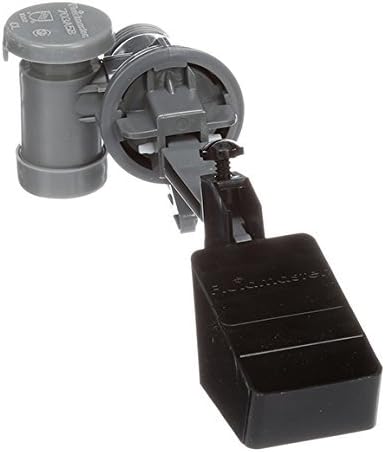
Image: A detailed diagram showing the components of the 703A5B fill valve, including the shock nut and flow regulator, and instructions for replacing the seal and rinsing out debris.
작동 지침
The Fluidmaster 703AP4 fill valve operates automatically to refill your toilet tank after each flush. Once installed, it will maintain the proper water level for optimal flushing performance.
- After flushing, the water level in the tank will drop, causing the fill valve to activate.
- The valve will quickly refill the tank to the predetermined water line.
- Once the desired water level is reached, the valve will automatically shut off the water flow.
유지
Regular maintenance can extend the life of your fill valve and ensure optimal performance. If you notice slow refilling or continuous running, the valve may need cleaning.
Replacing Seal and Rinsing Out Debris:
Refer to the diagram in the Installation section (Image: Diagram for replacing Fluidmaster 703A5B fill valve) for visual guidance.
- 수도를 잠그세요: 변기의 물 공급을 차단하세요.
- Unlock Valve: Turn the top of the fill valve counter-clockwise 1/8 turn to unlock it.
- Remove Float Arm: Remove the float arm assembly from the valve body.
- Rinse Debris: Place a cup over the top of the valve and turn on the water supply for several seconds to flush out any debris.
- 씰 검사: Inspect the disc shut-off seal for any damage or wear. Replace if necessary.
- 재조립: Reinsert the float arm and turn the valve top clockwise to lock it back into place. Ensure the side bubbler is set horizontally.
문제 해결
다음은 몇 가지 일반적인 문제와 이에 대한 잠재적 해결책입니다.
| 문제 | 가능한 원인 | 해결책 |
|---|---|---|
| 변기 물이 계속 흘러나옴 | Water level too high, debris in valve, worn seal | Adjust water level, clean valve (see Maintenance), replace seal. |
| Slow tank refill | Low water pressure, debris in valve, kinked supply line | Check water supply pressure, clean valve (see Maintenance), ensure supply line is not kinked. |
| Toilet does not flush properly | 수위가 너무 낮습니다 | Adjust water level higher. |
| Leaking at base of valve | Loose mounting nut, damaged shank washer | Tighten mounting nut, inspect and replace shank washer if damaged. |
명세서
| 기인하다 | 세부 사항 |
|---|---|
| 상표 | 플루이드마스터 |
| 모델 번호 | 703AP4 (also 745839830632) |
| 재료 | 금속, 플라스틱 |
| 입구 연결 크기 | 2 인치 |
| 입구 연결 유형 | 채우다 |
| 밸브 유형 | 플로트 밸브 |
| 품목 무게 | 6.9 온스 |
| 패키지 크기 | 9.17 x 7.83 x 2.56 인치 |
| 호환성 | Glacier Bay and Niagara Flapperless Toilets |
보증 및 지원
보증 정보:
The Fluidmaster 703AP4 Specialty Toilet Fill Valve comes with a 1년 보증 구매일로부터. 본 보증은 정상적인 사용 및 서비스 과정에서 발생한 재료 및 제조상의 결함을 보장합니다.
고객 지원:
For technical assistance, troubleshooting, or warranty claims, please visit the official Fluidmaster website or contact their customer service department. You can often find detailed FAQs and support resources online.
Fluidmaster Official Web대지: www.fluidmaster.com
When contacting support, please have your product model number (703AP4) and proof of purchase readily available.


