제품 끝view
The Sharkoon V1000 is a versatile Micro ATX PC case designed for various computing needs, from demanding office setups to compact multimedia stations or gaming PCs. Despite its compact dimensions of 17.7 x 7.6 x 15.8 inches, it offers ample space for components typically found in larger ATX cases. Key features include a dedicated power supply tunnel for discreet installation and improved airflow, a wireless front panel design, and removable dust filters for easy maintenance.
주요 특징:
- Power supply tunnel for clean cable management and improved thermal performance.
- Wireless front panel design for easy access and maintenance.
- Removable dust filter for convenient cleaning and system longevity.
- Decoupled power supply pad to reduce vibrations and noise.
- Variable fan configuration options for optimized cooling.
- Support for a radiator in the front panel for advanced cooling solutions.

그림 1: 각진 앞면 view of the Sharkoon V1000 PC Case, showcasing its sleek black design and mesh front panel.
설정 및 설치
This section provides general guidelines for setting up your Sharkoon V1000 PC case and installing essential components. Always refer to your component manuals for specific installation instructions.
1. 사건 준비
- 짐 풀기: 케이스를 포장에서 조심스럽게 꺼내십시오. 배송 중 파손 여부를 확인하십시오.
- 내부 접근: Remove the side panels. Typically, this involves unscrewing thumbscrews at the rear of the case and sliding the panels backward.

그림 2: 내부 view of the Sharkoon V1000, showing the motherboard tray, drive bays, and power supply tunnel.
2. 전원 공급 장치 설치
The V1000 features a dedicated power supply tunnel at the bottom for a clean build.
- Position the power supply unit (PSU) into the tunnel from the rear of the case.
- 케이스 뒷면에서 나사로 PSU를 고정합니다.
- Route necessary cables through the cutouts in the tunnel for connection to components.
3. 마더보드 설치
The V1000 supports mATX motherboards.
- 케이스 후면 개구부에 I/O 실드를 설치합니다.
- Align the motherboard with the pre-installed standoffs. Ensure all screw holes align.
- 제공된 나사로 마더보드를 고정합니다.

그림 3: 후면 view of the Sharkoon V1000, showing the I/O shield cutout, expansion slots, and power supply mounting area.
4. 드라이브 설치
Install your storage drives (HDDs/SSDs) into the designated bays. Refer to the case's internal structure for specific bay locations and mounting mechanisms.
5. 전면 패널 연결
Connect the front panel cables (USB, audio, power/reset switches, LEDs) to the appropriate headers on your motherboard. Consult your motherboard manual for header locations.

그림 4: 상단 전면 각도 view of the Sharkoon V1000, highlighting the front I/O panel with USB ports and audio jacks.
PC 케이스 작동 방법
Once all components are installed and connected, you can begin using your PC. The Sharkoon V1000 is designed for optimal airflow and user convenience.
전원 켜기
Press the power button located on the top front panel of the case to turn on your system. The power LED will illuminate.

그림 5: 전면 view of the Sharkoon V1000, showing the mesh front panel and the top-mounted power button and I/O ports.
팬 구성
The V1000 offers variable fan configuration. Ensure fans are installed to create positive or negative pressure as desired for optimal cooling. The case supports 120mm fans.
유지
정기적인 유지 관리는 PC 부품의 수명과 최적의 성능을 보장하는 데 도움이 됩니다.
먼지 필터 청소
The Sharkoon V1000 features removable dust filters. It is recommended to clean these filters every 1-3 months, depending on your environment, to maintain good airflow and prevent dust buildup inside the case.
- Locate and carefully remove the dust filters (e.g., front, top, bottom).
- 압축 공기, 부드러운 브러시 또는 물로 헹궈 필터를 청소하십시오(재설치하기 전에 완전히 건조되었는지 확인하십시오).
- Reinstall the clean dust filters.
일반 청소
케이스 외부를 부드러운 천으로 닦아주세요.amp 천으로 닦으세요. 연마성 세제나 용제는 사용하지 마세요.
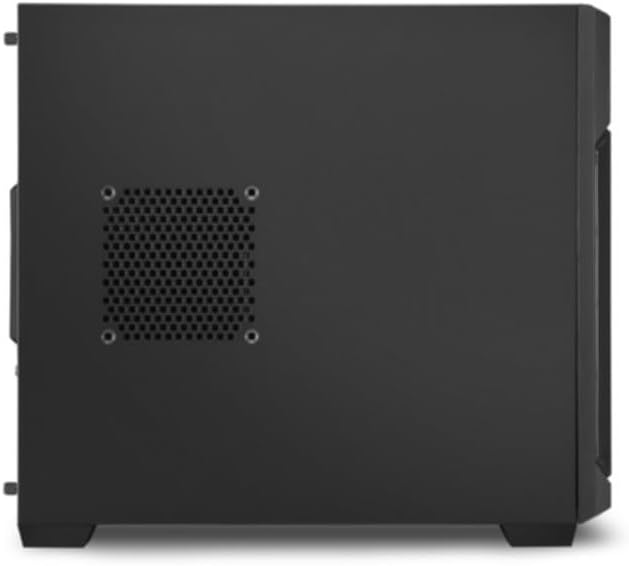
그림 6: 측면 view of the Sharkoon V1000, showing the ventilation cutouts which may have associated dust filters.
문제 해결
이 섹션에서는 PC 케이스 사용 시 발생할 수 있는 일반적인 문제에 대해 설명합니다.
전원이 켜지지 않음 / 시스템이 시작되지 않음
- 전원 공급 장치(PSU)가 벽면 콘센트에 제대로 연결되어 있는지, 그리고 PSU의 전원 스위치가 '켜짐' 위치에 있는지 확인하십시오.
- 전면 패널 전원 버튼 케이블이 마더보드의 전원 헤더에 올바르게 연결되어 있는지 확인하세요.
- 모든 내부 전원 연결부(24핀 ATX, CPU 전원, GPU 전원)가 제대로 연결되어 있는지 확인하십시오.
과도한 소음
- Inspect all fans (CPU, GPU, case fans) for obstructions or loose mounting.
- Ensure cables are not interfering with fan blades.
- Check if the power supply is securely mounted and its pad is properly decoupled.
과열
- 공기 흐름을 개선하려면 모든 먼지 필터와 내부 부품을 청소하십시오.
- Verify that case fans are installed in the correct orientation (intake/exhaust) to create proper airflow.
- Ensure CPU cooler and GPU cooler are properly seated and functioning.
명세서
Detailed specifications for the Sharkoon V1000 PC Case.
| 특징 | 세부 사항 |
|---|---|
| 상표 | 샤쿤 |
| 제조업체 | 샤쿤 테크놀로지스 GmbH |
| 시리즈 | V1000 |
| 색상 | 검은색 |
| 폼 팩터 | mATX |
| 품목 높이 | 40.2센티미터 |
| 품목 폭 | 19.5센티미터 |
| 제품 치수 | 45 x 19.5 x 40.2cm; 4kg |
| USB 2.0 포트 수 | 2 |
| USB 3.0 포트 수 | 1 |
| 마더보드 호환성 | mATX |
| 케이스 유형 | 미디 타워 |
| 전원 공급 장치 장착 유형 | 후면 마운트 |
| 냉각 방식 | 공기 |
| Fan Size Supported | 120 밀리미터 |
보증 및 지원
For warranty information and technical support regarding your Sharkoon V1000 PC Case, please refer to the official Sharkoon website or contact Sharkoon Technologies GmbH directly.
제조업체: 샤쿤 테크놀로지스 GmbH
보증 청구를 위해 구매 증명서를 보관하십시오.


