1. 이상view
The Aerocool Cylon RGB Midi-Tower PC Case, model ACCM-PV10012.11, is designed to house computer components, offering both functionality and aesthetic appeal. It features a side window panel for showcasing internal hardware and an RGB LED illumination strip on the front panel for customizable lighting effects. This case supports ATX motherboards and provides ample space for various components, including multiple storage drives and cooling solutions.

그림 1: 전면 view of the Aerocool Cylon RGB Midi-Tower PC Case, highlighting its distinctive RGB LED strip.
2. 패키지 내용
패키지에 모든 품목이 들어 있는지 확인하세요.
- Aerocool Cylon RGB Midi-Tower PC Case (ACCM-PV10012.11)
- 부속품 상자 (나사, 스탠드오프, 케이블 타이 등이 들어있습니다)
- 사용 설명서 (본 문서)
3. 안전 정보
Read and understand all safety instructions before installing or operating the PC case. Failure to do so may result in injury or damage to the product.
- 설치 또는 유지 보수 작업을 하기 전에 항상 벽면 콘센트에서 전원 공급 장치를 분리하십시오.
- 손상을 방지하기 위해 모든 구성품을 조심스럽게 다루십시오.
- Avoid touching electronic components directly; use anti-static precautions if possible.
- 작은 부품과 액세서리는 어린이의 손이 닿지 않는 곳에 보관하십시오.
- 과열을 방지하려면 케이스 주변의 적절한 환기를 확보하세요.
4. 설정 및 설치
4.1 사건 준비
Before installing components, remove the side panels to access the interior of the case.
- 케이스를 평평하고 안정적인 표면에 놓으십시오.
- Locate the thumbscrews on the rear of the case securing the side panel.
- Unscrew the thumbscrews and carefully slide the side panel backward, then lift it off. Repeat for the other side panel if necessary.
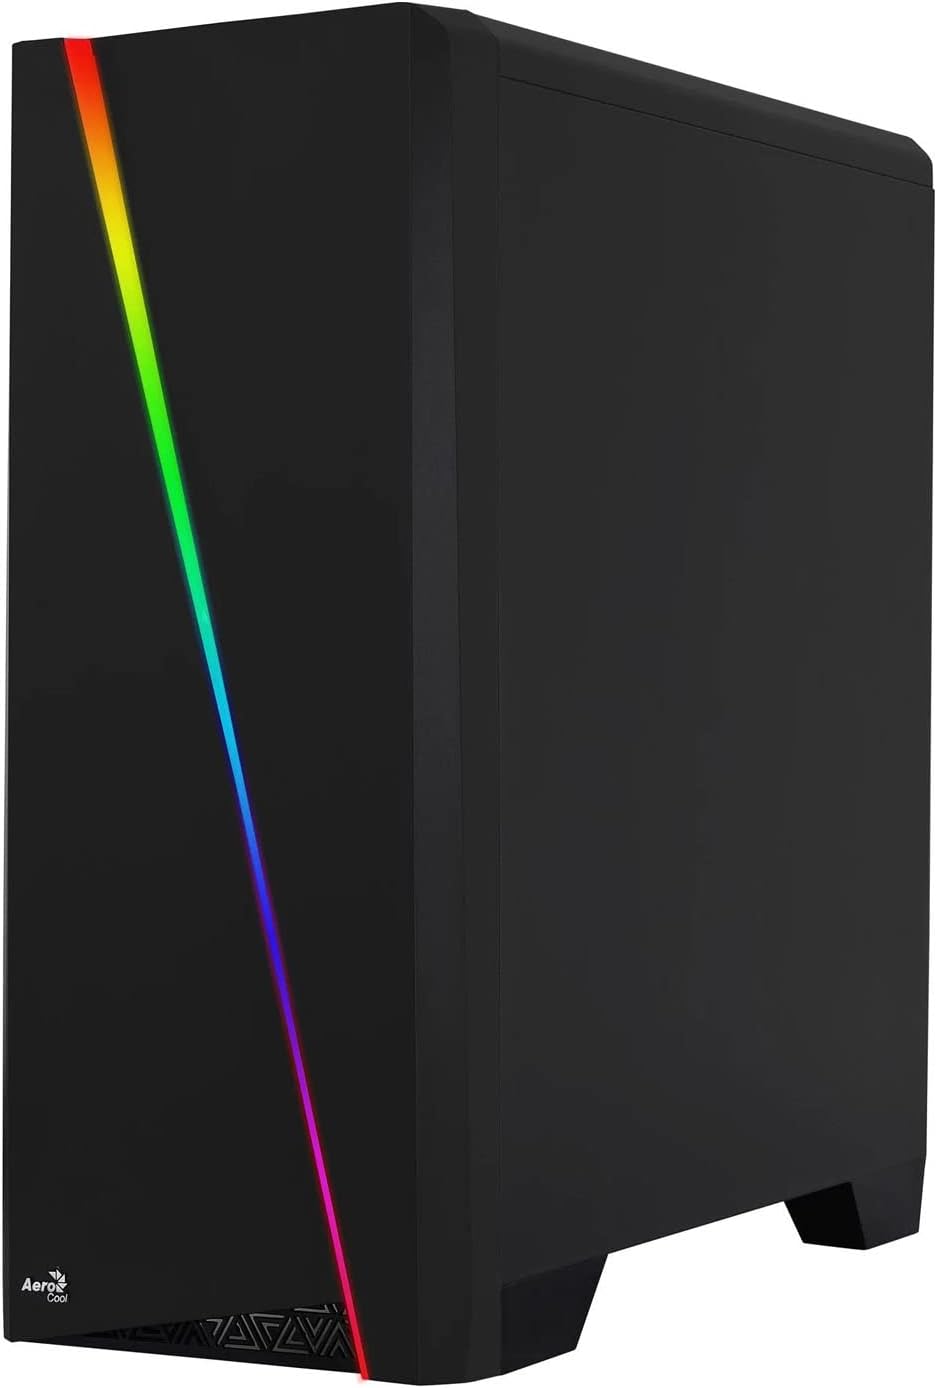

Figure 2: Left image shows the side panel attached, right image shows the side panel removed for access.
4.2 마더 보드 설치
The Aerocool Cylon case supports ATX motherboards.
- Install the I/O shield that came with your motherboard into the opening at the rear of the case.
- Ensure motherboard standoffs are correctly aligned with your motherboard's screw holes. Install any missing standoffs from the accessory box.
- 나사 구멍을 맞춰서 마더보드를 스탠드오프에 조심스럽게 올려놓습니다.
- 액세서리 상자에서 적절한 나사를 사용하여 마더보드를 고정합니다.
4.3 Drive Installation (2.5" / 3.5")
The case provides bays for 2.5-inch and 3.5-inch drives.
- Locate the drive bays within the case. Refer to the case diagram for specific locations.
- For 3.5-inch HDDs, slide the drive into the designated tray or bay and secure it with screws.
- For 2.5-inch SSDs, mount the drive onto the designated bracket or tray and secure it with screws.
4.4 전원 공급 장치(PSU) 설치
The PSU is typically mounted at the bottom rear of the case.
- 파워서플라이를 케이스 후면에서 지정된 칸에 밀어 넣으세요.
- Align the PSU's screw holes with those on the case.
- Secure the PSU with the provided screws.
4.5 확장 카드(GPU) 설치
Install your graphics card or other expansion cards into the PCIe slots.
- Remove the necessary PCI-E slot covers from the rear of the case corresponding to your expansion card's size.
- Carefully insert the expansion card into the appropriate PCI-E slot on the motherboard until it clicks into place.
- Secure the expansion card with screws.

그림 3: 후면 view of the PC case, showing the expansion slots and I/O area.
4.6 Fan / Liquid Cooling Radiator Installation
The Aerocool Cylon case supports various cooling configurations.
- 뒤쪽: 1 x 120mm fan (pre-installed or optional).
- 맨 위: Supports 2 x 120mm fans or 1 x 240mm radiator.
- 맨 아래: 120mm 팬 2개를 지원합니다.
- Mount fans or radiators to their respective positions using the appropriate screws.
- Connect fan power cables to the motherboard or a fan controller.

Figure 4: An interior shot of the case, illustrating potential fan and liquid cooling radiator placements.
4.7 케이블 관리
Effective cable management improves airflow and aesthetics.
- Route cables through the cutouts and behind the motherboard tray.
- Use cable ties (included in the accessory box) to bundle and secure cables.
4.8 전면 패널 I/O 연결
Connect the front panel cables to the corresponding headers on your motherboard.
- USB 3.0: USB 3.0 케이블을 마더보드의 USB 3.0 헤더에 연결하십시오.
- USB 2.0: Connect the USB 2.0 cables (x2) to the motherboard's USB 2.0 headers.
- HD 오디오: HD 오디오 케이블을 마더보드의 오디오 헤더에 연결하십시오.
- 전원/리셋/LED: Connect the small individual cables (Power SW, Reset SW, HDD LED, Power LED) to the motherboard's front panel headers according to your motherboard manual.
5. PC 케이스 작동
Once all components are installed and connected, reattach the side panels and power on your system.
- 전원 켜기: Press the power button located on the top I/O panel of the case.
- RGB 조명 제어: The front panel RGB LED illumination can be controlled via a dedicated button on the top I/O panel or through compatible motherboard software, depending on your setup. Refer to your motherboard manual for software control options.
6. 유지관리
정기적인 유지관리는 PC 케이스와 구성품의 최적의 성능과 수명을 보장하는 데 도움이 됩니다.
- 먼지 필터 청소: The case features dust filters (e.g., on the top and bottom). Regularly remove and clean these filters to prevent dust buildup and maintain good airflow. Use compressed air or a soft brush.
- 일반 청소: 부드러운 d를 사용하세요amp cloth to wipe down the exterior of the case. Avoid abrasive cleaners or solvents. For the transparent side panel, use a microfiber cloth to prevent scratches.
7. 문제 해결
문제가 발생하면 다음의 일반적인 문제 해결 단계를 고려하세요.
- 전원 없음: Ensure the PSU is properly connected to the wall outlet and the power switch on the PSU is in the 'ON' position. Verify all power cables to the motherboard and components are securely seated.
- 팬이 회전하지 않음: Check that all fan cables are correctly connected to the motherboard or fan controller. Ensure the system is receiving power.
- RGB가 작동하지 않음: Confirm RGB cables are properly connected. If using motherboard software, ensure it is installed and configured correctly.
- 느슨한 연결: Recheck all internal connections (power, data, front panel I/O) to ensure they are firmly seated.
8. 사양
| 특징 | 사양 |
|---|---|
| 모델명 | ACCM-PV10012.11 |
| 케이스 유형 | 미디타워 |
| 마더보드 호환성 | 에이티엑스 |
| 치수(길이x너비x높이) | 16.26 x 7.8 x 18.07 인치 |
| 품목 무게 | 8.36파운드 |
| 재료 | 아크릴 |
| USB 3.0 포트 | 1 |
| USB 2.0 포트 | 2 |
| 냉각 방식 | 공기 |
| Fan Size (Rear) | 120 밀리미터 |
| RGB 조명 | Front Panel LED Strip |
9. 보증 정보
The Aerocool Cylon RGB Midi-Tower PC Case is covered by a manufacturer's warranty. Please refer to the warranty card included with your product or visit the official AeroCool web보증 기간 및 청구 절차를 포함한 자세한 보증 약관은 해당 사이트를 참조하십시오.
10. 지원
For further assistance, technical support, or to download the latest drivers and software, please visit the official AeroCool web대지:
Web대지: www.aerocool.io
You may also contact AeroCool customer service through the contact information provided on their web대지.