1. 서론
This manual provides detailed instructions for the ELECROW 7-inch 1024x600 HD IPS TFT LCD Touch Monitor. This versatile display is designed for various applications, including use with Raspberry Pi, Windows PCs, and other compatible devices. It features a capacitive USB touch screen and supports multiple display modes.
2. 상자 안에는 무엇이 들어있나요?
아래 나열된 모든 품목이 패키지에 포함되어 있는지 확인하세요.

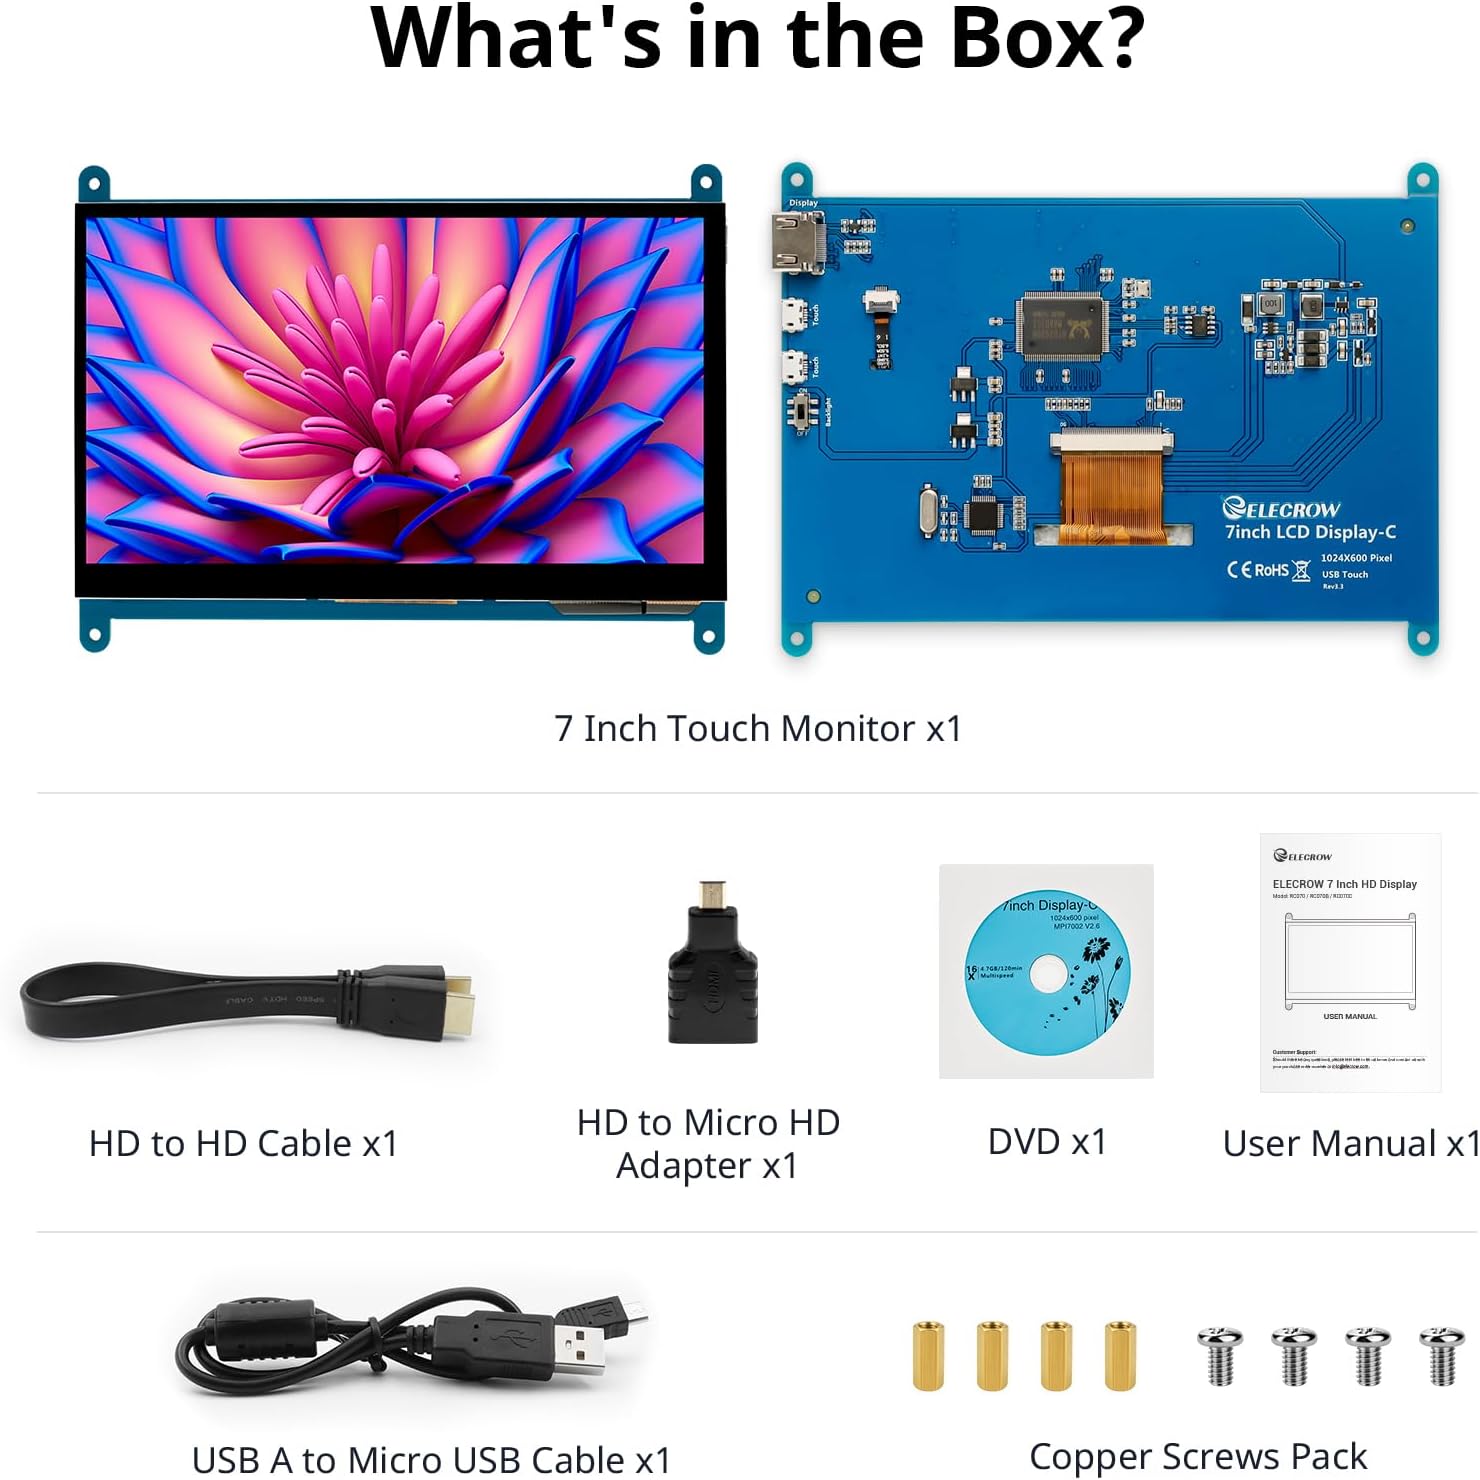
이미지: 제품 패키지의 내용.
- 7-inch Touch Monitor x1
- HD-HD 케이블 x1
- HD to Micro HD Adapter x1
- USB A to Micro USB Cable x1
- DVD x1 (containing drivers/software)
- 사용 설명서 x1
- Copper Screws Pack x1
3. 사양
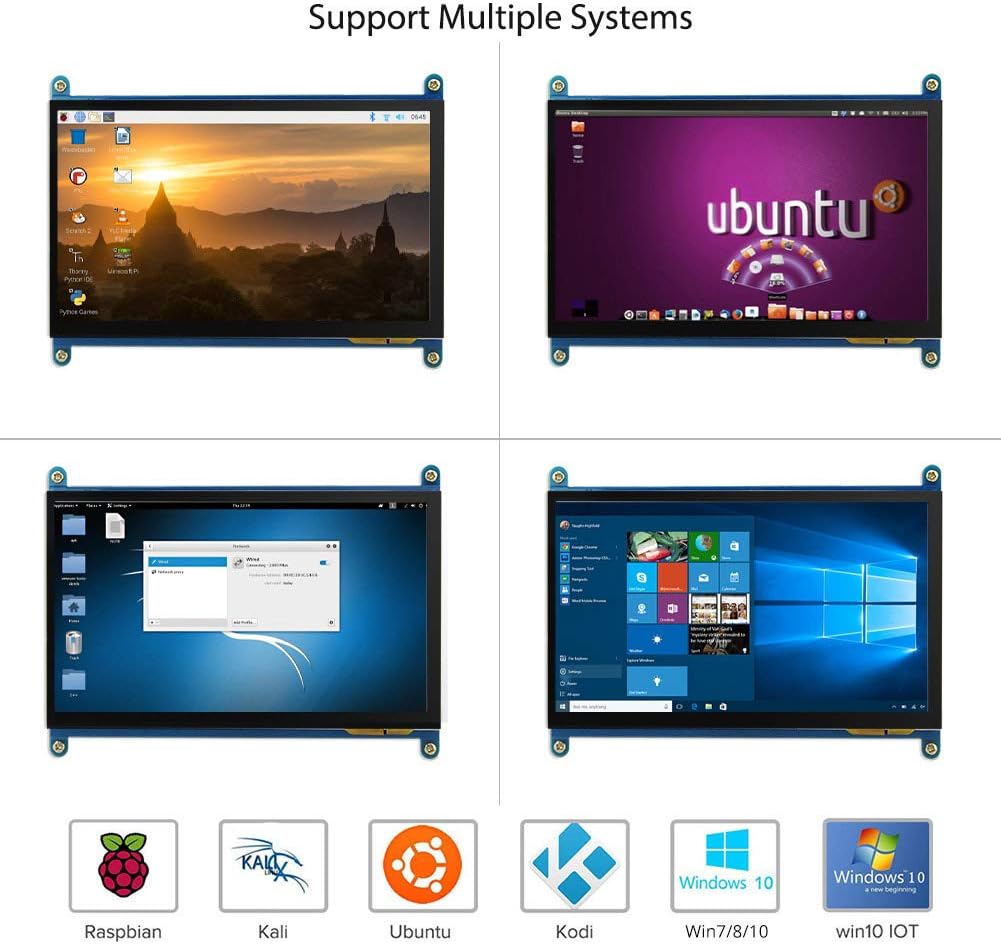
Image: The 7-inch IPS display highlighting its 1024x600 resolution.
| 특징 | 세부 사항 |
|---|---|
| 상표 | 일렉트로크로우 |
| 품목 모델 번호 | 7-inch 1024x600 Monitor |
| 시리즈 | 터치스크린 |
| 색상 | 다양한 색상 |
| 화면 유형 | 액정표시장치 |
| 화면 크기 | 7 인치 |
| 화면 해상도 | 1024 x 600 |
| 최대 디스플레이 해상도 | 1024 x 600 |
| 하드웨어 인터페이스 | HDMI, Micro-HDMI, USB |
| HDMI 포트 수 | 1 |
| 커넥터 유형 | HDMI, USB |
| 장치 호환성 | Raspberry Pi (5/400/4/3/2/1/3B+/BB), Banana Pi, Jetson Nano, BB Black |
| 품목 치수 L x W x H | 15 x 164 x 123 밀리미터 |
| 특징 | 터치 스크린 |
| 종횡비 | 1.71시 1분 |
| 화면 표면 설명 | 매끄러운 |
| 이미지 명암비 | [Estimated] 800:1 |
| 응답 시간 | 5 밀리초 |
| 새로 고침 빈도 | 60Hz |
| 예비 부품 가용성 | 정보가 없습니다 |
| 소프트웨어 업데이트는 다음 날짜까지 보장됩니다. | 정보가 없습니다 |
4. 설정 지침
Follow these steps to connect and set up your ELECROW 7-inch monitor.
4.1 하드웨어 오버view
이미지: 하드웨어view of the monitor, indicating ports and backlight.
모니터의 특징은 다음과 같습니다.
- Standard HD Port for Data Transfer
- Micro USB Port for Touch and Power
- Backlight (control)
4.2 일반 연결
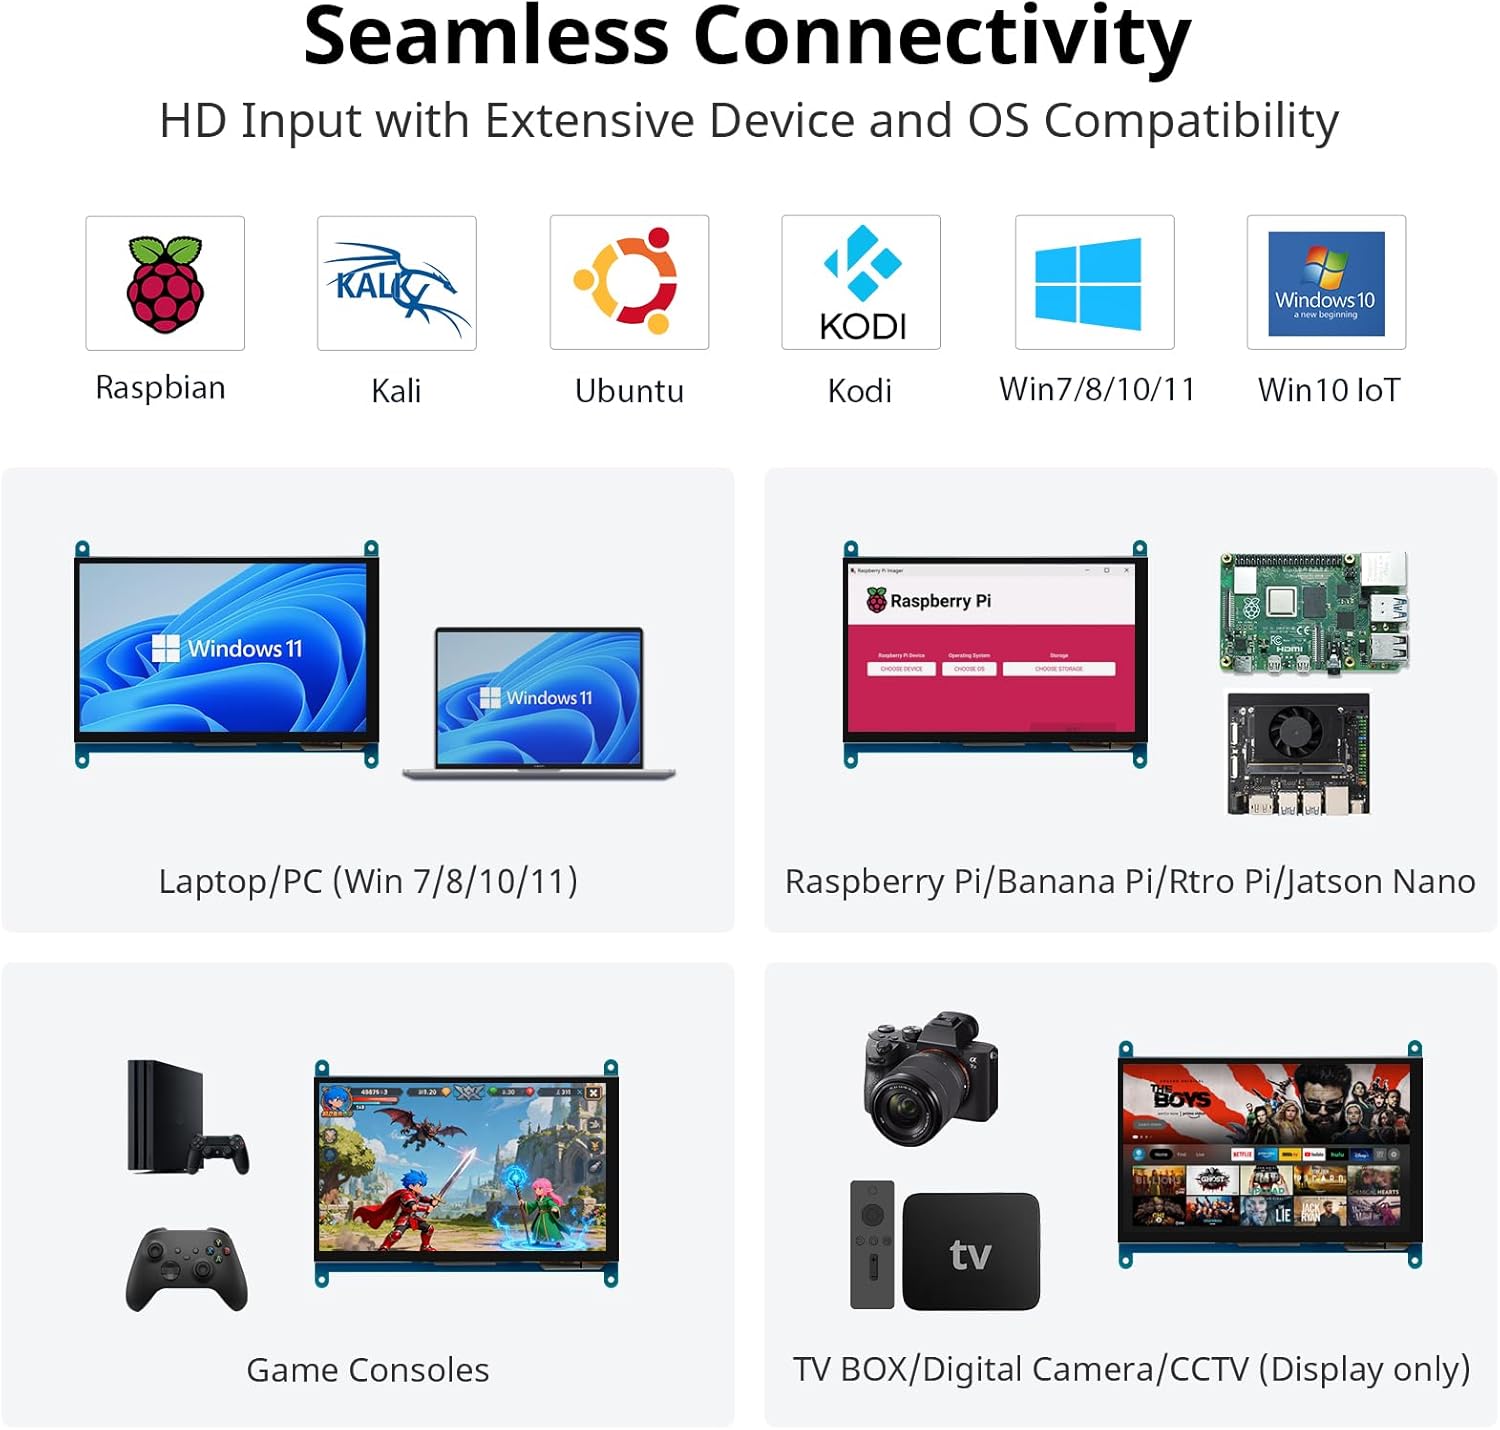
To enable both display and touch functionality, connect the monitor to your device using both the HD cable for video and the USB cable for touch and power.

Image: Seamless connectivity options for various devices.
4.3 라즈베리 파이에 연결하기
The monitor is fully compatible with Raspberry Pi models (5/400/4/3/2/1/3B+/BB). For touch functionality with Raspberry Pi, ensure the USB touch port is powered. The monitor supports Raspbian, Ubuntu, and single-touch input.
- Connect the HD cable from the Raspberry Pi to the monitor's HD port.
- Connect the USB A to Micro USB cable from a USB port on the Raspberry Pi to the monitor's Micro USB port. This provides power for the touch function.
- For initial boot or if experiencing issues, use an external power source for the Raspberry Pi, then unplug the USB power from the monitor and reconnect it to the Raspberry Pi's USB port.

Image: Raspberry Pi monitor setup diagram.
4.4 PC에 연결하기(Windows)
When used as a computer monitor, it supports Windows 10/8/7 with 5-point touch. No driver installation is typically required; it's plug and play.
- Connect the HD cable from your PC's HD output to the monitor's HD port.
- Connect the USB A to Micro USB cable from a USB port on your PC to the monitor's Micro USB port. This enables the touch functionality.

Image: Monitor connected to a laptop as a PC monitor.
5. 사용 설명서
5.1 터치 기능
The monitor features a capacitive touch screen. When connected to a Windows PC, it supports 5-point multi-touch for a smooth and responsive experience. With Raspberry Pi, it supports single-touch.
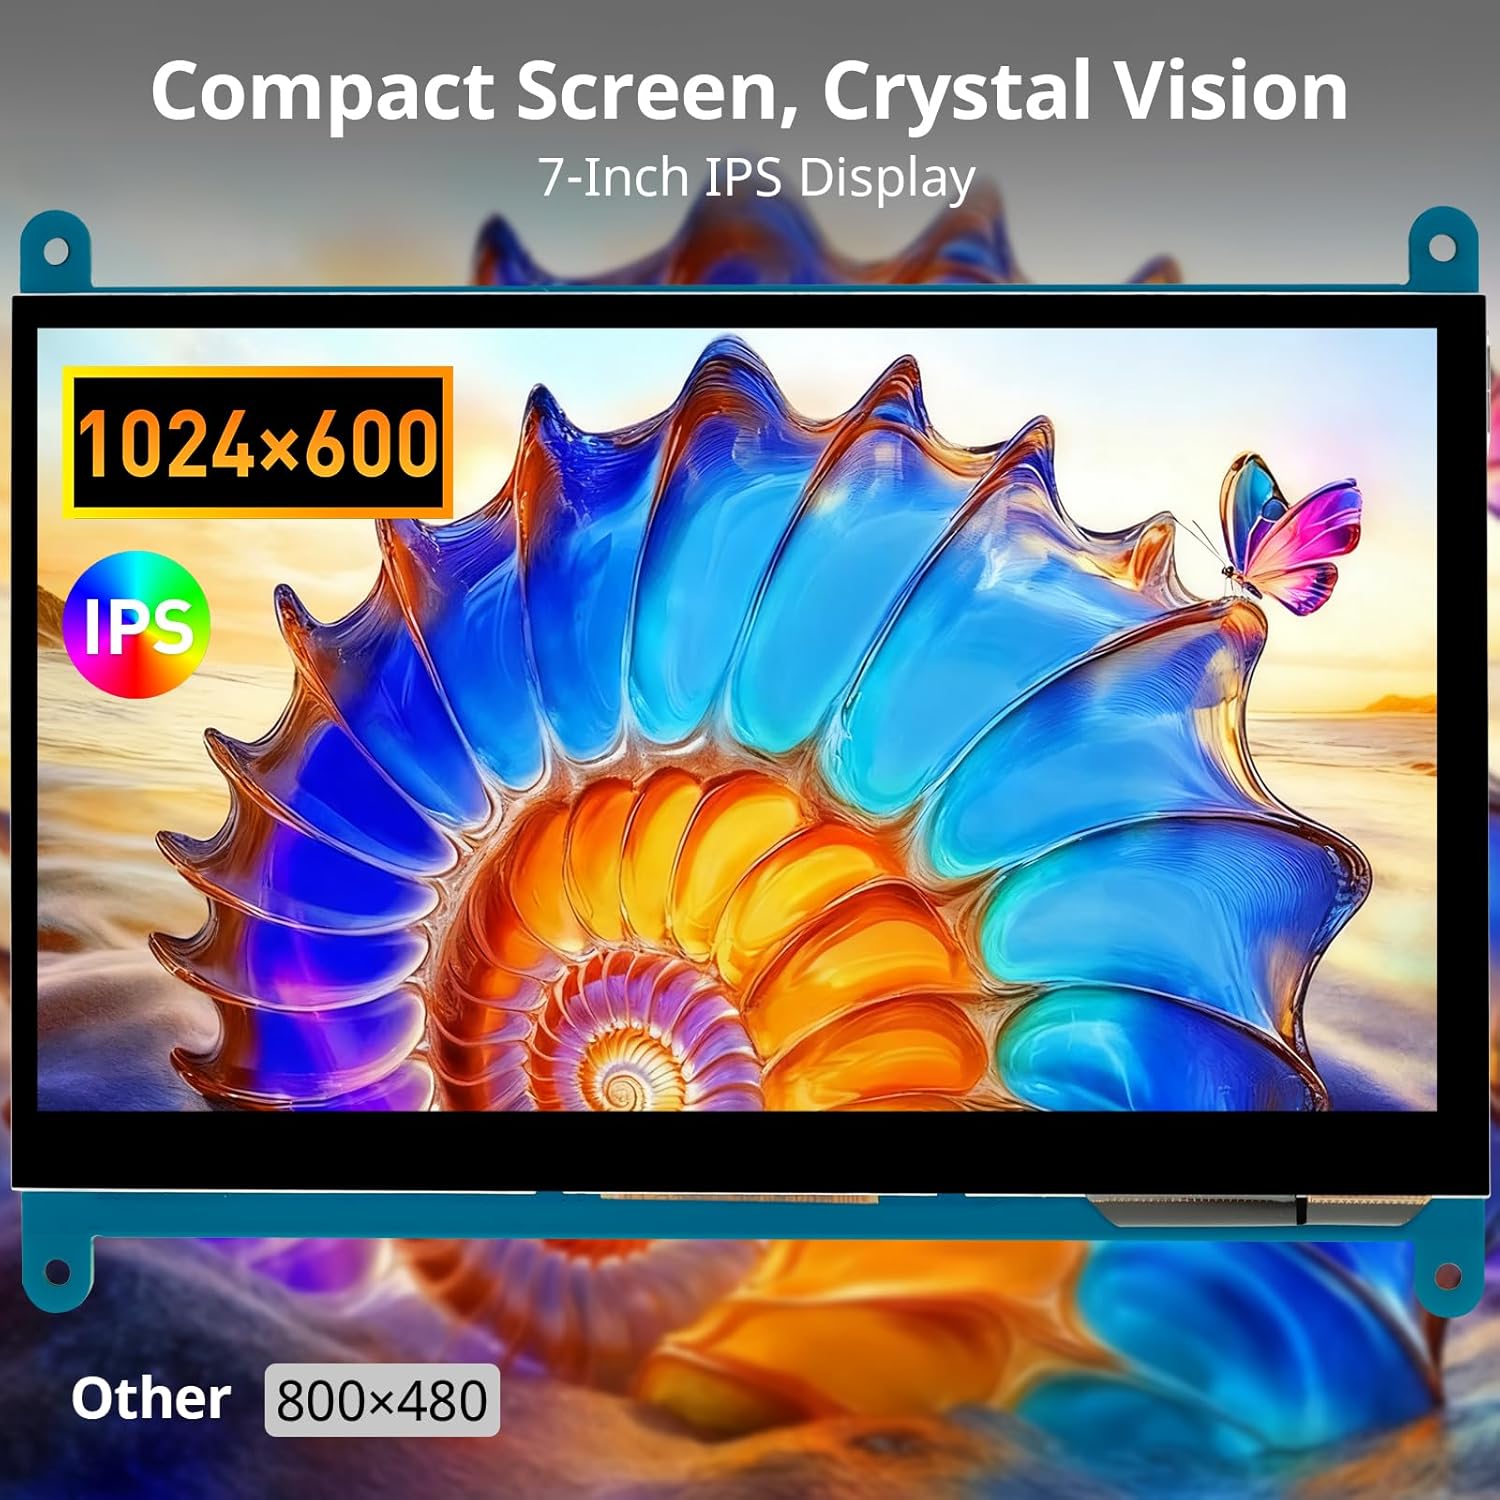
Image: Demonstration of 5-point multi-touch gestures.
5.2 디스플레이 모드
This mini monitor operates in three modes when connected to a compatible system:
- 복사 모드: Duplicates the primary display's content.
- 확장 모드: Extends the desktop across both displays, providing more screen real estate.
- 보조 화면 모드: Uses only the monitor as the primary display.
5.3 다양한 응용 프로그램
The monitor's compact size and features make it suitable for various uses:
이미지: 전amples of versatile display applications.
- Raspberry Pi Monitor: Ideal for DIY projects and embedded systems.
- Windows PC Monitor: Functions as a secondary or primary display for Windows 10/8/7.
- Gaming Monitor: Can be used with mini gaming setups.
- 디지털 액자: Display photos or other media.
- Home Monitoring Display: Integrate into smart home systems.
- In-Case System Monitor: Mount inside PC cases for system stats.
6. 유지관리
모니터의 수명과 최적의 성능을 보장하려면 다음 유지 관리 지침을 따르세요.
- 화면 청소: 부드럽고 털이 없는 천을 살짝 사용하세요.amp물이나 화면 세척액으로 닦으십시오. 강한 화학 물질, 연마재 또는 과도한 습기는 피하십시오.
- C 청소asing: 모니터를 닦으세요asin부드럽고 마른 천으로 닦으세요.
- 저장: 장기간 사용하지 않을 경우 모니터를 직사광선과 극한 온도 변화를 피해 서늘하고 건조한 곳에 보관하십시오.
- 손질: 모니터를 떨어뜨리거나 강한 충격을 가하지 마십시오. 화면에 과도한 압력을 가하지 마십시오.
- 통풍: Ensure proper airflow around the monitor to prevent overheating.
7. 문제 해결
If you encounter issues with your ELECROW monitor, refer to the following common problems and solutions:
| 문제 | 가능한 원인 / 해결책 |
|---|---|
| Screen remains black / No signal |
|
| 터치 기능이 작동하지 않습니다 |
|
| Display resolution incorrect |
|
| 화면 깜빡임 또는 이미지 왜곡 |
|
8. 보증 및 지원
8.1 보증 정보
Specific warranty details for this product are typically provided at the point of purchase or within the product packaging. Please refer to your purchase documentation for information regarding warranty duration and terms. Spare parts availability information is not available at this time.
8.2 고객 지원
For further assistance, technical support, or inquiries not covered in this manual, please contact ELECROW customer service through their official web제품을 구매한 사이트 또는 소매업체.