1. 서론
The Bionik Tetra Power is a compact charging dock designed for Nintendo Switch Joy-Con controllers. It allows for simultaneous charging of up to four Joy-Con controllers, providing a convenient and organized charging solution. This manual provides essential information for the proper setup, operation, and maintenance of your Tetra Power charging dock.

Image 1.1: Bionik Tetra Power Charging Dock in its retail packaging. The packaging highlights its ability to charge four Joy-Con controllers and its compatibility with Nintendo Switch.
주요 특징:
- 컴팩트한 디자인: Unique cross formation allows simultaneous charging of up to four Joy-Con controllers without occupying excessive space.
- 통합 케이블 관리: Features a built-in system for adjusting and storing the charging cable, promoting a tidy setup.
- LED Charge Status Indicators: Provides clear visual feedback on the charging status of each connected Joy-Con controller.
- 미적 통합: Designed to complement the visual style of the Nintendo Switch console.
2. 설정 지침
- 장치 포장 풀기: Carefully remove the Bionik Tetra Power charging dock from its packaging.
- 전원에 연결: The charging dock features a built-in USB cable. Connect this USB cable to an available USB port on your Nintendo Switch dock or to a compatible USB power adapter (not included).

Image 2.1: The Bionik Tetra Power charging dock viewed from the side, showing its integrated USB cable for power connection.
- 케이블 관리 : Utilize the built-in cable management system located at the base of the dock to adjust the cable length and store any excess, ensuring a neat setup.
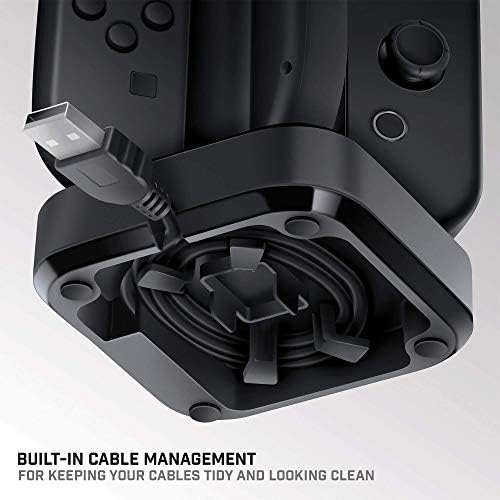
Image 2.2: The underside of the Tetra Power dock, illustrating the integrated cable management system for organizing the USB cable.
- 놓기: Place the charging dock on a stable, flat surface near your Nintendo Switch console for convenient access.
3. 사용 설명서
Charging Joy-Con Controllers:
- Ensure the Tetra Power charging dock is connected to a power source.
- Align a Joy-Con controller with one of the four charging slots on the dock. Gently slide the Joy-Con downwards until it clicks into place and makes contact with the charging pins.
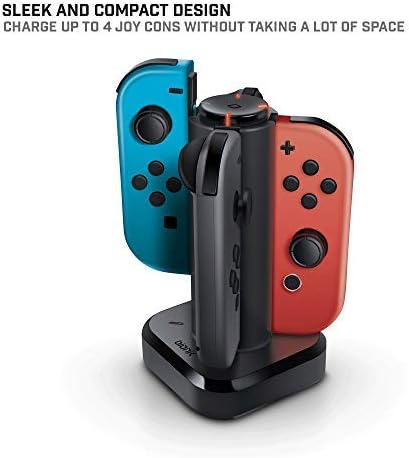
Image 3.1: The Tetra Power charging dock with two Nintendo Switch Joy-Con controllers inserted into their respective charging slots.
- Repeat for additional Joy-Con controllers, up to a maximum of four.
LED Charge Status Indicators:
Each charging slot is equipped with an LED indicator to display the charging status of the connected Joy-Con controller:
- 적색 LED : 조이콘 컨트롤러가 현재 충전 중임을 나타냅니다.
- 녹색 LED : Indicates that the Joy-Con controller is fully charged.
- LED 없음: Indicates no Joy-Con is connected or the dock is not receiving power.
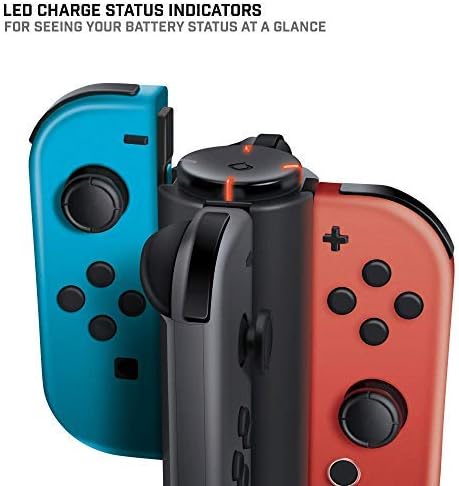
이미지 3.2: 클로즈업 view of the LED charge status indicators on the Tetra Power dock, showing the illuminated status lights.
4. 유지관리
- 청소: Disconnect the charging dock from its power source before cleaning. Use a soft, dry cloth to wipe the exterior surfaces. Avoid using abrasive cleaners, solvents, or harsh chemicals.
- 저장: 장기간 사용하지 않을 경우 충전 도크를 직사광선과 극한 온도 변화를 피해 서늘하고 건조한 곳에 보관하십시오.
- 손질: 기기를 조심스럽게 다루십시오. 떨어뜨리거나 강한 충격을 주지 마십시오. 내부 부품이 손상될 수 있습니다.
5. 문제 해결
- Joy-Con not charging:
- Ensure the charging dock is properly connected to a powered USB port.
- Verify that the Joy-Con controller is correctly seated in the charging slot and making full contact with the charging pins.
- Check if the USB cable is securely connected to both the dock and the power source.
- Try connecting the dock to a different USB port or power adapter.
- LED 표시등이 켜지지 않음:
- Confirm the charging dock is receiving power.
- Ensure a Joy-Con controller is properly inserted into the slot.
- If the Joy-Con is fully charged, the LED will be green. If no Joy-Con is present, the LED will be off.
6. 사양
| 모델 번호 | BNK-9019 |
| 상표 | Bionik |
| 제품 치수 | 6.1 x 4.1 x 3.9 인치 |
| 품목 무게 | 6.4 온스 |
| 호환 장치 | 닌텐도 스위치 조이콘 컨트롤러 |
| 커넥터 유형 | Mini USB (integrated cable) |
| 입력 Voltage | 5.4 볼트 |
| Amp에라 지 | 5 Amps |
| 총 USB 포트 | 4 (for Joy-Cons) |
| 특징 | Fast Charging, LED Charge Status Indicators, Cable Management |
7. 보증 및 지원
Bionik products are manufactured with quality and reliability in mind. For specific warranty information, product support, or to register your product, please visit the official Bionik web사이트를 방문하거나 고객 서비스에 직접 문의하세요. 보증 청구에 대비해 구매 증빙 자료로 구매 영수증을 보관하세요.
제조업체: Bionik
Web대지: bionikgaming.com

Image 7.1: The back of the Tetra Power retail box, displaying multilingual features, specifications, and manufacturer contact details including the web대지.


