소개
The ELEGOO Smart Robot Car Kit V4.0 is an educational learning kit designed for individuals interested in programming, electronic assembly, and robotics. Compatible with Arduino IDE, this kit provides a comprehensive solution for hands-on learning experiences. It includes various module components to build a functional robot car capable of multiple operational modes.
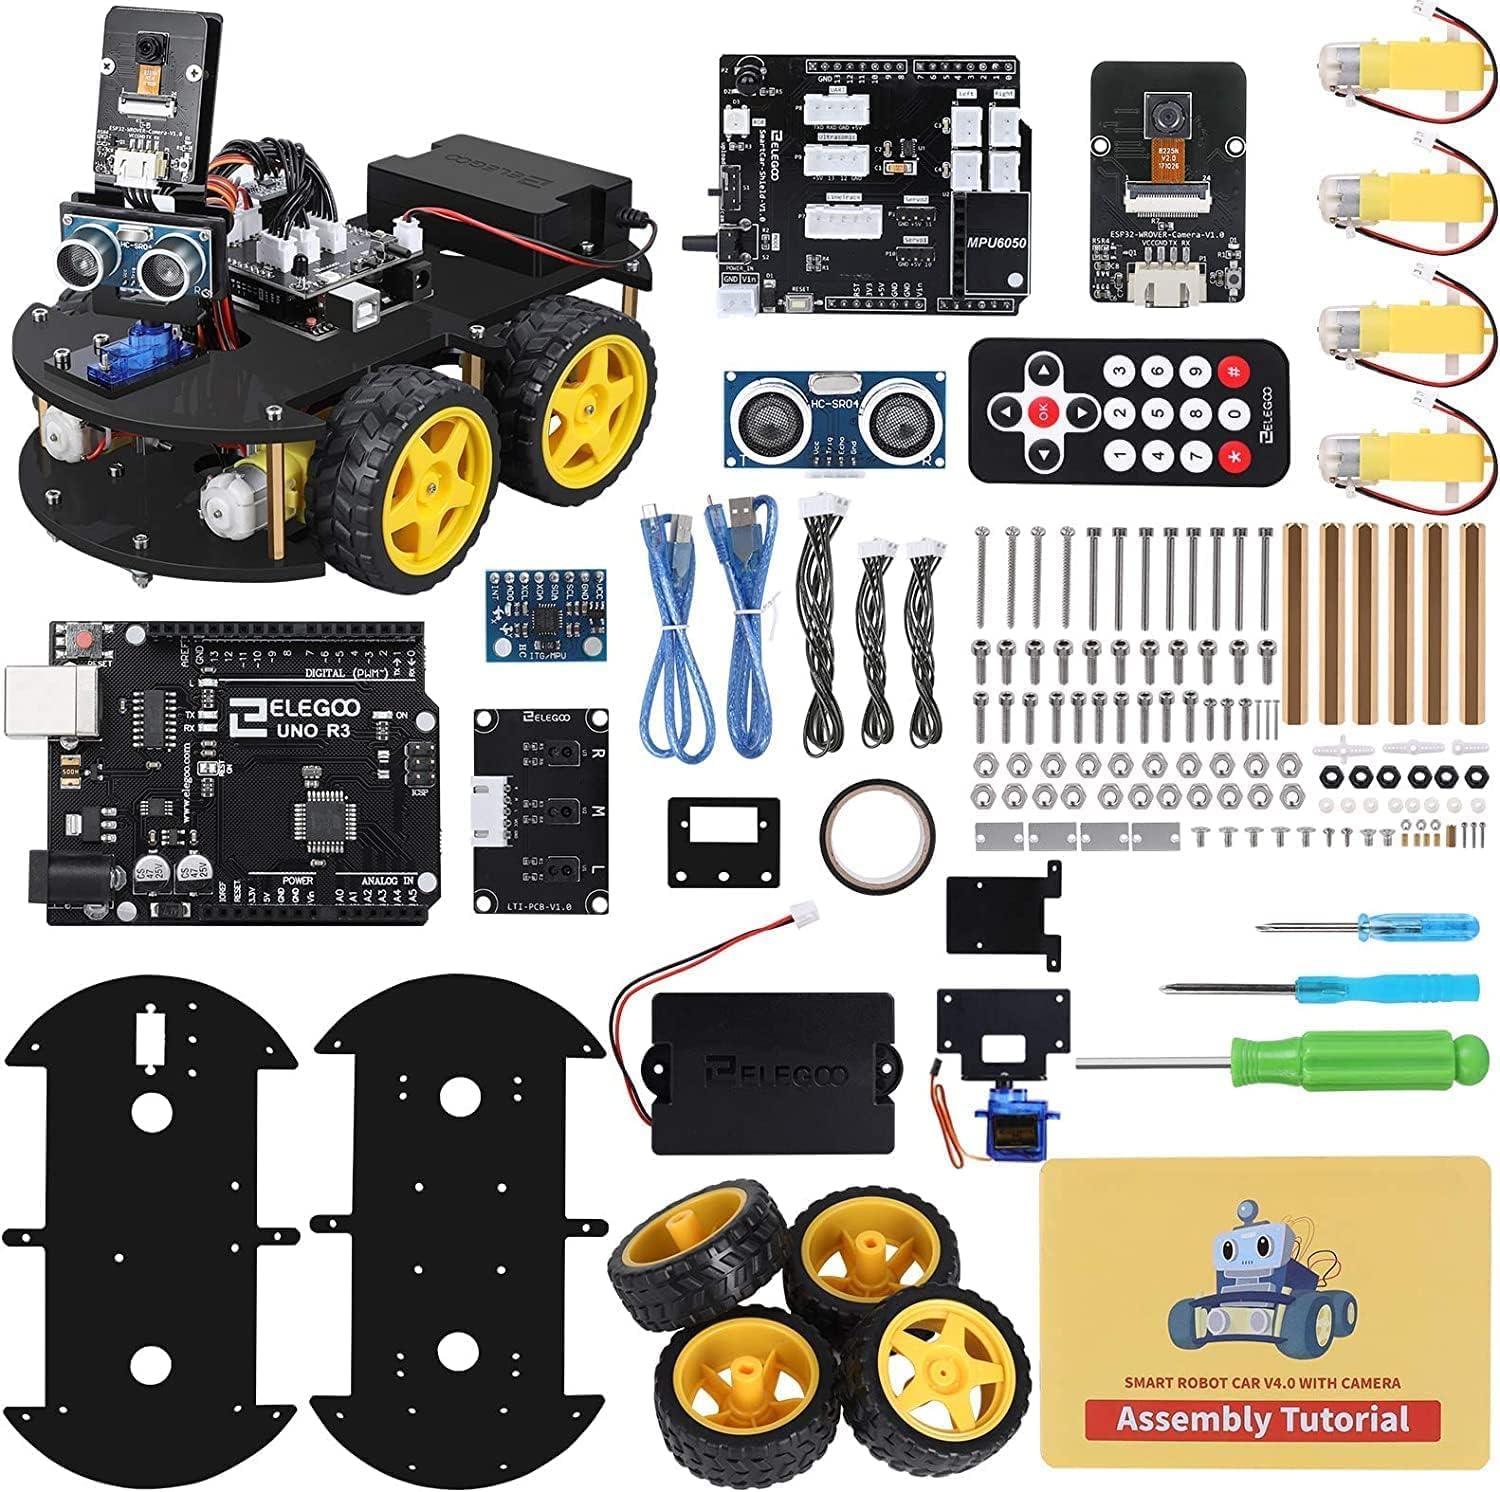
이미지: 이상view of the ELEGOO Smart Robot Car Kit V4.0, showing all included components and the fully assembled robot car.
안전 정보
- This kit contains small parts and is recommended for users aged 12 and above. Adult supervision is advised for younger users.
- 단락을 방지하기 위해 기기 전원을 켜기 전에 모든 연결이 단단히 고정되었는지 확인하십시오.
- Do not expose electronic components to water or excessive moisture.
- Handle circuit boards and sensors with care to avoid damage.
패키지 내용
The ELEGOO Smart Robot Car Kit V4.0 includes a comprehensive set of components for assembly and operation.
- UNO R3 Microcontroller
- Smart Car Shield V1.0
- ESP32-WROVER-B Camera Module
- Ultrasonic Sensor (HC-SR04)
- 라인 추적 모듈
- 적외선 원격 제어
- DC Motors and Wheels
- Acrylic Chassis Plates
- 배터리 홀더
- 서보 모터
- USB 케이블
- Various Screws, Nuts, and Spacers
- 전선 연결
- 드라이버
- Assembly Tutorial Card

이미지: 자세한 view of the various electronic modules, mechanical parts, and tools included in the kit.
설정 및 조립
The assembly process for the ELEGOO Smart Robot Car V4.0 is designed to be straightforward, with all module interfaces adapted with XH2.54 ports to simplify connections and reduce errors.
- 구성 요소 준비: 모든 구성품을 풀어서 패키지 내용물 목록과 비교해보세요.
- 섀시 조립: Attach the DC motors to the acrylic chassis plates using the provided screws and nuts. Mount the wheels onto the motor shafts.
- Install Main Board: Secure the UNO R3 Microcontroller and the Smart Car Shield V1.0 onto the chassis.
- 센서 연결: Attach the Ultrasonic Sensor and the ESP32-WROVER-B Camera Module to their designated positions on the chassis. Connect them to the Smart Car Shield using the XH2.54 cables.
- Wire Motors and Power: Connect the DC motors to the motor driver ports on the Smart Car Shield. Install batteries into the battery holder and connect it to the power input of the Smart Car Shield.
- 최종 점검: Double-check all connections to ensure they are firm and correctly oriented.
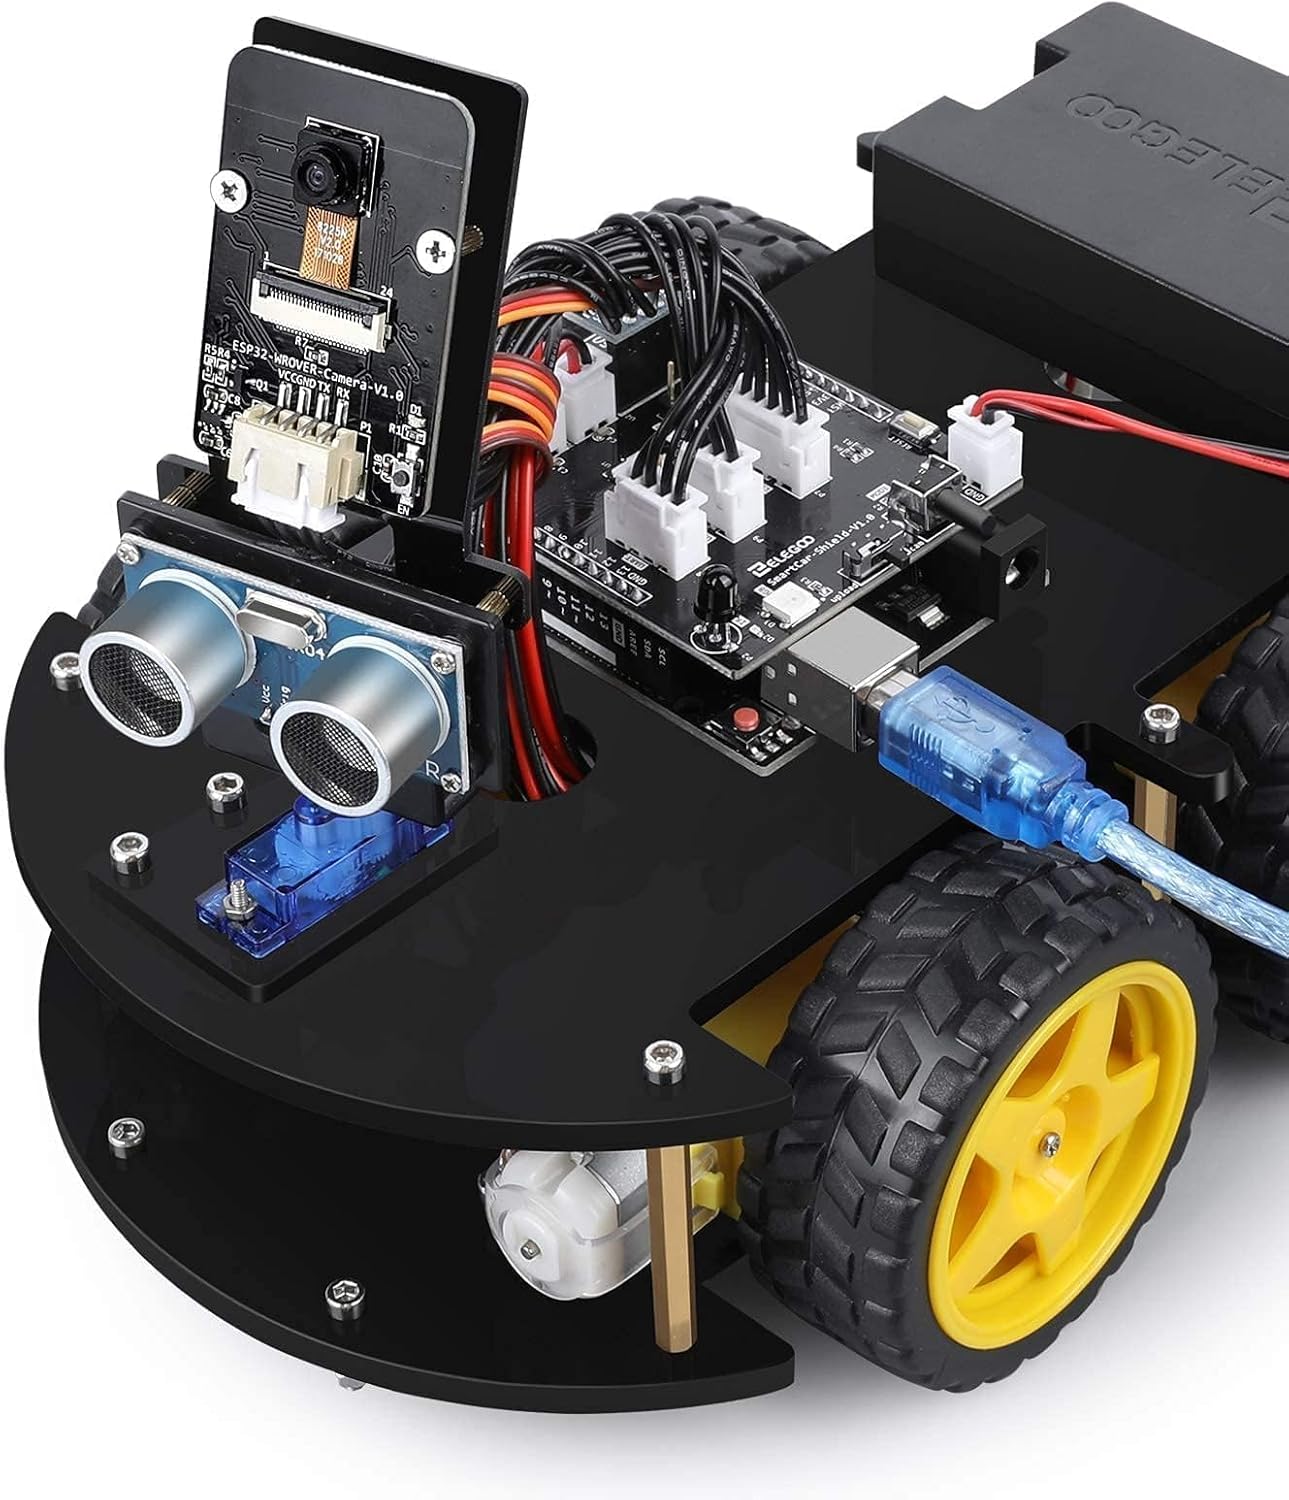
이미지: 클로즈업 view of the assembled robot car, highlighting the main control board and the USB connection for programming.
작동 지침
The ELEGOO Smart Robot Car V4.0 supports five primary operating modes, offering diverse functionalities.
- FPV(1인칭 시점) View) 모드: Utilize the integrated camera module to stream live video to a connected smartphone or tablet, allowing for remote control with a driver's perspective.
- 라인 추적 모드: The robot car follows a designated black line on a light surface using its line tracking module.
- 장애물 회피 모드: The ultrasonic sensor detects obstacles in the robot's path, causing it to autonomously navigate around them.
- Infrared Remote Control Mode: Control the robot car's movements using the included infrared remote control.
- 앱 제어 모드: Control the robot car via a dedicated smartphone or tablet application, offering a user-friendly interface for various commands.
For a visual demonstration of the robot car's capabilities, you may refer to the official video: ELEGOO Smart Robot Car V4.0 Demonstration Video.

Image: The robot car actively avoiding obstacles, illustrating its autonomous navigation capability.

Image: A smartphone screen showing the First-Person View (FPV) feed from the robot car's camera, demonstrating remote operation.
프로그래밍 및 사용자 정의
The ELEGOO Smart Robot Car Kit V4.0 is fully compatible with Arduino IDE, allowing users to upload custom code and expand its functionalities.
- 아두이노 IDE: 공식 Arduino에서 Arduino IDE를 다운로드하여 설치하십시오. web대지.
- 라이브러리 설치: Install necessary libraries for the sensors and modules included in the kit (e.g., ultrasonic sensor library, servo library).
- 업로드 코드: Connect the UNO R3 Microcontroller to your computer via the USB cable. Select the correct board and port in the Arduino IDE, then upload your custom sketches.
- 실험: Modify existing code examples or write new programs to explore different behaviors and interactions with the environment.
유지
- 청소: Gently wipe the robot car and its components with a dry, soft cloth to remove dust. Avoid using liquid cleaners.
- 배터리 관리 : Remove batteries if the robot car will not be used for an extended period to prevent leakage. Use only recommended battery types.
- 부품 검사: Periodically check all connections and physical components for any signs of wear or damage. Tighten loose screws as needed.
문제 해결
- 로봇이 움직이지 않음:
- Check battery level and ensure they are correctly inserted.
- Verify all motor connections to the Smart Car Shield.
- Ensure the correct code is uploaded to the UNO R3 Microcontroller.
- 센서가 응답하지 않습니다:
- Confirm sensor cables are securely connected to the correct pins on the Smart Car Shield.
- Check if the sensor libraries are correctly installed in Arduino IDE.
- 앱 연결 문제:
- Ensure the robot car is powered on and within range of your device.
- Verify that the ESP32-WROVER-B Camera Module is correctly configured for Wi-Fi communication.
- Restart both the robot car and your controlling device.
- Infrared remote not working:
- 리모컨의 배터리를 확인하세요.
- Ensure there is no obstruction between the remote and the robot's IR receiver.
명세서
| 제품 치수 | 24.99 x 19 x 8cm(9.84 x 7.48 x 3.15인치) |
| 무게 | 1.25kg(2.76파운드) |
| 추천연령 | 12세 이상 |
| 모델 번호 | ES-GYE-KIT-027 |
| 교육 목표 | Programming skills, building skills, robotics fundamentals |
| 재료 유형 | 알류미늄 |
| 필요한 배터리 | Yes (1 product-specific battery, Lithium-ion type recommended, not included) |
| 원격 제어 포함 | Yes (Infrared remote control is part of the kit) |
Note: While some general specifications might indicate 'Remote Control Included: No', the product features explicitly list an infrared remote control as part of the complete package.
지원 및 보증
For technical support, troubleshooting assistance, or warranty inquiries, please contact ELEGOO customer service through their official website or the platform where the product was purchased. ELEGOO is committed to providing efficient customer service.
Additional resources and tutorials may be available on the ELEGOO web대지.


