1. 서론
The SYMA X22W Mini Drone is a compact quadcopter designed for beginners and enthusiasts. It features a built-in camera for live video streaming, altitude hold for stable flight, and various control modes for an engaging flying experience. This manual provides essential information for safe operation and maintenance of your drone.
2. 패키지 내용
패키지에 모든 품목이 들어 있는지 확인하세요.
- SYMA X22W Mini Drone
- 리모컨
- Rechargeable LiPo Battery (2 included)
- USB 충전 케이블
- 예비 프로펠러 (4개)
- 드라이버
- 사용자 설명서
3. 설정 가이드
3.1. 드론 배터리 충전
The drone is powered by a rechargeable LiPo battery. Before first use, fully charge the battery.
- USB 충전 케이블을 배터리에 연결합니다.
- Plug the USB end into a compatible USB power source (e.g., computer USB port, USB wall adapter).
- The indicator light on the charging cable will show the charging status. Refer to the charging cable's specific instructions for light indications (usually red for charging, off or green for fully charged).
- 충전은 일반적으로 약 90분 정도 소요됩니다. 과충전하지 마십시오.
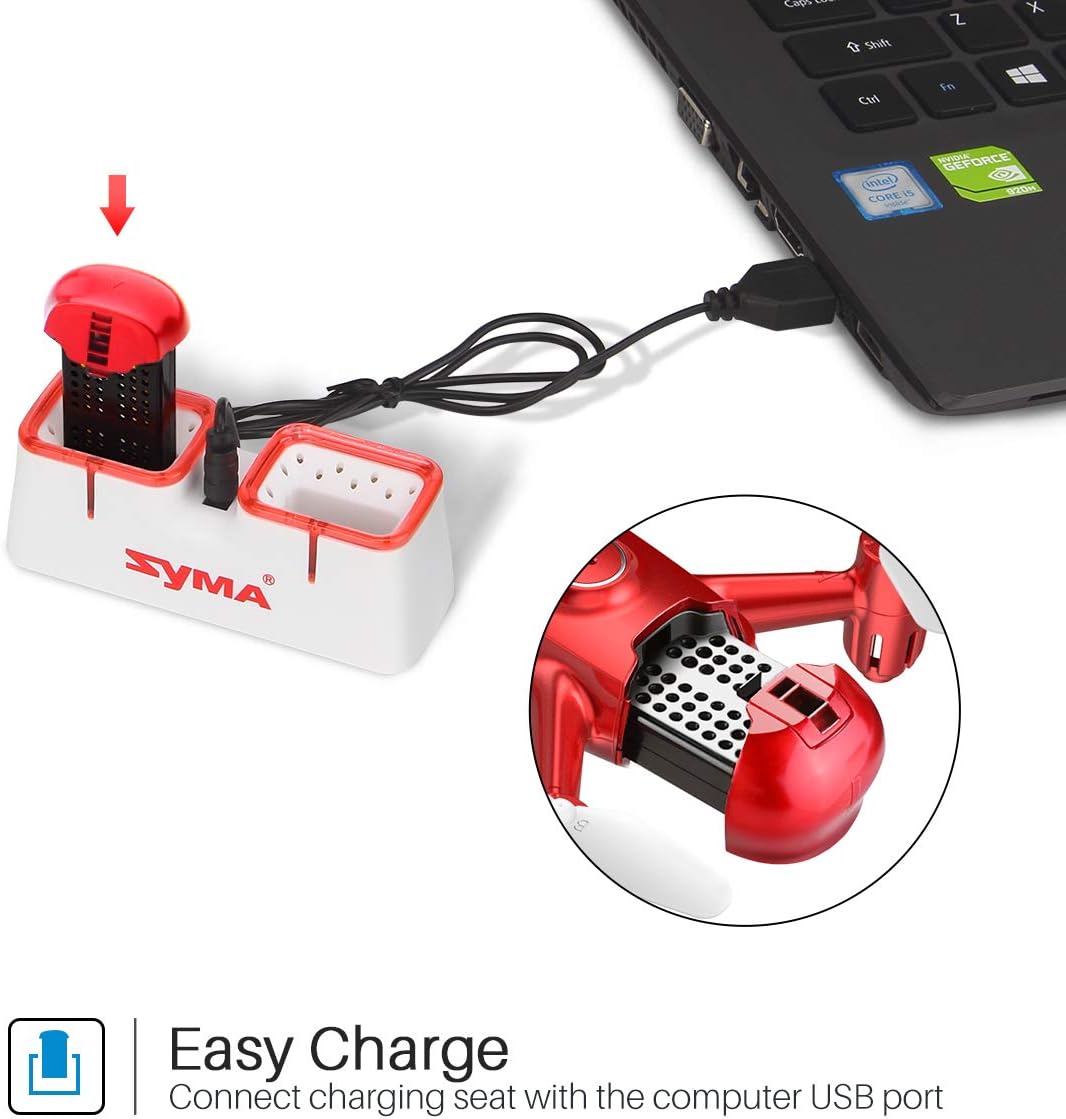
Figure 1: Drone battery charging via USB.
3.2. 드론 배터리 설치
Once charged, install the battery into the drone.
- 드론의 배터리 칸을 찾으세요.
- 충전된 배터리를 조심스럽게 배터리 칸에 넣으세요.
- 배터리 덮개를 고정하세요.

Figure 2: Drone battery installation. The drone comes with two batteries for extended flight time.
3.3. 리모컨 설정
리모컨에는 AA 배터리 4개가 필요합니다(별도 구매).
- 리모컨 뒷면의 배터리 수납칸을 엽니다.
- AA 배터리 4개를 올바른 극성에 맞춰 넣으세요.
- 배터리 칸을 닫습니다.
3.4. 프로펠러 설치/교체
If propellers need to be replaced, ensure they are installed correctly.
- Each propeller is marked with 'A' or 'B'. Match the propeller type to the corresponding motor shaft on the drone.
- 프로펠러가 모터 축에 단단히 고정될 때까지 부드럽게 밀어 넣으십시오.
4. 사용 설명서
4.1. 드론과 리모컨 페어링
- 드론을 평평하고 평평한 표면에 놓습니다.
- 드론의 전원 스위치를 켜세요. 드론 표시등이 깜빡일 것입니다.
- 리모콘을 켭니다.
- 왼쪽 조이스틱(스로틀)을 끝까지 위로 밀어 올린 후, 다시 끝까지 밀어 내립니다. 드론 표시등이 깜빡임을 멈추고 계속 켜져 있으면 페어링이 완료되었음을 나타냅니다.
4.2. 원터치 이착륙
This feature allows for simplified take-off and landing.
- After pairing, press the One-Key Take-off button on the remote controller. The drone will automatically ascend to a stable hovering height.
- To land, press the One-Key Landing button. The drone will slowly descend and land automatically.

Figure 3: One-Key Take-off/Landing functionality.
4.3. Altitude Hold Function
The Altitude Hold feature allows the drone to maintain a consistent altitude, making it easier to control and capture stable photos/videos.
- Once the drone is airborne, release the throttle joystick. The drone will automatically hold its current altitude.
- Use the throttle joystick to adjust the altitude as needed.

Figure 4: Altitude Hold for stable flight and photography.
4.4. 헤드리스 모드
Headless Mode simplifies flying by eliminating the need to distinguish the drone's front from its rear. The drone's orientation will be relative to the pilot.
- Before taking off, ensure the drone is facing forward relative to the pilot.
- Press the Headless Mode button on the remote controller. The drone's lights will flash to confirm activation.
- In Headless Mode, pushing the right joystick forward will always make the drone fly away from the pilot, regardless of the drone's actual orientation.
- Press the Headless Mode button again to exit this mode.

Figure 5: Headless Mode for easier drone control.
4.5. 3D Flips
Perform exciting aerial stunts with the 3D Flip function.
- 드론을 최소 3미터(10피트) 높이까지 비행시키십시오.
- Press the 3D Flip button on the remote controller.
- Immediately push the right joystick in any direction (forward, backward, left, or right). The drone will perform a 360-degree flip in that direction.
4.6. App Control and FPV Live Video
Download the SYMA GO app to your smartphone for advanced control and live video streaming.
- Download and install the SYMA GO app from your smartphone's app store.
- Turn on the drone and connect your smartphone to the drone's Wi-Fi network (usually named 'SYMA-X22W-XXXX').
- Open the SYMA GO app. You should see the live video feed from the drone's camera.
- The app allows for touch control, gravity control, and flight-track drawing.
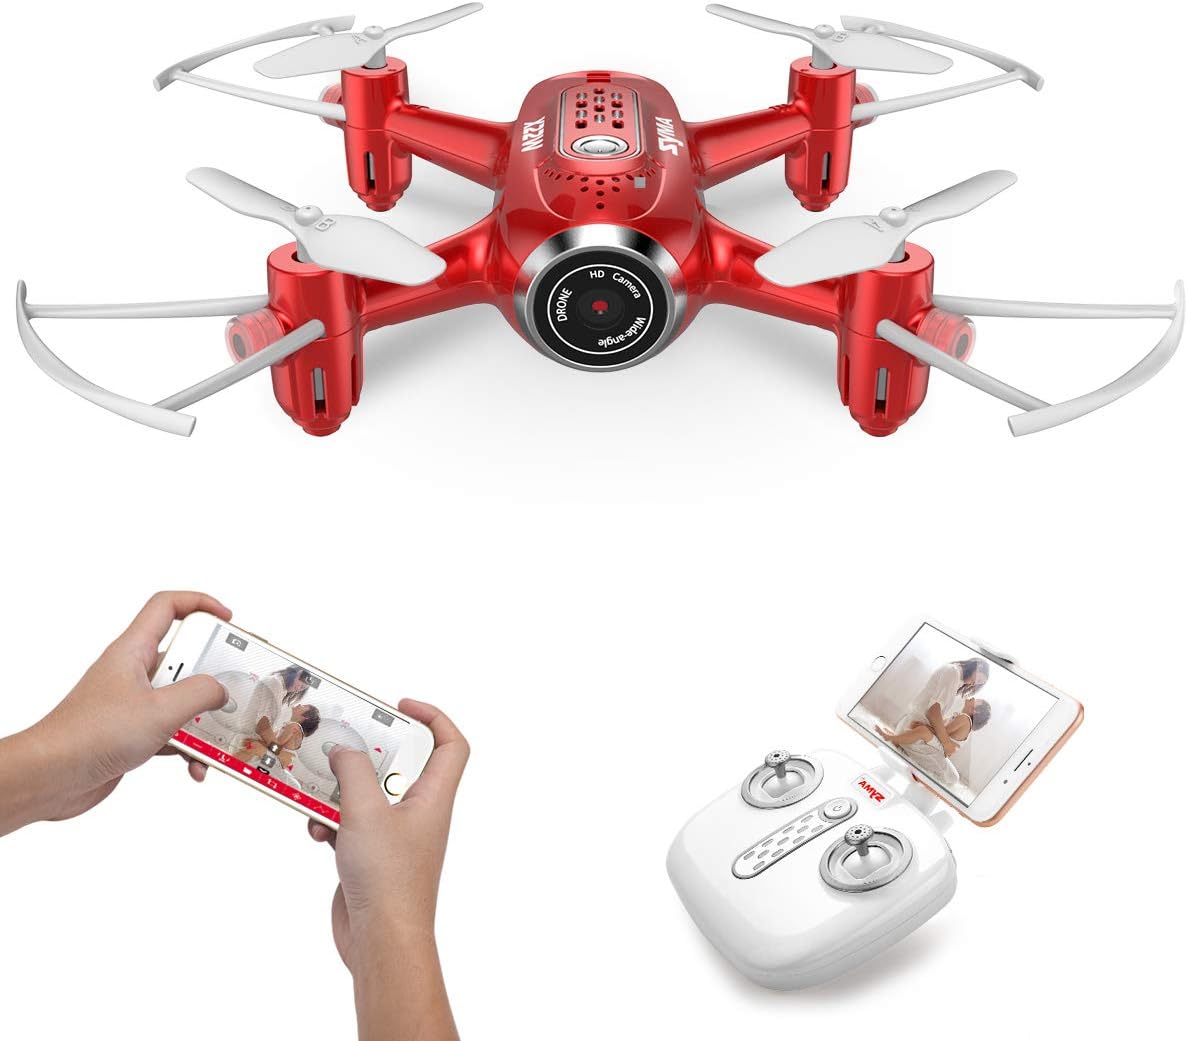
Figure 6: App control and FPV live video functionality.

Figure 7: Drone with finger flight path control via app.
4.7. HD 카메라
The drone is equipped with a 720p HD camera for capturing photos and videos directly to your smartphone via the SYMA GO app.

Figure 8: Drone's HD camera.
5. 유지관리
- 청소: Use a soft, dry cloth to clean the drone. Do not use solvents or harsh chemicals.
- 프로펠러 : Regularly check propellers for damage. Replace any bent or broken propellers immediately.
- 배터리 관리 : Store batteries in a cool, dry place. Do not expose to extreme temperatures. Fully charge before storage and periodically during long storage periods.
- 저장: When not in use, store the drone and remote controller in a safe, dry environment away from direct sunlight.
6. 문제 해결
| 문제 | 가능한 원인 | 해결책 |
|---|---|---|
| 드론이 리모컨에 반응하지 않습니다. | 페어링되지 않았습니다. 배터리 부족(드론/리모컨). | Re-pair the drone and remote. Charge/replace batteries. |
| 드론이 비행 중에 표류합니다. | Not calibrated; uneven surface during startup. | Ensure drone is on a flat surface during pairing. Perform gyroscope calibration (refer to app/manual for specific steps). |
| Poor video quality/no live feed. | Weak Wi-Fi signal; app not connected. | Ensure strong Wi-Fi connection to drone. Reconnect app. Fly closer to the drone. |
| 짧은 비행 시간. | 배터리가 완전히 충전되지 않았습니다. 배터리가 오래되었습니다. | Fully charge battery. Consider replacing old batteries. |
7. 사양
| 특징 | 세부 사항 |
|---|---|
| 상표 | 시마 |
| 모델명 | 22주 |
| 색상 | 빨간색 |
| 비디오 캡처 해상도 | 720p |
| 연결 기술 | 와이파이 |
| 기술 수준 | 초보자 |
| 품목 무게 | 7 온스 |
| 배터리 용량 | 3000밀리amp Hours (total for both batteries, assuming 1500mAh each or similar) |
| 제어 유형 | 앱 제어 |
| 재료 | ABS 플라스틱 |
| 제품 치수 | 12.6 x 7.48 x 2.76 인치 |
| 추천연령 | 14세 이상 |
8. 보증 및 지원
For warranty information and technical support, please refer to the official SYMA web사이트를 방문하거나 판매점에 문의하세요. 구매 증빙 자료로 구매 영수증을 보관하세요.