1. 서론
Thank you for choosing the Audibax Missouri 2000 A Dual VHF Wireless Microphone System. This professional wireless microphone system is designed to deliver clear, interference-free audio for various applications. This manual provides essential information for the safe and efficient use of your new system. Please read it thoroughly before operation and retain it for future reference.
2. 안전 정보
- 전원: Ensure the receiver is connected to a 230V power supply. Use only the provided power adapter.
- 배터리 사용: Microphones operate on AA batteries. Replace batteries when the low battery indicator appears to ensure optimal performance. Do not mix old and new batteries, or different types of batteries.
- 환경: Avoid exposing the system to water, moisture, extreme temperatures, or direct sunlight. Operate in a well-ventilated area.
- 손질: 마이크와 수신기를 조심스럽게 다루십시오. 떨어뜨리거나 강한 충격을 가하지 마십시오.
- 서비스: 직접 기기를 열거나 수리하지 마십시오. 모든 정비는 자격을 갖춘 기술자에게 맡기십시오.
3. 패키지 내용
아래 나열된 모든 품목이 패키지에 포함되어 있는지 확인하세요.
- 1x Audibax Missouri 2000 A Receiver Unit
- 2x Audibax Missouri 2000 A Handheld Wireless Microphones
- 수신기용 전원 어댑터 1개
- 1x 사용자 설명서
- (AA Batteries for microphones are not included and must be purchased separately)
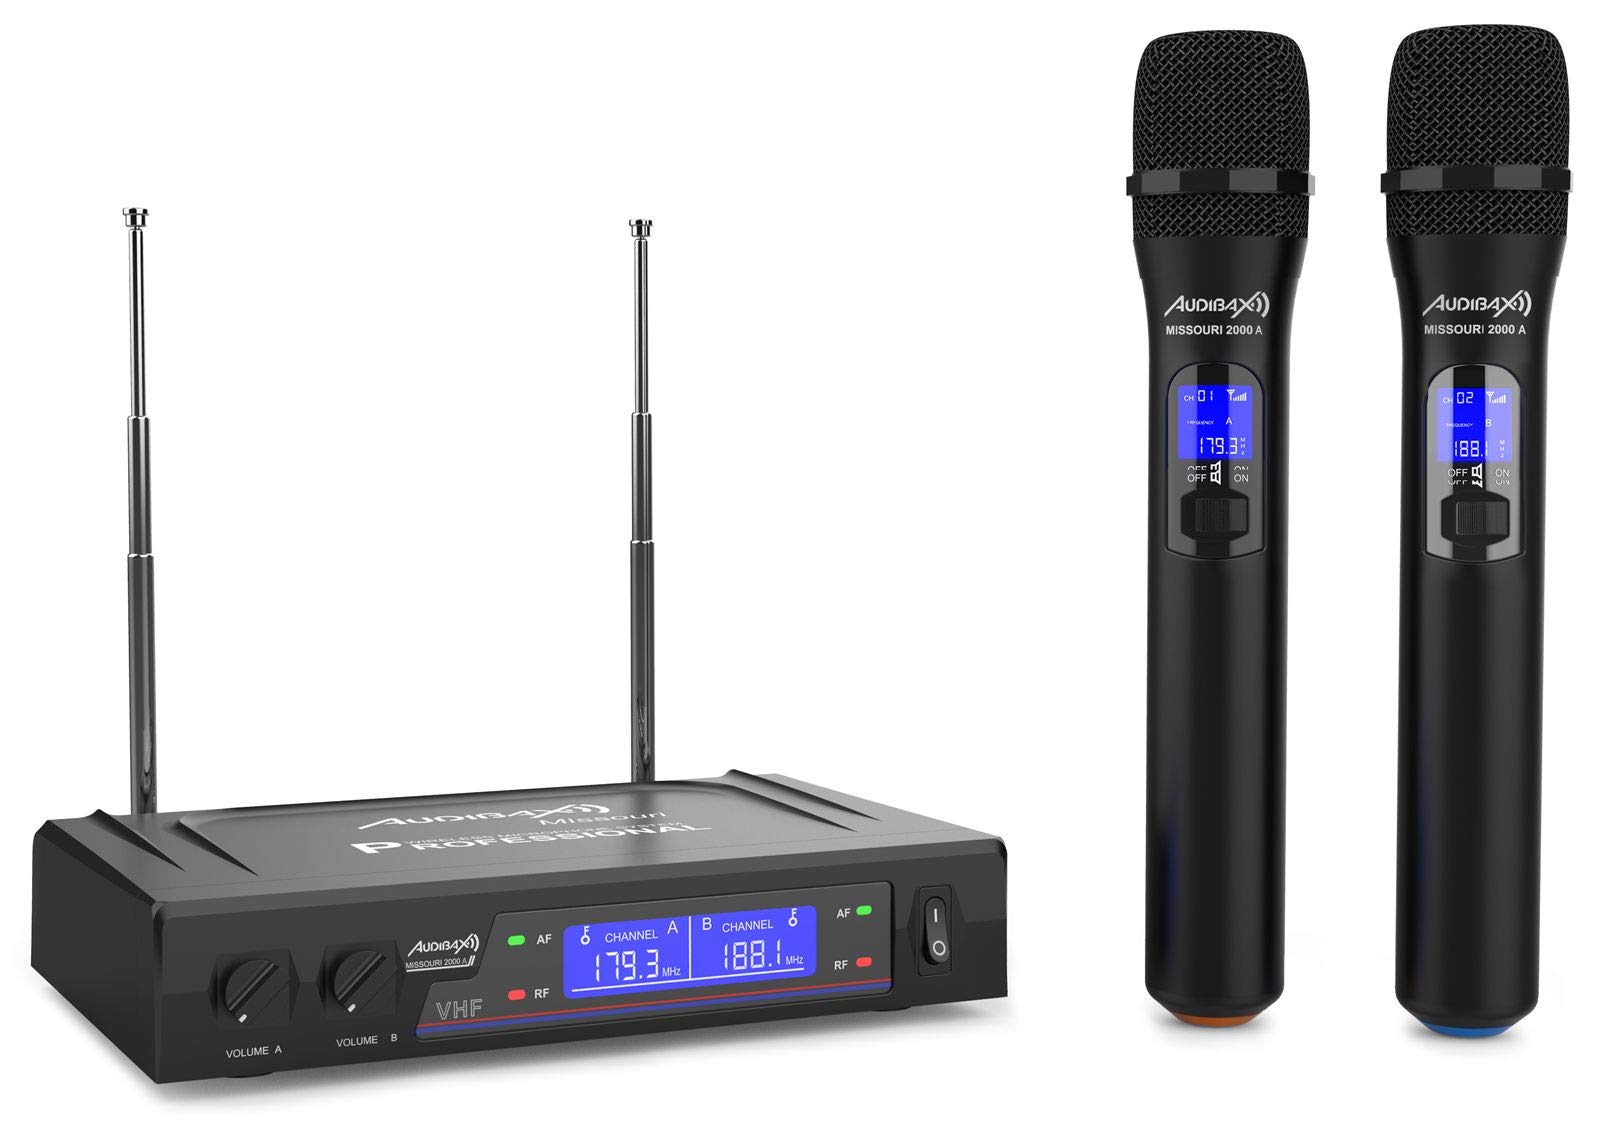
Figure 3.1: Complete Audibax Missouri 2000 A system including receiver and two microphones.
4. 제품 오버view
The Audibax Missouri 2000 A is a dual VHF wireless microphone system designed for professional audio applications. It features two high-quality handheld wireless microphones and a receiver unit with independent volume controls and RF/AF indicators.
주요 특징:
- Dual VHF wireless system with 2 handheld microphones.
- Receiver with Diversity antennas for improved signal reception and up to 80 meters coverage.
- Clean sound with a signal-to-noise ratio of 105 dB, minimizing interference.
- 수신기의 각 마이크에 대해 독립적인 볼륨 조절 기능이 있습니다.
- RF/AF indicators on the receiver display for monitoring signal status.
- Microphone power via AA batteries, offering extended autonomy.
- Dynamic cardioid microphone capsule for focused sound capture and attenuation of off-axis sounds.
- Output connectors: XLR balanced and auxiliary (MIX) output.

Figure 4.1: Front panel of the receiver unit.

Figure 4.2: Two handheld wireless microphones.
5. 설정
5.1 수신기 설정
- 놓기: Position the receiver unit on a stable, flat surface, away from potential sources of interference (e.g., computers, Wi-Fi routers). Ensure adequate ventilation.
- 안테나 연결: Screw the two included antennas firmly into the ANT A and ANT B connectors on the rear of the receiver. Adjust them vertically for optimal signal reception.
- 전원 연결: Connect the provided power adapter to the DC IN port on the rear of the receiver and then plug it into a 230V AC power outlet.
- 오디오 출력:
- For a mixed output of both microphones, connect an audio cable (e.g., 6.35mm jack) from the "OUT MIX" port on the receiver to the input of your mixer, amplifier, or sound system.
- For individual balanced outputs, use XLR cables to connect the "BALANCED" XLR output ports (if available on your specific model) to your audio system.
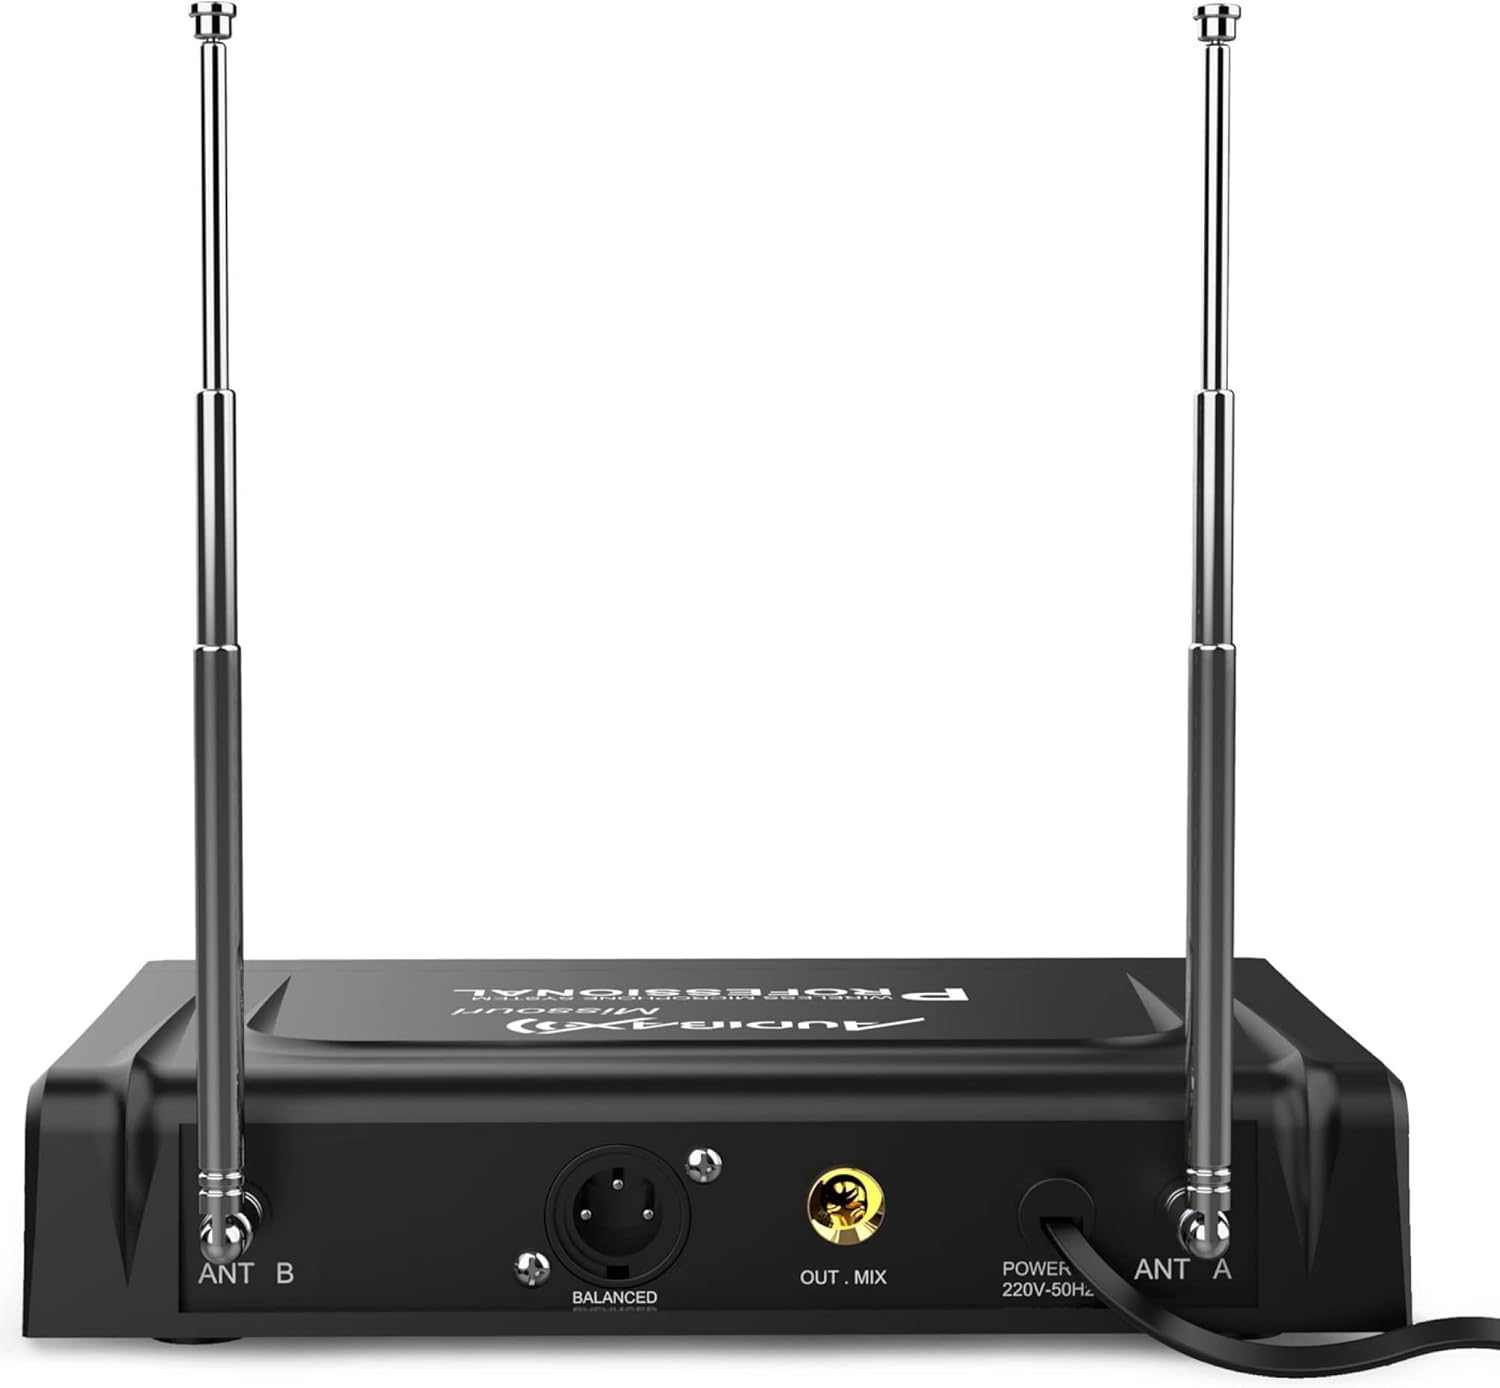
그림 5.1: 수신기 장치의 후면 패널 연결부.
5.2 마이크 설정
- 배터리 설치: Unscrew the bottom part of each microphone to access the battery compartment. Insert two AA batteries, ensuring correct polarity (+/-). Screw the bottom part back on securely.
- 전원 켜기: Slide the ON/OFF switch on each microphone to the "ON" position. The microphone display should illuminate, showing the channel and frequency.
- 음소거 기능: Each microphone has a MUTE switch. Use this to temporarily silence the microphone without turning it off completely.
6. 사용 설명서
6.1 시스템 전원 켜기
- Ensure all connections (power, audio output) are secure on the receiver.
- Turn on your mixer or amplifier first, with its volume set to minimum.
- Press the power button on the receiver unit. The display will light up.
- Turn on each microphone by sliding its ON/OFF switch to "ON".
- Observe the receiver's display. The "RF" (Radio Frequency) indicator for each channel should light up, indicating a successful connection between the microphone and receiver. The "AF" (Audio Frequency) indicator will light up when sound is detected by the microphone.

Figure 6.1: Receiver display with RF/AF indicators and frequency information.
6.2 볼륨 조절
- The receiver has independent volume knobs for Microphone A (VOLUME A) and Microphone B (VOLUME B). Adjust these to set the desired output level for each microphone.
- Gradually increase the volume on your mixer or amp청취 레벨을 원하는 수준으로 맞추세요.
6.3 Frequency Information
The Audibax Missouri 2000 A operates on fixed VHF frequencies. For this specific model, the frequencies are 179.300 MHz and 188.100 MHz. These frequencies are displayed on both the receiver and microphone units.
7. 유지관리
7.1 청소
- Always disconnect the receiver from the power outlet before cleaning.
- Use a soft, dry cloth to wipe the surfaces of the receiver and microphones.
- 액체 세척제, 에어로졸 또는 용제를 사용하지 마십시오. 이러한 제품은 마감재나 내부 부품을 손상시킬 수 있습니다.
7.2 배터리 교체
- When the microphone's display indicates low battery, replace both AA batteries immediately to avoid interruption during use.
- 새 배터리를 넣을 때 극성이 올바른지 확인하세요.
- 사용한 배터리는 현지 규정에 따라 책임감 있게 폐기하십시오.
7.3 보관
- When not in use for extended periods, remove batteries from the microphones to prevent leakage.
- 시스템은 직사광선과 극한의 온도를 피해 서늘하고 건조한 곳에 보관하세요.
8. 문제 해결
| 문제 | 가능한 원인 | 해결책 |
|---|---|---|
| 마이크에서 소리가 나지 않음 |
|
|
| 간헐적인 소리 또는 신호 끊김 |
|
|
| 음질이 좋지 않음 / 왜곡 |
|
|
| RF indicator not lighting up |
|
|
9. 사양
| 특징 | 세부 사항 |
|---|---|
| 상표 | 오디백스 |
| 모델명 | Missouri 2000 A |
| 모델 번호 | 10107904 |
| 연결 기술 | Wireless (VHF), XLR |
| 마이크 폼 팩터 | 핸드헬드 |
| 극성 패턴 | 단방향 (카디오이드) |
| 주파수 응답 | 40Hz - 18kHz |
| 신호 대 잡음 비율 | 105데시벨 |
| 오디오 감도 | 105데시벨 |
| 소음 수준 | 103데시벨 |
| Receiver Frequencies | 179.300MHz / 188.100MHz |
| 전원 | Receiver: 230V AC; Microphones: AA Batteries (not included) |
| 채널 수 | 2 |
| 작동 범위 | 최대 80미터(시야) |
| 제품 크기(LxWxH) | 39 x 31 x 8cm |
| 품목 무게 | 1.04 킬로그램 |
| 추천 용도 | Videoconferencing, Karaoke |
| 포함된 구성 요소 | Microphones, Receiver, User Manual |
10. 보증 및 지원
For warranty information and technical support, please refer to the documentation provided with your purchase or contact Audibax customer service directly. Keep your proof of purchase for any warranty claims.


