소개
This manual provides detailed instructions for the safe installation, operation, and maintenance of your Progress Lighting Verdae Collection 3-Light Clear Seeded Glass New Traditional Outdoor Large Wall Lantern Light. This fixture features a traditional design with clear seeded glass and an Antique Bronze finish, suitable for various exterior settings. The open bottom design facilitates easy lamp 대사.
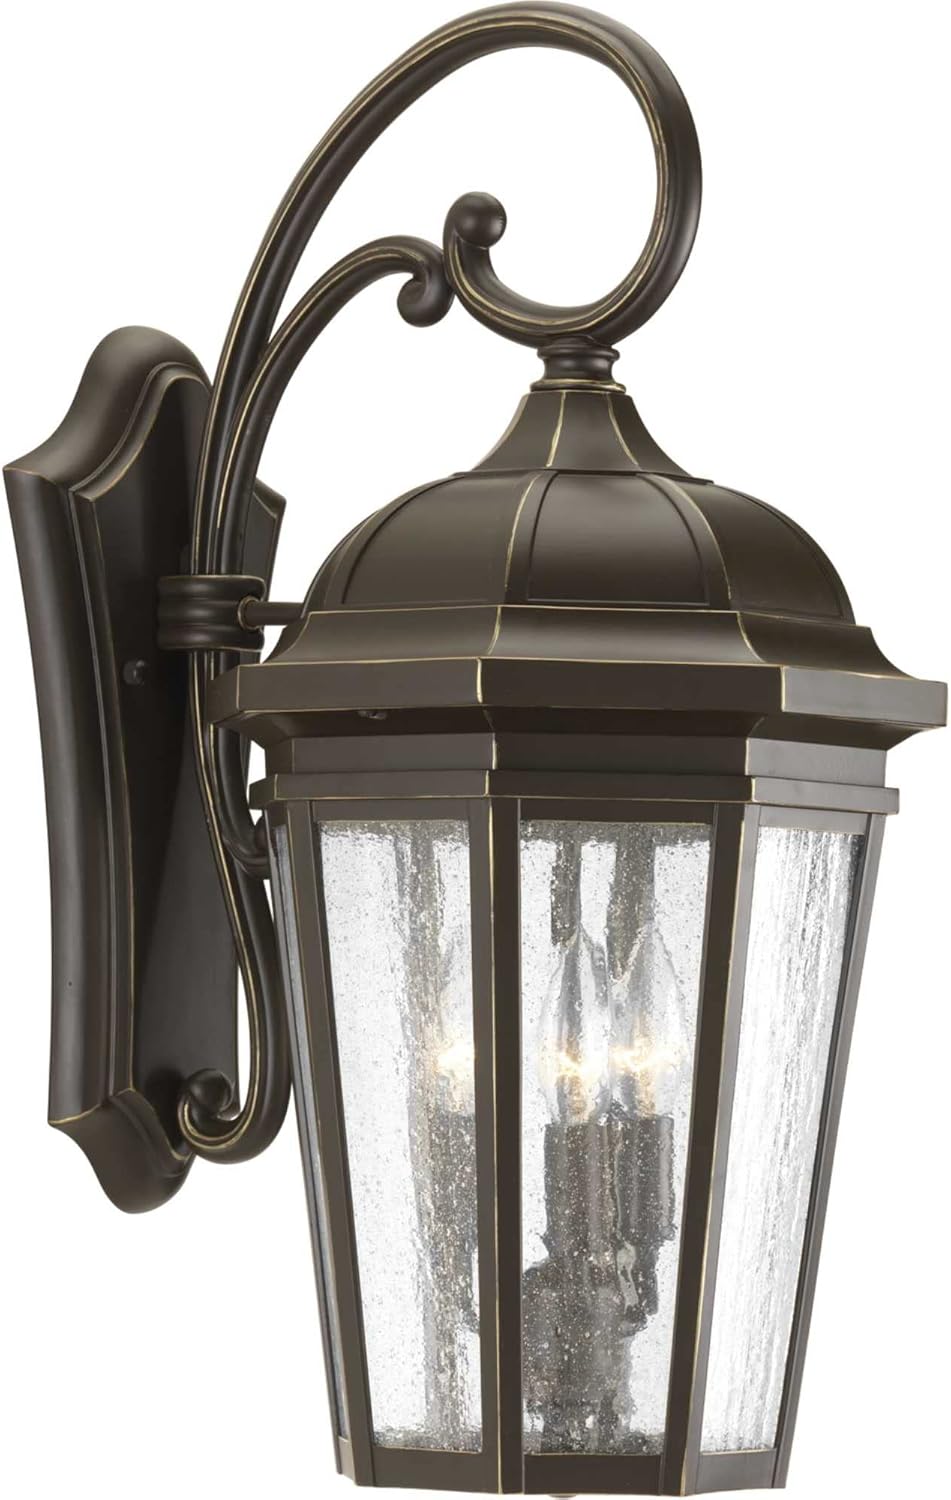
Image 1: The Verdae Collection Outdoor Wall Lantern, showcasing its Antique Bronze finish and clear seeded glass panels.
안전 정보
경고: 감전 위험이 있습니다. 설치 또는 정비 전에 퓨즈 박스 또는 회로 차단기의 전원을 분리하세요.
- 모든 전기 연결은 지역 규정, 조례 또는 미국 전기 규격(NEC)을 준수해야 합니다.
- 전기 배선에 익숙하지 않다면 자격을 갖춘 전기 기술자에게 문의하십시오.
- Wear safety glasses and appropriate protective gear during installation.
- 파손을 방지하기 위해 유리 부품을 조심스럽게 다루십시오.
- 조명기구가 구조 요소에 단단히 고정되었는지 확인하십시오.
- 최대 와트를 초과하지 마십시오tag전구에 대해 지정됨.
패키지 내용
설치를 시작하기 전에 모든 구성 요소가 있는지 확인하세요.
- 실외 벽걸이 조명기구 (1)
- 장착 하드웨어 키트 (1)
- Installation Sheet (1)
메모: 전구는 포함되어 있지 않으며 별도로 구매해야 합니다.
명세서
| 특징 | 세부 사항 |
|---|---|
| 모델 번호 | P560016-020 |
| 상표 | 진행 조명 |
| 재료 | 알루미늄, 유리 |
| 마치다 | 앤틱 브론즈 |
| 그늘 소재 | 투명 시드 유리 |
| 조명의 수 | 3 |
| 전구베이스 | E12(촛대) |
| 최대 와트tag전구당 e | 60 와트 |
| 권tage | 120 볼트 |
| 실내/실외 사용 | 집 밖의 |
| 설치 유형 | Hardware-mounted |
| 방수 레벨 | 방수 |
| 품목 무게 | 6.3 파운드 |

Image 2: Dimensional drawing of the Verdae Outdoor Wall Lantern, indicating a height of 21-3/4 inches and a width of 10-3/8 inches.
설정 및 설치
Follow these general steps for installation. Refer to the included installation sheet for detailed, model-specific instructions.
- 설치 준비: 회로 차단기 또는 퓨즈 박스에서 전원을 차단하십시오. 작업을 진행하기 전에 전원이 완전히 차단되었는지 확인하십시오.
- 장착 브래킷 설치: Attach the mounting bracket to the electrical junction box using the provided screws. Ensure it is securely fastened.
- 전기 연결: Connect the fixture's wires to the house wiring according to standard electrical codes (black to black, white to white, ground to ground). Use approved wire connectors and ensure all connections are secure.
- 고정물 장착: Carefully align the fixture with the mounting bracket and secure it in place using the provided hardware. Ensure the fixture is flush against the wall and stable.
- 전구 설치: Insert three E12 base bulbs (max 60W each, not included) into the sockets. The open bottom design allows for easy access.
- 복원력 : 설치가 완료되고 모든 구성 요소가 단단히 고정되면 회로 차단기에서 전원을 다시 켜십시오.
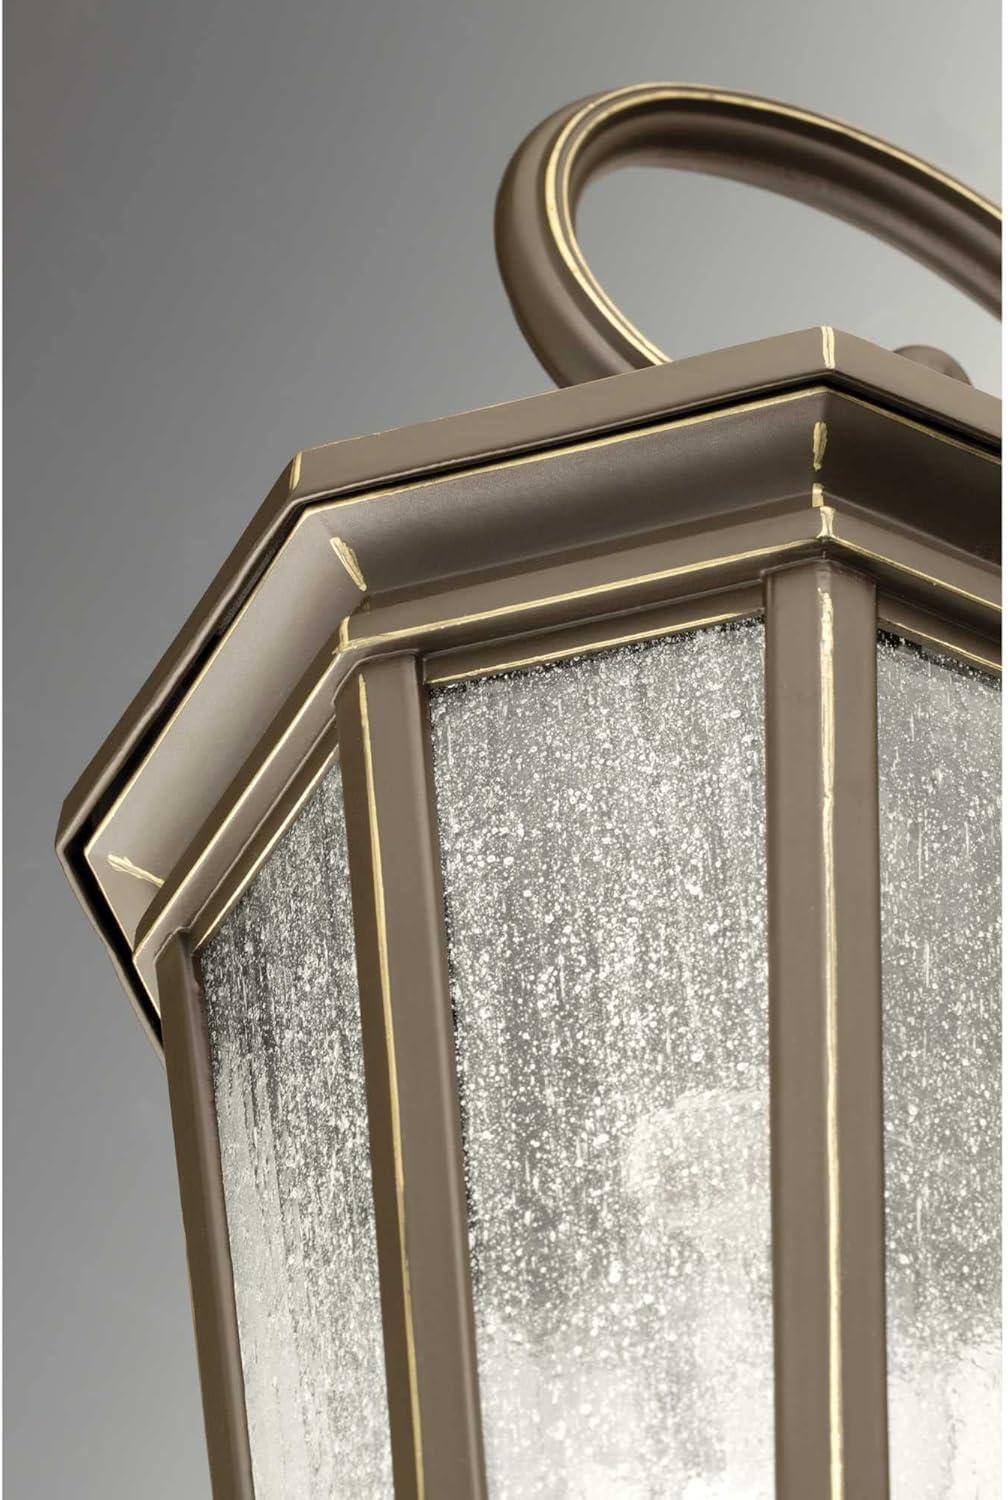
이미지 3: 클로즈업 view of the lantern's base, illustrating the open bottom design for convenient bulb replacement.
작동 지침
This outdoor wall lantern operates via a standard wall switch or a remote-compatible switch (if installed). Once the fixture is properly installed and power is restored:
- Flip the wall switch to the 'ON' position to illuminate the fixture.
- Flip the wall switch to the 'OFF' position to turn off the fixture.
- If a remote-controlled switch is used, refer to the instructions provided with your specific remote control system.
유지
- 청소: To clean the fixture, ensure power is off. Wipe with a soft, dry cloth. Do not use abrasive cleaners or solvents, as they may damage the finish or glass.
- 전구 교체: Turn off power at the circuit breaker. Allow bulbs to cool completely. Unscrew old bulbs and replace with new E12 base bulbs (max 60W each). The open bottom design provides easy access for this task.
- 점검: 정기적으로 조명기구를 점검하여 마모, 손상 또는 연결 불량 등의 징후가 있는지 확인하십시오. 문제가 발견되면 즉시 조치하십시오.

이미지 4: 자세한 view of the clear seeded glass, which provides a traditional aesthetic and diffuses light.
문제 해결
If you encounter issues with your outdoor wall lantern, refer to the following common problems and solutions:
| 문제 | 가능한 원인 | 해결책 |
|---|---|---|
| 불이 켜지지 않습니다 | 고정 장치에 전원이 공급되지 않음 느슨한 전선 연결 전구가 불량합니다 | 회로 차단기/퓨즈를 확인하세요 모든 배선 연결이 단단히 되어 있는지 확인하십시오 (전원을 끄십시오). 전구 교체 |
| 불빛이 깜빡인다 | 느슨한 전구 느슨한 전선 연결 잘못된 전구 유형/전력tage | 전구를 조이십시오 Check wire connections (power off) Ensure bulbs meet specifications |
| Glass is broken or cracked | 충격 손상 | 교체 부품에 대해서는 고객 지원팀에 문의하십시오. |
If the problem persists after attempting these solutions, contact a qualified electrician or Progress Lighting customer support.
보증 및 지원
이 Progress Lighting 제품은 보증 대상입니다. 1년 한정 보증 from the date of purchase. This warranty guarantees your complete satisfaction with your purchase and includes professional after-sales customer service support.
The warranty covers defects in materials and workmanship under normal use. It does not cover damage resulting from improper installation, accident, misuse, abuse, or unauthorized modifications.
For warranty claims, technical assistance, or to inquire about replacement parts, please contact Progress Lighting customer service. Refer to the contact information provided on the original packaging or the official Progress Lighting web대지.


