1. 제품 오버view
The Radiolink R9DS is a 10-channel 2.4GHz RC receiver designed for reliable long-range control of various remote-controlled models, including airplanes, cars, and multirotors. It supports both PWM and SBUS signal outputs, offering flexibility for different control systems. Featuring DSSS&FHSS pseudo-random algorithm technology, the R9DS provides excellent anti-interference capabilities for stable operation.
주요 특징
- 탁월한 간섭 방지 기능: DSSS 및 FHSS 의사난수 알고리즘을 활용하여 강력한 신호 무결성을 보장합니다.
- 9/10 채널: Supports PWM/SBUS signal output, compatible with Radiolink AT9/AT9S/AT9S Pro/AT10/AT10II transmitters.
- 빠른 응답: High resolution ratio of 4096 and stability of 0.5us ensure quick, low-latency connections.
- 장거리 제어: Offers an outstanding control range of up to 2.1 miles in optimal environments.
- Quick to Bind and Anti-polarity Protection: No complex settings required for binding. Features reverse polarity protection to prevent damage from incorrect power connection.
2. 패키지 내용
- 1 x Radiolink R9DS Receiver
3. 설정 가이드
3.1. Binding the R9DS Receiver
Follow these steps to bind your R9DS receiver with a compatible Radiolink transmitter:
- Place the transmitter and receiver close to each other, within 30-50 centimeters.
- Turn on the transmitter, then power on the R9DS receiver.
- Press the binding button on the R9DS receiver for 1 second and release. The LED indicator on the receiver will flash quickly during the binding process.
- For AT10II transmitters, ensure the SYSTEM channel selection is set to 10ch mode for proper operation.
비디오 설명: This video demonstrates the correct procedure for binding the Radiolink R9DS receiver with your radio transmitter, ensuring a stable connection for your RC model.
3.2. Signal Output Modes (PWM/SBUS)
The R9DS receiver supports two signal output modes: PWM and SBUS. The mode is indicated by the color of the LED on the receiver.
- PWM (Red LED): Provides 9 channels of Pulse Width Modulation output.
- SBUS (Blue LED): Provides 10 channels of Serial Bus output.
To switch between modes, short press the binding button twice within one second. The LED color will change to indicate the active mode.

이미지 설명: This image illustrates the two signal output modes of the R9DS receiver. The top diagram shows PWM output with 9 channels, indicated by a red LED. The bottom diagram shows SBUS output with 10 channels, indicated by a blue LED, along with the corresponding wiring for each mode.
3.3. 볼륨tage 원격 측정 연결
볼륨을 활성화하려면tage telemetry and display your airplane's battery voltage on your transmitter screen, the R9DS receiver must be equipped with a telemetry module like the PRM-01 or PRM-03. Connect one end of the PRM-01 module to the telemetry port of the R9DS receiver, and the other end to the airplane's battery.

이미지 설명: This diagram details the connection for voltage telemetry. It shows the R9DS receiver, a PRM-01 Telemetry Module, an ESC (Electronic Speed Controller), and an airplane battery, illustrating how to wire them to display external battery voltag송신기에 e가 있습니다.
비디오 설명: This video demonstrates how to set up and view the telemetry data, specifically the airplane's battery voltage, directly on the screen of a Radiolink AT9S Pro transmitter using the R9DS receiver and a PRM-01 telemetry module.
4. 작동 지침
4.1. Transmitter Channel Selection
When using the R9DS receiver with a 12-channel transmitter like the AT10II, it is crucial to set the transmitter's system channel selection to 10-channel mode. Failure to do so may result in improper functionality or unstable servo control.

이미지 설명: This image displays the system menu of Radiolink AT9S Pro and AT10/AT10II transmitters, highlighting the 'CH-SELECT' option. It instructs users to set this option to '10CH' to ensure proper compatibility and operation with the R9DS receiver.
비디오 설명: This video explains how to configure a Radiolink AT9S Pro transmitter to work correctly with a 12-channel receiver, demonstrating the necessary channel selection adjustments within the transmitter's system menu.
비디오 설명: This video guides users on how to make a 10-channel receiver function properly with a 12-channel Radiolink AT10II transmitter, detailing the critical channel selection settings to ensure stable control.
4.2. Receiver Installation Guide
For optimal signal reception and range, ensure the receiver's antenna is kept straight and positioned away from metal objects or carbon fiber structures that could interfere with the signal. Secure the receiver firmly within your model to prevent movement during operation.

이미지 설명: This image provides a visual guide for installing the R9DS receiver in an RC airplane. It emphasizes keeping the antenna straight and properly positioned for maximum signal reception and reliability.
5. 호환성
5.1. 호환 가능한 송신기
The R9DS receiver is compatible with the following Radiolink transmitters:
- Radiolink AT9
- Radiolink AT9S
- Radiolink AT9S Pro
- Radiolink AT10
- Radiolink AT10II
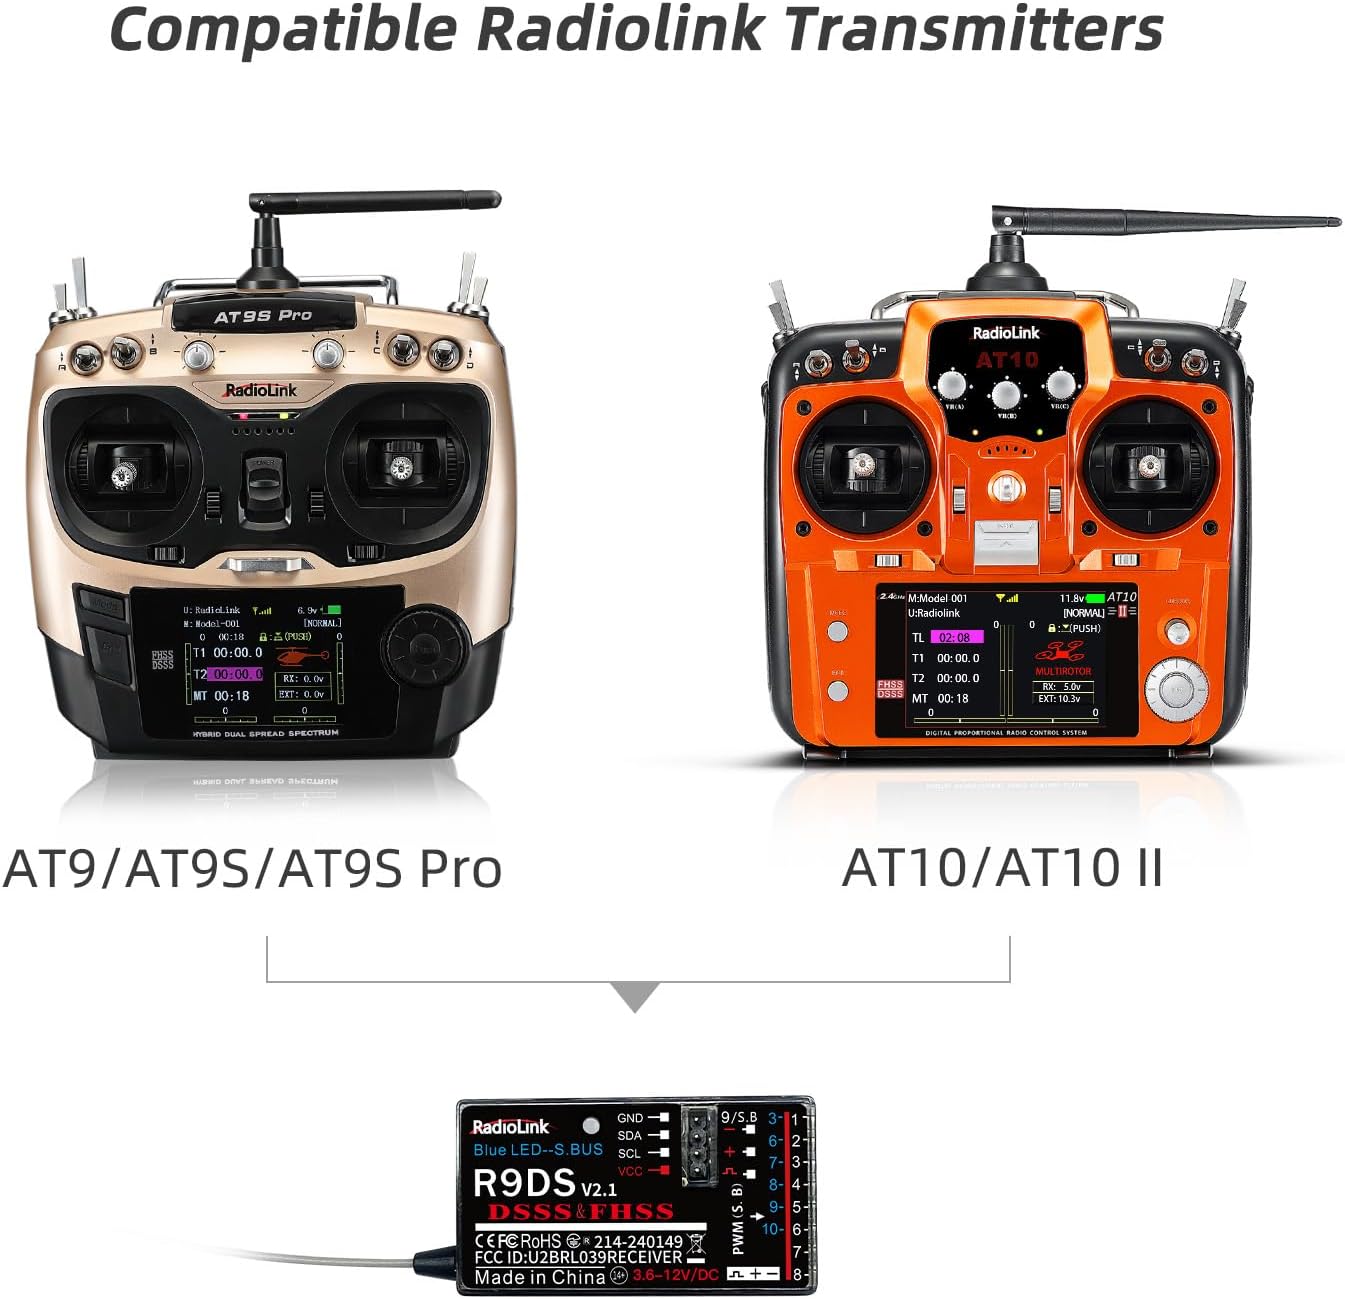
이미지 설명: This image displays two compatible Radiolink transmitters, the AT9S Pro and the AT10/AT10II, highlighting their compatibility with the R9DS receiver for various RC applications.
5.2. 적합한 모델
The R9DS receiver is suitable for a wide range of RC models, including:
- 비행기
- 자동차
- Multirotors (Drones)
- 헬리콥터
- 보트

이미지 설명: This image showcases a selection of RC models, including a helicopter, airplane, drone, car, and boat, all of which are suitable for use with the Radiolink R9DS receiver.
6. 제품 사양
| 특징 | 값 |
|---|---|
| 제품 치수 | 1.69 x 0.94 x 0.59 인치 |
| 품목 무게 | 0.352 온스 |
| 품목 모델 번호 | R9DS |
| 제조업체 | 라디오링크 |
| 운영 볼륨tage | 4.8-10V DC |
| Signal Output Modes | PWM (9 Channels) / SBUS (10 Channels) |
| 제어 범위 | Up to 2.1 miles (environment dependent) |

이미지 설명: 이 이미지는 명확한 view of the R9DS receiver with its key dimensions labeled, showing its compact size for easy integration into various models.

이미지 설명: A detailed comparison table showcasing various Radiolink receiver models, including the R9DS, with information on channels, signal output, voltage telemetry, control range, dimensions, weight, and compatible transmitters.
7. 관리 및 유지 보수
- 수신기를 건조하게 유지하고 습기로부터 멀리하십시오.
- 수신기를 극한 온도나 직사광선에 노출시키지 마십시오.
- Regularly inspect antenna connections for any damage or loose contacts.
- Clean the receiver gently with a soft, dry cloth if necessary. Do not use harsh chemicals.
- Ensure proper ventilation when installed in a model to prevent overheating.
8. 문제 해결 팁
- 신호/바인딩 문제 없음: Ensure the transmitter is powered on and the binding procedure is followed correctly (transmitter and receiver within 30-50cm). Check that the transmitter's RF mode is enabled and the channel selection matches the receiver (e.g., 10CH for R9DS).
- Unstable Servo Control: Verify that the transmitter's channel selection matches the receiver's capabilities. Incorrect channel settings can lead to erratic servo behavior.
- 원격 측정 데이터 없음: Confirm that the PRM-01/PRM-03 telemetry module is correctly connected to both the R9DS receiver and the model's battery. Ensure the transmitter's firmware supports telemetry display.
- 감소된 범위: Check for any obstructions or damage to the receiver's antenna. Ensure the antenna is positioned straight and away from carbon fiber or metal components.
- 수신기 전원이 켜지지 않음: Check the power supply to the receiver. The R9DS operates between 4.8-10V DC. Ensure correct polarity; the receiver has anti-polarity protection but always double-check connections.
9. 보증 및 고객 지원
Radiolink products are manufactured to high-quality standards and are covered by a manufacturer's warranty against defects in materials and workmanship. For specific warranty details, technical assistance, or troubleshooting not covered in this manual, please refer to the official Radiolink website or contact Radiolink customer support directly. Online user instructions, FAQs, and troubleshooting resources are also available on the product's sales page.


